
Loading ...
Loading ...
Loading ...
EN - 15
CHECK ENGINE OIL
NOTICE: Engine oil level must be maintained
at correct level or engine damage may occur.
Refer to engine manual.
CHANGE ENGINE OIL
Refer to engine manual.
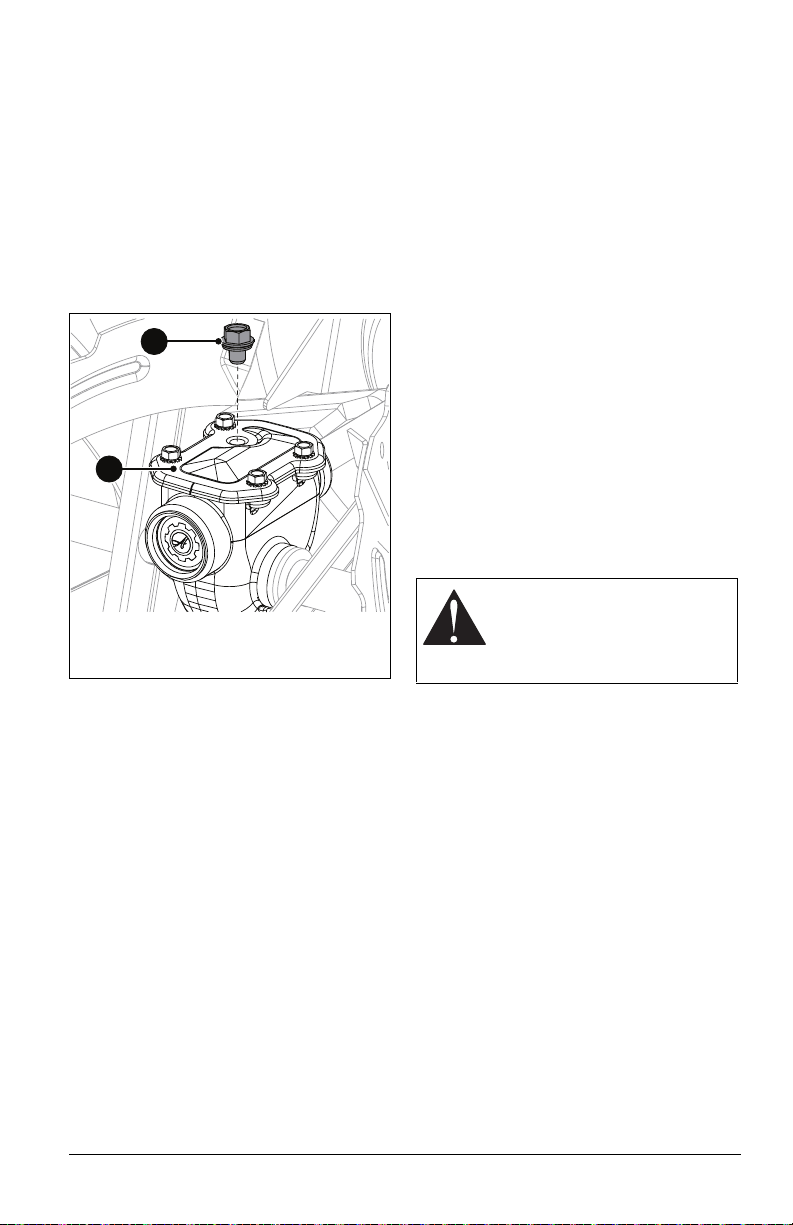
CHECK AUGER GEARCASE OIL
1. Place unit on flat, level surface.
2. Remove oil fill plug. See Figure 17.
IMPORTANT: DO NOT remove gearcase
cover.
3. Check oil level with a suitable measuring
device, such as a clean screwdriver and
add oil if needed. Oil level must be
4.1 cm – 4.8 cm (1.6" – 1.9") from the flat
surface of the gearcase cover.
IMPORTANT: Ariens recommends using only
Ariens L3 synthetic severe duty gear lube
(see Service Parts on page 14). Using other
lubricants will not automatically void unit
warranty, but the warranty will not cover
damage caused by using unauthorized
lubricants.
4. Inspect oil fill plug for wear or rubber
deterioration and replace if needed.
5. Reinstall oil fill plug. Torque to 9 N•m
(80 lb-in).
IMPORTANT: DO NOT over torque.
Measurements are given in pound force
inches (lb-in) and not pound force foot (lb-ft).
IMPORTANT: Incorrect torquing and failure to
install or correctly torque oil fill plug may void
gearcase warranty.
LUBRICATE UNIT
Ariens recommends using Ariens Hi-Temp
Grease or equivalent (see Service Parts) to
lubricate fittings. Lubricate each season or
every 25 hours of operation.
IMPORTANT: Wipe each fitting clean before
and after lubrication.
Remove Bottom Cover
Models 920025, 920029, 920030
1. Place unit in service position. See
Figure 16.
2. Remove six hex bolts retaining cover and
remove cover. Save for reinstallation.
Model 920028
See Figure 18.
1. Place unit in service position. See
Figure 16.
2. Remove three top-lock flange nuts
retaining height-adjuster plate to height-
adjuster bracket.
3. Remove height-adjuster plate and three
spacers on the round head square neck
bolts. The height-adjuster stop will be
attached to the rear axle.
4. Slide height-adjuster stop to the right and
rotate it away from frame.
5. Remove six bolts retaining bottom cover
and remove cover. Rotate track carriage
as needed to remove cover.
1. Auger Gearcase Cover
2. Oil Fill Plug
1
2
Figure 17
CAUTION: The track carriage
will rotate freely without the
height-adjuster bracket. Keep
fingers and hands away from
pinch points.
Loading ...
Loading ...
Loading ...