Loading ...
Loading ...
Loading ...
Installing the Unit
GB
12
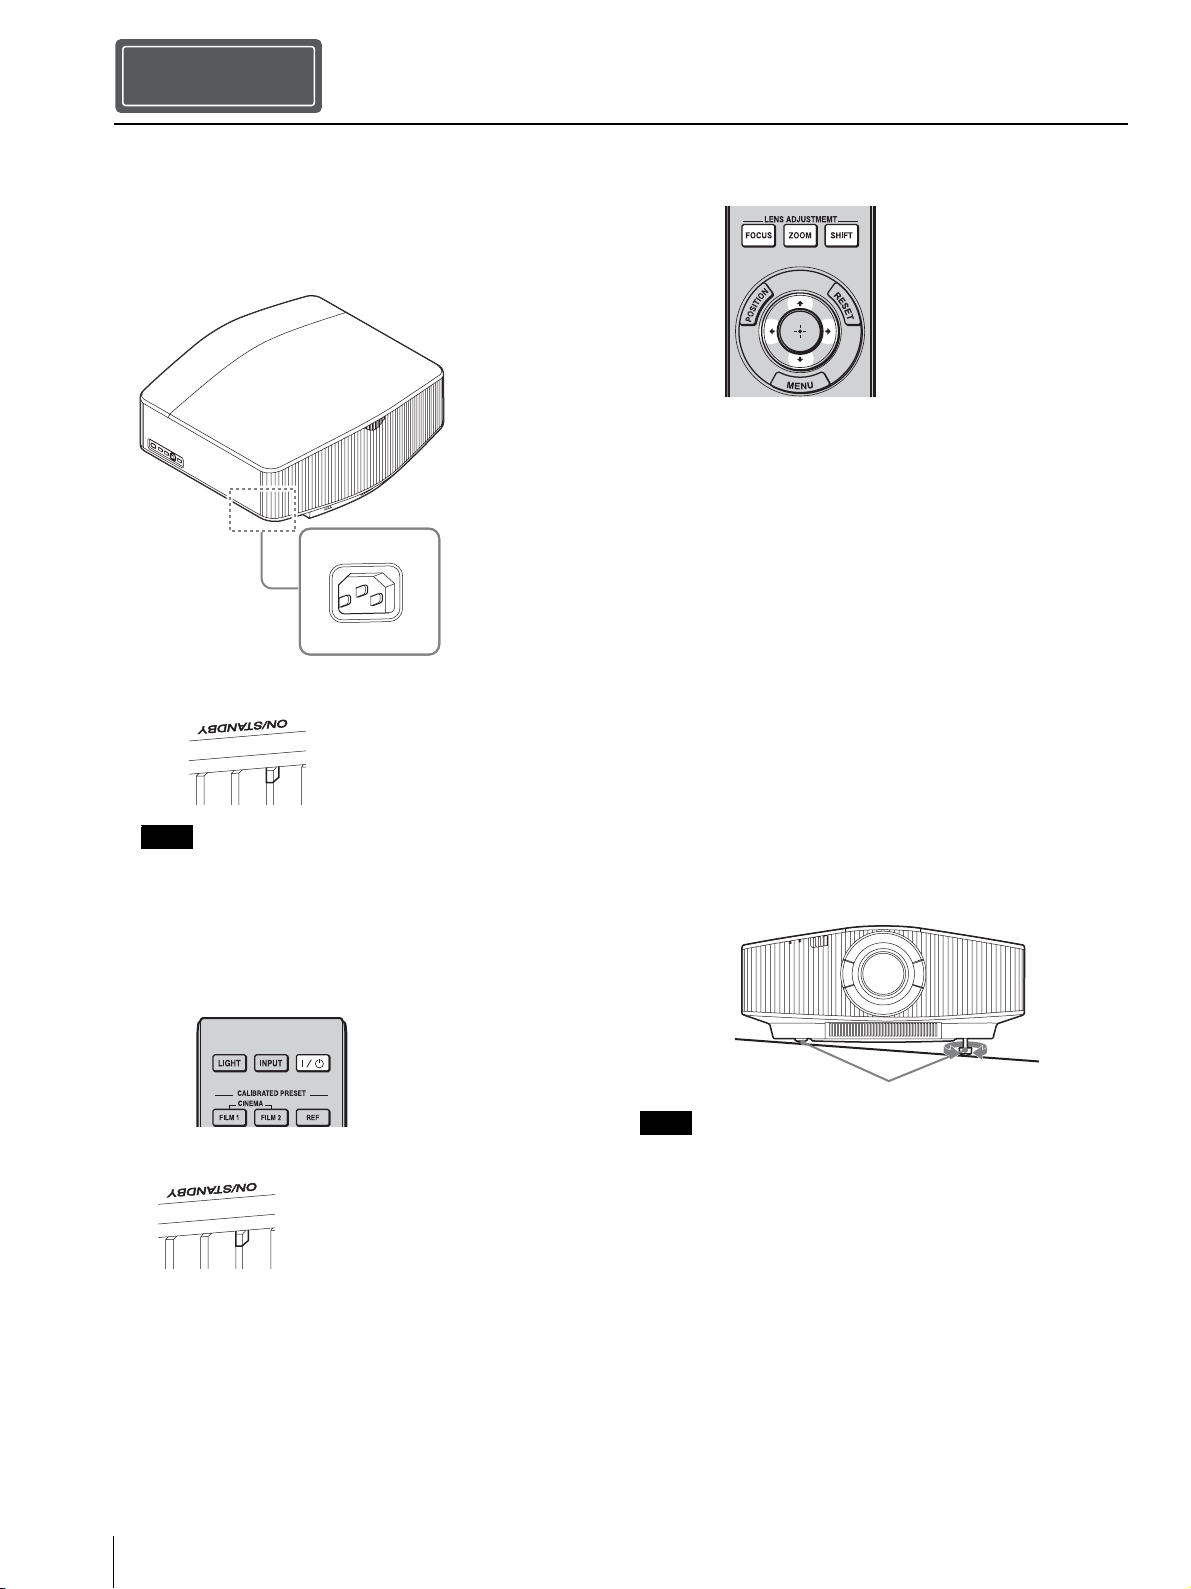
1 Position the unit so that the lens is parallel to the
screen.
2 After connecting the AC power cord to the unit, plug
the AC power cord into a wall outlet.
After connecting the AC power cord to the unit, the ON/
STANDBY indicator may blink in orange.
You may not be able to control the unit while the indicator is
blinking, but this is not a malfunction. Wait until it stops blinking
and remains lit in red.
3 Press the ?/1 (On/Standby) button to turn on the unit.
4 Project an image on the screen, then adjust the focus,
size, and position.
a Adjust the focus.
Press the LENS ADJUSTMENT (FOCUS) button to
display the Lens Focus adjustment window (test
pattern). Then adjust the focus of the picture by
pressing the M/m/</, button.
b Adjust the picture size.
Press the LENS ADJUSTMENT (ZOOM) button to
display the Lens Zoom adjustment window (test
pattern). Then adjust the size of the picture by
pressing the M/m/</, button.
c Adjust the picture position.
Press the LENS ADJUSTMENT (SHIFT) button to
display the Lens Shift adjustment window (test
pattern). Then adjust to the proper position of the
picture by pressing the M/m/</, button.
To adjust the tilt of the installation surface
If the unit is installed on an uneven surface, use the front
feet (adjustable) to keep the unit level.
• If the unit is tilted up or down, the projected image may be
trapezoidal.
• Be careful not to catch your finger when turning the front feet
(adjustable).
Installing the Unit
Step 2
Note
Rear of the unit
Lights in red.
Front of the unit
Flashes in green
for tens of seconds
and then lights in
green.
Front of the unit
Notes
Front feet (adjustable)
Tu r n t o
adjust.
Loading ...
Loading ...
Loading ...