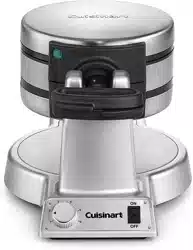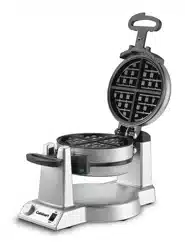
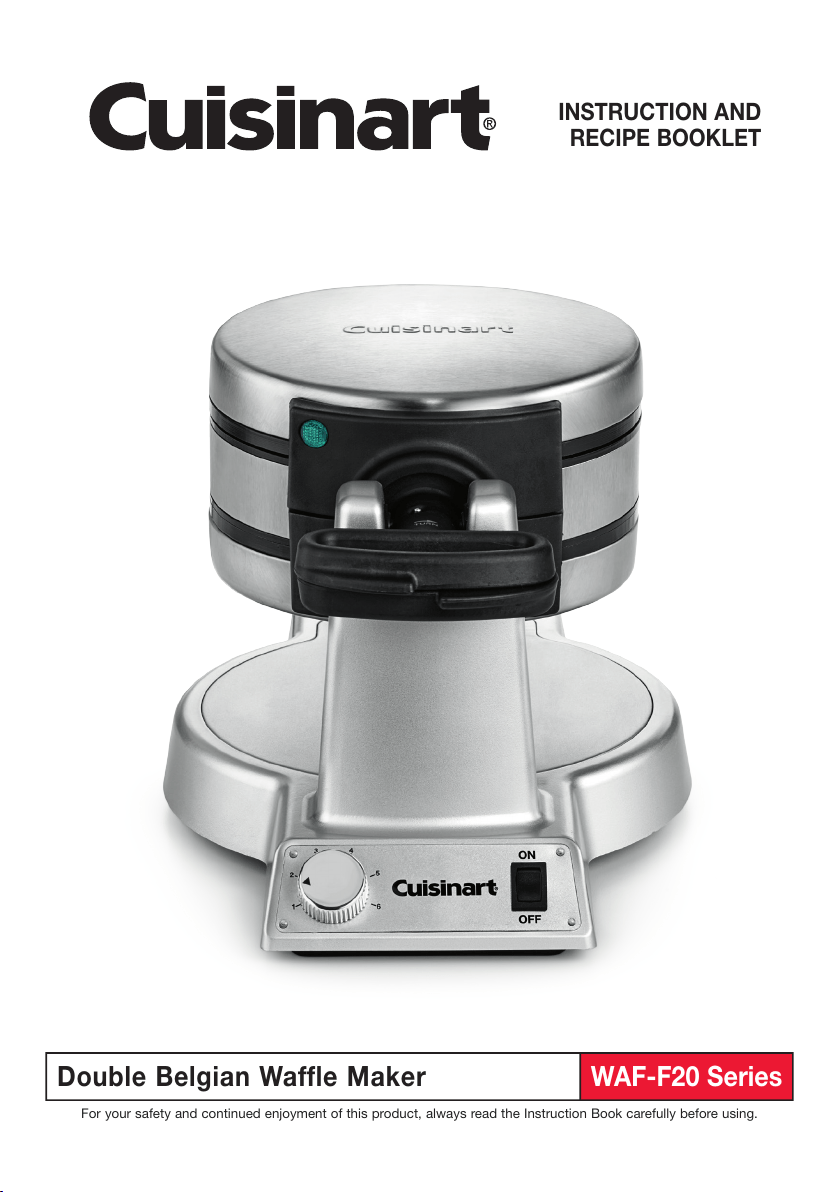
Double Belgian Waffle Maker
INSTRUCTION AND
RECIPE BOOKLET
WAF-F20 Series
For your safety and continued enjoyment of this product, always read the Instruction Book carefully before using.

IMPORTANT
SAFEGUARDS
When using electrical appliances, basic safety
precautions should always be taken, including
the following:
1. READ ALL INSTRUCTIONS.
2. Unplug from outlet when not in use and
before cleaning. Allow to cool before
putting on or taking off parts, and before
cleaning appliance.
3. Do not touch hot surfaces. Use handles and
knobs.
4. To protect against re, electrical shock, and
injury to persons, DO NOT IMMERSE CORD,
PLUG, OR UNIT in water or other liquids.
5. Close supervision is necessary when any
appliance is used by or near children or
individuals with certain disabilities.
6. Do not operate any appliance with a
damaged cord or plug, or after the appliance
malfunctions or has been damaged in any
manner. Return appliance to the nearest
Cuisinart Authorized Service Facility for
examination, repair, or adjustment.
7. The use of accessory attachments not
recommended by Cuisinart may result in re,
electrical shock, or injury to persons.
8. Do not use outdoors, or use for other than its
intended use.
9. Do not let power cord hang over edge of table
or counter, or touch hot surfaces.
10. Do not place on or near a hot gas or electric
burner, or in a heated oven.
11. Unplug the unit when nished baking wafes.
12. Always begin by plugging appliance into wall
outlet. To disconnect, turn control to setting
#1, then remove plug from wall outlet.
13. WARNING: TO REDUCE THE RISK OF FIRE
OR ELECTRIC SHOCK, REPAIR SHOULD BE
DONE ONLY BY AUTHORIZED PERSONNEL.
DO NOT REMOVE THE BASE PANEL. NO
USER-SERVICEABLE PARTS ARE INSIDE.
14. Extreme caution must be used when
moving an appliance containing hot oil or
other hot liquids.
15. Do not operate your appliance in an appliance
garage or under a wall cabinet. When storing
in an appliance garage, always unplug the
unit from the electrical outlet. Not doing
so could create a risk of re, especially if the
appliance touches the walls of the garage or
the door touches the unit as it closes.
SAVE THESE
INSTRUCTIONS
FOR HOUSEHOLD
USE ONLY
2

POLARIZATION
INSTRUCTIONS
For your protection, the
Cuisinart
®
Double Belgian
Wafe Maker is supplied
with a polarized plug (one
blade is wider than the
other). To reduce the risk
of re, this plug will t in a
polarized outlet only one
way. If the plug does not t fully in the outlet,
reverse the plug. If it still does not t, contact a
qualied electrician for assistance. Do not modify
the plug in any way.
SPECIAL CORD SET
INSTRUCTIONS
A short power-supply cord is provided to reduce
the risks resulting from becoming entangled in or
tripping over a longer cord. Extension cords may
be used if care is exercised in their use.
If an extension cord is used, the marked electrical
rating of the extension cord should be at least
as great as the electrical rating of the appliance,
and the longer cord should be arranged so that
it will not drape over the countertop or tabletop
where it can be pulled on by children or animals,
or tripped over. The extension cord should be for
a polarized plug and outlet.
This appliance is for 120 volts only and should
not be used with a converter.
CONTENTS
Important Safeguards ...................................... 2
Parts and Features .......................................... 4
Before First Use ............................................... 5
Operating Instructions .................................... 5
Cleaning, Care and Maintenance .................... 6
Tips and Hints .................................................. 6
Warranty ........................................................... 7
Recipes ............................................................ 9
3
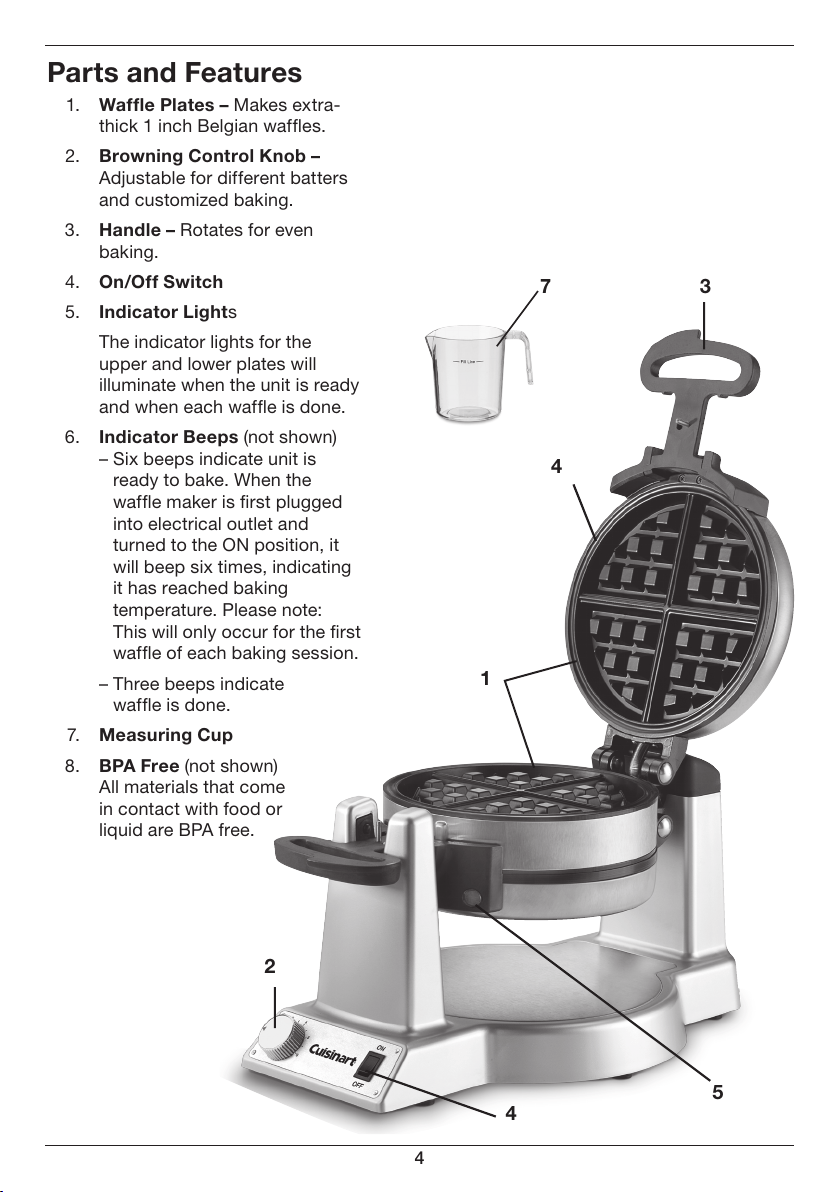
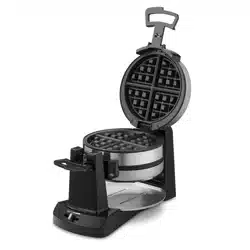
Parts and Features
1. Waffle Plates – Makes extra-
thick 1 inch Belgian wafes.
2. Browning Control Knob –
Adjustable for different batters
and customized baking.
3. Handle – Rotates for even
baking.
4. On/Off Switch
5. Indicator Lights
The indicator lights for the
upper and lower plates will
illuminate when the unit is ready
and when each wafe is done.
6. Indicator Beeps (not shown)
– Six beeps indicate unit is
ready to bake. When the
wafe maker is rst plugged
into electrical outlet and
turned to the ON position, it
will beep six times, indicating
it has reached baking
temperature. Please note:
This will only occur for the rst
wafe of each baking session.
– Three beeps indicate
wafe is done.
7. Measuring Cup
8. BPA Free (not shown)
All materials that come
in contact with food or
liquid are BPA free.
4
2
7
1
5
4
4
3

BEFORE FIRST USE
Remove all packaging and any promotional labels
or stickers from your wafe maker. Be sure that
all parts (listed in Part and Features) of your
new wafe maker have been included before
discarding any packaging materials. You may
want to keep the box and packing materials for
use at a later date.
Before using your Cuisinart
®
Double Belgian
Wafe Maker for the rst time, remove any
dust from shipping by wiping the plates with
a damp cloth.
NOTE: The rst time you use your Cuisinart
®
Double Belgian Wafe Maker it may have a slight
odor and may smoke a bit. This is normal and
common to heating appliances.
NOTE: This Cuisinart
®
Double Belgian Wafe
Maker has been treated with a special nonstick
coating. Before each use, we suggest you
season the wafe grids by spraying or brushing
with cooking spray or avorless vegetable oil
to thoroughly coat the grids. Wipe with a paper
towel or pastry brush.
OPERATING
INSTRUCTIONS
MAKING ONE WAFFLE
1. Place the Double Belgian Wafe Maker on
a clean at surface.
2. Plug cord into 120V AC wall or outlet.
3. Turn the rocker switch to the ON position.
Adjust control knob to a desired setting.
Your Cuisinart
®
Double Belgian Wafe
Maker will now begin preheating.
4. Once preheated, the indicator lights will
be illuminated and the wafe maker will
beep 6 times.
5. After wafe maker is preheated, season
wafe plates with cooking spray or brush
with a avorless oil to thoroughly coat all
surfaces. It’s important that you preheat
the wafe maker before seasoning with
cooking spray or oil. Your wafe maker is
now ready to bake.
IMPORTANT NOTICE!
TO FACILITATE OPENING AND CLOSING
THE DOUBLE WAFFLE MAKER, PLEASE
NOTE THE FOLLOWING INSTRUCTIONS.
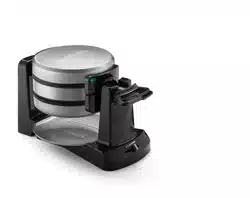
TO OPEN:
Place thumb on top of lip of lower handle
and index nger under lip of upper handle.
Push open.
TO CLOSE:
Place thumb on top handle and ngers under
bottom handle and pull together until shut.
NOTE: Please note that top and bottom grid
covers may separate slightly during use. This
is normal. Should this occur, do not close
handles to rotate until unit beeps, indicating that
the baking cycle is completed. To reduce grid
separation and overow during cooking, you may
want to reduce the quantity of batter.
6. After the wafe maker is preheated and
ready for baking, open the wafe maker
lid. Pour wafe batter evenly on the wafe
grid. Use a heatproof spatula to spread
the batter evenly over the plate.
7. Close top cover and rotate the wafe
maker plates 180º.
8. When the wafe is baked to the desired
doneness, the unit will beep three times
and the indicator light will illuminate.
9. Rotate wafe grid with the lit indicator
light to the top position. Raise top cover
and remove the baked wafe with a
heatproof spatula.
10. Repeat for additional wafes.
MAKING TWO WAFFLES
AT ONE TIME
1. Raise top cover and pour wafe batter
evenly on the wafe grid. Use a heatproof
spatula to spread the batter evenly over
the plate.
2. Close top cover and rotate the wafe
grid 180°. The Ready indicator light will
turn off.
3.
Raise the cover that is now on top and
pour wafe batter evenly on the wafe
plate. Use a heatproof spatula to spread
the batter evenly over the plate. Close the
cover and rotate the wafe maker plates
180°.
4. When one of the wafes is done, the unit
will beep three times and the indicator
light located on the wafe maker cover
will illuminate.
5. Rotate the wafe plates with the lit
indicator to the top position. Raise the top
cover and remove the baked wafe.
5

6. If making additional wafes, pour wafe
batter evenly on the wafe plate. Use a
heatproof spatula to spread the batter
evenly over the plate. Close top cover and
rotate the wafe maker plates 180°.
7. When the second wafe is baked to the
preferred setting, the unit will beep three
times and a light located on the wafe grid
cover will illuminate.
8. Rotate the wafe maker with the lit
indicator to the top position. Raise the top
cover and remove the baked wafe.
9. If making additional wafes, repeat the
instructions above.
10. When you are nished baking, turn unit
switch to the OFF position, unplug the
unit and allow the wafe maker to cool
before handling.
CLEANING, CARE AND
MAINTENANCE
Once you have nished baking, turn the unit to
the OFF position; remove plug from electrical
outlet. Leave top lid open and allow grids to cool
down completely before cleaning.
Brush crumbs from grooves, and absorb any
excess cooking oil by wiping with a dry cloth or
paper towel. You may clean the grids by wiping
with a damp cloth to prevent staining and sticking
from batter or oil buildup. Never take your
waffle maker apart for cleaning.
Be certain that grids have cooled completely
before cleaning. If batter adheres to plates,
simply pour a little cooking oil onto the baked
batter and let stand approximately ve minutes,
allowing batter to soften for easy removal.
To clean exterior, wipe with a soft, dry cloth.
Never use an abrasive cleanser or harsh pad.
NEVER IMMERSE CORD, PLUG OR UNIT IN
WATER OR OTHER LIQUIDS.
Any other servicing should be provided by an
Authorized Service Representative.
TIPS AND HINTS
• Setting #1 will produce the lightest color
wafes. Setting #6 will produce the darkest
color wafes. Experiment to determine your
preferred setting.
• Packaged Belgian wafe mixes found in most
supermarkets may be used with this unit.
• For best results, we recommend lling the
supplied measuring cup to the top so it will ll
the wafe grids.
• For evenly lled wafes, pour the batter into
the center of the lower grid and spread out
evenly to the edges. The entire wafe grid
should be lled.
• We recommend turning the browning control
dial to setting #4 when using commercial
pancake/wafe mixes and for the included
recipes. If you prefer crisper, darker Belgian
wafes, set the browning control higher. If you
prefer lighter wafes, turn the browning control
dial down.
• If wafes tend to stick to wafe grids, add
slightly more oil or butter to the batter.
• Belgian wafes taste best when made to order,
but baked Belgian wafes may be kept warm
in a 200˚F oven. Place them in a baking pan
or wrap them in foil while in the oven. Wafes
wrapped in foil may lose their crispness.
• Baked wafes may be frozen. Allow them to
cool completely, and then place them in a
plastic food storage bag. Use waxed paper
to keep wafes separated. Reheat in an oven,
toaster or toaster oven when ready to serve.
6
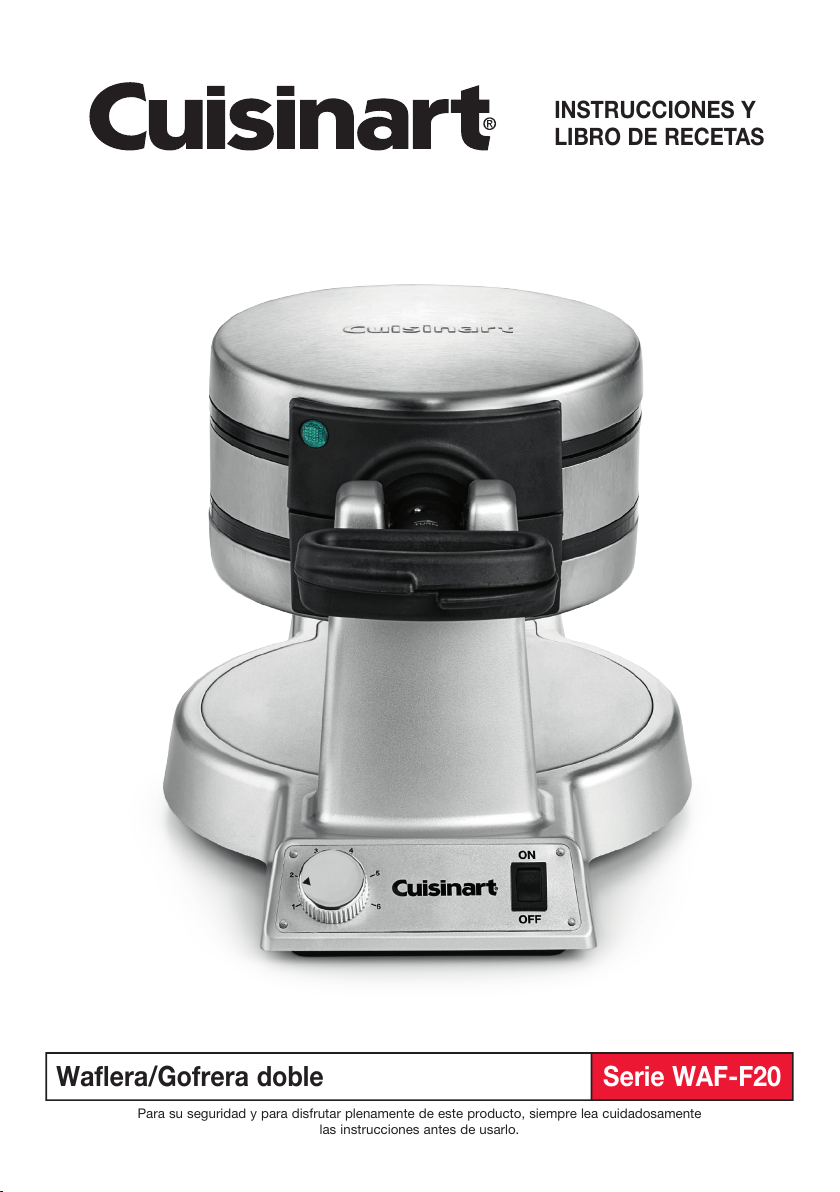
Waflera/Gofrera doble
INSTRUCCIONES Y
LIBRO DE RECETAS
Serie WAF-F20
Para su seguridad y para disfrutar plenamente de este producto, siempre lea cuidadosamente
las instrucciones antes de usarlo.

MEDIDAS DE
SEGURIDAD
IMPORTANTES
Al usar aparatos eléctricos, siempre debe tomar
precauciones básicas de seguridad, incluso las
siguientes:
1. LEA TODAS LAS INSTRUCCIONES.
2. Desconecte el aparato cuando no está en
uso y antes de limpiarlo. Permita que se
enfríe antes de instalar/sacar piezas y antes
de limpiarlo.
3. No toque las superficies calientes; utilice
el mango o las perillas.
4. Para reducir el riesgo de incendio,
electrocución o heridas, NO SUMERJA EL
CABLE, LA CLAVIJA O EL APARATO en agua
u otro líquido.
5. Supervise el uso de este aparato
cuidadosamente cuando sea usado por
o cerca de niños o personas con ciertas
discapacidades.
6. No utilice este aparato si el cable o la clavija
estuviesen dañados, después de que hubiese
funcionado mal o que se hubiese caído o
si estuviese dañado; regréselo a un centro
de servicio autorizado para su revisión,
reparación o ajuste.
7. El uso de accesorios no recomendados por
Cuisinart presenta un riesgo de incendio,
electrocución o heridas.
8. No lo utilice en exteriores, ni para ningún otro
fin que no sea el indicado.
9. No permita que el cable cuelgue del borde
de la encimera o de la mesa, ni que haga
contacto con superficies calientes.
10. No coloque el aparato sobre o cerca de
un quemador a gas o una hornilla eléctrica
caliente, ni en un horno caliente.
11. Siempre desconecte el aparato después
del uso.
12. Siempre conecte el cable a la toma de
corriente antes de encender el aparato.
Siempre ponga el control de temperatura en
la posición n.°1 antes de desconectarlo.
13. ADVERTENCIA: PARA REDUCIR EL RIESGO
DE INCENDIO O ELECTROCUCIÓN, LAS
REPARACIONES DEBEN SER REALIZADAS
POR UN TÉCNICO CALIFICADO. NO
DESARME EL APARATO. ESTE APARATO
NO CONTIENE NINGUNA PIEZA QUE
PUEDA SER REPARADA/CAMBIADA POR
EL USUARIO.
14. Tenga sumo cuidado al mover un aparato que
contenga aceite u otros líquidos calientes.
15. No haga funcionar el aparato debajo o dentro
de un armario/gabinete. Siempre desconecte
el aparato antes de guardarlo en un
armario/gabinete. Dejar el aparato conectado
presenta un riesgo de incendio, especialmente
si este toca las paredes o la puerta del
armario/gabinete cuando cierra.
GUARDE ESTAS
INSTRUCCIONES
PARA USO
DOMÉSTICO
SOLAMENTE
2

INSTRUCCIONES
DE CONEXIÓN
Para su protección, el
cable de este aparato
está dotado de una
clavija polarizada (una
pata es más ancha que
otra). Como medida de
seguridad, se podrá
enchufar de una sola
manera en la toma de corriente polarizada. Si no
entrara en la toma de corriente, inviértala. Si aún
no entrara completamente, comuníquese con un
electricista. No intente modificarla.
USO DE EXTENSIONES
El cable provisto con este aparato es corto, para
reducir el peligro de que alguien se enganche o
tropiece con un cable más largo. Puede usarse
una extensión eléctrica con cuidado.
La clasificación nominal de la extensión debe ser
por lo menos igual a la del aparato. Es importante
acomodar el cable más largo de manera que
no cuelgue de la encimera/mesa donde puede
ser jalado por niños o puede causar tropiezos.
Solamente utilice extensiones con clavija
polarizada.
Conecte el cable a una toma de corriente de 120V
solamente; no utilice el aparato con un convertidor
de voltaje.
ÍNDICE
Medidas de seguridad importantes ................. 2
Piezas y características .................................... 4
Antes del primer uso ........................................ 5
Instrucciones de operación .............................. 5
Limpieza y mantenimiento .............................. 6
Consejos útiles ................................................. 6
Garantía ............................................................ 7
Recetas ........................................................... 9
3
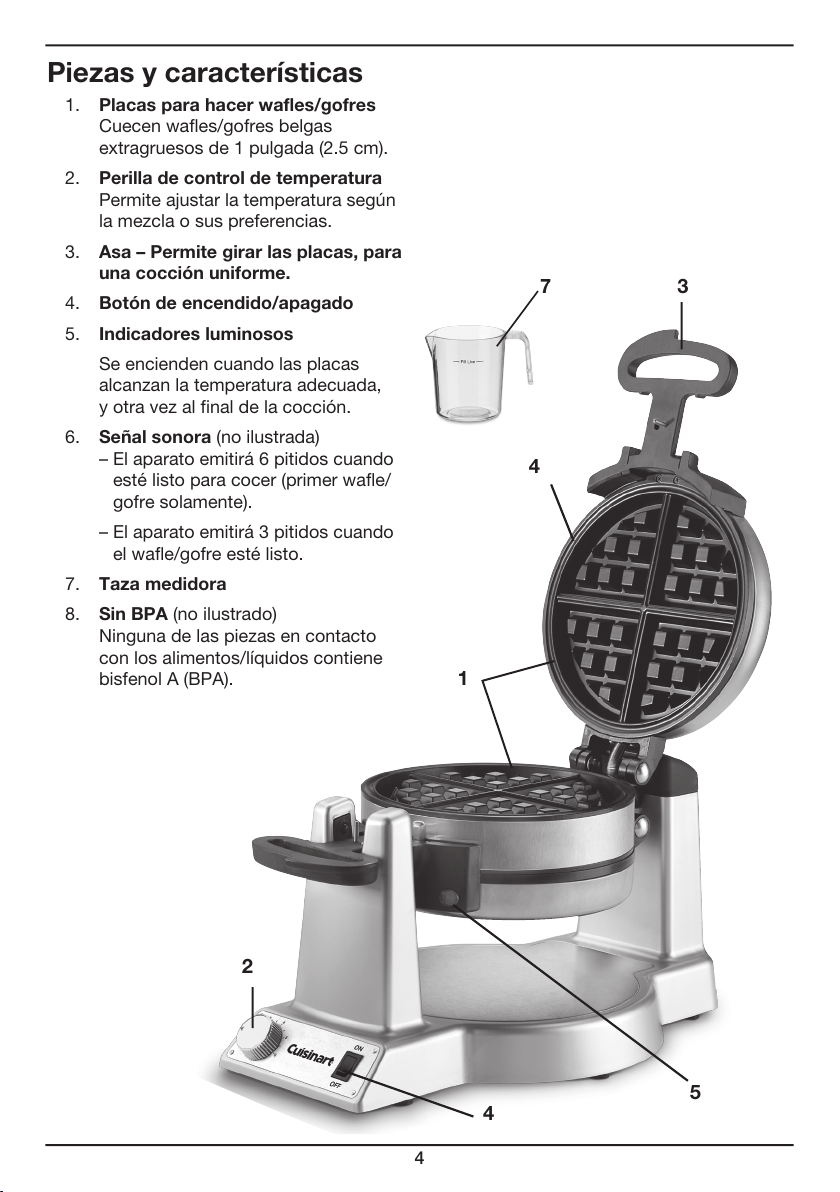
Piezas y características
1. Placas para hacer wafles/gofres
Cuecen wafles/gofres belgas
extragruesos de 1 pulgada (2.5 cm).
2. Perilla de control de temperatura
Permite ajustar la temperatura según
la mezcla o sus preferencias.
3. Asa – Permite girar las placas, para
una cocción uniforme.
4. Botón de encendido/apagado
5. Indicadores luminosos
Se encienden cuando las placas
alcanzan la temperatura adecuada,
y otra vez al final de la cocción.
6. Señal sonora (no ilustrada)
– El aparato emitirá 6 pitidos cuando
esté listo para cocer (primer wafle/
gofre solamente).
– El aparato emitirá 3 pitidos cuando
el wafle/gofre esté listo.
7. Taza medidora
8. Sin BPA (no ilustrado)
Ninguna de las piezas en contacto
con los alimentos/líquidos contiene
bisfenol A (BPA).
7
4
2
1
5
4
4
3

ANTES DEL PRIMER USO
Retire el aparato del material de embalaje y
quite las etiquetas promocionales pegadas en
su cuerpo. Asegúrese de que todas las piezas
descritas en la sección “Piezas y características”
estén incluidas. Le aconsejamos que guarde el
material de embalaje.
Antes de usar el aparato por primera vez, limpie
las placas con un paño ligeramente humedecido
para quitar el polvo acumulado durante el
transporte.
NOTA: puede que el aparato produzca humo y un
ligero olor a quemado la primera vez que lo use;
esto es normal.
NOTA: las placas de su waflera/gofrera están
cubiertas con un revestimiento antiadherente. Sin
embargo, le aconsejamos que engrase las placas
antes del primer uso, usando aceite o spray
vegetal sin sabor. Distribuya el aceite con una
toallita de papel o una brocha.
INSTRUCCIONES
DE OPERACIÓN
CÓMO PREPARAR
SOLAMENTE UN WAFLE/
GOFRE A LA VEZ
1. Coloque el aparato sobre una superficie
limpia y plana.
2. Conecte el cable a una toma de corriente
120V AC.
3. Encienda el aparato (ON). Ajuste la
temperatura al nivel deseado; el aparato
empezará a calentar.
4. Cuando alcance la temperatura adecuada,
los indicadores luminosos se encenderán
y el aparato emitirá 6 pitidos.
5. Una vez calientes, aceite las placas con
aceite o spray vegetal sin sabor. Nota: es
importante precalentar las placas antes de
aceitarlas. Su waflera/gofrera ya está lista.
¡AVISO IMPORTANTE!
SIGA LAS INSTRUCCIONES A
CONTINUACIÓN PARA ABRIR/CERRAR
LA UNIDAD FÁCILMENTE.
PARA ABRIR: Ponga el pulgar encima del asa
inferior y el índice debajo del asa superior. Empuje
hacia arriba y abajo para abrir.
PARA CERRAR: Ponga el pulgar encima del
asa superior y los dedos debajo del asa inferior;
apriete para cerrar.
NOTA: puede que las placas se abran ligeramente
durante la cocción; esto es normal. Si esto
ocurriera, espere hasta que la unidad emita unos
pitidos (lo que indica que el ciclo de cocción ha
terminado) para girar las placas; no gire las placas
durante la cocción. Para evitar que las placas se
abran durante la cocción, utilice menos mezcla.
6. Cuando el aparato alcance el nivel
adecuado para la cocción, abra las placas.
Vierta la mezcla en el centro la placa
inferior. Esparza uniformemente la mezcla,
usando una espátula resistente al calor.
7. Cierre y gire las placas 180°.
8. Al final de la cocción, la unidad emitirá
tres pitidos y el indicador luminoso se
encenderá.
9. Gire las placas de tal manera que el
indicador luminoso iluminado se encuentre
arriba. Abra las placas y saque el wafle/
gofre, usando una espátula resistente al
calor.
10. Repita estos pasos para preparar más
wafles/gofres.
CÓMO PREPARAR DOS
WAFLES/GOFRES A LA VEZ
1. Abra las placas de arriba y vierta la mezcla
en el centro la placa inferior. Esparza
uniformemente la mezcla, usando una
espátula resistente al calor.
2. Cierre y gire las placas 180°; el indicador
luminoso se apagará.
3.
Ahora, abra las placas de arriba y vierta
la mezcla en el centro la placa inferior.
Esparza uniformemente la mezcla, usando
una espátula resistente al calor. Cierre y
gire las placas 180°.
4. Cuando el primer wafle/gofre esté listo, la
unidad emitirá tres pitidos y el indicador
luminoso correspondiente se encenderá.
5. Gire las placas de tal manera que el
indicador luminoso iluminado se encuentre
arriba. Abra las placas y saque el wafle/
gofre.
6. Para seguir preparando wafles/gofres,
vierta más mezcla en el centro la placa.
5

Esparza uniformemente la mezcla, usando
una espátula resistente al calor. Cierre y
gire las placas 180°.
7. Cuando el segundo wafle/gofre esté listo,
la unidad emitirá tres pitidos y el indicador
luminoso correspondiente se encenderá.
8. Gire las placas de tal manera que el
indicador luminoso iluminado se encuentre
arriba. Abra las placas y saque el wafle/
gofre.
9. Repita estos pasos para preparar más
wafles/gofres.
10. Después de terminar, apague (OFF) el
aparato, desconecte el cable de la toma de
corriente y permita que el aparato se enfríe
antes de manipularlo.
LIMPIEZA Y
MANTENIMIENTO
Después de cada uso, apague (OFF) y desconecte
el aparato. Abra las placas y permita que se
enfríen completamente antes de limpiarlas.
Elimine los residuos de las placas con una brocha
y absorba el aceite con un papel absorbente o un
paño seco. Si es necesario, limpie las placas con
un paño ligeramente humedecido para eliminar las
manchas y la acumulación de residuos de aceite
y evitar que la mezcla pegue. Nunca desarme el
aparato para limpiarlo.
Compruebe que las placas están
completamente frías antes de limpiarlas.
Si hay mezcla pegada sobre las placas, vierta
un poco de aceite encima y espere durante
aproximadamente 5 minutos; esto remojará la
mezcla seca para facilitar la limpieza.
Limpie la carcasa del aparato con un paño suave
seco. Nunca utilice limpiadores abrasivos ni
estropajos duros. NUNCA SUMERJA EL CABLE,
LA CLAVIJA NI EL APARATO EN AGUA U
OTRO LÍQUIDO.
Cualquier otro servicio debe ser realizado por un
técnico autorizado.
CONSEJOS Y
SUGERENCIAS
• El ajuste de temperatura n.°1 producirá
wafles/gofres claros. El ajuste de temperatura
n.°6 producirá wafles/gofres oscuros. Le
aconsejamos que experimente con varios
niveles para determinar cuál prefiere.
• Para preparar wafles/gofres más rápidamente,
utilice mezcla preparada (disponible en la
mayoría de los supermercados).
• Para resultados óptimos, llene el vaso medidor
hasta arriba.
• Para que los wafles/gofres sean uniformes,
vierta la mezcla en el centro de la placa inferior
y espárzala hacia los bordes hasta cubrir
totalmente la superficie de las placas.
• Le aconsejamos que utilice el nivel de
temperatura n.°4 para preparar wafles/gofres
con mezclas preparadas y con nuestras recetas.
Para que los wafles/gofres sean más crujientes y
cocidos, escoja un ajuste más alto. Para que los
wafles/gofres sean menos cocidos, escoja un
ajuste más bajo.
• Si nota que los wafles/gofres pegan a las placas,
añada un poco de aceite o mantequilla derretida
a la mezcla.
• Los wafles/gofres son mejores recién hechos
pero si desea, los puede mantener calientes en
un horno precalentado a 95°C (200 °F), adentro
de un molde o envueltos en papel de aluminio.
Nota: los wafles/gofres envueltos en papel de
aluminio serán menos crujientes.
• Los wafles/gofres se congelan muy bien.
Permita que se enfríen, luego póngalos en una
bolsa hermética, entre hojas de papel encerado.
Recaliéntelos en el horno o en la tostadora.
GARANTÍA LIMITADA DE
TRES AÑOS
(válida en los EE.UU. y en
Canadá solamente)
Esta garantía es para los consumidores
solamente. Usted es un consumidor si ha
comprado su aparato Cuisinart
®
en una tienda,
para uso personal o casero. A excepción de los
6