Loading ...
Loading ...
Loading ...
7
400mm
2000mm
1000mm
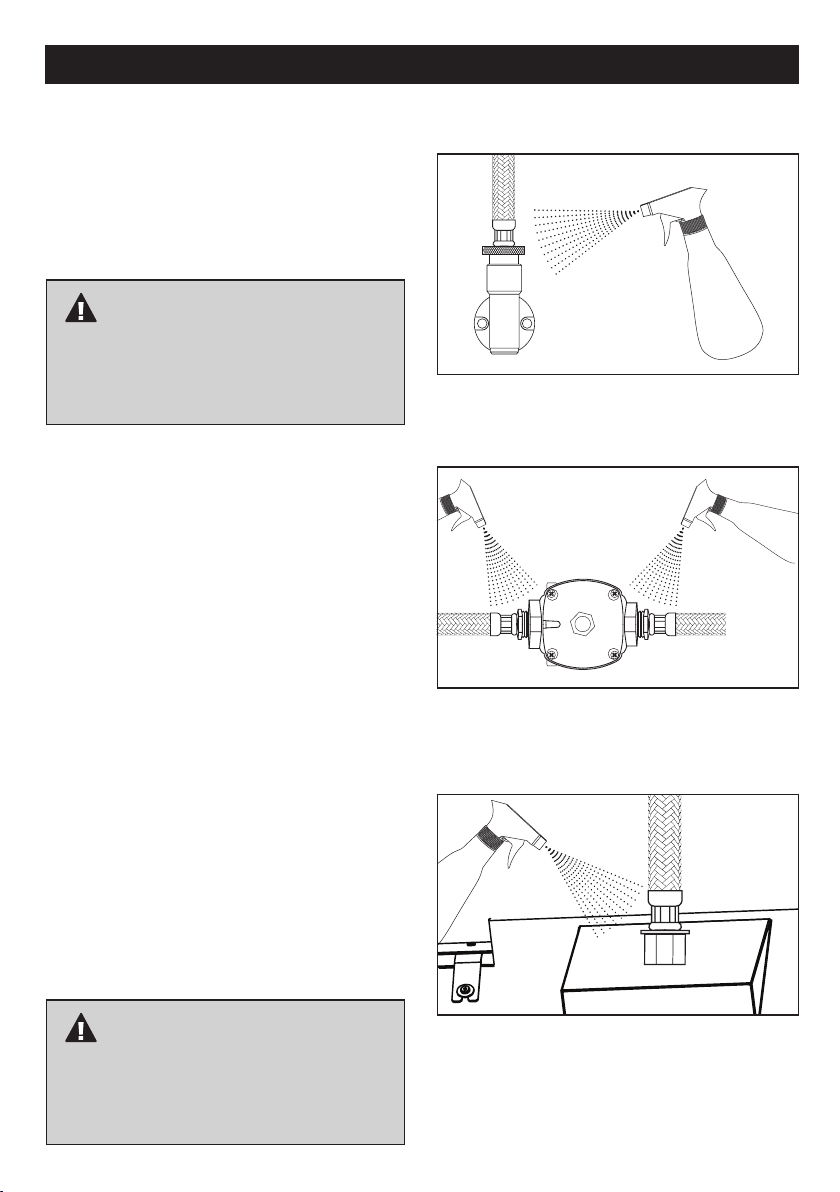
LEAK TESTING THE PRODUCT
A gas leak test must be done after assembly and before
operating the appliance. Procedure as follows:
1. If the product is installed on Natural Gas, the hose &
regulator must be connected to both the heater and
mains supply. If the product is installed on LPG then
the hose & regulator must be connected to both the
heater and a full gas cylinder.
2. Must ensure the unit is not running when leak test is
being performed
RH200 (Auto): Power must be switched off
RH205 (Manual): Do not light the unit
3. Make a mild soapy water solution. Apply with a
spray bottle, soft cloth or brush to the following
connections:
Hose connection to mains supply if on
natural gas (See image 1) or if on LPG, it
is the regulator connection to gas cylinder
Hose connection to regulator (See image 2)
Hose connection to the heater (See image 3)
4. Turn on the gas supply either at the mains or gas
cylinder
5. Apply the soapy water solution to the 3 connections
6. If soap bubbles appear at any of the connections,
there is a gas leak
7. If a gas leak is detected, turn the gas supply off.
Tighten any leaking fittings and repeat the process
8. If soap bubbles still appear (gas is still leaking), you
must:
If on natural gas, turn off the gas supply at the
mains then contact the licenced gas installer
If on LPG, turn off the gas supply at the
cylinder and disconnect the regulator, then
contact the licenced gas installer
INSTALLATION AND SERVICING
IMPORTANT
Any threaded connection that is required in the
assembly of the hose & regulator must be tightened
with a shifter or spanner. Failing to do this may lead
to a gas leak at the connection.
IMPORTANT
It is the responsibility of the gas installer to ensure
there are no leaks when installing the product. DO
NOT contact the place of purchase or supplier, you
must contact the licenced gas installer.
IMAGE 1
IMAGE 3
IMAGE 2
Loading ...
Loading ...
Loading ...