Loading ...
Loading ...
Loading ...
15
First Steps
7
DATE
Y
M
D
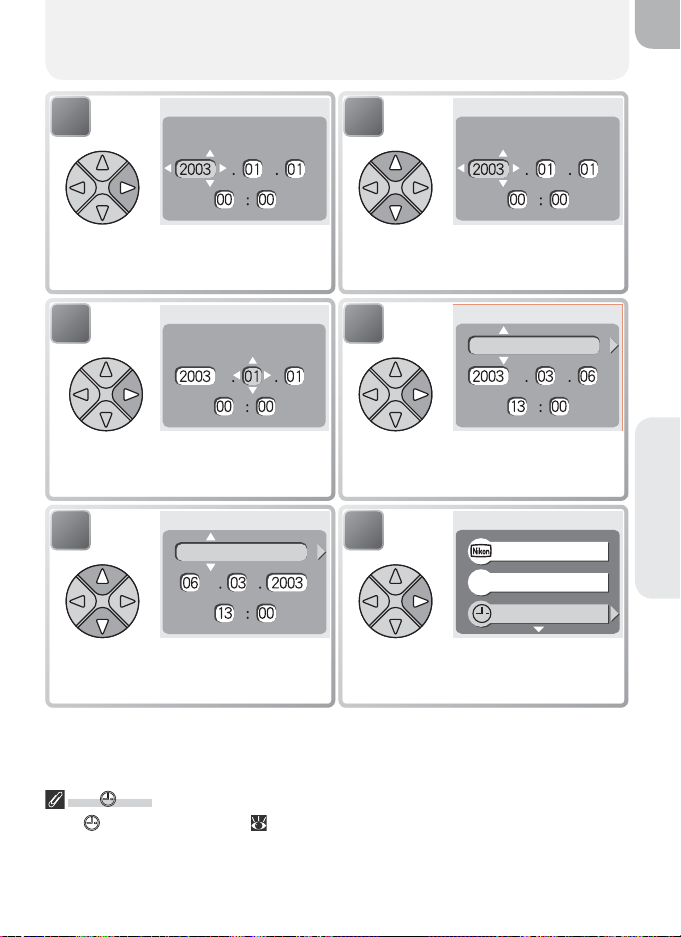
Display DATE menu.
8
DATE
Y
M
D
Edit Year.
9
DATE
Y
M
D
Select Month. Repeat steps 8–9 to
edit remaining items.
10
DATE
Y
M
D
SET
Highlight Y M D.
11
DATE
Y
M
D
SET
Choose order in which Year, Month,
and Day will be displayed.
12
Date
Welcome screen
Language
SET-UP
En
SET
Return to setup menu.
The Icon
If the (“date not set”) icon ( 4) fl ashes in the top right corner of the monitor when
the camera is in shooting mode, the date and time have not been set or the clock bat-
tery is exhausted. Set the camera clock as described above. Any pictures taken before
the clock has been set will have a time stamp of “0000.00.00 00:00.”
Loading ...
Loading ...
Loading ...