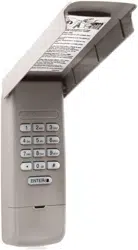
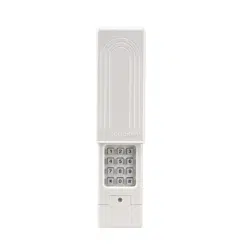
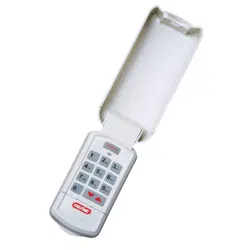
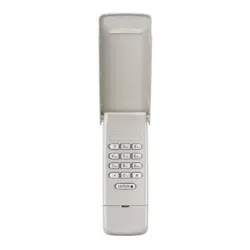
User Manual for WIRELESS KEYLESS ENTRY
BEFORE YOU START
Read instructions thoroughly BEFORE beginning. If you are using this product with residential door openers, this product must be used only with door openers manufactured starting January 1, 1993 that use photoelectric sensors located near the bottom of the door track.
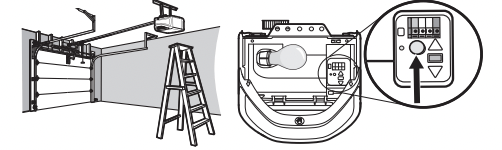
IMPORTANT: The keypad will activate your door or gate during programming. Be sure the door is clear of ALL obstructions. Start with the garage door closed. Make sure the garage door opener has a working light because it is a programming indicator
Install the battery and program the wireless keyless entry prior to installation.
WARNING: This product can expose you to chemicals including lead, which are known to the State of California to cause cancer or birth defects or other reproductive harm.
WARNING:
To prevent possible SERIOUS INJURY or DEATH from a moving gate or garage door:
- Install Wirelss Keyless Entry within sight of the garage door, out of reach of children at a minimum height of 5 feet (1.5 m), and away from ALL moving parts of door.
- ALWAYS keep remote controls out of reach of children. NEVER permit children to operate, or play with remote controls.
- Activate gate or door ONLY when it can be seen clearly, is properly adjusted, and there are no obstructions to door travel.
- ALWAYS keep gate or garage door in sight until completely closed. NEVER permit anyone to cross path of moving gate or door.
INSTALLATION
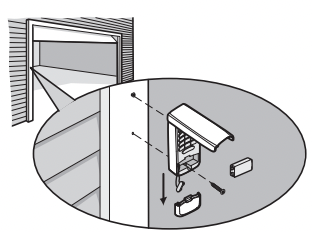
- Select a location to mount the wireless keyless entry at a minimum height of 5' (1.5 m) out of the reach of children.
- Remove the battery cover and battery to show mounting holes.
- Mark the top mounting hole and drill 1/8" (3.2mm) pilot hole.
- Install the top screw, allowing 1/8" (3.2mm) to protrude above the surface. Position the wireless keyless entry over the top screw.
- Mark the bottom hole and drill 1/8" (3.2 mm) pilot hole. Install the bottom screw. Do not overtighten to avoid cracking the plastic housing.
- Reinstall the battery and replace the cover.
PROGRAM THE INITIAL PIN
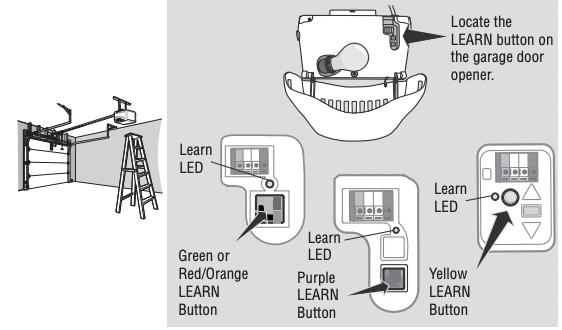
The wireless keyless entry is pre-programmed towork with a LiftMaster garage door opener with a yellow LEARN button. Locate the LEARN button on the garage door opener. If the LEARN button is YELLOW, see Method A. Otherwise, see Method B for other colored LEARN buttons.
Method A - Yellow LEARN Button
- Press and release the LEARN button on the garage door opener. The learn LED will light.
- Enter a 4-digit personal identification number (PIN) of your choice.
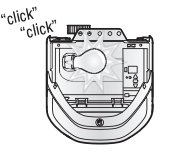
- Press the ENTER button until the opener light bulb blinks or two clicks are heard.
- Test by pressing in the PIN you just programmed, and then press the ENTER button. The garage door opener will activate.
Method B - Yellow LEARN/Security+ 2.0® and Other LEARN Buttons
- Press and hold the * and # buttons until the lights on the keypad stop blinking.
- Enter a 4-digit personal identification number (PIN) of your choice. Then press the # button. Youwill use this PIN in step 6.
- Press and release the ENTER button the number of times that corresponds with the garage door opener type:
| # of Presses |
Garage Door Opener Type |
| 1 |
Yellow LEARN Button (Security+ 2.0®) |
| 2 |
Purple LEARN Button (315 MHz Security+®) |
| 3 |
Red/Orange LEARN Button (390 MHz Security+®) |
| 4 |
Green LEARN (390 MHz Billion Code) |
4. Press and release the 0 button.
5. Press and release the LEARN button one time on the garage door opener. The Learn LED will light.
6. Enter the 4-digit PIN from step 2, then press and release the ENTER button until the garage door opener lights flash or two clicks are heard.
7. Test by pressing in the PIN you just programmed, and then press the ENTER button. The garage door opener will activate. Add more openers by repeating steps 1 through 7 using a new PIN for each.
HOW TO USE THE WIRELESS KEYLESS ENTRY
The garage door opener activates when you press the personal identification number (PIN) and ENTER button. The keypadwill blink for 15 seconds. During that time the ENTER button can be used to stop, start or reverse the door.
If the wrong PIN number is accidentally pressed, press the correct PIN then ENTER button. The wireless keyless entry will transmit only the last four digits that were pressed before the ENTER button.
ONE BUTTON CLOSE FEATURE: This feature allows you to CLOSE your garage door by pressing just the ENTER button instead of your 4-digit PIN.
NOTE: This feature ONLY closes and is not available on garage door openers manufactured prior to 2006 or an externalreceiver.
To deactivate the one button close feature:
Press and hold the 1 and 9 buttons for 10 seconds. The keypadwill blink four times when the one button close feature is deactivated.
To activate the one button close feature:
Press and hold the 1 and 9 buttons for 10 seconds. The keypadwill blink twice when the one button close feature is activated.
PROGRAM A TEMPORARY PIN
NOTE: This feature is not available on garage door openers that have a green LEARN button or an externalreceiver.
A temporary 4-digit personal identification number (PIN) can be programmed to allow access to visitors. Each programmed PIN can program one temporary PIN.
The temporary PIN can be set for a number of hours or a number of door openings.
The temporary PIN cannot be the same as any previously programmed PIN.
- Press any programmed PIN, then press and hold the * button until the garage door opener light blinks three times.
- Press the temporary 4-digit PIN of your choice, then press the ENTER button. The light blinks 4 times.
- Enter the temporary PIN limit of use by:
| Number of Hours PIN Will Work |
|
Number of Openings PIN Will Work |
| Press the number of hours the temporary PIN willwork (up to 255), then press the * button. The opener light blinks once. |
OR |
Press the number of openings the temporary PIN willwork (up to 255), then press the # button. The opener light blinks once. |
4. Test by pressing in the temporary PIN you just programmed, and then press the ENTER button. The garage door opener activates. The test uses up one opening. Clear the temporary PIN by repeating steps 1 through 4, and set the number of hours or openings to 0 at step 3.
CHANGE AN EXISTING PIN*
- Enter the programmed PIN youwant to change.
- Press and hold the # button until the garage door opener light blinks twice.
- Enter the new 4-digit PIN of your choice and press the ENTER button. The opener light will blink once.
- Test by entering the PIN you just programmed, and then press the ENTER button. The garage door opener will activate.
*You cannot change an existing PIN for an opener with a green LEARN button or an externalreceiver. You MUST repeat "Program the Initial PIN" to change the PIN number.
ERASE ALL REMOTE CONTROL AND KEYLESS ENTRY PROGRAMMING FROM THE OPENER
The following steps will erase ALL remote controls and any keyless entries from your opener.
- Press and hold the LEARN button on the garage door opener until the Learn LED turns off (approximately 6 seconds).
2. Test by pressing the buttons on the remote control and keyless entry to ensure they no longer activate the opener.
3. Follow programming steps to reprogram each remote control and keyless entry youwish to use.
REPLACE THE BATTERY
WARNING
To prevent possible SERIOUS INJURY or DEATH:
- NEVER allow small children near batteries.
- If battery is swallowed, immediately notify doctor.
Replace the battery when the keypad becomes dim or does not light after a button is pressed.
Slide the cover up, remove the battery cover, and replace the battery. Dispose of the old battery properly.
NOTICE: This device complies with part 15 of the FCC rules and Innovation, Science and Economic Development Canada license-exempt RSSs. Operation is subject to the following two conditions: (1) this device may not cause harmful interference, and (2) this device must accept any interference received, including interference that may cause undesired operation. Any changes or modifications not expressly approved by the party responsible for compliance could void the user’s authority to operate the equipment. This device must be installed to ensure a minimum 20 cm (8 in.) distance is maintained between users/bystanders and device. This device has been tested and found to comply with the limits for a Class B digital device, pursuant to part 15 of the FCC rules and Industry Canada ICES standard. These limits are designed to provide reasonable protection against harmful interference in a residential installation. This equipment generates, uses and can radiate radio frequency energy and, if not installed and used in accordance with the instructions, may cause harmful interference to radio communications. However, there is no guarantee that interference will not occur in a particular installation. If this equipment does cause harmful interference to radio or television reception, which can be determined by turning the equipment off and on, the user is encouraged to try to correct the interference by one or more of the following measures:
- Reorient or relocate the receiving antenna.
- Increase the separation between the equipment and receiver.
- Connect the equipment into an outlet on a circuit different from that to which the receiver is connected.
- Consult the dealer or an experienced radio/TV technician for help.