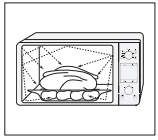
Microwaves are high-frequency electromagnetic waves; the energy released enables food to be cooked or reheated without changing either the form or the colour.
You can use your microwave oven to:
• Defrost
• Reheat
• Cook
Cooking principle.
1. The microwaves generated by the magnetron reflected at cavity and are distributed uniformly as the food rotates on the turntable. The food is thus cooked evenly.
2. The microwaves are absorbed by the food up to a depth of about 1 inch (2.5 cm). Cooking then continues as the heat is dissipated within the food.
3. Cooking times vary according to the container used and the properties of the food:
• Quantity and density
• Water content
• Initial temperature (refrigerated or not)
As the centre of the food is cooked by heat dissipation, cooking continues even when you have taken the food out of the oven. Standing times specified in recipes and in this booklet must therefore be respected to ensure:
• Even cooking of the food right to the centre
• The same temperature throughout the food
CHECKING THAT YOUR OVEN IS OPERATING CORRECTLY
The following simple procedure enables you to check that your oven is working correctly at all times. If you are in doubt, refer to the section entitled “troubleshooting” on the page 39.
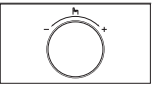
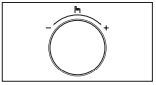
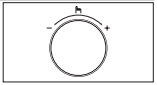
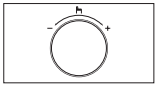
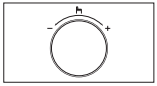
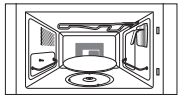
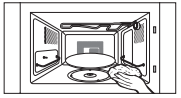
The oven must be plugged into an appropriate wall socket. The turntable must be in position in the oven. If a power level other than the maximum (100 % - 900 W) is used, the water takes longer to boil.
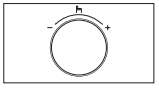
Open the oven door by pulling the handle on the right side of the door.
Place a glass of water on the turntable. Close the door.
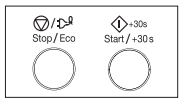
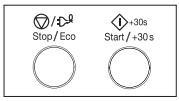
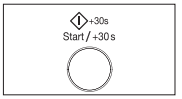
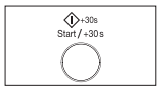
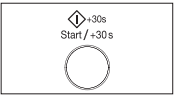
Press the Start/+30s button and set the time to 4 or 5 minutes, by pressing the Start/+30s button the appropriate number of times.
Result: The oven heats the water for 4 or 5 minutes.
The water should then be boiling.
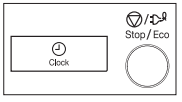
SETTING THE TIME
Your microwave oven has an inbuilt clock. When power is supplied, “:0”, “88:88” or “12:00” is automatically displayed on the display.
Please set the current time. The time can be displayed in either the 24- hour or 12-hour notation. You must set the clock:
• When you first install your microwave oven
• After a power failure
Do not forget to reset the clock when you switch to and from summer and winter time.
Auto Energy Saving Function (Only for applicable models)
If you do not select any function when appliance is in the middle of setting or operating with temporary stop condition, function is canceled and Clock will be displayed after 25 minutes.
Oven Lamp will be turned off after 5 minutes with door open condition.
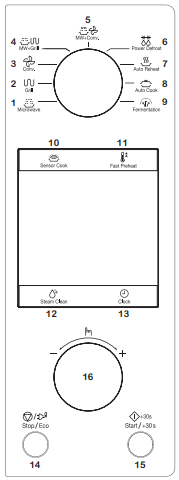
1. Press the Clock () button.
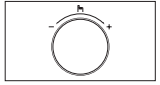
2. Turn the Multi Function Selector Dial to set time display type. (12 H or 24 H)
3. Press the Multi Function Selector Dial to complete the setup.
4. Turn the Multi Function Selector Dial to set the hour.
5. Press the Multi Function Selector Dial.
6. Turn the Multi Function Selector Dial to set the minute.
7. When the right time is displayed, press the Multi Function Selector Dial to start the clock.
Result: The time is displayed whenever you are not using the microwave oven.
COOKING/REHEATING
The following procedure explains how to cook or reheat food.
ALWAYS check your cooking settings before leaving the oven unattended.
Open the door. Place the food in the centre of the turntable. Close the door. Never switch the microwave oven on when it is empty.
1. Turn Mode Selector Dial to Microwave mode position.
Result: The following indications are displayed:
(microwave mode)
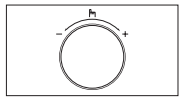
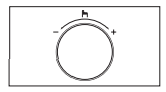
2. Turn Multi Function Selector Dial to desired until the appropriate power level is displayed. At that time, press the Multi Function Selector Dial to set the power level.
3. Set the cooking time by turning the Multi Function Selector Dial.
Result: The cooking time is displayed.
4. Press the Start/+30s button.
Result: The oven light comes on and the turntable starts rotating. Cooking starts and when it has finished:
• The oven beep and flash “0” four times. The oven will then beep one time per minute.
If you would like to know the current Power Level of the oven cavity, press Multi Function Selector Dial once. If you would like to change the power level during cooking, turn the Multi Function Selector Dial.
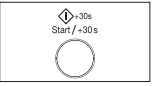
Quick Start:
If you wish to heat a dish for a short period of time at maximum power (900 W), you can also simply press the Start/+30s button once for each 30 seconds of cooking time. The oven starts immediately.
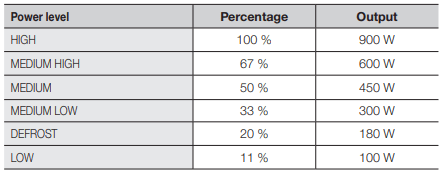
POWER LEVELS AND TIME VARIATIONS
The power level function enables you to adapt the amount of energy dissipated and thus the time required to cook or reheat your food, according to its type and quantity. You can choose between six power levels.
The cooking times given in recipes and in this booklet correspond to the specific power level indicated.
STOPPING THE COOKING
You can stop cooking at any time so that you can:
• Check the food
• Turn the food over or stir it
• Leave it to stand
ADJUSTING THE COOKING TIME
You can increase the cooking time by pressing the +30s button once for each 30 seconds to be added.
• Check how cooking is progressing at any time simply by opening the door
• Increase the remaining cooking time
To increase the cooking time of your food, press the Start/+30s button once for each 30 seconds that you wish to add.
• Example: To add three minutes, press the Start/+30s button six times.
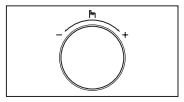
Just turning Multi Function Selector Dial to adjust cooking time.
• To increase cooking time, turn to right and to decrease cooking time, turn to left.
USING THE STEAM CLEANING
The steam provided by steam clean system will soak the cavity surface. After using steam clean function, you can easily clean the cavity of oven.
Use this function only after the oven has completely cooled. (Room temperature)
Use normal water only,and no distilled water.
1. Open the door.
2. Fill with water following guide line outside the water bowl.
3. Please attach the water bowl in right side of the oven.
4. Close the door.
5. Press the Steam clean () button. It will start Steam clean by automatic. (Bulb does work during Steam cleaning time.)
6. If Steam clean is completed, beep of 4 times rings. Than Open the door.
7. Please clean cavity of oven with dried dishtowel. Remove the turntable and only under rack with kitchen paper.
• Water Bowl only can be use during “Steam clean” mode.
• When cooking non-liquid items, remove water bowl because It will damage and cause fire to the microwave oven.
USING THE AUTO REHEAT FEATURE
The twelve Auto Reheat features include/provide pre-programmed cooking times. You do not need to set either the cooking times or the power level. You can adjust the size of the serving by turning the Dial knob.
Use only recipients that are microwave-safe.
Open the door. Place the food in the centre of the turntable. Close the door.
1. Turn Mode Selector Dial to Auto Reheat () mode position.
2. Select the Program Auto Reheat then press Multi Function Selector Dial.
Select the type of food that you are cooking by turning the Multi Function Selector Dial. Refer to the table on the following page for a description of the various preprogrammed settings. At that time, press the Multi Function Selector Dial to select the type of food.
3. Select the size of the serving by turning the Multi Function Selector Dial.
4. Press the Start/+30s button.
Result: The food is cooked according to the preprogrammed setting selected.
• When cooking has finished, the oven will beep and flash “0” four times. The oven will then beep one time per minute.
USING THE AUTO REHEAT PROGRAMMES
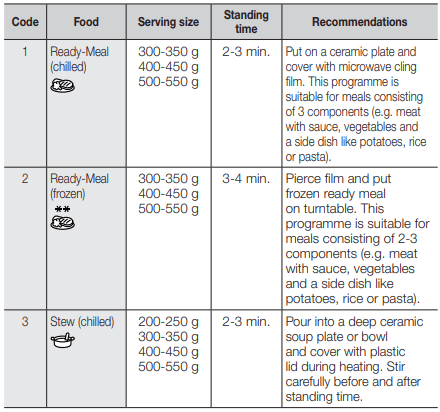
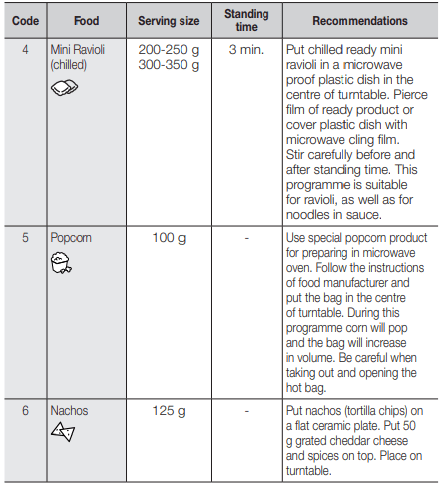
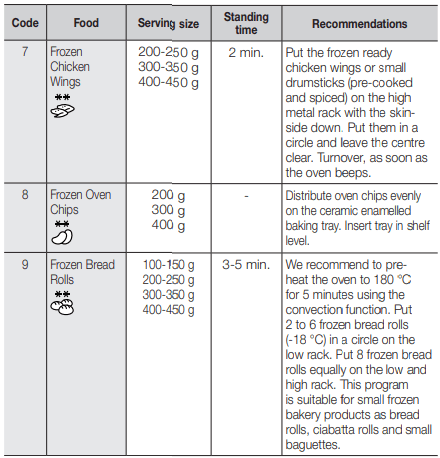
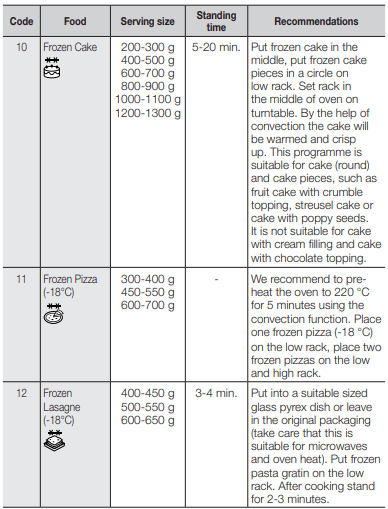
The following table presents the various Auto Reheat Programmes, quantities, standing times and appropriate recommendations. Programmes no 1 to 6 are running with microwave energy only.
Programmes no 7 is running with a combination of microwaves and grill. Programme no 8 is running with convection only. Programme no 9 and 12 are running with a combination of microwaves and convection.
USING THE SENSOR COOK FEATURE
The six Sensor Cook features include/provide pre-programmed cooking times.
You do not need to set either the cooking times or the power level.
You can adjust the Sensor Cook category by turning the dial knob.
First, place the food in the center of the turntable and close the door
Use only dishes that are microwave-safe.
1. Press the Sensor Cook () button.
2. Select the type of food that you are cooking by turning the Multi Function Selector Dial. Refer to the table on the following page for a description of the various pre-programmed settings. At that time, press the Multi Function Selector Dial to select the type of food.
3. Press the Start/+30s button.
Result: Cooking starts. When it has finished.
1) The oven beeps four times.
2) The end reminder signal will beep 3 times (once every minute).
3) The current time is displayed again.
Use only recipients that are microwave-safe.
If the inside temperature is over the 60 °C, Display shows “hot” and cooling fan will operate for 3 minutes. You can’t use Sensor Cook button temperarily until oven get cool to a desired temperature for sensor safe mode.
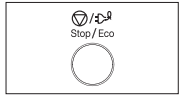
If the door is opened or press the Stop/Eco button during this operation, “E-15” will be displayed. At that time, press the Stop/Eco button one more, “E-15” will disappear.
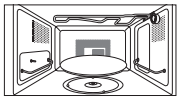
FAST PREHEATING THE OVEN
For convection cooking, it is recommended that you preheat the oven to the appropriate temperature before placing the food in the oven. When the oven reaches the requested temperature, it is maintained for approximately 10 minutes; it is then switched off automatically. Check that the heating element is in the correct position for type of cooking that you require.
1. Press the Fast Preheat () button.
Result: The following indications are displayed:
220 °C (temperature)
2. Set the temperature by turning the Multi Function Selector Dial.
Result: The oven is preheated to the requested temperature.
• Upon arrival at the preset temperature, the oven beeps 6 times and the temperature is kept for 10 minutes.
• After 10 minutes, the beeps 4 times and the operation stops.
In case the inner temperature has reached the preset temperature, the beeps 6 times when temperature and the preset temperature is kept for 10 minutes.
SAFETY-LOCKING YOUR MICROWAVE OVEN
Your microwave oven is fitted with a special Child Safety programme, which enables the oven to be “locked” so that children or anyone unfamiliar with it cannot operate it accidentally.
The oven can be locked at any time.
1. Press the Clock () and Stop/Eco button at the same time (about three second).
Result:
• The oven is locked.
• The follow indication is display “”.
2. To unlock the oven, press the Clock () and Stop/ Eco button again at the same time (about three second).
Result: The oven can be used normally.
SWITCHING THE BEEPER OFF
You can switch the beeper off whenever you want.
1. Press the Start/+30s and Stop/Eco button at the same time (about two second).
Result: The oven does not beep to indicate the end of a function.
2. To switch the beeper back on, press the Start/+30s and Stop/Eco button again at the same time (about two second).
Result: The oven operates normally.
SETTING THE ENERGY SAVE MODE
The oven has an energy save mode.
• Press the Stop/Eco button.
• To remove energy save mode, press any button or turn any dial. The oven is ready for use.
Cooking Guide
MICROWAVES
Microwave energy actually penetrates food, attracted and absorbed by its water, fat and sugar content.
The microwaves cause the molecules in the food to move rapidly. The rapid movement of these molecules creates friction and the resulting heat cooks the food.
COOKING
Cookware for microwave cooking:
Cookware must allow microwave energy to pass through it for maximum efficiency. Microwaves are reflected by metal, such as stainless steel, aluminium and copper, but they can penetrate through ceramic, glass, porcelain and plastic as well as paper and wood. So food must never be cooked in metal containers.
Food suitable for microwave cooking:
Many kinds of food are suitable for microwave cooking, including fresh or frozen vegetables, fruit, pasta, rice, grains, beans, fish, and meat. Sauces, custard, soups, steamed puddings, preserves, and chutneys can also be cooked in a microwave oven. Generally speaking, microwave cooking is ideal for any food that would normally be prepared on a hob. Melting butter or chocolate, for example (see the chapter with special hints and tips).
Covering during cooking
To cover the food during cooking is very important, as the evaporated water rises as steam and contributes to cooking process. Food can be covered in different ways: e.g. with a ceramic plate, plastic cover or microwave suitable cling film.
Standing times
After cooking is over food the standing time is important to allow the temperature to even out within the food.
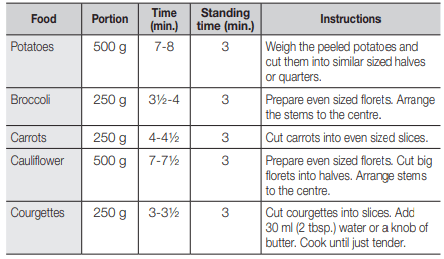
Cooking Guide for fresh vegetables
Use a suitable glass pyrex bowl with lid. Add 30-45 ml cold water (2-3 tbsp.) for every 250 g unless another water quantity is recommended – see table.
Cook covered for the minimum time – see table. Continue cooking to get the result you prefer. Stir once during and once after cooking. Add salt, herbs or butter after cooking. Cover during a standing time of 3 minutes.
Hint: Cut the fresh vegetables into even sized pieces.
The smaller they are cut, the quicker they will cook
All fresh vegetables should be cooked using full microwave power (900 W).
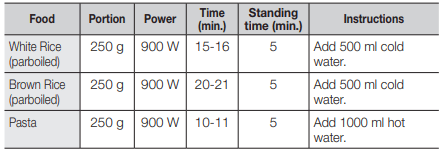
Cooking Guide for rice and pasta
Cooking Guide for rice and pasta
Rice:
Use a large glass pyrex bowl with lid – rice doubles in volume during cooking. Cook covered.
After the cooking time is over, stir before standing time and salt or add herbs and butter.
Remark: the rice may not have absorbed all water after the cooking time is finished.
Pasta:
Use a large glass pyrex bowl. Add boiling water, a pinch of salt and stir well. Cook uncovered.
Stir occasionally during and after cooking. Cover during standing time and drain thoroughly afterwards.
Troubleshooting
TROUBLESHOOTING
If you have any of the problems listed below try the solutions given.
Problem
Cause
Action
General
The buttons cannot be pressed properly.
Foreign matter may be caught between the buttons.
Remove the foreign matter and try again.
For touch models: Moisture is on the exterior.
Wipe the moisture from the exterior.
Child lock is activated.
Deactivate Child lock.
The time is not displayed.
The Eco (powersaving) function is set.
Turn off the Eco function.
The oven does not work.
Power is not supplied.
Make sure power is supplied.
The door is open.
Close the door and try again.
The door open safety mechanisms are covered in foreign matter.
Remove the foreign matter and try again.
The oven stops while in operation.
The user has opened the door to turn food over.
After turning over the food, press the Start/+30s button again to start operation.
The power turns off during operation.
The oven has been cooking for an extended period of time.
After cooking for an extended period of time, let the oven cool.
The cooling fan is not working.
Listen for the sound of the cooling fan.
Trying to operate the oven without food inside.
Put food in the oven.
There is not sufficient ventilation space for the oven.
There are intake/exhaust outlets on the front and rear of the oven for ventilation.
Keep the gaps specified in the product installation guide.
Several power plugs are being used in the same socket.
Designate only one socket to be used for the oven.
There is a popping sound during operation, and the oven doesn't work.
Cooking sealed food or using a container with a lid may causes popping sounds.
Do not use sealed containers as they may burst during cooking due to expansion of the contents.
The oven exterior is too hot during operation.
There is not sufficient ventilation space for the oven.
There are intake/exhaust outlets on the front and rear of the oven for ventilation. Keep the gaps specified in the product installation guide.
Objects are on top of the oven.
Remove all objects on the top of the oven.
The door cannot be opened properly.
Food residue is stuck between the door and oven interior.
Clean the oven and then open the door.
Heating including the Warm function does not work properly.
The oven may not work, too much food is being cooked, or improper cookware is being used.
Put one cup of water in a microwave-safe container and run the microwave for 1-2 minutes to check whether the water is heated. Reduce the amount of food and start the function again. Use a cooking container with a flat bottom.
The thaw function does not work.
Too much food is being cooked.
Reduce the amount of food and start the function again.
The interior light is dim or does not turn on.
The door has been left open for a long time.
The interior light may automatically turn off when the Eco function operates. Close and reopen the door or press the Stop/Eco button.
The interior light is covered by foreign matter.
Clean the inside of the oven and check again.
A beeping sound occurs during cooking.
If the Auto Cook function is being used, this beeping sound means it's time to turn over the food during thawing.
After turning over the food, press the Start/+30s button again to restart operation.
The oven is not level.
The oven is installed on an uneven surface.
Make sure the oven is installed on flat, stable surface.
There are sparks during cooking.
Metal containers are used during the oven/thawing functions.
Do not use metal containers.
When power is connected, the oven immediately starts to work.
The door is not properly closed.
Close the door and check again.
There is electricity coming from the oven.
The power or power socket is not properly grounded.
Make sure the power and power socket are properly grounded.
1. Water drips.
2. Steam emits through a door crack.
3. Water remains in the oven.
There may be water or steam in some cases depending on the food. This is not an oven malfunction.
Let the oven cool and then wipe with a dry dish towel.
The brightness inside the oven varies.
Brightness changes depending on power output changes according to function.
Power output changes during cooking are not malfunctions. This is not an oven malfunction.
Cooking is finished, but the cooling fan is still running.
To ventilate the oven, the cooling fan continues to run for about 3 minutes after cooking is complete.
This is not an oven malfunction.
Turntable
While turning, the turntable comes out of place or stops turning.
There is no roller ring, or the roller ring is not properly in place.
Install the roller ring and then try again.
The turn table drags while turning.
The roller ring is not properly in place, there is too much food, or the container is too large and touches the inside of the microwave.
Adjust the amount of food and do not use containers that are too large.
The turn table rattles while turning and is noisy.
Food residue is stuck to the bottom of the oven.
Remove any food residue stuck to the bottom of the oven.
Grill
Smoke comes out during operation.
During initial operation, smoke may come from the heating elements when you first use the oven.
This is not a malfunction, and if you run the oven 2-3 times, it should stop.
Food is on the heating elements.
Let the oven cool and then remove the food from the heating elements.
Food is too close to the grill.
Put the food a suitable distance away while cooking.
Food is not properly prepared and/or arranged.
Make sure food is properly prepared and arranged.
Oven
The oven does not heat.
The door is open.
Close the door and try again.
Smoke comes out during preheating.
During initial operation, smoke may come from the heating elements when you first use the oven.
This is not a malfunction, and if you run the oven 2-3 times, it should stop.
Food is on the heating elements.
Let the oven cool and then remove the food from the heating elements.
There is a burning or plastic smell when using the oven.
Plastic or non heat-resistant cookware is used.
Use glass cookware suitable for high temperatures.
There is a bad smell coming from inside the oven.
Food residue or plastic has melted and stuck to the interior.
Use the steam function and then wipe with a dry cloth. You can put a lemon slice inside and run the oven to remove the odour more quickly.
The oven does not cook properly.
The oven door is frequently opened during cooking.
If you open the door often, the interior temperature will be lowered and this may affect the results of your cooking.
The oven controls are not correctly set.
Correctly set the oven controls and try again.
The grill or other accessories are not correctly inserted.
Correctly insert the accessories.
The wrong type or size of cookware is used.
Use suitable cookware with flat bottoms.
“E-24” message indicates.
• The “E-24” message is automatically activated prior to the microwave oven overheating. Should the “E-24” message be activated, then depress the Stop/Eco key to utilize the initialization mode.
“E-15” message indicates.
• The “E-15” message is automatically actived when you open the door or push Stop/Eco key on Sensor Cook Mode. Press Stop/Eco key to return to initialization mode.
If the above guidelines do not enable you to solve the problem, then contact your local SAMSUNG customer serivice centre.
Please have the following information read;
• The model and serial numbers, normally printed on the rear of the oven
• Your warranty details
• A clear description of the problem
Then contact your local dealer or SAMSUNG aftersales service.
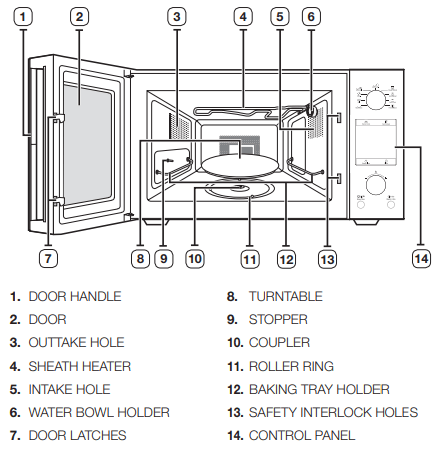
 The oven must be plugged into an appropriate wall socket. The turntable must be in position in the oven. If a power level other than the maximum (100 % - 900 W) is used, the water takes longer to boil.
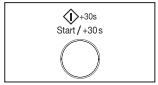
 ) button.
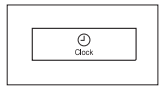


 (microwave mode)
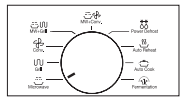

 ) button. It will start Steam clean by automatic. (Bulb does work during Steam cleaning time.)
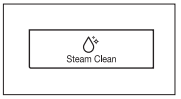

 ) mode position.
 Use only dishes that are microwave-safe.
 ) button.
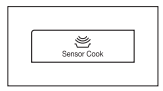
 ) button.
 ) and Stop/Eco button at the same time (about three second).
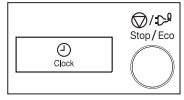
 ”.
”.