Loading ...
Loading ...
Loading ...
9
INSTALLATION INSTRUCTIONS
OPERATING INSTRUCTIONS
LIGHTING THE GRILL
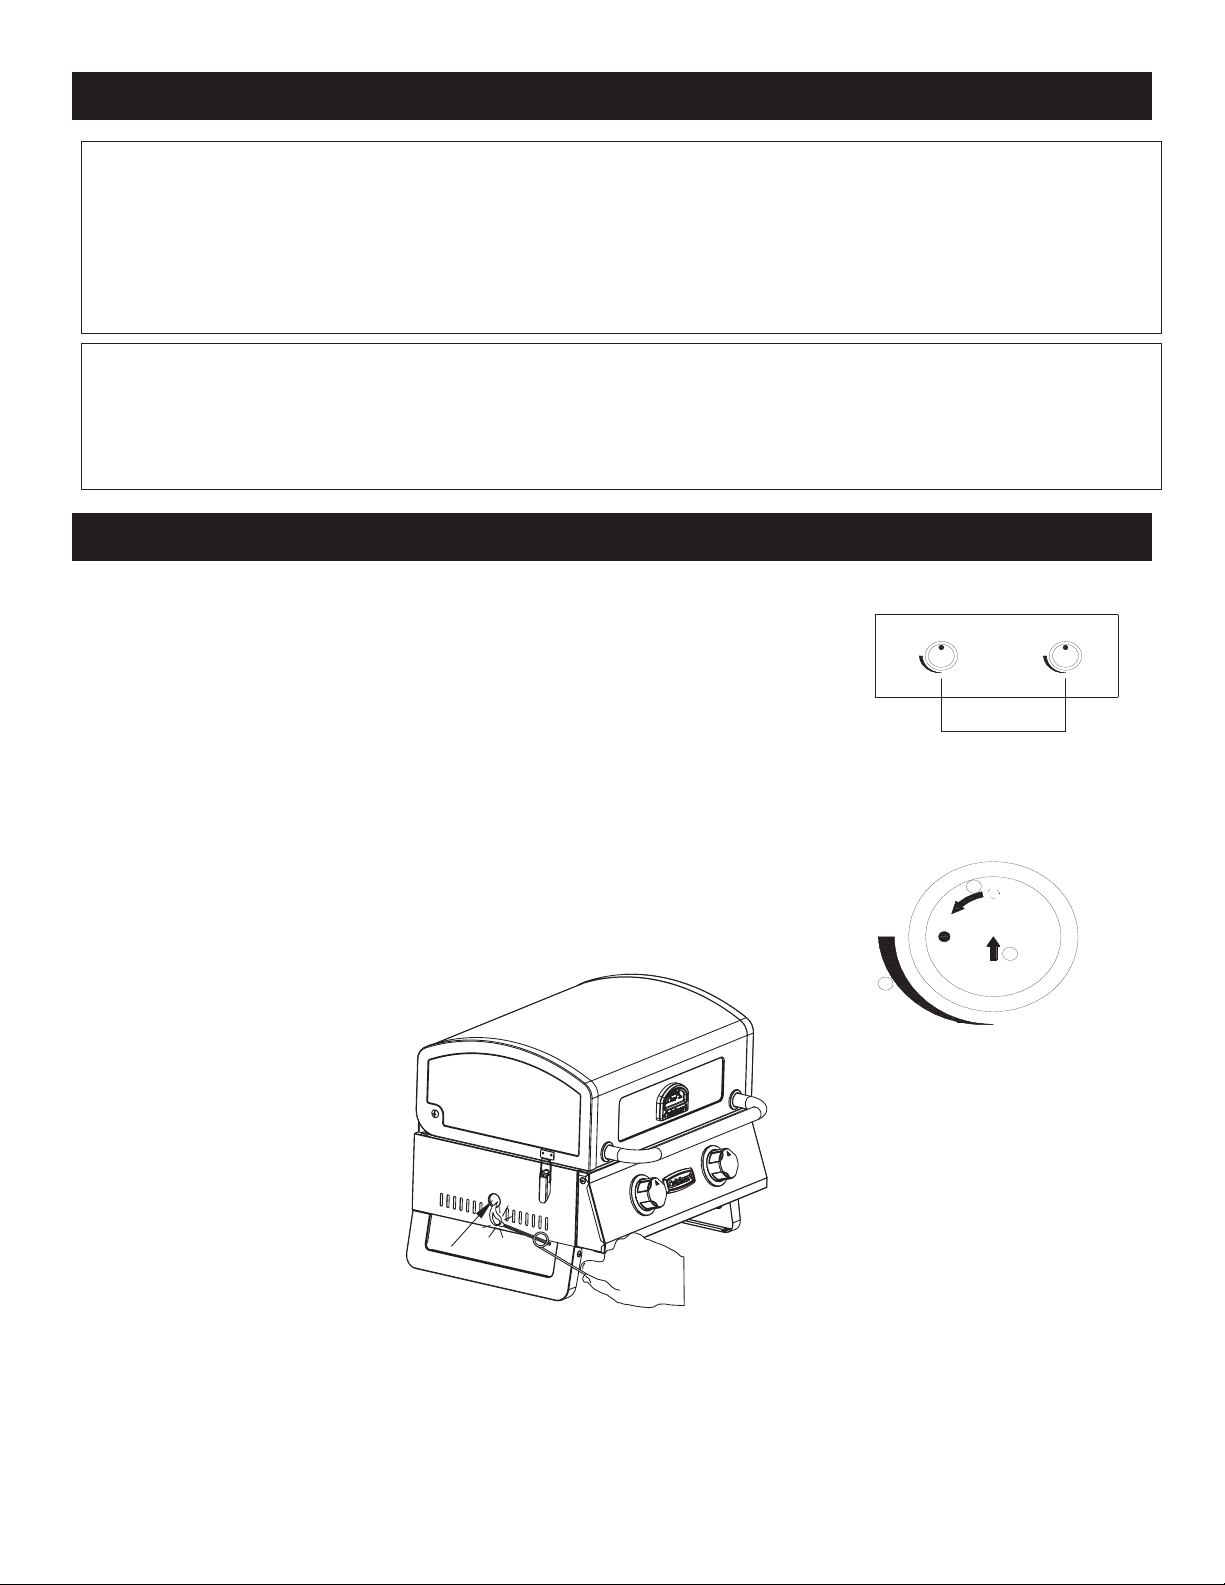
1. Place the legs in the standing position.
2. Make sure the propane cylinder is tightly threaded into the regulator
(hand tighten only).
3. Open lid. Always open lid when lighting.
4. Push and turn Main burner knob slowly to IGNITE/HI as show in
Figure 6, burner should light immediately.
5. If ignition does not occur in 3-5 seconds, turn the control knob
“OFF”. Wait 5 minutes before attempting to re-light the grill. If the
grill fails to ignite after the second attempt, call customer service at
1-866-994-6390 for assistance. With burner lit, gently close the lid
and allow the grill to warm up for 5 minuets prior to use.
Note: If the knob can’t spark
insert a match into the match
light tool as show in Figure 7.
Ignite the match and insert it
through one of the match
lighting holes on the side of
the grill body.
TURNING THE GRILL OFF
1. Turn knob to “OFF” position.
2. Turn the propane cylinder control knob to the “OFF” position.
Caution: Do not attempt to re-light the grill without following all the lighting instructions.
3. Allow the grill body to cool at least 30 minutes before attempting to move or transport.
4. Remove and clean grease tray prior to transporting, then reinstall.
m WARNING
1. The grill and its individual shutoff valve must be disconnected from the gas supply piping system during
any pressure testing of that system at test pressure in excess of 1/2-in.PSI (3.5kpa).
2. The outdoor cooking gas appliance must be isolated from the gas supply piping system by closing its
individual manual shutoff valve during any pressure testing of the gas supply piping system at test
pressure equal to or less than 1/2-in.PSI (3.5kpa).
m WARNING
1. Do not store spare Liquid Propane cylinders under or near this appliance.
2. Never ll the cylinder beyond 80 percent capacity.
3. If the information in item 1&2 is not followed exactly, a re causing death or serious injury may occur.
1
3
2
OFF
Main
Burners
IGNITE / HI
LO
OFF
IGNITE / HI
LO
IGNITE / HI
LO
OFF
Figure 6
1. Push
2. Turn knob to Ignite/Hi
3. Adjust ame
Figure 7
Loading ...
Loading ...
Loading ...