Loading ...
Loading ...
Loading ...
M6 Nut
Leg Support Bracket
M6 x12 Screw
Leg Assembly
Grease Tray
6
ASSEMBLY INSTRUCTIONS
Figure 1
Figure 2
Figure 4
Figure 5
Figure 3
1. Remove all the packing materials and move grill close to a
desired location.
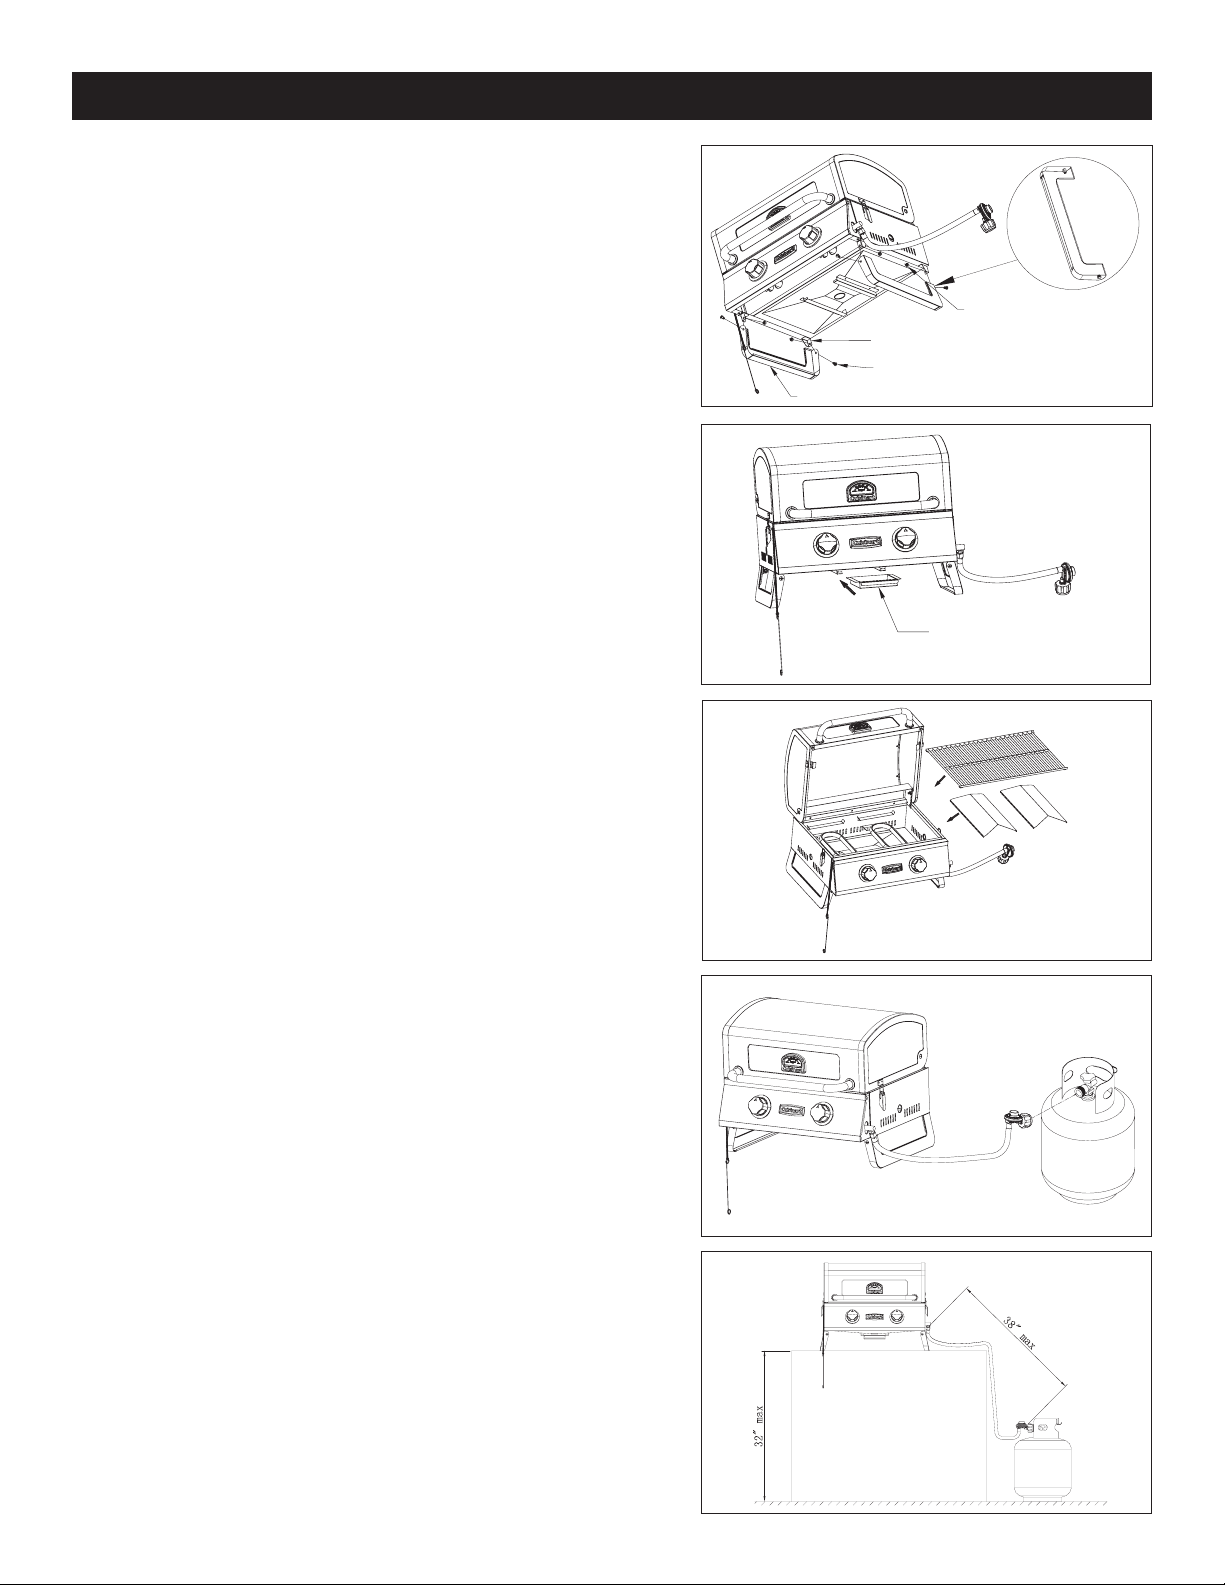
2. Remove the M6x12 screws and M6 nuts from leg
assembly. Then, as shown in Figure 1, use the M6x12
screws and M6 nuts to fasten the leg assembly to the
leg support brackets. Remove ame tamers and cooking
grid from the grill and lock the lid down before attempting
to assemble the legs.
3. As shown in Figure 2, insert the grease tray underneath the
grill body.
4. As shown in Figure 3, rst install the ame tamers onto the
brackets above the gas burners and then install the cast iron
cooking grate onto the grill body.
5. Attach the regulator with 38” hose to the propane cylinder
by turning the regulator handle clockwise as shown in
Figure 4. If the outdoor cooking appliance is not in use, the
gas must be turned “OFF” at the Liquid Propane cylinder.
Check all gas supply ttings for leaks before each use. Do not
use the grill until all connections have been checked and do
not leak (see “Leak Testing” instructions on page 8).
6. Place the table top grill on the desk as shown in Fig.5.
Note: This table top grill uses a 38” gas hose, we suggest
using this grill on a 32” high table.
Loading ...
Loading ...
Loading ...