Loading ...
Loading ...
Loading ...
23
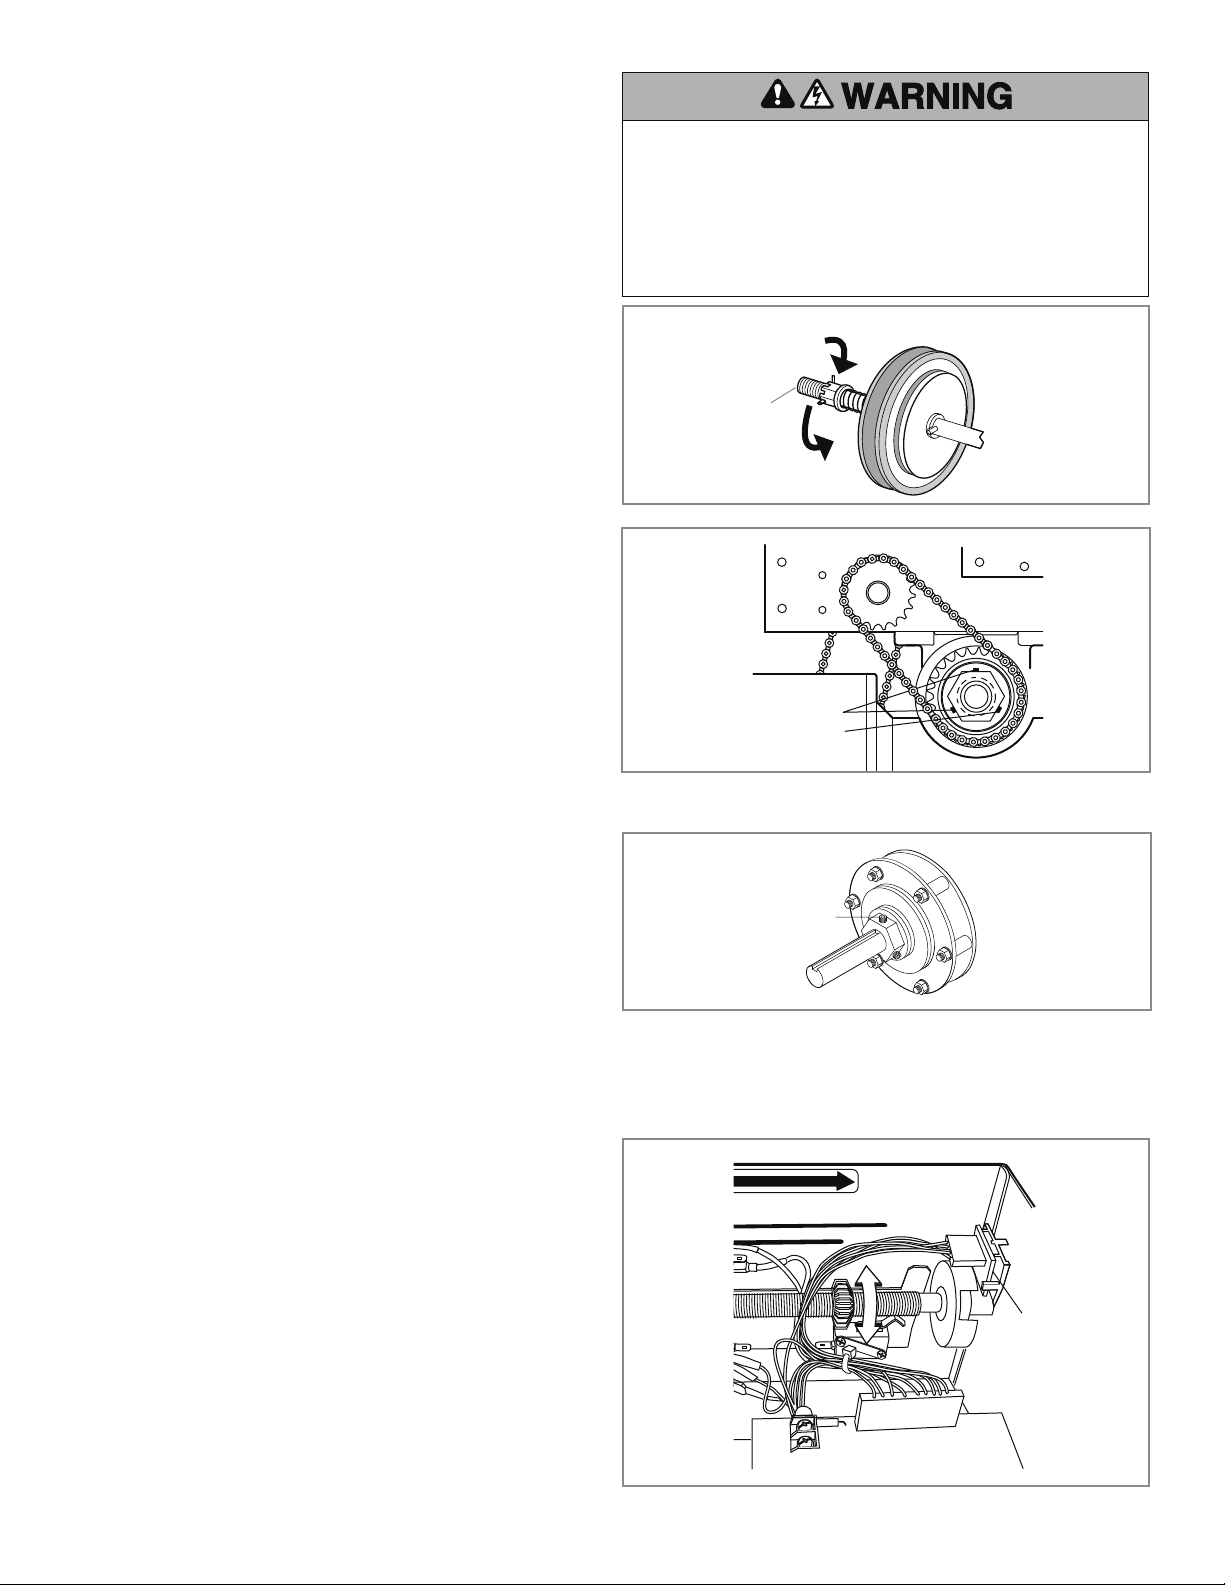
CLUTCH ADJUSTMENT
(BELT DRIVE MODEL OPERATORS)
Remove the cotter pin from the clutch nut on the clutch shaft.
Turn the clutch nut to release tension.
Re-tighten the clutch nut until there is just enough tension to
permit smooth operation of the door and to allow the clutch
to slip if the door is obstructed.
The Clutch System is designed to protect the door an motorized
operator. It is NOT a substitute for an entrapment protection
device.
Secure the clutch nut with the cotter pin.
1
1
2
2
3
3
4
4
1
4
2
3
Adjustment
To avoid SERIOUS personal INJURY or DEATH from
electrocution:
• Disconnect electric power BEFORE performing ANY
adjustments or maintenance.
• ALL maintenance MUST be performed by an Authorized
Service Technician.
AUXILIARY REVERSAL SYSTEM / RPM SENSOR
The Auxiliary Reversal System is designed to protect the door
and motorized operator. It is NOT a substitute for an entrapment
protection device.
Feature: This feature utilizes the RPM sensor connected to the logic
board to detect when the clutch slips and reverses the door (clutch
must be properly adjusted). In addition, the RPM eliminates the
need for a centrifugal switch on single phase motors.
Benefi t: The Auxiliary Reversal System reverses the operator upon
hitting an obstruction, preventing excessive door and operator
damage. (The Auxiliary Reversal System is not applicable on GH
models unless the clutch modifi cation is installed.)
NOTE: This feature is automatically learned and does not require
programming.
L
OSE OPEN
RPM Sensor
Logic Board
1
2
3
Loosen the set screws on the clutch nut.
Back off the clutch nut until there is very little tension on the
clutch spring.
Tighten the clutch nut gradually until there is just enough
tension to permit the operator to move the door smoothly but
allow the clutch to slip if the door is obstructed. When the
clutch is properly adjusted, it should generally be possible to
stop the door by hand during travel.
Loosen the set screws of the torque adjustment nut on the gear
reducer.
Back off the torque nut until there is very little tension on the
belleville washers.
Tighten torque nut gradually until there is just enough tension
to permit the operator to move the door smoothly through a
complete open/close cycle, but to allow the reducer to slip if
the door is obstructed.
Re-tighten the set screw directly over the fl at portion of the
shaft.
(3) Set Screws
Set Screws
Torque Nut
ADJUST TORQUE LIMITER CLUTCH (MODEL GT ONLY)
MODEL GH (OPTIONAL MODIFICATION)
Loading ...
Loading ...
Loading ...