Loading ...
Loading ...
Loading ...
Getting started
17
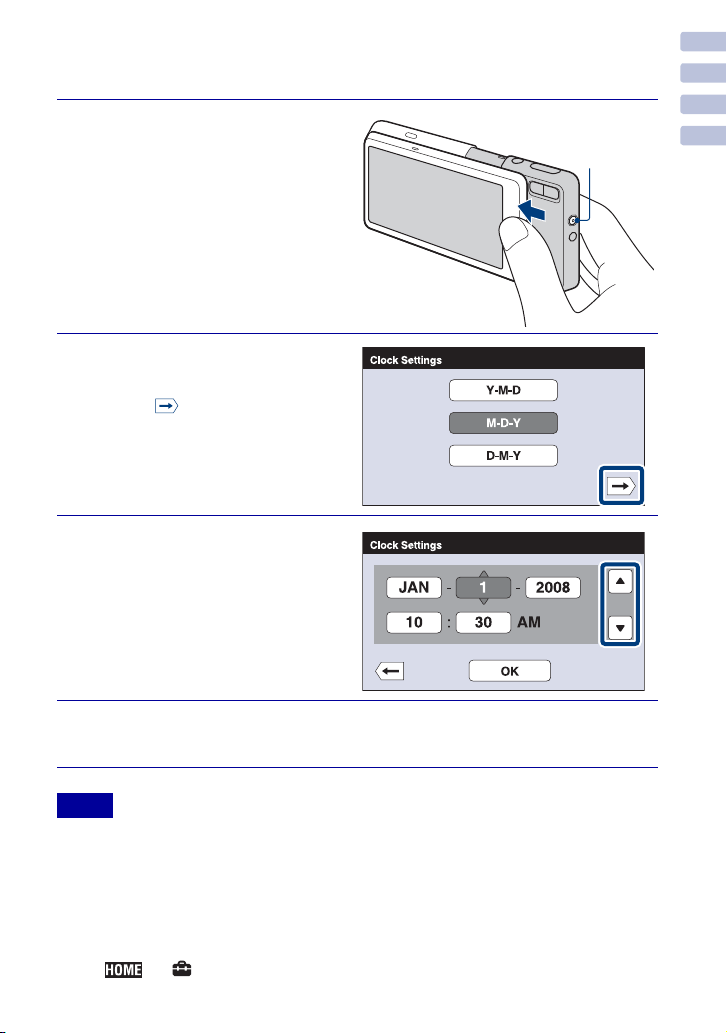
Setting the clock
• The camera does not have a feature for superimposing dates on images. By using “PMB” in the
CD-ROM (supplied), you can print or save images with the date.
• If the camera is running on and you do not operate the camera for about three minutes, the camera
turns off automatically (Auto power-off function).
• It may take time for the power to turn on and allow operation.
x
Setting the date and time again
Touch t (Settings) t [Clock Settings] (page 51).
1
Slide the lens cover as
illustrated.
Press the frame on the
LCD screen with your
thumb until it opens fully.
The camera is turned on.
• You can also turn on the camera by
pressing the POWER button.
2
Touch the desired date
display format, then
touch .
3
Touch each item, then
touch v/V to set its
numeric value.
• Midnight is indicated as 12:00 AM,
and noon as 12:00 PM.
4
Touch [OK].
Notes
POWER button
Loading ...
Loading ...
Loading ...