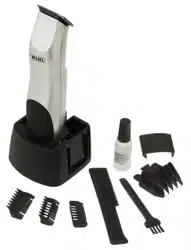
Operating Instructions for Trimmer
BATTERY INSTALLATION/ REPLACEMENT
1. Remove battery cover from trimmer by pushing in and back on the plastic door in the direction of the arrow.
2. Insert two AA batteries as indicated by molded outline in trimmer.
IMPORTANT: Be sure to insert the negative (-) end of each battery first, so that it depresses the spring at the bottom of the battery compartment. Then slide the positive (+) end into position. Do not allow the negative terminal clips to bend and cut the casing of the batteries.
Carbon or alkaline batteries may be used with your Wahl trimmer. Alkaline batteries will provide the longest operating time before battery replacement is needed. Trimmer should run approximately three hours on alkaline batteries.
3. Replace battery cover to its original position.
4. Move switch to “ON” position to use.
5. To maximize battery life, trimmer should be shut “OFF” immediately after using.
6. To replace batteries, complete Step 1, remove batteries one at a time.

TROUBLESHOOTING
If your trimmer fails to operate when switched “ON,” check your batteries to see if they are properly installed. Positive end (center post) should be located as shown in battery housing. Make sure the switch is in the “ON” position and check to be sure blades are free to move. If blades become clogged with debris, manually pushing the blades back and forth a few times while unit is turned “OFF” may help free the blades and allow the trimmer to operate. If it still does not operate, your batteries have probably exceeded their useful life. To maximize battery life, replace all batteries at the same time.
CARING FOR YOUR TRIMMER
OILING BLADES
For best results, use Wahl Clipper Oil on the blades only when necessary, or approximately once a month. Motor bearings are permanently lubricated—do not attempt to oil.
When oiling your trimmer, turn the trimmer “ON - I,” hold the unit with the blades facing DOWN and squeeze three drops across the front of the blade and one drop on each side on the heel of the blade. Wipe off excess oil with soft cloth.

NOTICE—DO NOT OVER OIL!
Excessive oiling or application of liquids will cause damage if allowed to seep back into motor.
BLADE CARE
Trimmer blades have precision-hardened, ground and lapped cutting teeth. Blades should be handled carefully and never bumped or used to cut dirty or abrasive material. Never rinse the blades with water, or the blades may rust. Clean with the included brush.
SHARPENING
Trimmer blades have precision-ground cutting teeth. Blades should be handled carefully and never bumped. To keep blades sharp, cut only clean hair and avoid cutting into dirt or abrasive particles. Blades should be sharpened or changed in sets only. To remove blades for sharpening or replacement, loosen and remove two screws on bottom blade. Replace same and tighten. To have blades sharpened, return blades (only) along with a check or money order for $6.95 (includes shipping back to you) to: Wahl Clipper Corporation, Attn: Repair Department, 3001 Locust Street, Sterling, IL 61081.
New replacement blades may be acquired from a Wahl Authorized Service Center. For products purchased outside of the United States, please contact your distributor.
5-Position Guide makes achieving a consistent trim easy, every time. The guide can be removed (providing a sixth cutting position) and reattached without changing the preset cutting length, so once you have found the perfect length, there’s no guesswork in achieving it every trim. To attach the guide, simply slide it on at a slight angle and press the release tab down to secure in position. To remove the guide, gently push up on the release tab and slide the assembly away from the trimmer. Adjust the trimming length by pressing on the thumb lever and moving the comb forward or backward to the desired setting.
GROWING A BEARD
There are three key factors that will determine which beard style is best for you:
1. The shape and dimensions of your face.
2. The natural growth of your beard.
3. The thickness of your beard. If you are unsure about the type of beard that would most suit your face, speak with a professional hair stylist or go to: WahlUSA.
TRIMMING AND EDGING YOUR BEARD
The following are suggested trimming steps and trimmer positions. You may find different procedures work better for you.
1. Comb your beard in the direction that it grows to help reveal stray hairs that may be longer than the others.
2. Attach the 5-position trimming guide to trim and taper your beard. With the blades pointing toward you, begin with the trimming guide attachment set at a long trimming length.
For best results, start at each sideburn and stroke downward toward your neck. Trim toward your chin in smooth, overlapping strokes, following the lay of your beard. If you trim against the way your beard naturally lays, the trimmer will cut the hair much shorter and the result may be patchy.
Adjust the trimming guide to progressively shorter settings until you reach the desired length of beard. You may wish to set the trimming guide attachment to cut closer near the ear and down under the chin, changing to a longer setting toward the front of the face and point of your chin. When the trimming guide is removed, it will remain at its last length setting until you change it.
Always be sure the trimming guide is snapped solidly into the desired position before you start to trim.
3. Remove the trimming guide and cut the outline of your beard.
Rotate the trimmer so that the blades are pointing toward you. Starting under your chin and working back toward your jawbone and ears, cut the outer perimeter of your beard underneath the jawbone. Continue the line all the way up to the ears and hairline.
4. Accentuate your beard line by using the trimmer in a downward motion. Start at the line you’ve created and, working from the chin back toward the ears, trim the area right under your beard line.
5. Define the upper part of your beard using the same technique.
TRIMMING YOUR MUSTACHE
1. Comb your mustache.
2. Hold the trimmer in a vertical position with the blades pointing toward you in order to define the line of your mustache.
3. With the attachment set at a fairly long trimming length, begin trimming your mustache, starting at the top and working down to your upper lip. Use progressively closer settings to get the look and length you desire.
4. For tapering the mustache, set the 5-position trimming guide at a medium length. Starting in the middle of your mustache, follow the lip line and taper with short upward strokes of the trimmer, working out toward the corners until a gentle shape is created on the bottom of your mustache.
5. As a finishing step, remove the trimming guide and, using only the bare blades, make a definitive line at the bottom of your mustache.
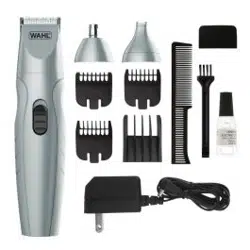
TRIMMING WITH ATTACHMENT COMBS
Your trimmer includes three trimming attachments; stubble, medium and long. The stubble guide has 1 bar, the medium-cut attachment has two bars and the long-cut attachment has three bars. These attachments are ideal for blending, tapering and defining beards, as well as for achieving a “close trim” stubble look around the face. To use the attachments, go with the hair direction. To achieve closer looks, go against the hair direction.


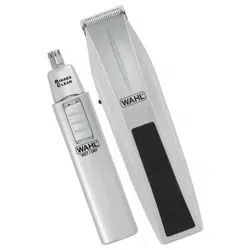
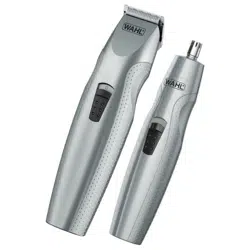
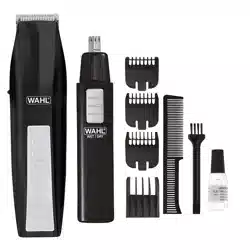
BONUS PERSONAL TRIMMER OPERATING INSTRUCTIONS
BATTERY INSTALLATION/REPLACEMENT
1. Holding the trimmer with the switch facing away from you, place your thumb on the arrow molded into the battery compartment cover, press lightly and slide the cover downward to remove it.
2. Insert one AA alkaline battery, positive end up, toward the cutting head.
3. Replace the battery compartment cover.
4. To maximize battery life, turn the trimmer “OFF” immediately after each use.
5. Replace the battery as soon as you notice the trimmer running slower than normal, to avoid pulling of hairs.
BEFORE TRIMMING
Remove the protective head cap and turn trimmer “ON” (push the slide switch up). Now you’re ready to trim.
TRIMMING EYEBROWS
Move the cutting head slowly to trim stray eyebrow hairs. For precise, even trimming of the entire eyebrow, move the trimmer closer or farther away to achieve the desired length.
TRIMMING HAIR FROM NOSE
Make sure the nasal passages are clean. Slowly move the trimmer in and out of each nostril, no more than 1/4”. Keep the side of the cutting head firmly against the skin to prevent a tickling sensation.
TRIMMING HAIR FROM EARS
Make sure the outer areas of the ears do not contain any wax. Hold the ear flat with one hand and carefully insert the cutting head no more than 1/4” into the outer ear.
CAUTION: Do not insert the cutting head or any other foreign object into the inner ear.
For hair growing on the outside of the ear, simply move the trimmer slowly along the edges of the ear.
CLEANING YOUR TRIMMER
Periodically after use, turn the trimmer “OFF” and rinse cutting head under warm, running water. Take care not to get water in the battery compartment.
For more thorough cleaning, remove the cutting head assembly (unscrew in counterclockwise direction) and rinse under running water to remove hairs from inside of assembly.
After cleaning, return cutting head assembly to its original position (turn clockwise) and wipe entire trimmer dry with soft cloth. Always replace protective head cap before storing trimmer.