
Loading ...
Loading ...
Loading ...
13
SURFACE MAINTENANCE:
Do not use corrosive detergents, abrasive detergents or oven cleaners.
Do not use any product containing chlorine bleach or any product containing chloride.
Do not use steel wool or abrasive scrubbing pads which will scratch and damage surface.
Cleaning Stainless Steel
Clean periodically with warm soapy water and clean cotton cloth or micro fiber cloth. Always rub in the
direction of the stainless steel grain. To remove heavier grease build up use a liquid degreaser detergent.
Aftercleaninguseanon-abrasivestainlesssteelpolish/cleaners,topolishandbuoutthestainlessluster
andgrain.Alwaysscrublightly,withcleancottonclothormicroberclothandbuinthedirectionofthe
stainless steel grain.
Cleaning the Bae Filters
Theltersareintendedtotrapresidueandgreasefromcooking.Althoughtheltersshouldneverneed
replacing,theyarerequiredtobecleanedevery30daysormoreoftendependingoncookinghabits.
FiltersmaybeplacedindishwasheratlowheatorsoakedinhotsoapywaterDryltersandre-installbefore
using hood.
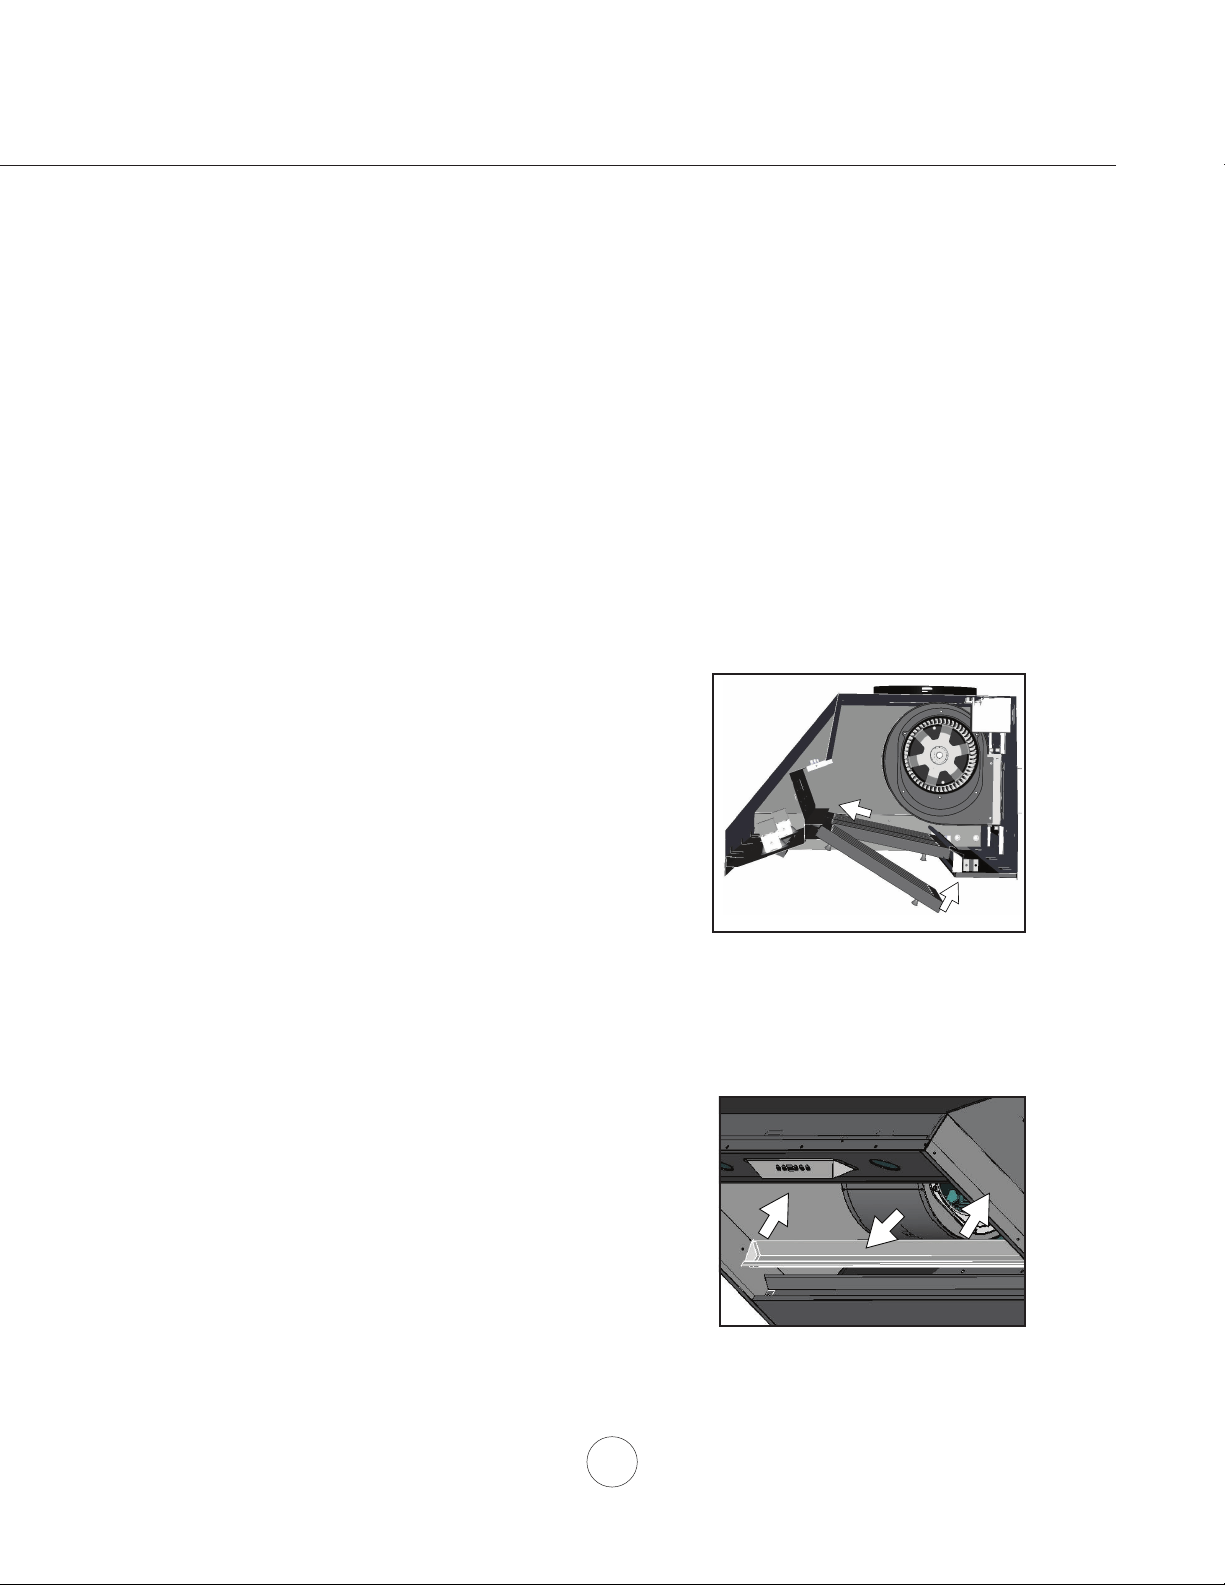
Installing the Bae FIlters, FIG 5:
1. Placelterintotopgrooveoftheinsertasshownand
pull towards front of insert using handles.
2. Pivotbackoflterupwardssoitisangledintheinsert.
3.Pushlterintochannelonbackofinserttolockintoplace.
Cleaning the Grease Tray
Thegreasetrayisintendedtocatchresidueandgreasethatmaydripfromthebaelters.Thegreasetray
shouldbecleanedwhenbaeltersarecleaned.Cleanthegreasetraybysoakinginhotsoapywaterand
gentlyscrubinganyresidueowithasoftterrycloth.Drygreasetrayandre-installbeforeusinghood.
Removing the Grease Tray
Greasetrayhasahookedlipthatattachestobottompaneltopedge.
Remove grease tray by:
1. Pull up on tray to release from bottom panel. FIG. 6-1
2. Pull tray out of insert body. FIG. 6-2
1
2
Maintenance – Cleaning & Installing Filters
1 1
2
FIG. 5
FIG. 6
Loading ...
Loading ...
Loading ...