
Loading ...
Loading ...
Loading ...
10
www.zephyronline.com
Installation – Installing the One Piece Insert
1.Removeallpackingmaterialsandprotectivelmpriortoinstallation.
Use caution during installation to prevent scratches or damage to the
stainless steel.
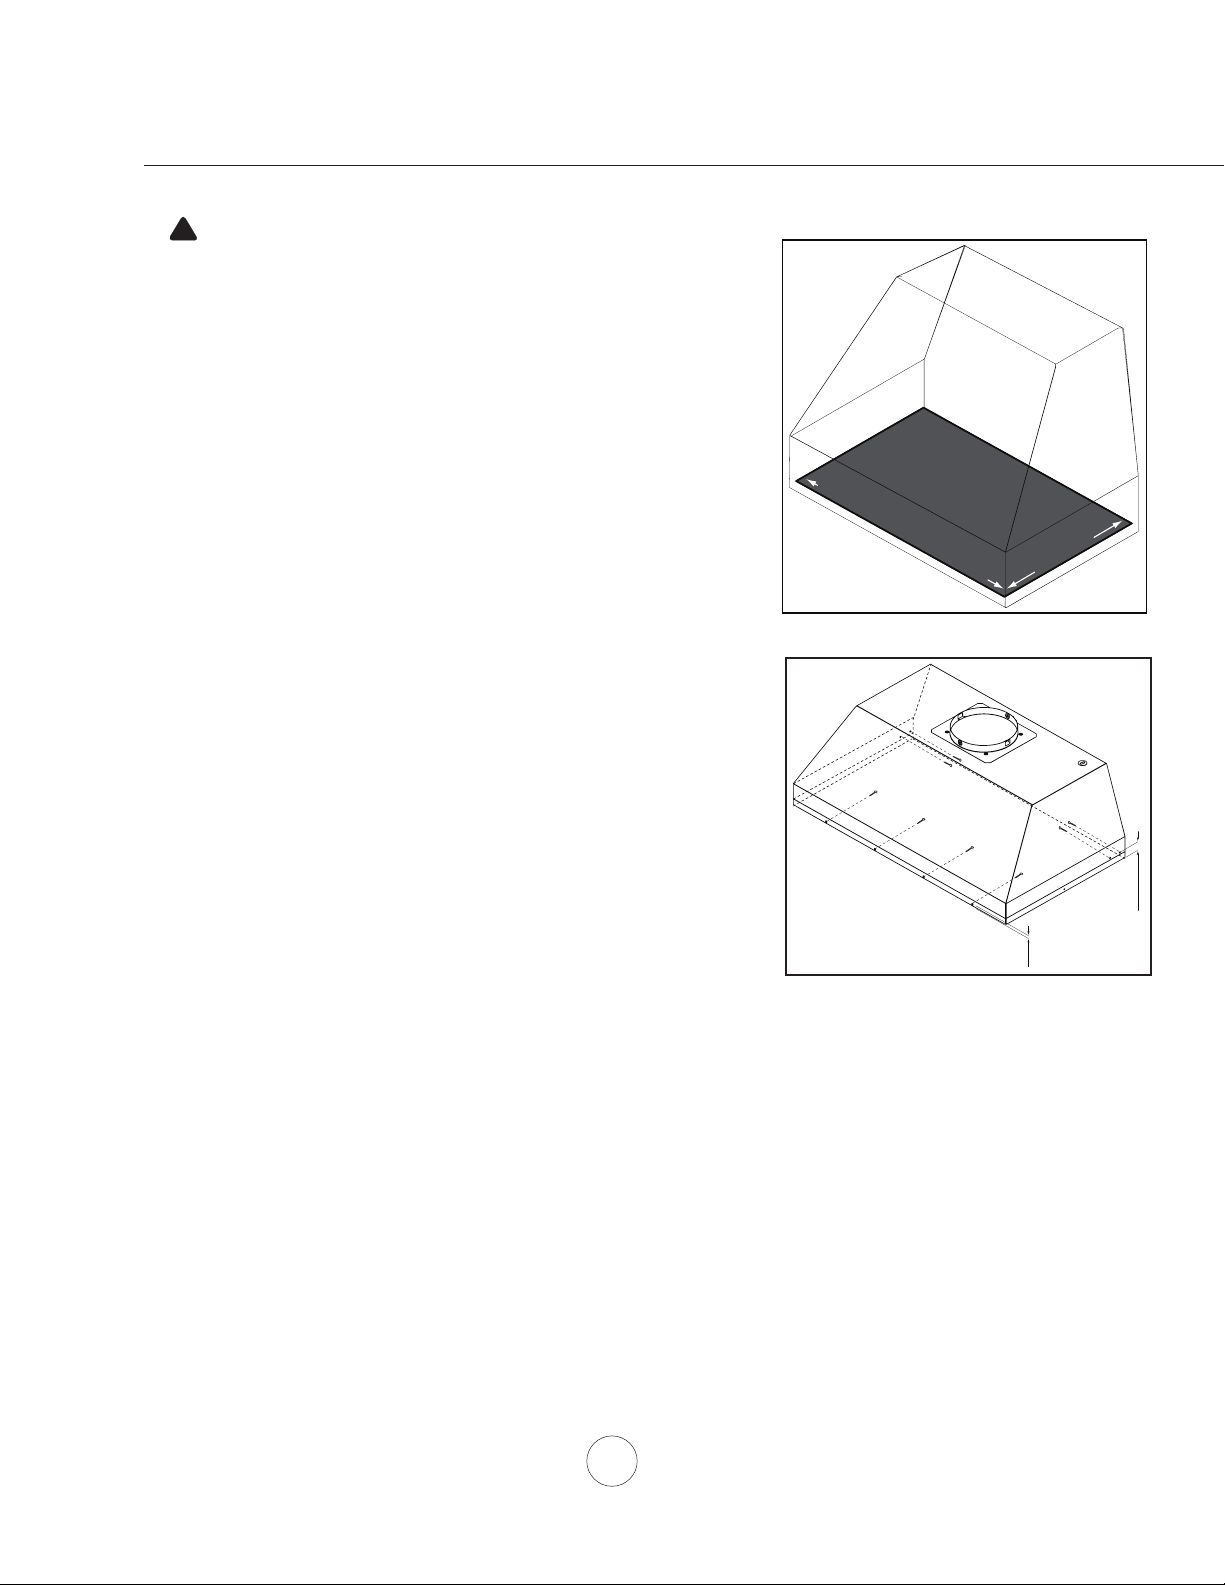
2. Cut out an opening in the bottom of the cabinet by following the
dimensions in FIG. 1.
3. Prepare insert for installation into cabinet by following the steps on
page 11.
4. Lift insert into bottom opening of cabinet and secure to interior of
cabinetusing(8)#8x1/2”stainlesssteelscrews;(4)screwsinthe
frontand(4)screwsinthesides.SeeFIG.2.
WARNING: Make sure the surface you are securing the insert to
is capable of holding the weight of AK98. Failure to do so may
cause personal injury or damage to cooking surface or counter.
5. Finalizeinstallationofelectricalandductwork.Sealductworkwith
certiedaluminumducttape.Poweroninsert,checkforleaksaround
duct tape and verify proper operation.
NOTE: If access to top of insert is not available after installation,
electricalandductworkconnectionmayneedtobemadepriorto
installing the insert.
6. Re-install the previously removed bottom panel, side spacer panels,
greasetray,andbaelters.
CAUTION: At least two installers ar
e
required
due to the weight and size of
the
hood.
!
FIG 1
FIG 2
34-1/2” or 40-1/2” or 46-1/2”
22-
5/
8
”
1-
1/8
”
1-
9/16
”
7/8
”
2-
1/2
”
1/4
”
5-
1/2
”
or
Front Mount Screw Dimensions
Side Mount Screw Dimensions
cut
ou
t
(AK9834)
(AK9846)
(AK9840)
7-
7/8
”
11-
7/8
”
or
7-
7/8
”
11-
7/8
”
or
7-
7/8
”
11-
7/8
”
or
or 59”
(AK9858)
If possible, power up and test all functions prior to installation.
1/4”
1-
1/8
”
FIG. 2
FIG. 1
Loading ...
Loading ...
Loading ...