PLEASE READ ENTIRE MANUAL PRIOR TO USE – SAVE THESE INSTRUCTIONS
Please read through these instructions completely to be sure you’re comfortable with this easy install process. Check your TV owner’s manual to see if there are any special requirements for mounting your TV.
If you do not understand these instructions or have doubts about the safety of the installation, assembly or use of this product, contact Customer Service.
CAUTION: Avoid potential personal injuries and property damage!
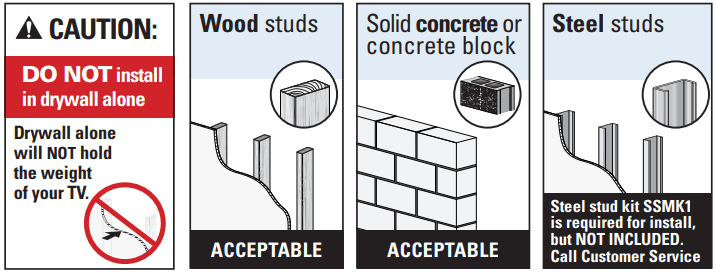
This product is designed ONLY to be installed into wood stud, solid concrete or concrete block or steel stud walls.
DO NOT INSTALL INTO DRYWALL ALONE — DRYWALL ALONE WILL NOT HOLD THE WEIGHT OF YOUR TV.
This product is designed for INDOOR USE ONLY.
The wall must be capable of supporting five times the weight of the TV and mount combined.
Do not use this product for any purpose not explicitly specified by manufacturer.
Manufacturer is not responsible for damage or injury caused by incorrect assembly or use.
TV Weight Limit (including accessories)
DO NOT EXCEED
If your TV, plus accessories, weighs MORE than indicated, this mount is NOT compatible.
Wall Construction
ONLY install on these acceptable wall types.
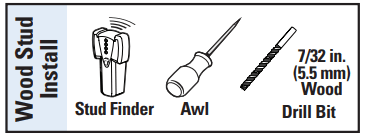
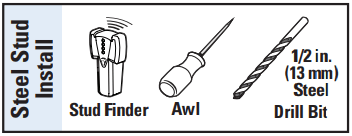
Tools Needed
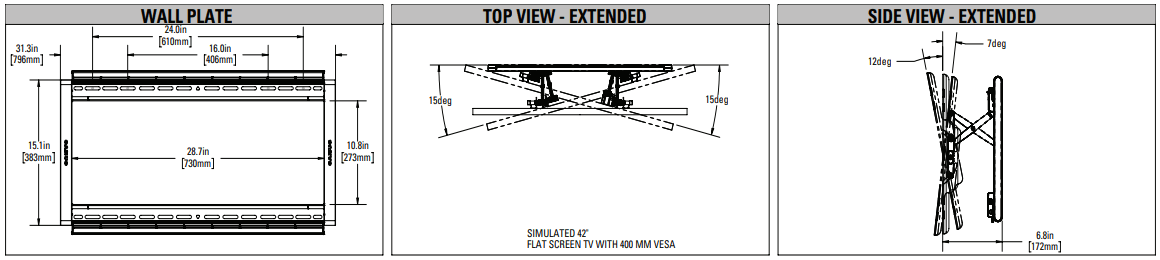
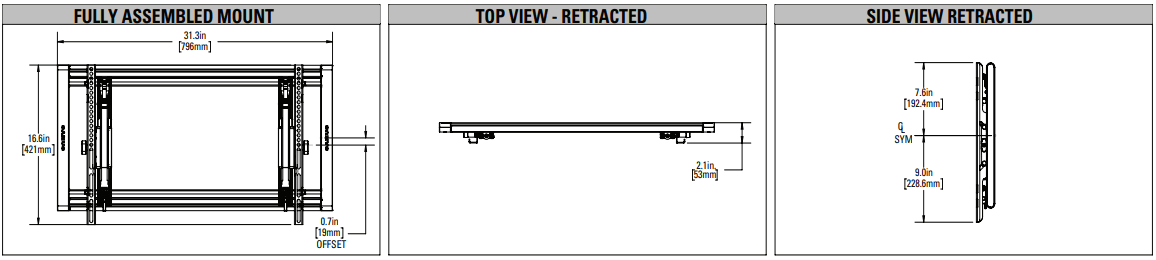
Dimensions in. [mm]
BEFORE YOU BEGIN
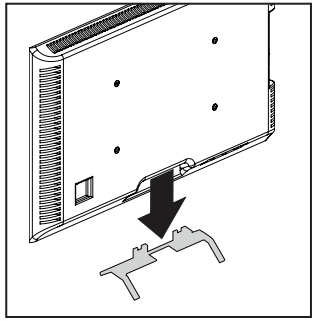
Remove the stand from your TV — if attached.
Install any accessories you may have purchased, if they require TV removal prior to assembly. The TV is removable for future accessory purchases.
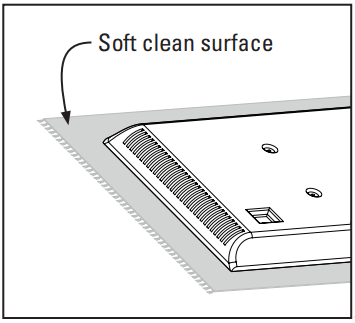
Protect the face of your TV when laying it down for installation.
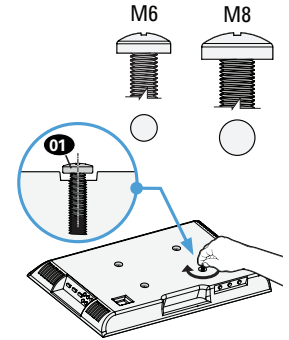
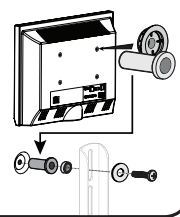
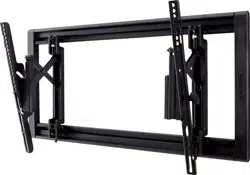
STEP 1 ATTACH TV BRACKET TO TV
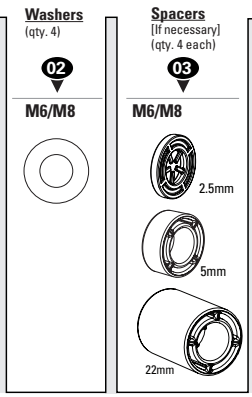
Parts and Hardware for STEP 1
WARNING: This product contains small items that could be a choking hazard if swallowed. Before starting assembly, verify all parts are included and undamaged. If any parts are missing or damaged, do not return the damaged item to your dealer; contact Customer Service. Never use damaged parts!
NOTE: Not all hardware included will be used.
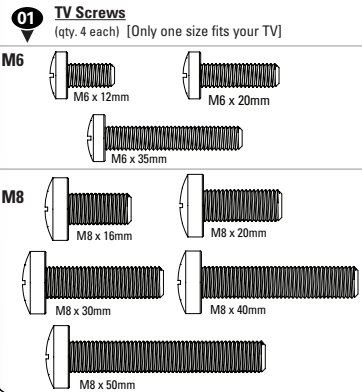
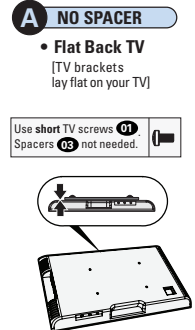
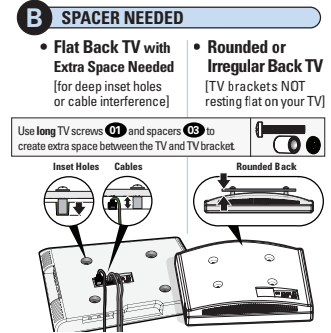
1.1 Select TV Screw Diameter
Only one screw size fits your TV.
NOTE: If your TV included inset spacers or adapters, use them UNDER the mount hardware.
1.2 Select TV Screw Length / Spacers
1.3 Attach TV Bracket Assembly to TV
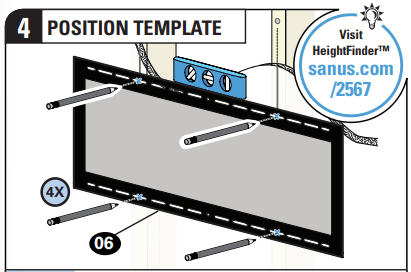
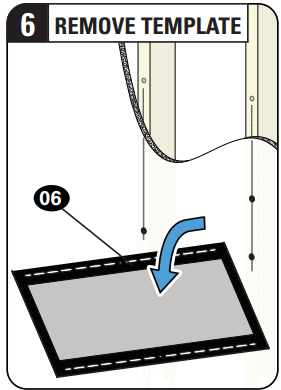
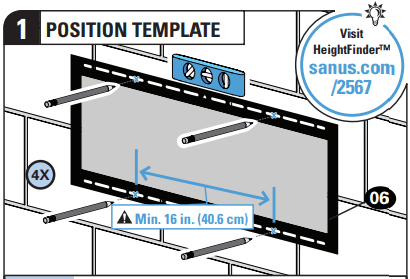
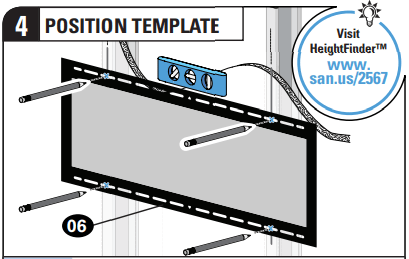
STEP 2 ATTACH WALL PLATE TO WALL
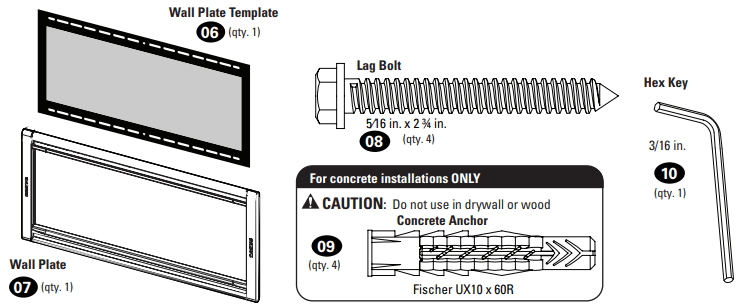
Parts and Hardware for STEP 2
WARNING: This product contains small items that could be a choking hazard if swallowed. Before starting assembly, verify all parts are included and undamaged. If any parts are missing or damaged, do not return the damaged item to your dealer; contact Customer Service. Never use damaged parts!
NOTE: Not all hardware included will be used.
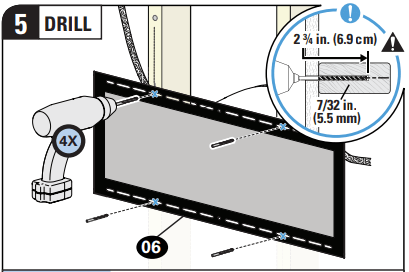
STEP 2A Wood Stud Installation
CAUTION: Avoid potential personal injury or property damage!
● Drywall covering the wall must not exceed 5/8 in. (1.5 cm)
● Minimum wood stud size: nominal 2 x 4 in. (5.1 x 10.2 cm) actual 1 ½ x 3 ½ in. (3.8 x 8.9 cm)
● Minimum horizontal space between fasteners:16 in. (40.6 cm)
● Stud centers must be verified
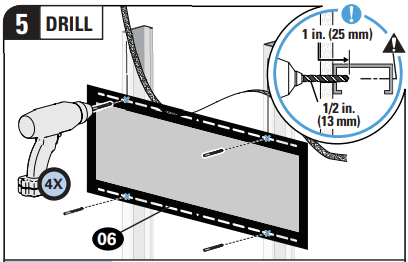
CAUTION: Be sure you drill into the CENTER of the stud.
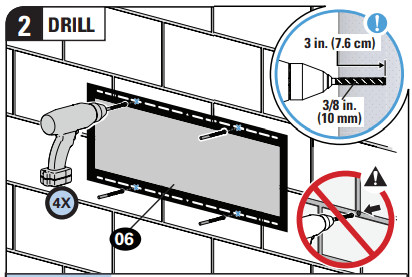
STEP 2B Solid Concrete or Concrete Block Installation
CAUTION: Avoid potential personal injury or property damage!
● Mount the wall plate 07 directly onto the concrete surface
● Minimum solid concrete thickness: 8 in. (20.3 cm)
● Minimum concrete block size: 8 x 8 x 16 in. (20.3 x 20.3 x 40.6 cm)
● Minimum horizontal space between fasteners: 16 in. (40.6 cm)
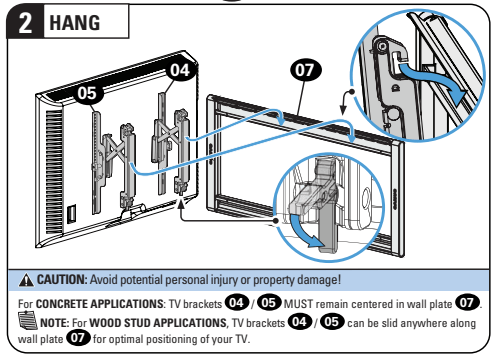
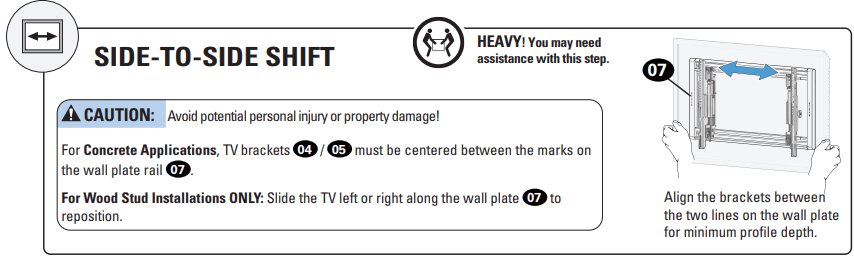
● For concrete applications, TV brackets 04 / 05 must remain centered in wall plate 07 . Keep this in mind when selecting the wall plate location.
CAUTION: Never drill into the mortar between blocks. Never drill into the mortar between blocks.
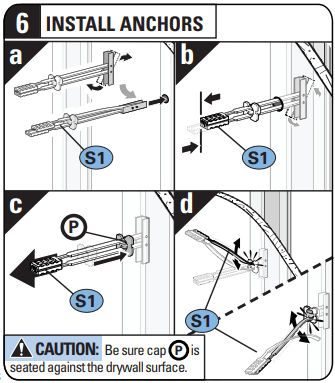
CAUTION: Be sure the anchors 09 are seated flush with the concrete surface.
CAUTION: Avoid potential personal injury or property damage!
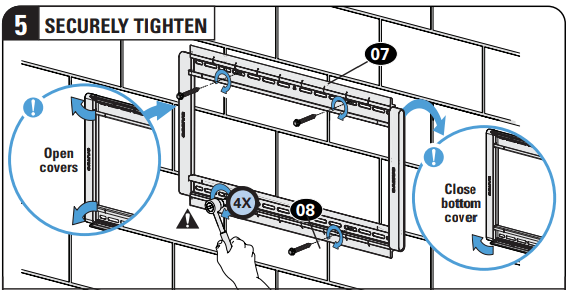
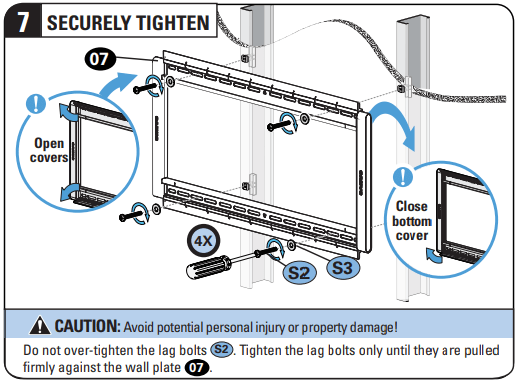
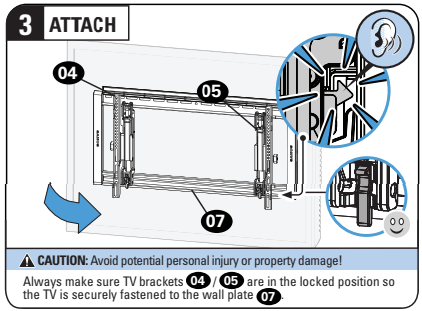
Do not over-tighten the lag bolts 08. Tighten the lag bolts only until they are pulled firmly against the wall plate 07.
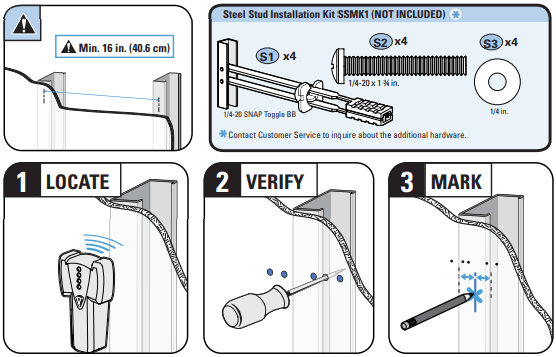
STEP 2C Steel Stud Installation
CAUTION: Avoid potential personal injury or property damage!
● Studs must be at least 2x4 / 25 ga.
● If back side of wall is unfinished, drywall must be installed to a minimum of one stud left and right of the stud(s) being used to install the mount
● Drywall must be a minimum of 1/2 in. (13 mm) thick on each side of the studs, and a minimum clearance of 1 ⅞ in. (48 mm) behind the wall is required
● This product must be centered on the studs
● Stud type and structural strength must conform to the North American Specification for the Design of Cold-Formed Steel Structural Members [362 S 125 18, C-Shape, S - Stud Section]
● Drywall must be secured to studs with screws 12 in. (304.8 mm) on center
CAUTION: Be sure you drill into the CENTER of the stud.
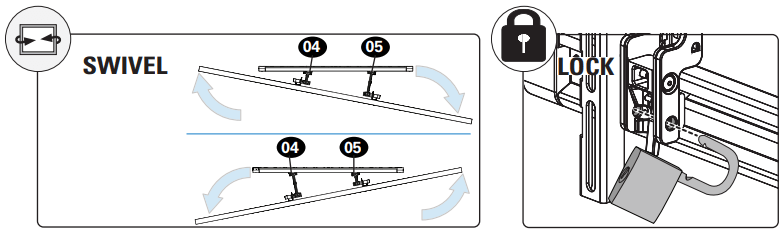
STEP 3 ATTACH TV TO WALL PLATE
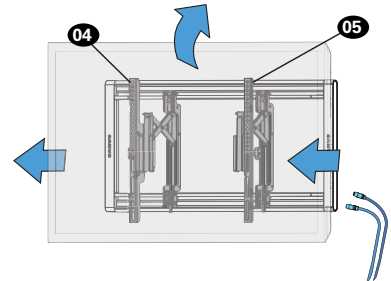
MANAGE CABLES
TIP: Extend the TV outward AND tilt the TV up or down to gain better access to the back of the TV.
After all of our research and testing, we selected the Sanus VMPL50A-B1 as the best tilting TV mount. This UL-approved mount is designed for TVs ranging in size from 32 to 70 inches, and it can hold up to 130 pounds, which is more than enough for any TV.
TV Weight and Size The larger the TV, the heavier it is. Mounts will have a maximum weight rating, as well as a range of VESA standards that are compatible. As long as your monitor falls within the designated guidelines, the mount should easily hold the weight of your TV.c