Loading ...
Loading ...
Loading ...
English
7
READ THIS INSTRUCTION MANUAL AND SAFETY
RULES BEFORE OPERATING YOUR MOWER.
See Fig. A to familiarize yourself with
the location of various controls and
adjustments. Save this manual for
future reference.
WARNING: ROTATING BLADES CAN CAUSE SERIOUS
INJURY. TO PREVENT SERIOUS INJURY, UNPLUG
MOWER WHEN UNATTENDED, CLEANING, SERVICING,
TRANSPORTING, LIFTING, OR STORING MOWER.
WARNING: Sharp moving blade. Do not operate
the mower if the rear door is not closed under spring
tension as serious injury could result. Take your mower
to the nearest service center for repair.
WARNING: Sharp moving blade. Never operate the
mower unless the hanger hooks on the grass catcher
are seated properly on the mower and the rear
discharge door rests firmly against the top of the grass
catcher as serious injury could result.
WARNING: Do not operate mower without grass
catcher
8
attached.
WARNING: Let the appliance work at its own pace.
Do not overload.
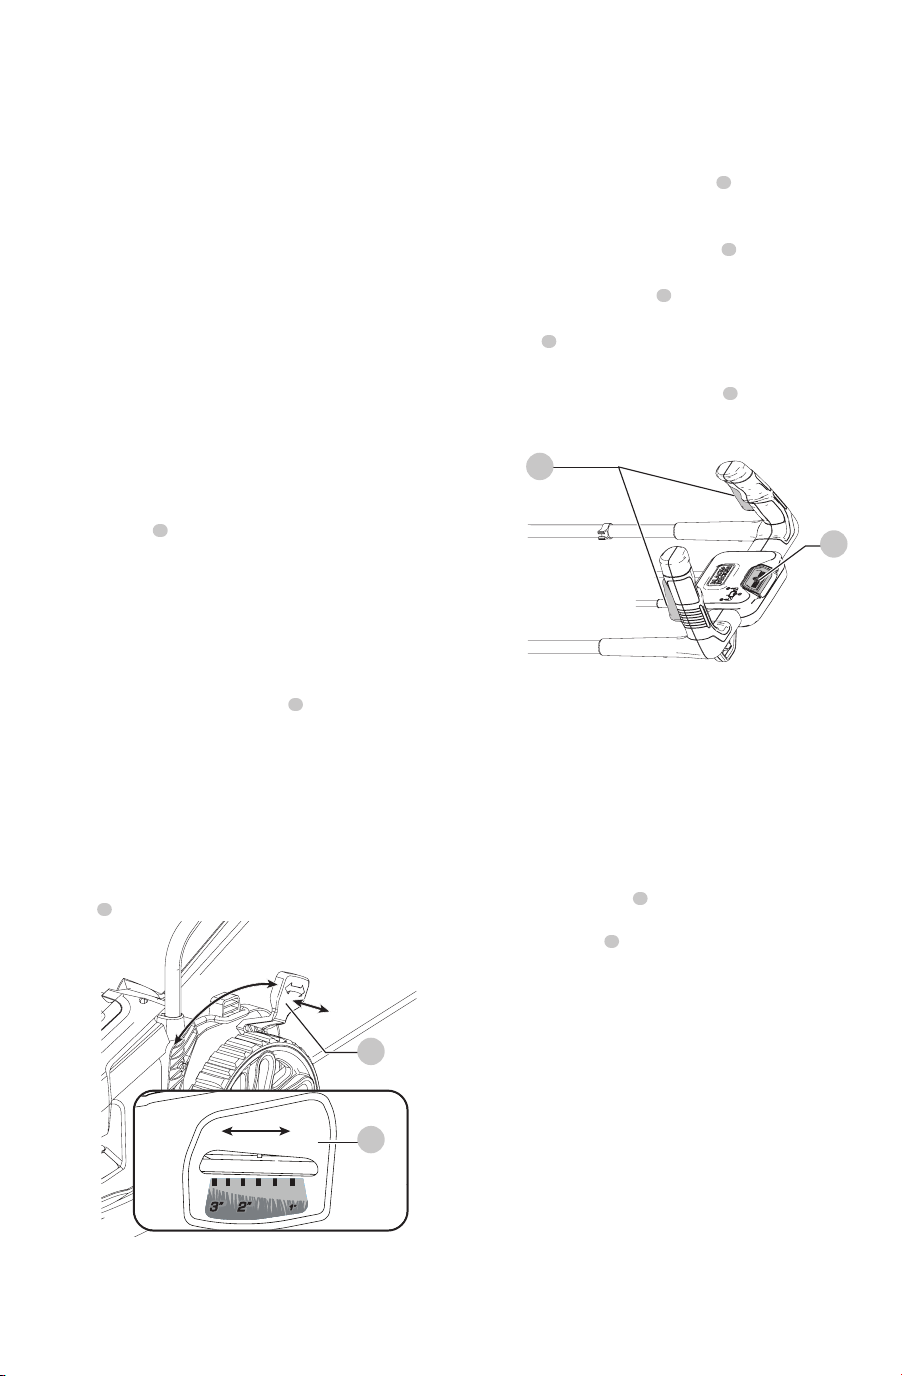
Adjusting the height of cut (Fig. H)
The height of cut is adjusted by the central height adjust
mechanism, there are 6 positions to choose from.
To set the height of cut
1. Pull the height adjustment lever
5
away from the body
of the unit.
2. Move the lever towards the rear of the appliance to
lower the height of cut.
3. Move the lever towards the front of the appliance to
raise the height of cut.
4. Push the height adjustment lever into one of the 6
height locations.
nOTE: The height of cut can be viewed on the height of cut
gauge
7
on the side of the unit.
Fig. H
5
7
Switching on and off (Fig. I)
DANGER: SHARP MOVING BLADE. NEVER ATTEMPT
TO OVERRIDE THE OPERATION OF THE SWITCH AS
SERIOUS INJURY COULD RESULT.
switching on
1. Push in and hold the safety switch
1
.
nOTE: You can not pull both ON/OFF switches when
the safety switch is being held
2. Pull the left or right ON/OFF switch
3
towards the
handle and hold it in.
3. Release the safety switch
1
.
4. The mower will run with either ON/OFF
switch
3
actuated.
switching off
1. Release the both ON/OFF switches
3
.
WARNING: Never attempt to lock a switch in the
onposition.
Fig. I
1
3
Mowing (Fig. J, K)
nOTE: AlWAYs insPECT AREA WhERE MOWER is TO
BE UsED AnD REMOVE All sTOnEs, sTiCKs, WiRE,
AnD OThER DEBRis WhiCh MighT BE ThROWn BY ThE
ROTATing BlADE.
We recommend to use your mower as outlined in this
section in order to achieve optimum results and to reduce
the risk of cutting the main cable.
1. Loop the extension cord through the cable
management system
5
as shown (Fig. J). Ensure you
leave approximately 3 feet (100 cm) of cord between
the safety switch
1
and the cable management system.
2. Ensure that the cable management system can slide
freely from one side to the other.
3. Place the bulk of the extension cord on the lawn, close
to the starting point (position 1 in Fig. K).
4. Switch the mower on as described above.
5. Proceed as shown in Fig. K.
6. Move from position 1 to position 2.
7. Turn right, stepping over the extension cord and
proceed towards position 3. The cable management
system will slide from one side to the other, ensuring
the extension cord is kept away from the cutting blade.
8. Turn left, stepping over the extension cord and move
towards position 4. The extension cord will slide from
one side of the handle to the other, ensuring the
extension cord is kept away from the cutting blade.
9. Repeat the above procedure as required.
Loading ...
Loading ...
Loading ...