Loading ...
Loading ...
Loading ...
11
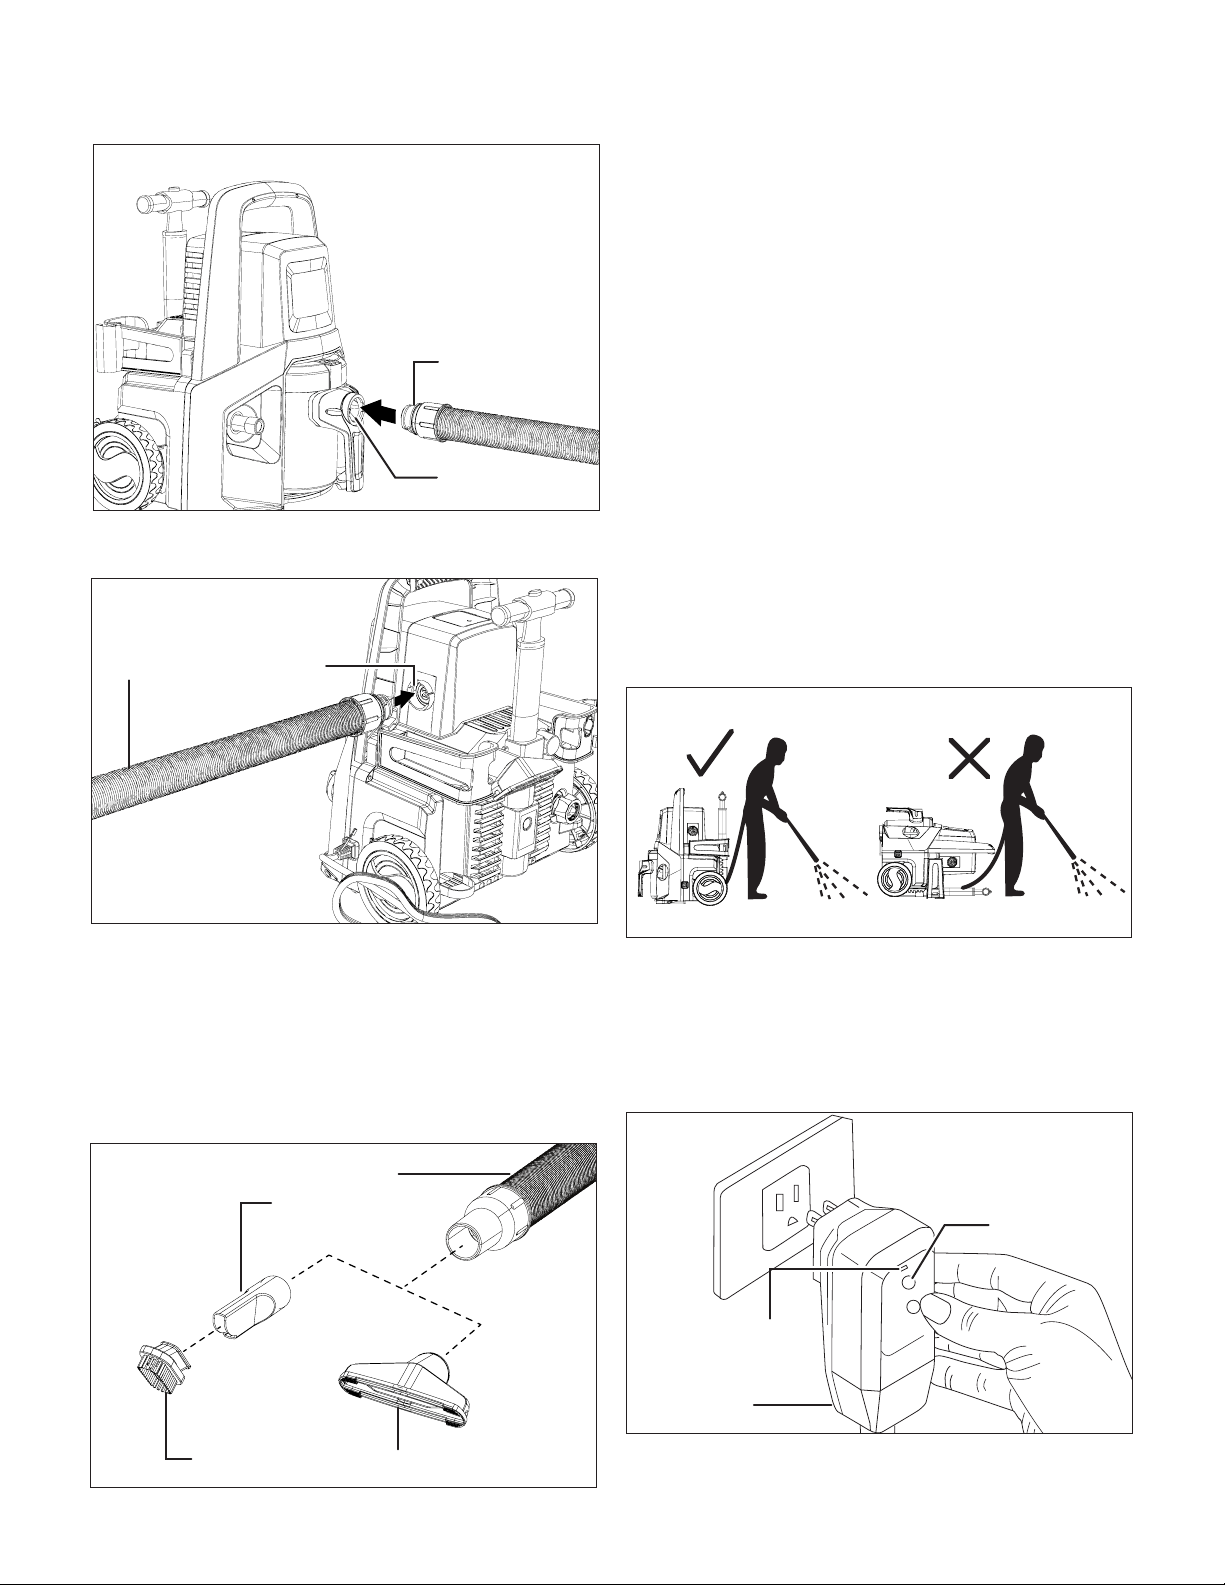
2. To use this tool as a blower, insert the vacuum tube into
the air outlet, and twist clockwise to secure (Fig. 8).
3. Select the desired accessory, connect it with the other
end of the hose, and press rmly to secure. Your vacuum/
blower is ready for use (Fig. 9).
NOTE: The unit is equipped with 3 attachments: an
all-purpose nozzle, a crevice nozzle, and a dust brush
which can be connected with the crevice nozzle. Choose
dierent attachment based on the specic cleaning project
you are working on.
Operation
Using the Pressure Washer
mWARNING! The intake water temperature must not
exceed 104ºF/40ºC. The water supply must not exceed
0.7 MPa.
mCAUTION! The washer must only be used with clean
water; use of unltered water containing corrosive chemicals
will damage the washer.
mIMPORTANT! This pressure washer is equipped with
a micro-switch sensitive to water ow. This Total Stop System
(TSS) senses water ow in the pump. When the trigger is
released, water stops owing through the pump. The TSS then
automatically turns the motor o to protect the pump from
overheating, thus saving energy and prolonging pump life.
1. Position the washer as CLOSE as possible to the water
supply.
2. The washer must be used on a secure and stable surface
in a standing, upright position (Fig. 10).
3. Make sure the unit is switched o before plugging the unit
into the power outlet.
4. Check that the electrical supply voltage and frequency
(Volt/Hz) correspond to those specied on the rating plate.
If the power supply is correct, you may now plug the
pressure washer into the power outlet (Fig. 11).
Fig. 7
Vacuum hose
Air inlet
Fig. 8
Vacuum hose Air outlet
Fig. 9
Vacuum hose
Crevice nozzle
Dust brush All purpose nozzle
Fig. 10
RESET
TEST
Fig. 11
GFCI
Power light
indicator
Reset
Loading ...
Loading ...
Loading ...