
Loading ...
Loading ...
Loading ...
8
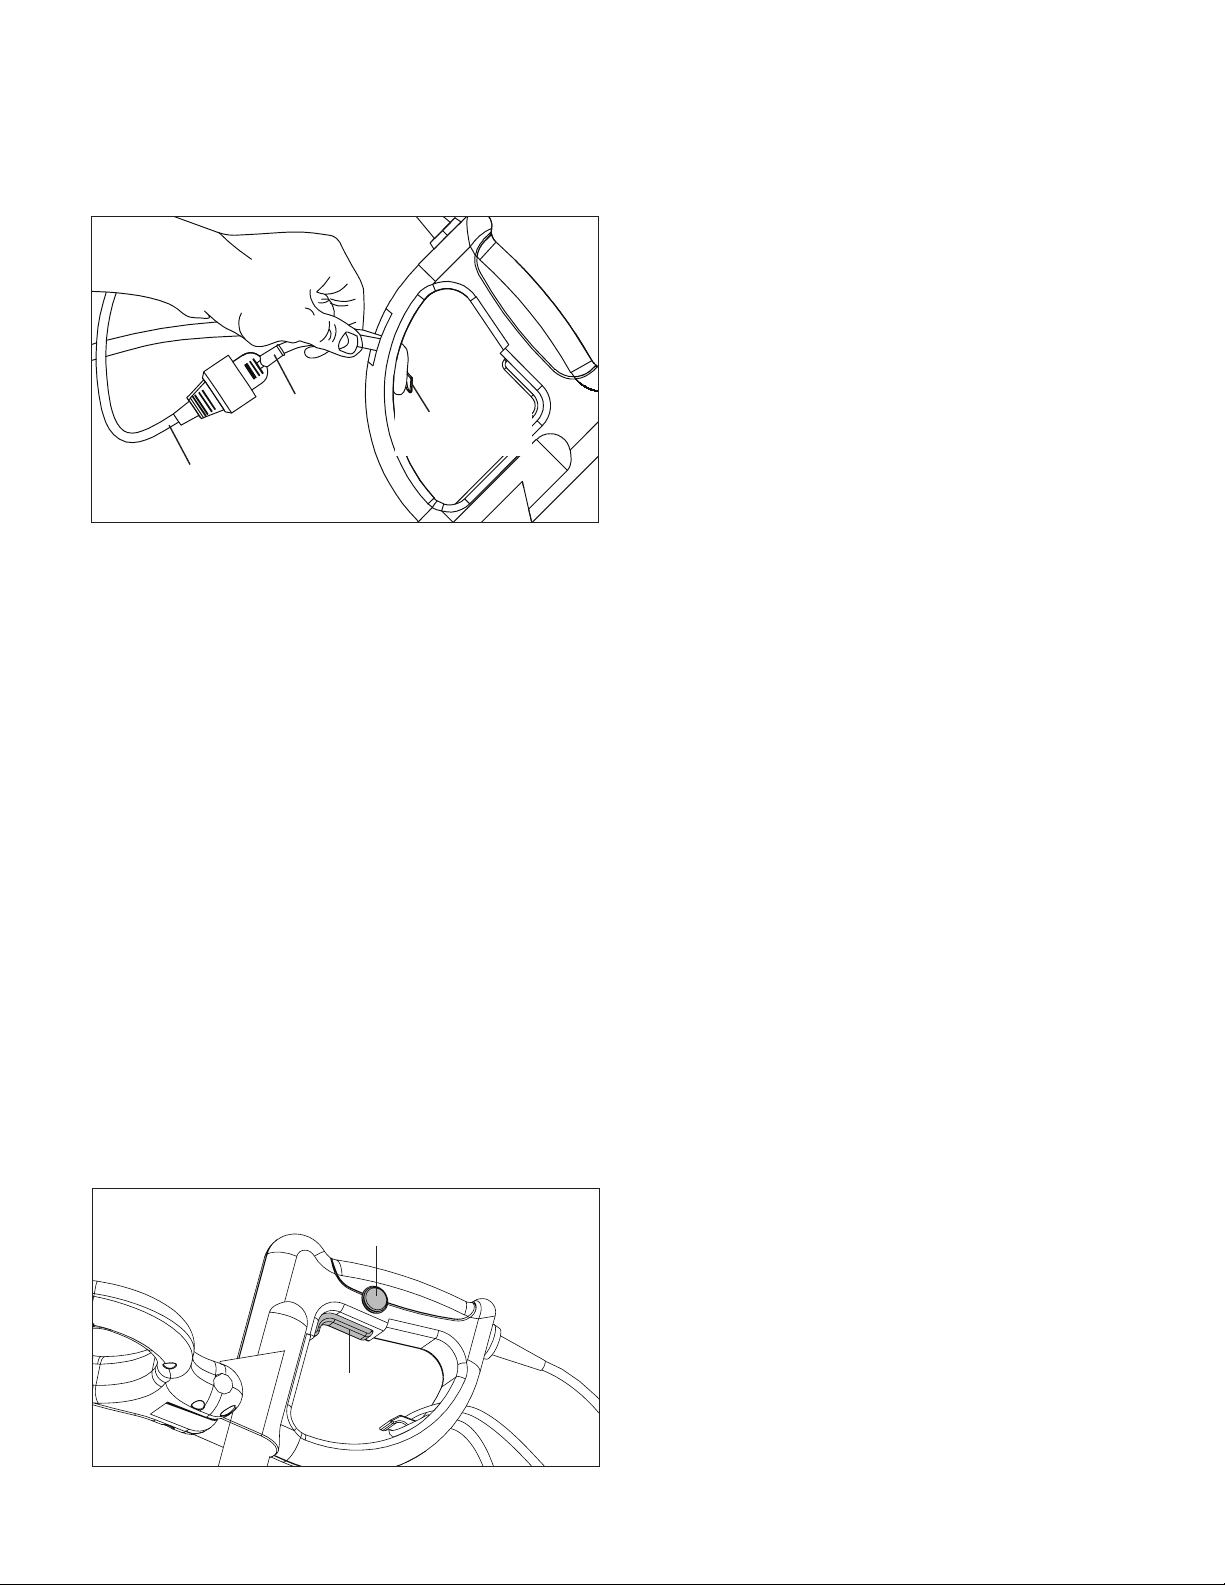
3. Secure the loop onto the extension cord restraint hook
then connect the extension cord to the appliance cord
(Fig. 9).
mCAUTION! Always wear eye protection.
Cord Routing
• Always keep the extension cord away from the area being
edged. Make sure the extension cord is behind the edger.
• If you cut or damage the cord, unplug it immediately. After
cord is unplugged, inspect it for damage and replace cord if
necessary.
Starting + Stopping
The electric edger + trencher is tted with a safety lock button
and a trigger switch to prevent accidental operation of the tool.
mCAUTION! The edger + trencher blade coasts after the
unit is turned o. Keep hands away from blade.
1. Before you start the unit, tilt the edger + trencher on back
wheel to ensure blade is not in contact with the work
surface.
2. Hold the edger + trencher rmly with both hands before
turning on.
3. To turn the edger + trencher ON, press and hold the safety
lock button with your thumb, then squeeze the ON/OFF
trigger switch with your ngers. Once the machine powers
on, you can release the safety button and proceed with
operation (Fig. 10).
4. To switch OFF, release the ON/OFF trigger switch (Fig. 10).
mCAUTION! Do not force the trigger switch without rst
pressing the safety lock button.
mCAUTION! Do not tie or jam the trigger switch in the ON
position. The trigger switch is designed to be held in the ON
position by your hand only.
mWARNING! Take care when you turn the edger +
trencher ON that the cutter is in a safe position to operate.
NOTE: When a switch is released, a short spark may appear
from the engine. This is normal, and not a cause for concern.
The spark is caused by the braking system that is built into the
product.
mCAUTION! If the edger + trencher becomes jammed or
stalled on a branch, sticks, or other foreign object, release the
trigger immediately. Failure to stop the unit when the unit jams
may cause excessive damage to the unit’s motor. Always wear
eye protection when using the unit.
Edging Techniques
NOTE: The edger + trencher is a major appliance and should
not be operated simultaneously with other major appliances on
the same household circuit.
mCAUTION! Make sure that other persons and pets are
at least 100 ft (30.5 m) away.
mWARNING! Do not use the edger + trencher on wet
growth or in the rain.
mCAUTION! To prevent injury, keep hands away from
trigger when clearing jams. To prevent injury, do not use the
edger + trencher with any damaged parts.
1. Set cutting depth. Refer to Cut Depth Adjustment
instructions on v 7.
2. To avoid kickback of the edger, tilt the handle down so the
blade is above the ground.
3. Turn switch on and allow blade to spin without moving the
tool.
4. Slowly lift the handle to lower the blade. Then, begin to
move tool forward slowly, being careful not to strike the
edge of the paved surface.
For the rst edging each season, it is best to move forward
slowly because grass is thickest then. Subsequent edging will
be completed more rapidly.
If the tool slows down, back it up slightly until the blade
returns to normal speed. During edging some sparks may be
generated from hitting stones, this is normal. Do not attempt
to edge when the grass or soil is wet or moist - for electrical
safety and to prevent clogging of the blade chamber.
Fig. 9
Extension cord
restraint hook
Extension
cord
Appliance
cord
Fig. 10
Trigger switch
Safety lock button
Loading ...
Loading ...
Loading ...