
Loading ...
Loading ...
Loading ...
9
mWARNING! If you must edge under conditions that
cause the blade chamber to become clogged, release trigger,
and wait for blade to come to complete stop! Unplug the
tool and remove clogged material with a stick. To continue to
operate the tool in a clogged condition will seriously overload
the motor.
mCAUTION! Do not attempt to unclog the blade chamber
by dropping or tapping the tool on the ground. This can
damage the unit. Keep hands clear of
and blade when cleaning as these wear to a very sharp point
during edging.
Landscaping + Trenching
Before landscaping or trenching, inspect and ensure there are
no exposed or buried cables or pipes or other objects that may
create a hazard or interfere with operating the edger.
Set depth to only that required for the job, do not overload, if
tool slows, pull back slightly and wait until the blade returns to
normal speed.
Application
Changing the Blade
mWARNING! Prior to attempting to perform any
maintenance which includes the changing of the blade, ensure
the power supply cord has been totally disconnected from the
main supply.
mWARNING! Wait for blade to come to complete stop!
Position the edger + trencher on its side with the blade
upwards. Ensure the surface you are working on is clean and
foreign particles (stones, etc.) cannot enter the air intake slots
of the motor housing.
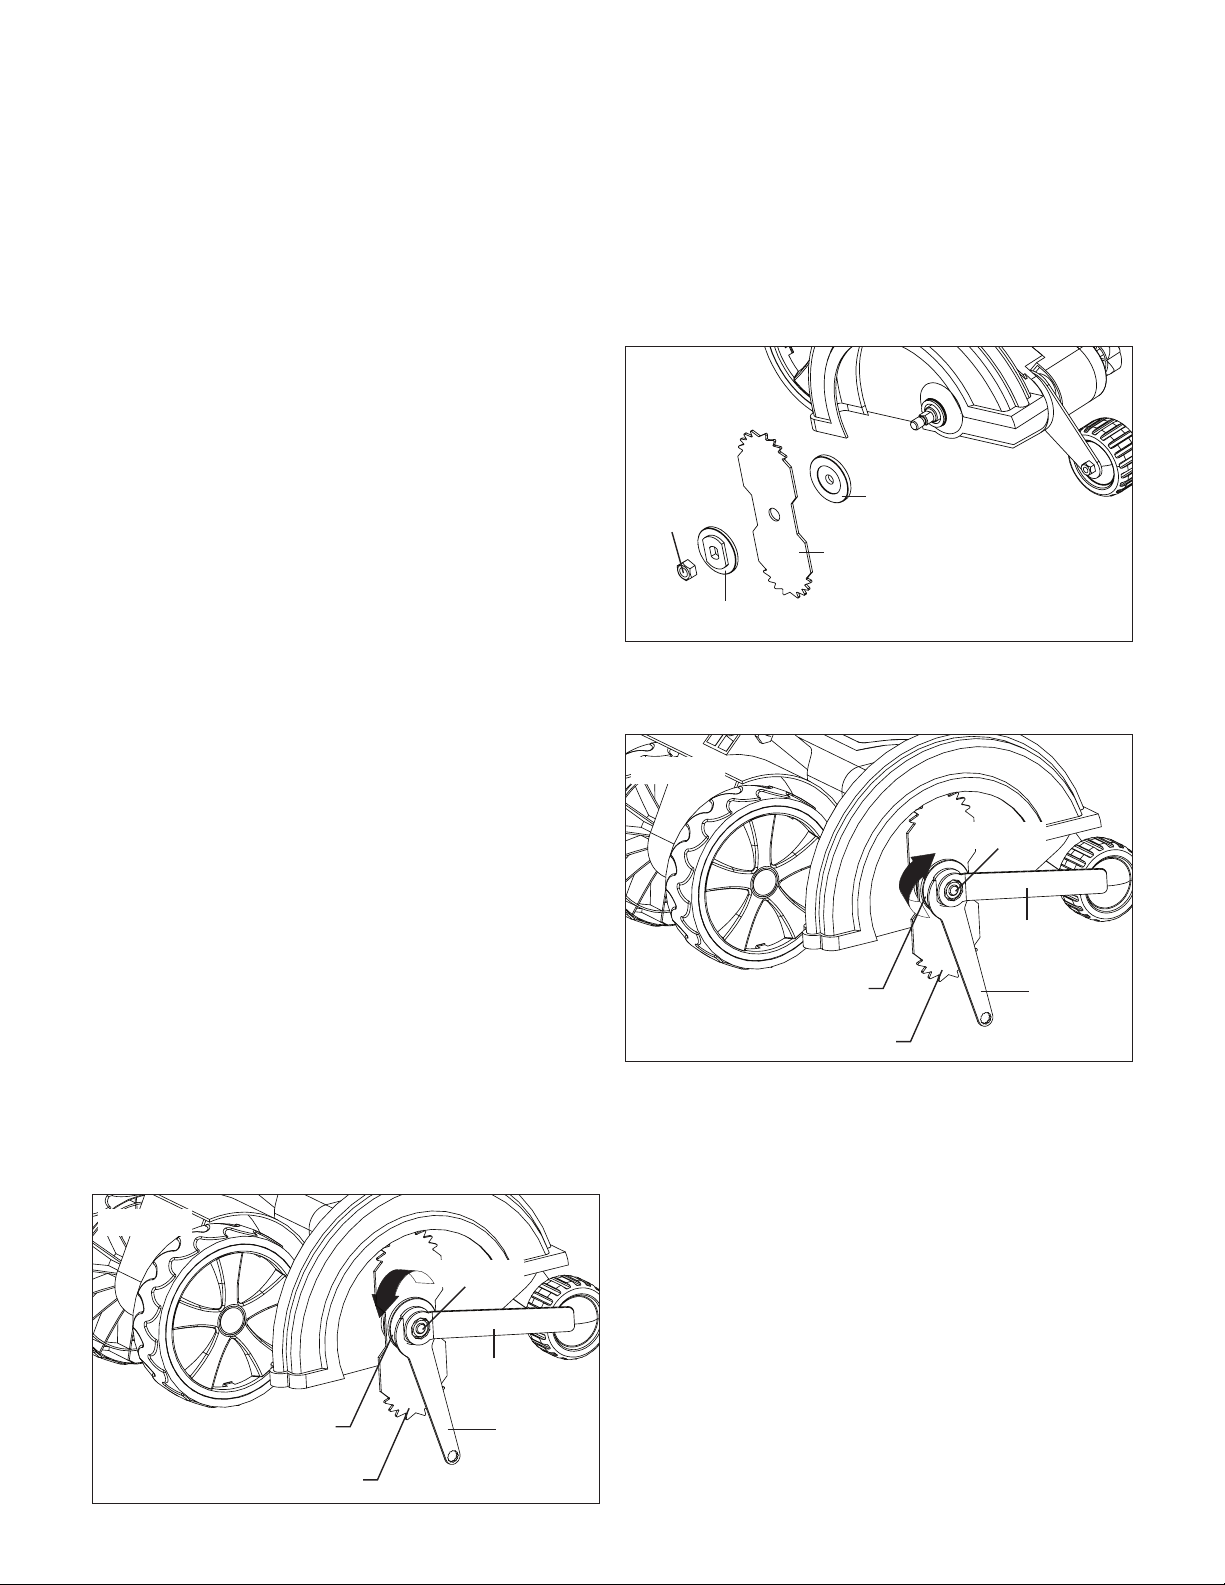
1. Place the large ange spanner over the outer blade ange
(Fig. 11).
2. Fit the blade spanner over the blade lock nut and while
holding rmly the spanner on the blade ange, rotate the
locking nut in counterclockwise direction (Fig. 11).
3. Remove the lock nut counterclockwise along with the
outer ange and blade (Fig. 11).
4. There is no need to remove the inner ange, although on
reassembly the area of the inner ange must be free of
foreign particles (dirt, etc.).
5. To reassemble with a new blade t the inner ange on to
the spindle, t the replacement blade and secure the outer
ange on to the spindle and blade (Fig. 12).
6. Ensure the assembly is correct and the blade is correctly
orientated (Fig. 12).
7. With the spanner tted to the outer ange, t the locking
nut and tighten with the blade spanner in a clockwise
direction (Fig. 13).
8. After the blade is secure, rotate the blade by hand
to ensure the blade is not making contact with any
components of the edger.
9. Blade wear is expected whenever you use your edger.
10. The blade wears quite quickly when edging along concrete
paths. This does not aect the eciency of the edger and
is expected due to the aggressive abrasion of concrete on
steel.
NOTE: To increase blade life, keep initial cutting depth at
minimum and increase depth setting as blade wears.
Fig. 11
Outer blade
ange
Blade
Large
ange
spanner
Blade spanner
Lock nut
Fig. 12
Outer blade ange
Lock
nut
Inner blade ange
Blade
Fig. 13
Outer blade
ange
Blade
Large
ange
spanner
Blade spanner
Lock nut
Loading ...
Loading ...
Loading ...