Loading ...
Loading ...
Loading ...
10
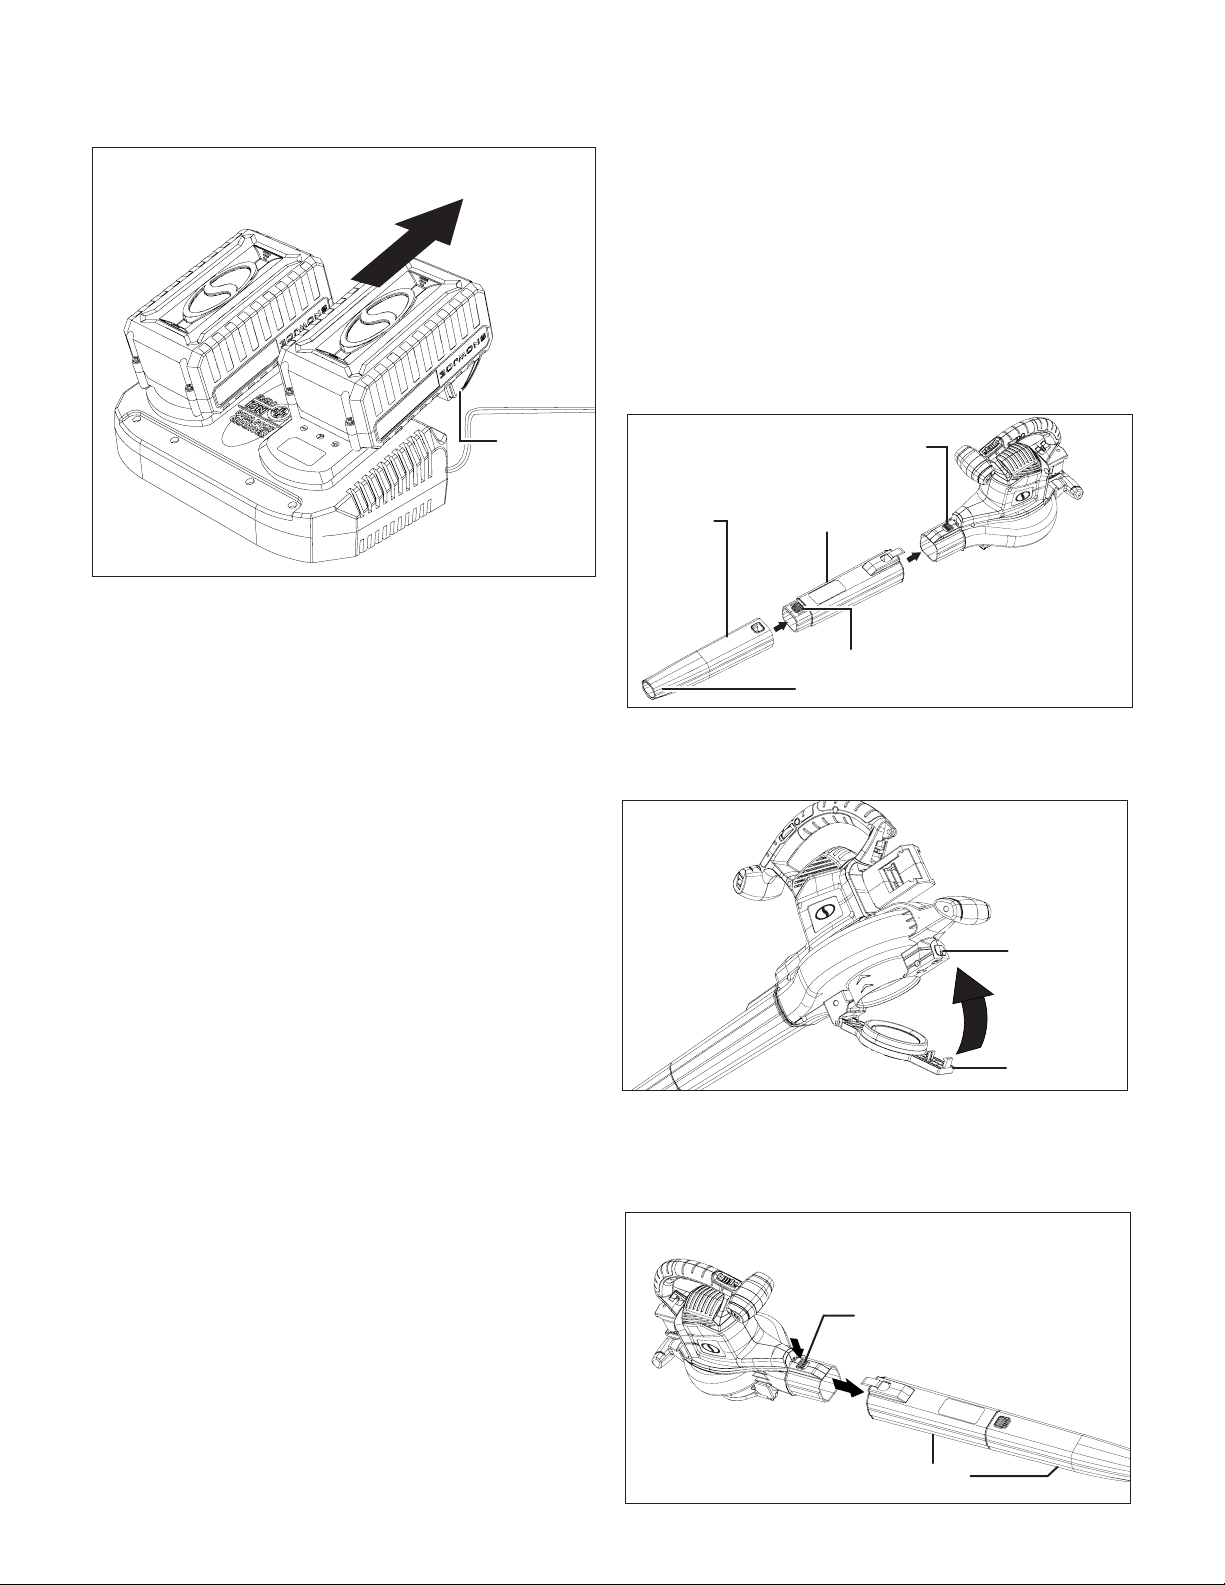
Fig. 4
Push lock
button
mCAUTION! FIRE HAZARD. When removing the batteries
from the charger, be sure to unplug the charger from the outlet
rst, then remove the batteries from the charger.
mWARNING! This charger does not automatically turn
o when the batteries are fully charged. Please take care not
to leave the batteries in the charger. Switch o or unplug the
charger at the mains when charging is complete.
7. Timely recharging of the batteries will help prolong the
batteries' life. You must recharge the battery packs when
you notice a drop in the equipment's power.
IMPORTANT! Never allow the battery packs to become
fully discharged as this will cause irreversible damage to the
batteries.
Assembly
mWARNING! To avoid serious personal injury, read and
understand all safety instructions provided.
mWARNING! Do not insert batteries until assembly is
complete. Failure to comply could result in accidental starting
and possible serious personal injury.
mWARNING! Before performing any maintenance, make
sure the batteries are removed from the tool. Failure to heed
this warning could result in serious personal injury.
mWARNING! To prevent serious personal injury, make
sure the switch is in the OFF (O) position, the batteries are
disconnected and the impeller has come to a complete stop
before attaching or removing tubes.
Assemble as a Blower
1. Slide the rear blower tube forward until the tube releasing
button on the motor housing clicks into the slot on the
blower tube (Fig. 5).
2. Slide the front blower tube onto the rear blower tube until
the locking tab on the rear blower tube clicks into the slot
on the front blower tube (Fig. 5).
NOTE: The front blower tube is equipped with a
concentrator nozzle, which is used to increase air ow in
tight areas (i.e around ower beds, under decks, etc.).
3. Before using the blower function, securely fasten the inlet
cover over the air inlet by closing the inlet cover until the
lock button clicks and locks (Fig. 6).
4. To remove the blower tube, turn the ON/OFF power switch
to the OFF (O) position and remove both the batteries.
5. Press the tube release button and remove the blower tube
(Fig. 7).
Fig. 5
Tube releasing
button
Rear blower
tube
Front
blower
tube
Concentration nozzle
Locking tab
Fig. 6
Inlet cover
lock button
Inlet cover
Fig. 7
Tube releasing
button
Blower tube
Loading ...
Loading ...
Loading ...