Loading ...
Loading ...
Loading ...
English
6
CHILLING THE DRAUGHTKEG
TM
1. Before pouring a draught beer, it is very important that the Heineken
®
,
Heineken Premium Light
®
DraughtKeg
TM
and Newcastle Brown Ale
®
DraughtKeg™ reach the correct temperature.
2. Ensure DraughtKeg
TM
is sufficiently chilled before pouring a draught beer.
Insufficiently chilled DraughtKegs
TM
will produce too much foam. It is ideal
to purchase the DraughtKeg
TM
pre-chilled or pre-chill over night before
intended use.
If the DraughtKeg
TM
needs additional chilling, there are 2 recommended
options:
a. Inside the BeerTender
®
– Depending on the temperature of the DraughtKeg
TM
,
it will take up to 18 hours to chill to the ideal serving temperature.
b. In a refrigerator – Depending on the temperature of your refrigerator, it will
take up to 12 hours to chill to the ideal serving temperature.
Tip: We recommend that you always keep an extra DraughtKeg
TM
in your
refrigerator to always have a chilled keg available.
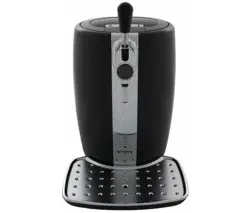
PREPARING THE BEERTENDER
®
IMPORTANT: It is important that the BeerTender
®
power switch is turned
on before inserting the DraughtKeg
TM
.
n After setting up the BeerTender
®
and before use, it is vital to clean the
detachable pour spout – this is the only part of the appliance that will
come into contact with the beer. The spout should be rinsed by hand. After
cleaning, screw back into place - fig. 5.
n Before inserting the DraughtKeg
TM
into the BeerTender
®
, simply snap
the patented disposable draught beer tube (5 tubes included) onto the
DraughtKeg
TM
- fig. 6.
n Open the BeerTender
®
cover by pressing in the release panel on the top of
the machine and remove the tap spout cover - fig. 7-8-9.
n Place DraughtKeg
TM
into BeerTender
®
- fig. 10.
n Position the draught beer tube as shown in drawing - fig. 11-12.
n Put the tap spout cover back into place - fig. 13.
n Carefully close the lid - fig. 14.
n Set the drip tray and grate in place at the front of the appliance. Make sure
the drip tray is properly fitted and positioned.
WARNING! The drip tray must be positioned on a level surface and must
not jut out from the surface it is resting on.
notice_krups_beertender_nafta.indd 6 10/08/10 11:49:11
Loading ...
Loading ...
Loading ...