Loading ...
Loading ...
Loading ...
ENGLISH
9ninjakitchen.com8
1-877-646-5288
BEFORE FIRST USE
NOTE: If you unplug the brewer or in the event of an extended power loss, you will
need to reset the clock the next time the brewer is plugged in.
NOTE: If the clock stops flashing and does not display the correct time
of day, pressing the hour (H) or minute (M) button at any time will cause
the clock to flash again. You can now reprogram the correct time by
following the previous steps.
PLEASE KEEP THIS IMPORTANT SAFEGUARD IN MIND
WHEN USING THE APPLIANCE:
IMPORTANT: DO NOT run the appliance without water.
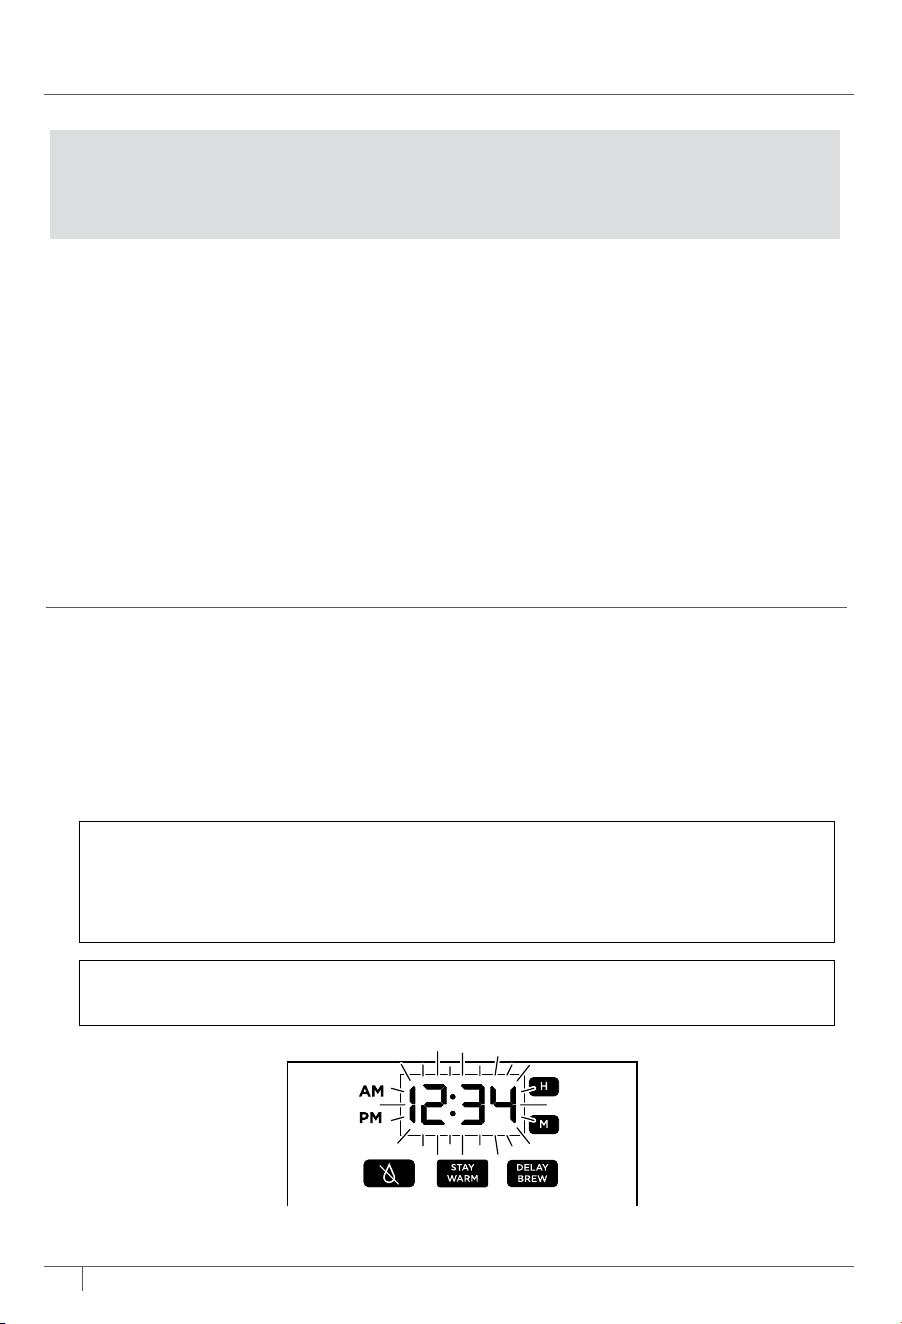
SETTING THE CLOCK
1 Plug the power cord into an electrical outlet. The clock will flash on the
control panel to indicate that the time has not been set (Fig. 1).
2 Press the hour (H) or minute (M) button until you reach the current time.
The AM or PM indicator will illuminate on the left side of the display as you
are setting the time.
3 After 5 seconds, the clock will stop flashing and the clock will be set.
1 Remove all packaging material and stickers from the brewer.
2 Wash the water reservoir, glass carafe, removable filter holders, and coee
and tea permanent filters in warm, soapy water with a soft cloth.
3 Rinse parts and dry thoroughly.
4 Before first use, prime the system by running two Full Carafe, Classic Brew
cycles with water only. After each cycle is complete, discard the water.
Fig. 1
PRIMING YOUR
NINJA
HOT & COLD BREWED SYSTEM™
1 To fill the water reservoir, use the
hand grips to lift it to the right and
up o the brewer (Fig. 2). Flip the
reservoir lid open or remove the
entire lid, then add fresh, filtered
water up to, but not exceeding,
the Max Fill line (Fig. 3). Return
the water reservoir to the brewer
(Fig. 4). DO NOT fill water reservoir
with anything other than water, as
other liquids may damage
your brewer.
2 Ensure one of the removable filter
holders is nested inside the brew
basket (Fig. 5). Once in place, slide
the brew basket all the way in until
you hear a slight click (Fig. 6).
Fig. 2
Fig. 4
Fig. 6
Fig. 5
Fig. 3
Loading ...
Loading ...
Loading ...