| Problem |
Root Cause |
Corrective Action |
1. Display shows " " " |
1. The thermostat sensor is broken or disconnected. |
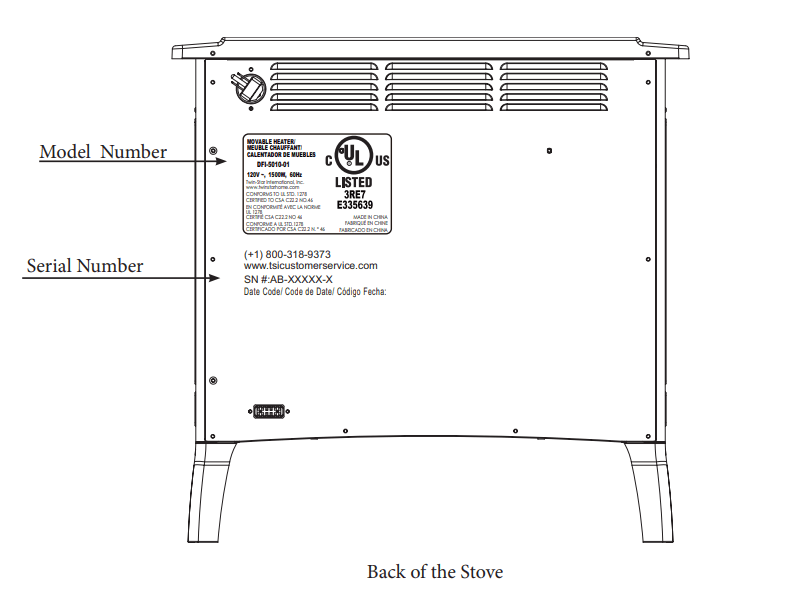
1. Unplug the stove, remove the back panel of the stove and check that the thermostat is plugged into the main circuit board. If this does not solve the problem contact customer service for a replacement thermostat sensor. |
2. Display shows “  ” ” |
2. The thermostat sensor is broken. |
2. Contact customer service for a replacement thermostat sensor. |
3. Display shows “ ” ” |
3. Manual Reset overheat protection has triggered. |
3. Inspect the heater and check that the air inlets and outlets are not blocked as this may cause overheating. Unplug the heater for 30 minutes and allow it to cool down. Replug and operate, monitor the heater for signs of overheating, if the problem persist discontinue use of the heater and contact customer service. |
| 4. No power, buttons do not light up. |
4. Power cord was not plugged into the outlet. |
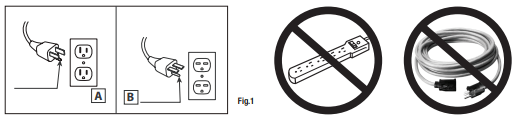
4. Check that unit is plugged directly into a standard 120 volt outlet |
| 5. Stove does not turn on manually |
5a. No incoming power from the electrical wall socket or buttons.
5b. Improper operation.
5c. Defective button
|
5a. Check circuit breakers and move unit to another outlet.
5b. Manually press main power button from front of unit.
5c. Replace control panel circuit board.
|
| 6. Flames are not moving |
6a. Defective flame generator drive motor.
6b. Spinner detached from the motor.
|
6a. Replace flame generator drive motor.
6b. Remove the back panel/ emberbed/ metal bracket and check to see if “spinner” is correctly mounted to the motor.
|
| 7. Logs glow, but no flame effect. |
7. Flame effect turned off |
7. Press flame button several times. |
| 8. Heater does not blow warm air. |
8. Thermostat setting is preventing heater from turning on. |
8. Adjust the temperature settings to ensure that the thermostat is set higher than the current room temperature. |
| 9. Heater is not turning on. |
9a. Improper operation
9b. Defective heater/blower assembly
|
9a. Manually press main power button on front of unit.
9b. Replace heater/blower assembly
|
| 10.Not producing enough heat. |
10a. power strip/surge protector/ extension cord being used
10b. Location of unit.
|
10a. Plug unit directly into the wall.
10b. Make sure unit is located on an interior wall.
|
| 11.Unit blows cool or cold air. |
11. Defective heater blower assembly. |
11. Replace heater blower assembly |
| 12.Noise with heater on. |
12a. Dirty heater blower motor
12b. Defectiveheater/blower assembly.
|
12a. Gently vacuum heater blower vents.
12b. Replace heater/blower assembly
|
| 13.Noise with flames on and heater off. |
13a. Defective flame generator drive motor.
13b. Dented back panel
13c. Warped spinner shaf
|
13a. Replace flame generator drive motor.
13b. Refer to TSI customer service.
13c. Refer to TSI customer service.
|
| 14.Is it safe to place unit on carpet? |
14. Product Inquriy |
14. It is safe to place unit on carpet but make sure any flammable items are at least 3 feet away from front and sides of the unit. |
| 15.How many square feet will my unit warm up? |
15. Product Inquriy |
15. Provides supplemental heat up to 1000 square feet |
| 16. Flame effect works but heater function does not and the emberbed flashes when the heater button is pressed. |
16. The heater is disabled. |
16. With the power on press and hold the POWER button on the control panel for 10 seconds. Once re-enabled the emberbed lights will flash multiple times. |
| 17. Remote control is not working when buttons are pressed. |
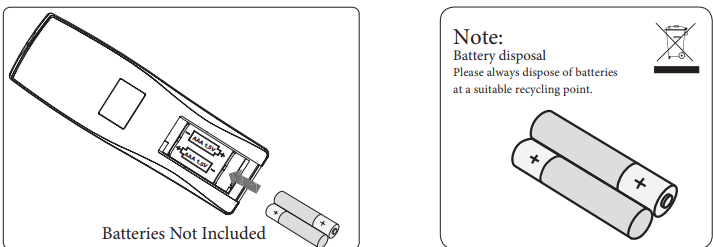
17a. No batteries or battery power.
17b. Poor signal
17c. Distance
|
17a. Change the remote batteries.
17b. Operate remote transmitter at a slow measured pace. Press the remote control buttons with an even motion and gentle pressure. Repeatedly pressing buttons in rapid succession may cause the transmitter to malfunction.
17c. Operate the remote at a distance less than 20 feet from the front of the appliance; point the remote at the control panel.
|