www.tsicustomerservice.comA488
1
www.tsicustomerservice.com
Twin-Star International, Inc; Delray Beach, FL 33445
Made in China • Printed in China
1-888-674-7517
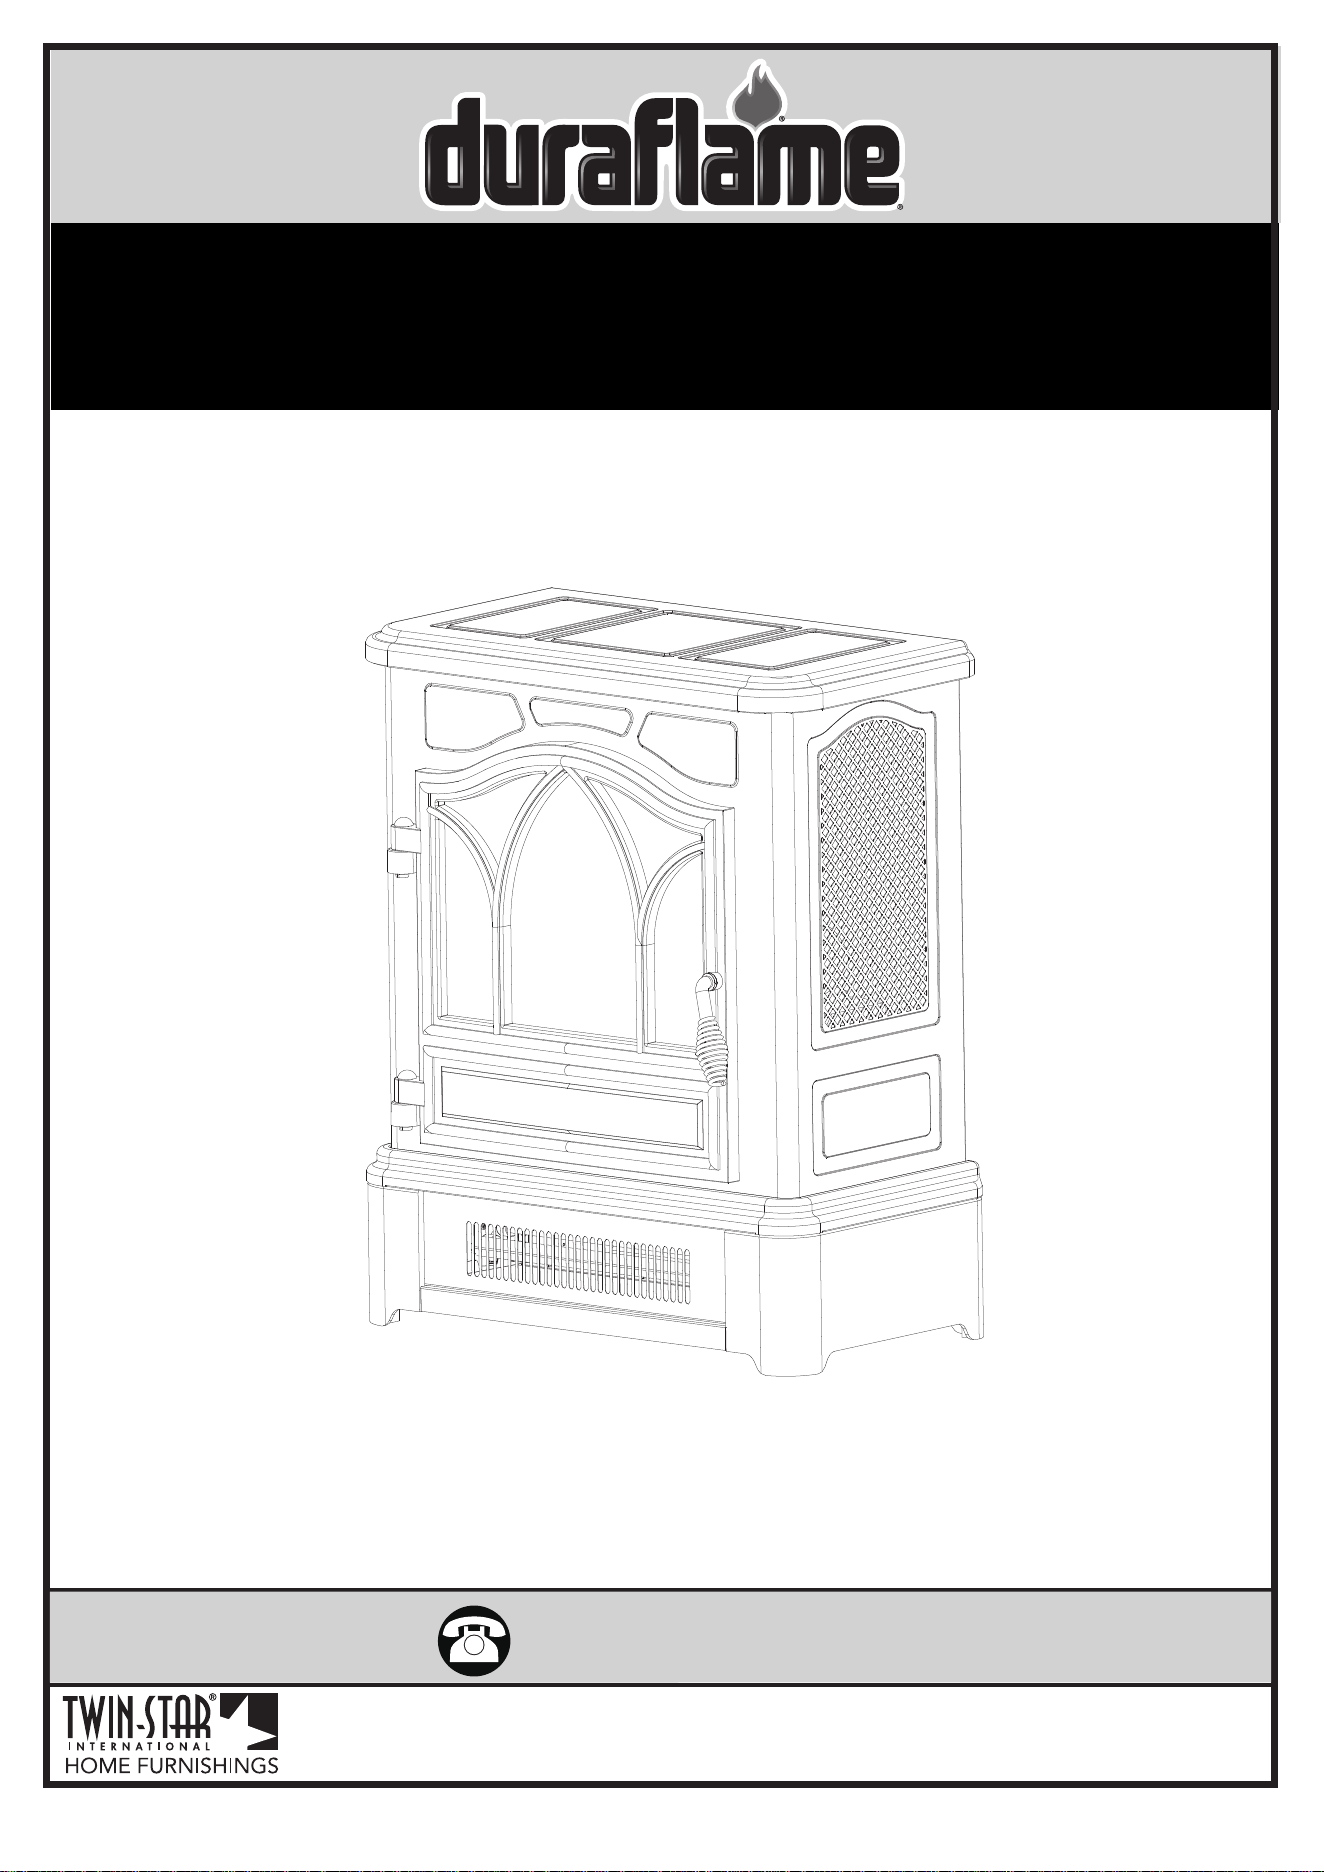
MODEL:
DFI-470-06, DFI-470-07, DFI-470-08, DFI-470-09
https://manual-hub.com/
www.tsicustomerservice.comA488
2
IMPORTANT INSTRUCTIONS
SAVE THESE INSTRUCTIONS
When using electrical appliances, basic precautions should always be followed to reduce the risk of re, electrical shock, and injury
to persons including the following:
1. Read all instructions before using this appliance.
2. is appliance is hot when in use. To avoid burns, do not let bare skin touch hot surfaces. If provided, use handles when moving this
appliance. Keep combustible materials, such as furniture, pillows, bedding, papers, clothes and curtains at least 3 feet (0.9 m) from the
front of this appliance. WARNING: In order to avoid overheating, do not cover the heater.
3. CAUTION: Never leave the heater operating unattended. Extreme caution is necessary if unsupervised children or invalids are nearby.
4. e appliance is not to be used by children or persons with reduced physical, sensory or mental capabilities, or lack of experience and
knowledge, unless they have been given supervision or instruction.
5. Always unplug this appliance when not in use.
6. Do not operate any heater with a damaged cord or plug or aer the appliance malfunctions, or if it has been dropped or damaged in
any manner.
7. If the supply cord is damaged, it must be replaced by the manufacturer, its service agent or similarly qualied persons in order to avoid
a hazard.
8. Do not use outdoors.
9. is heater is not intended for use in bathrooms, laundry areas and similar indoor locations. Never locate this appliance where it may
fall into a bathtub or other water container.
10. Do not run cord under carpeting. Do not cover cord with throw rugs, runners or the like. Arrange cord away from trac areas and
where it will not be tripped over.
11. To disconnect this appliance, turn controls to the o position, then remove plug from outlet.
12. Do not insert or allow foreign objects to enter any ventilation or exhaust opening as this may cause an electric shock or re, or damage
the appliance.
13. To prevent a possible re, do not block air intakes or exhaust in any manner. Do not use on so surfaces, like a bed, where opening
may become blocked.
14.is appliance has hot and arcing or sparking parts inside. Do not use it in areas where gasoline, paint or ammable liquids are used
or stored. is stove should not be used as a drying rack for clothing. Christmas stockings or decorations should not be hung
in the area of it.
15.Use this appliance only as described in the manual. Any other use not recommended by the manufacturer may cause re, electric shock
or injury to persons.
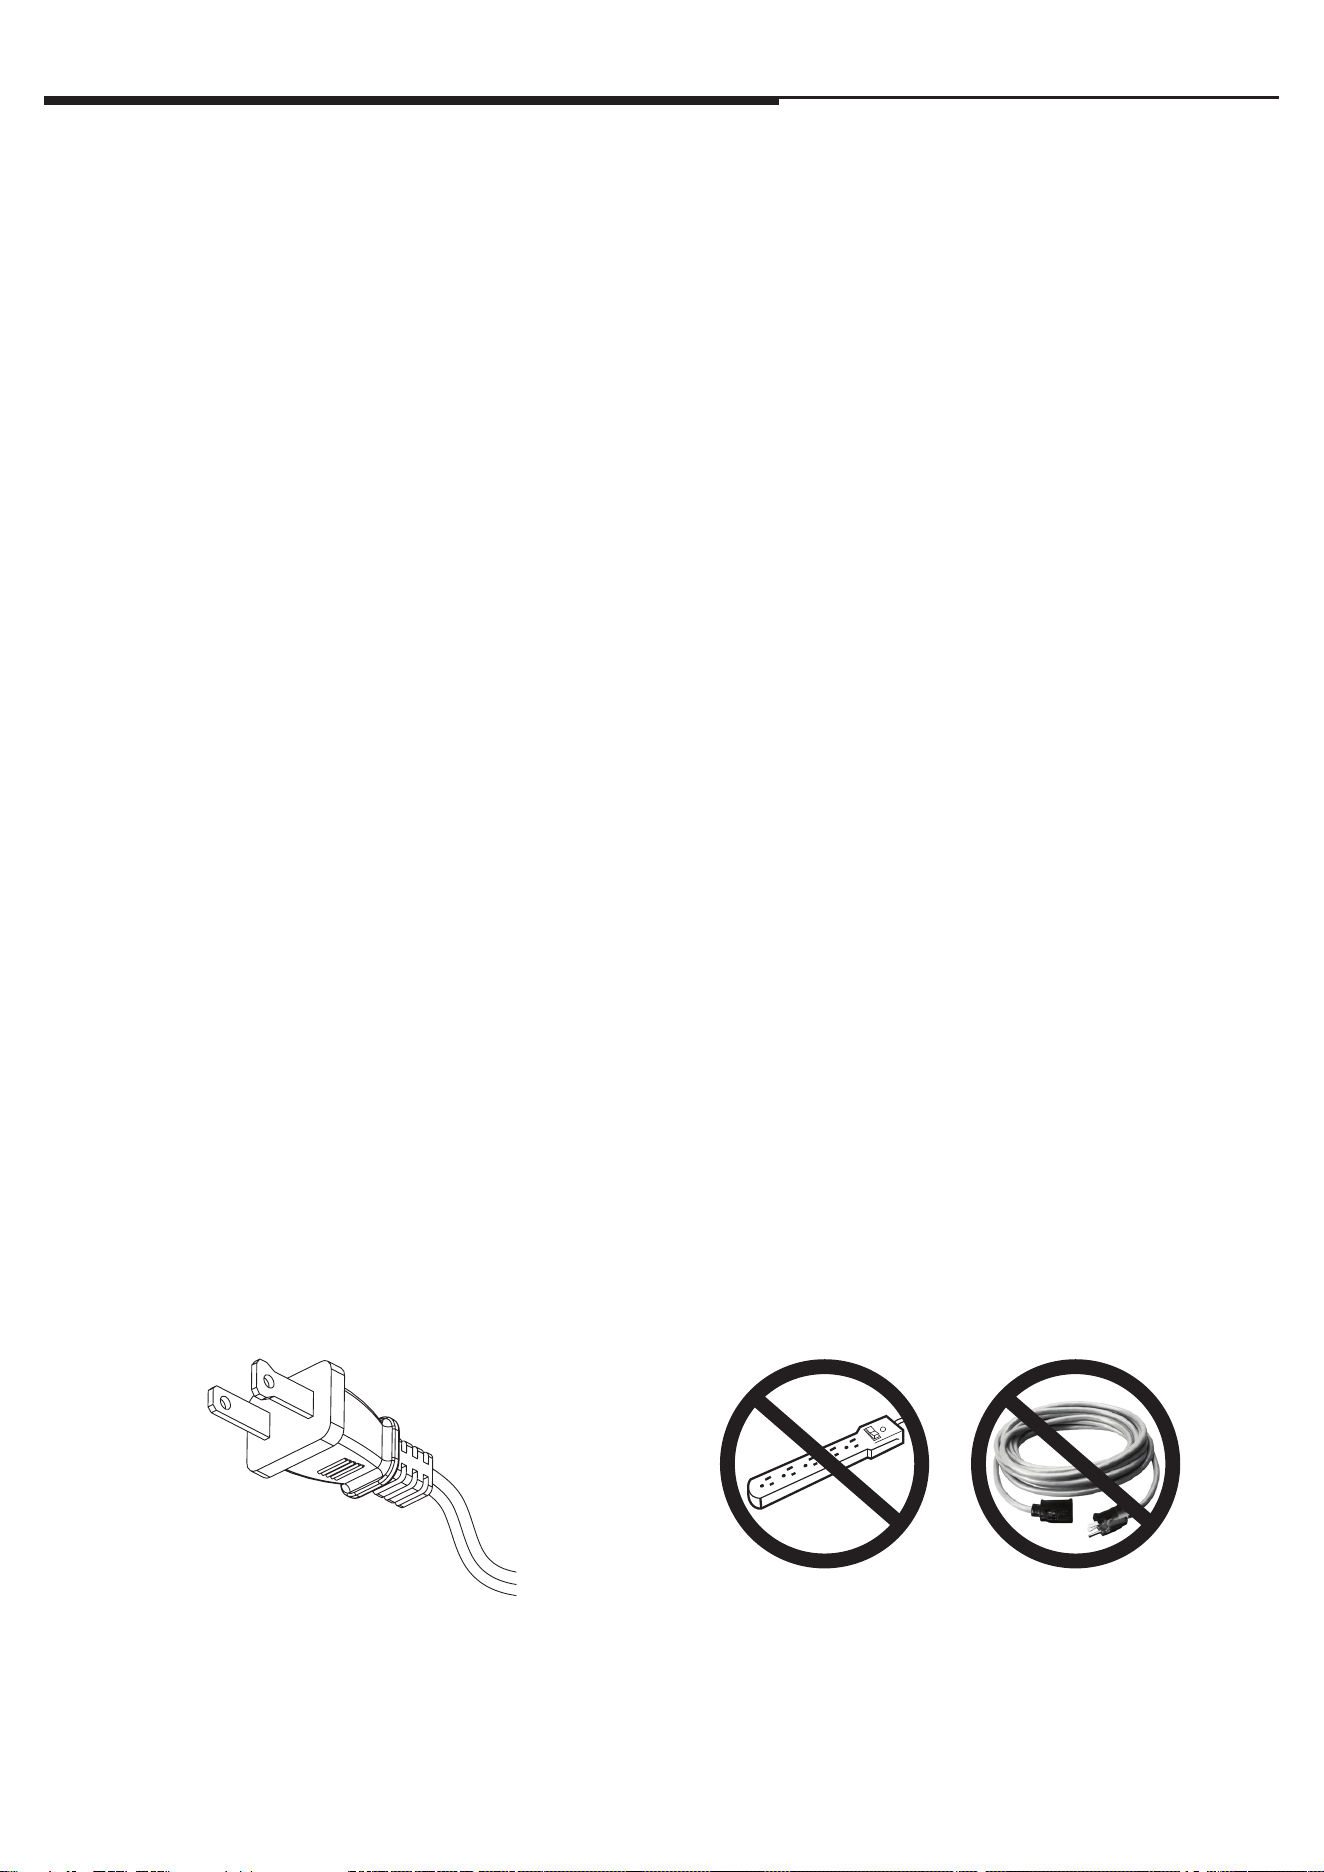
16. is product is equipped with a polarized plug (one blade is wider than the other blade). To reduce the risk of electrical shock, this plug
will t into a polarized outlet only one way. is is a safety feature. If you are unable to insert the plug into the electrical outlet, try
reversing the plug. If the plug still does not t, contact a qualied electrician.
https://manual-hub.com/
www.tsicustomerservice.comA488
3
GETTING STARTED
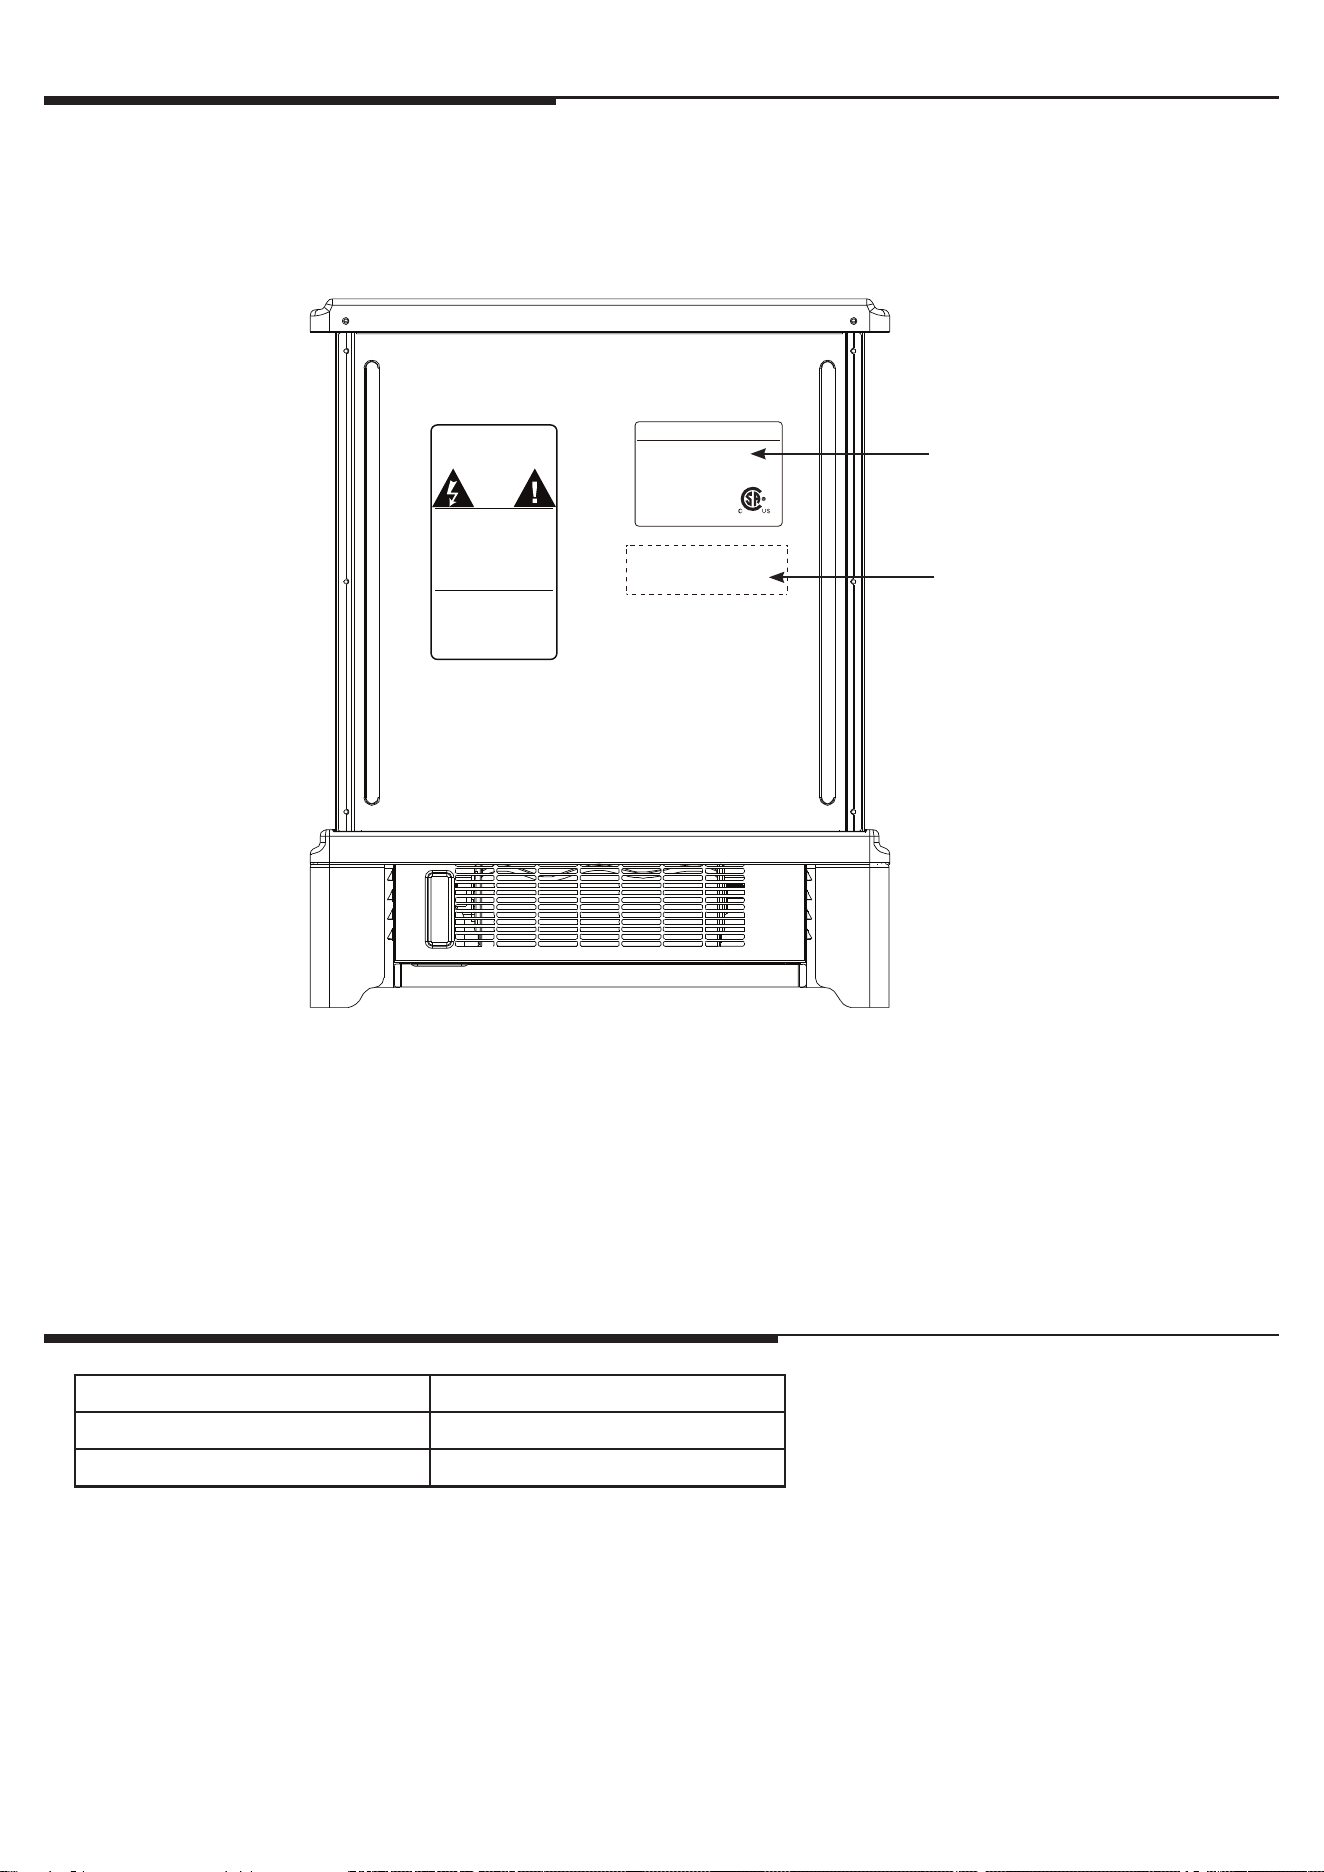
1. e serial number is located on the back of the stove, the serial number is necessary for product
warranty registration and customer service.
2. Go to www.tsicustomerservice.com for product warranty registration. For registration use the MODEL
NUMBER: DFI-470-06. If you are unable to complete registration save your proof of purchase for warranty
purposes.
PRODUCT SPECIFICATIONS
VOLTAGE 120VAC, 60 Hz
AMPS 12.5 Amps
WATTS (max.) 1500 Watts
SEE OWNERS MANUAL FOR SERVICE DETAILS
WARNING:
DISCONNECT POWER BEFORE CLEANING OR SERVICING
CAUTION:
HIGH TEMPERATURE, RISK OF FIRE, KEEP ELECTRICAL CORDS, DRAPERY,
FURNISHINGS AND OTHER COMBUSTIBLES AT LEAST 3 FEET(0.9M) FROM
THE FRONT OF THE HEATER AND AWAY FROM THE SIDE AND THE REAR.
CAUTION:
RISK OF ELECTRICAL SHOCK
DO NOT OPEN NO USER
SERVICEABLE PARTS INSIDE
CUIDADO: EL RIESGO DE CHOQUE ELÉCTRICO,NO ABRA.
NO HAY PARTES DE SERVICIO PARA EL USUARIO EN EL INTERIOR.
(0.9M) DEL FRENTE DEL CALENTADOR Y LEIOS DE LA PARTE POSTERIOR.
PAÑERÍA,MOOBILIARIO Y OOTROS COMBUSTIBLES POR LO MENOS 3 POES
CUIDADO:
LA TEMPERATURA,RIESGO DE INCENDIO,GUARDA CORDONESÉCRICOS,
AVISO:
DESCONECTE LA ENERGÍA ANTES DE APOYARSE O REPAARA.
VERA A DUENOS MAÑUALES PARA LOS DETALLES DEL
SERVICIO
VOIR LE MANUEL DU PROPRIÉTAIRE POUR LES DÉTAILS
SUR L’ENTRETIEN ET LA RÉPARATION
DÉBRANCHEZ L’APPAREIL AVANT DE NETTOYER OU
TEMPÉRATURE ÉLEVÉE,RISQUE DEFEU,GARDEZ LES
AVERTISSEMENT:
AVERTISSEMENT:
TIBLES À AU MOINS 0.9M(3 PIEDS) DE LA PARTIE FRONTALE DE L’APAREIL DE
RISQUE DE CHOC ÉLECTRIQUE NE PAS OUVRIR AUCUN
ENTRETIEN DES PIÈCES INTÉRIEURES PAR L’UTILISATEUR
AVERTISSEMENT:
EFFECTUER L’ENTRETIEN OU LA RÉPARATION.
CORDONS ÉLECTRIQUES,DRAPERIES,MEUBLES ET AUTRES MATIÈRES COMBU-
CHAUFFAGE ET ÉLOIGNÉS DES CÔTÉS.
(+1) 888-674-7517
www.tsicustomerservice.com
SN #:AC-XXXXX-X
Date Code/ Code de Date/ Código Fecha:
ELECTRIC FIREPLACE/FOYER
ÉLECTRIQUE/INSERTO PARA CHIMENEA
MODEL / MODÈLE / MODELO
Twin-Star International, Inc.
www.twinstarhome.com
Made In China
Fabriqué en Chine
Fabricado en China
DFI-470-06
VOLTS WATTS/VATIOS H
Z
120V~ 1500 60
220391
Back of the Stove
Serial Number
Model Number
https://manual-hub.com/
www.tsicustomerservice.comA488
4
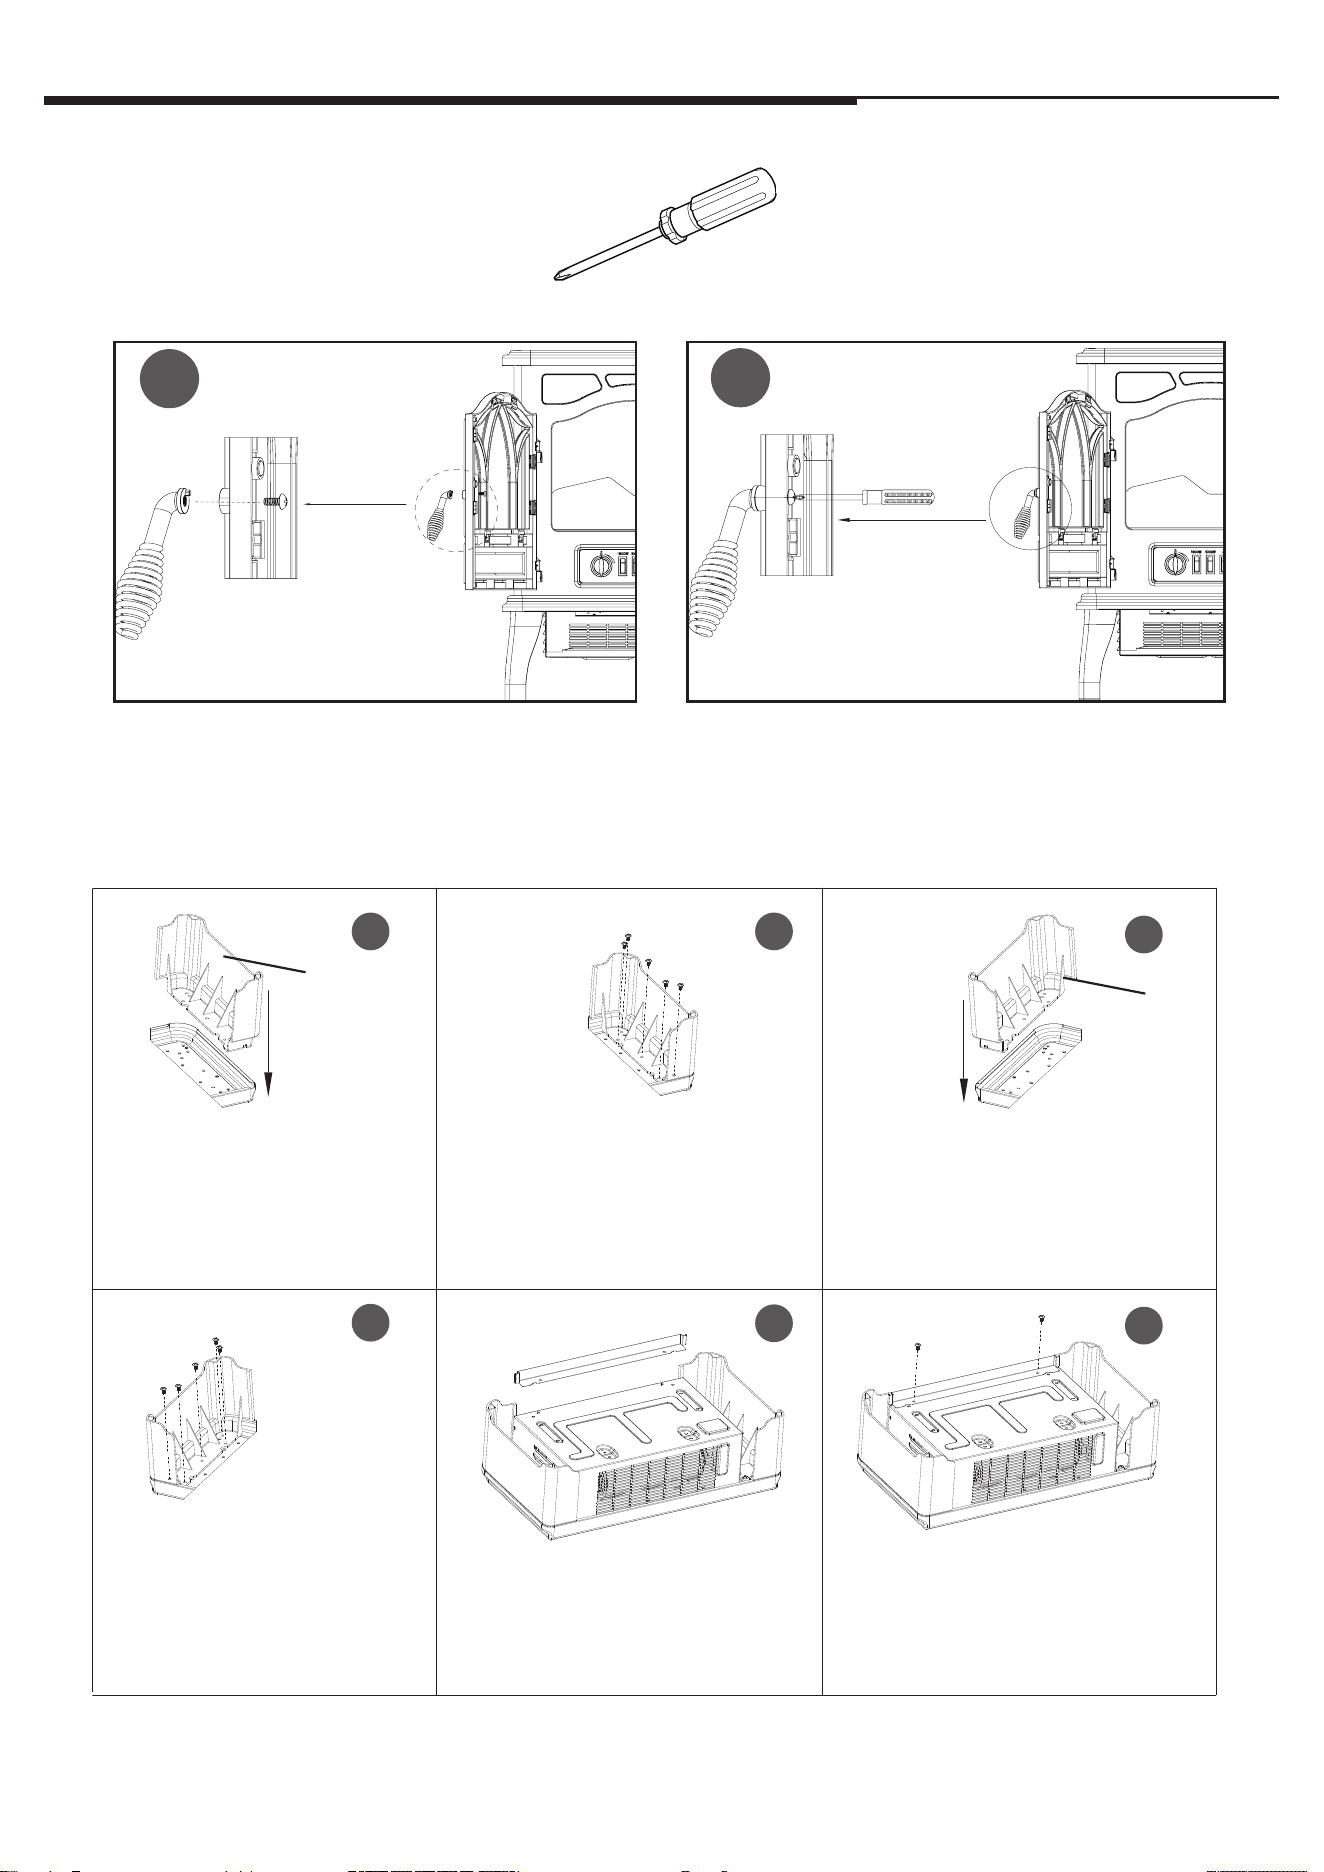
INSTALLATION INSTRUCTIONS
Tools Required for Assembly
2. Feet Assembly
1. Handle Installation
1
2
Attach the handle to the mounting hole on the
outside of the door.
Insert the screw (0.16 in. x 0.4 in.) from inside of
door and tighten the screw until the handle can not
be turned.
Phillips Head Screwdriver
Right Support Foot
Le Support Foot
1
4
2
5
3
6
1. Turn the stove upside-down.
Lower the Right Support Foot
onto the base, aligning with
the 5 attachment holes.
3. Lower the Le Support Foot
onto the base, aligning with the
5 attachment holes.
4. Use ve Screws to fasten the
Le Support Foot to the base.
5. Place the Base Bracket onto the
front of the base.
6. Use two Screws to fasten the Base
Bracket to the base.
2. Use ve Screws to fasten the
Right Support Foot to the base.
https://manual-hub.com/
www.tsicustomerservice.comA488
5
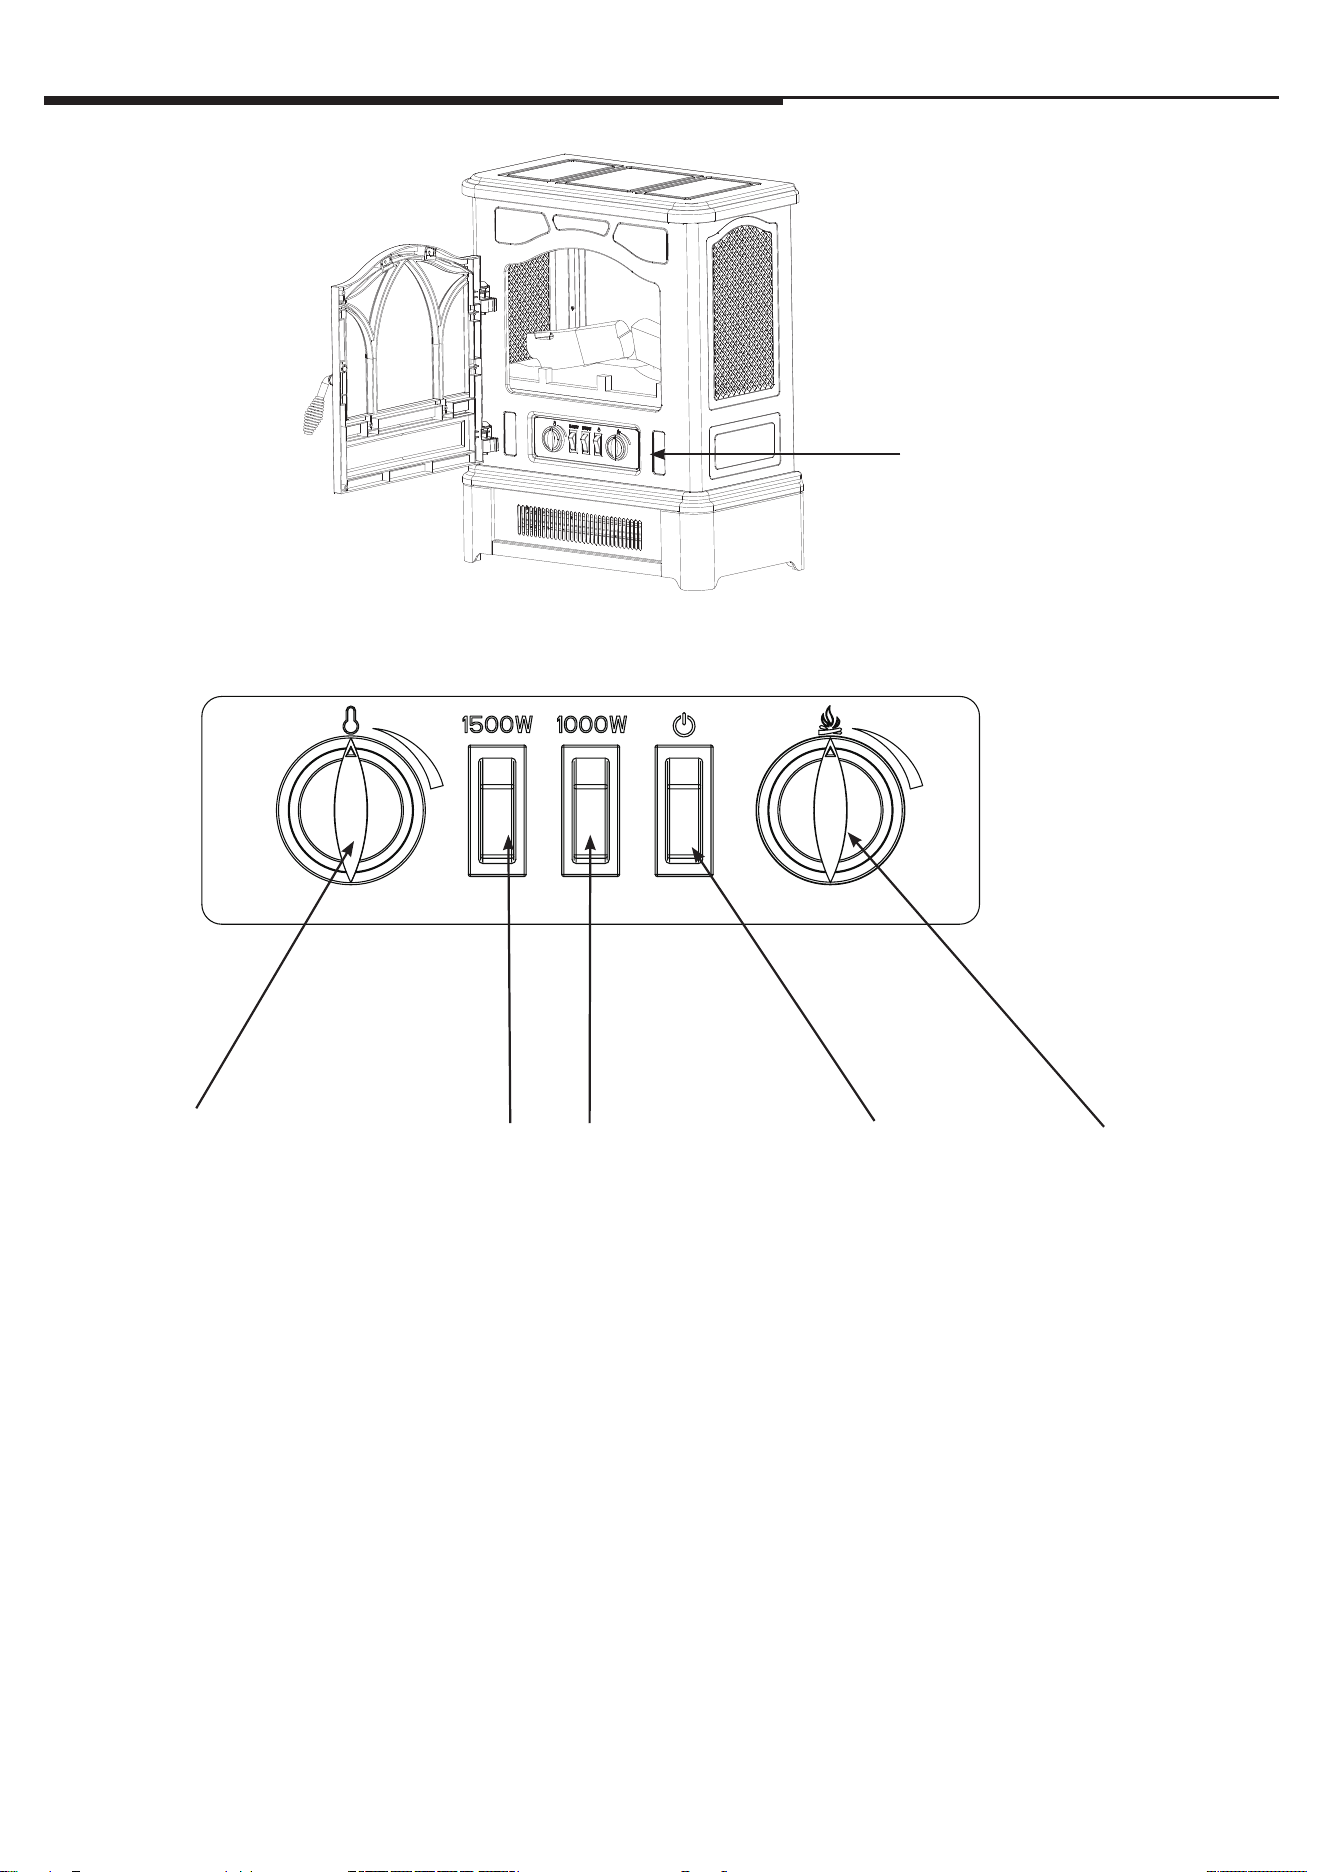
OPERATION INSTRUCTIONS
Control Panel Location
Control Panel
Thermostat Dial
1. Set the thermostat knob
to turning clockwise to
allow the heater to warm
up the room.
2. When the desired
comfort level is reached,
lower the thermostat
knob counter clockwise
until the unit shuts o.
3. e heater will now
automatically maintain
the desired comfort level
by cycling the heater
on and o.
Note: Day to day changes
in room or outdoor
temperatures can eect the
thermostat. Readjust the
thermostat if needed.
Heater Switch
1. e 1000W switch will turn on the
heater to the low heat setting and
will also turn the heater o.
2. Turning on both the 1000W and
1500W switches will turn on the
high heat setting.
High Heat--1000W(ON)+1500W(ON)
Low Heat--1000W(ON)+1500W(OFF)
Power Switch
1. is switch turns
on and o the
main power.
2. e switch will be
illuminated when
the heater is on.
3. is switch needs
to be on in order
to use the heater.
Flame Brightness
Dimmer
1. Turning the dial
clockwise will
increase the
brightness of the
ame eect.
2. Turning the dial
counter clockwise
will decrease the
brightness of the
ame eect.
https://manual-hub.com/
www.tsicustomerservice.comA488
6
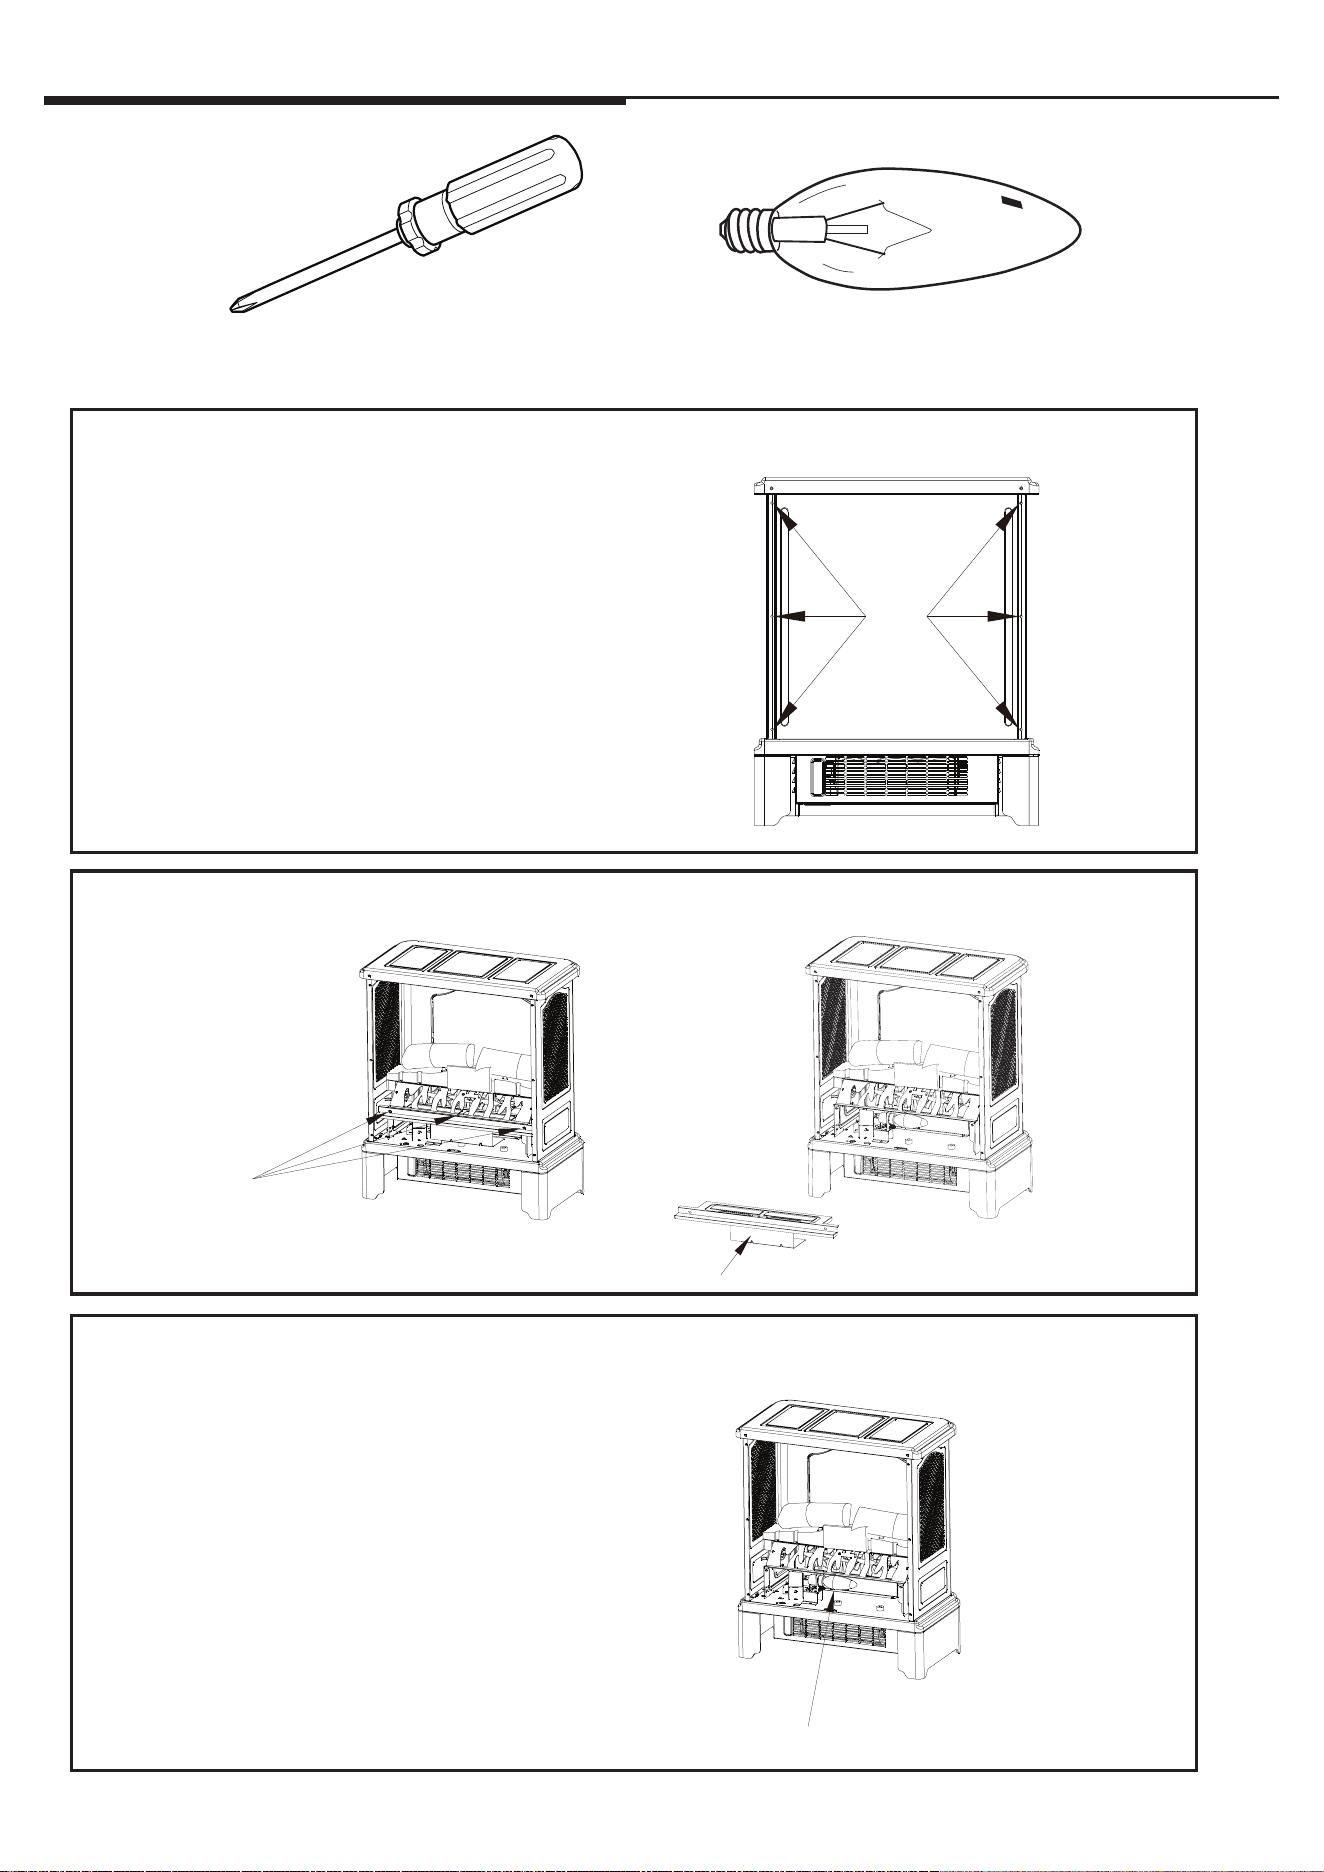
BULB REPLACEMENT
Clear, 40-watt, E12 socket base light bulb
(candelabra base, B bulb).
1. Unplug the stove. Remove the screws holding the stove back panel in place. Remove the back
panel to access the light bulb.
2. Unscrew 3 screws holding the bae and remove it carefully.
3. Remove light bulb and replace. Reverse steps 2 and 1, re-install bae and stove back panel into
position; be careful to not overtighten the screws.
REMOVE
Screws
Bulb
Bae
Tools Required for Assembly
Phillips Head Screwdriver
1
3
2
https://manual-hub.com/
www.tsicustomerservice.comA488
7
Problem Root Cause Corrective Action
1. No power, switches
do not light up.
1. Power cord was not plugged into
the outlet.
1. Check that unit is plugged directly into a standard
120 volt outlet.
2. Stove does not
turn on manually.
2a. No incoming power from the
electrical wall socket or switches.
2b. Improper operation.
2c. Defective switch.
2a. Check circuit breakers and move unit to another outlet.
2b. Manually press main power button from front of unit.
2c. Replace power switch.
3. Flames are not
moving.
3a. Defective ame generator drive
motor.
3b. Spinner detached from
the motor.
3a. Replace ame generator drive motor.
3b. Remove the back panel and check to see if “spinner” is correctly
mounted to the motor.
4. Flames are not
visible.
4a. Burnt out light bulb. 4a. Replace 40 watt candelabra bulb.
5. Flames are not
bright.
5a. Normal operation.
5b. Defective dimmer switch.
5a. Turn brightness dimmer knob until desired brightness is achieved.
5b. Replace dimmer switch.
6. No ames eect and
heater is turning on.
6a. Defective Flame Circuit Aseembly.
6b. Defective Power Circuit Aseembly.
6a. Replace Flame Circuit Aseembly.
6b. Replace Power Circuit Aseembly.
7. Heater is not
turning o.
7a. Defective ermostat. 7a. Replace ermostat.
8. Heater is not
turning on.
8a. Improper operation.
8b. Defective switch.
8c. Defective heater blower motor.
8a. Manually press main power button on front of unit.
8b. Replace heater switch.
8c. Replace heater/blower Assembly.
9. Not producing
enough heat.
9a. power strip/surge protector/
extension cord being used.
9b. Location of unit.
9a. Plug unit directly into the wall.
9b. Make sure unit is located on an interior wall.
10. Unit blows cool or
cold air.
10. Defective heater blower motor. 10. Replace heater/blower Assembly.
11. Noise with
heater on.
11a. Dirty heater blower motor.
11b. Defective heater blower motor.
11a. Gently vacuum heater blower vents.
11b. Replace heater/blower Assembly.
12. Noise with ames
on and heater o.
12a. Defective ame generator
drive motor.
12b. Dented back panel.
12c. Warped spinner sha.
12a. Replace ame generator drive motor.
12b. Refer to TSI customer service.
12c. Refer to TSI customer service.
13. Power cord gets
warm.
13. Normal operation. 13. Check your heater cord and plug connections. Faulty wall outlet
connections or loose plugs can cause the outlet or plug to overheat.
Be sure the plug ts tight in the outlet. Heaters draw more current
than small appliances, overheating of the outlet may occur even if
it has not occurred with the use of other appliances. During use
check frequently to determine if your plug outlet or faceplate
is HOT! If so, discontinue use of the heater and have a qualied
electrician check and/or replace the faulty outlet(s).
14. Is it safe to place
unit on carpet?
14. Product Inquiry. 14. It is safe to place unit on carpet but make sure any ammable
items are at least 3 feet away from front and sides of the unit.
15. How many square
feet will my unit
warm up?
15. Product Inquiry. 15. Provides supplemental heat up to 1000 square feet.
16. Heater doesn’t work,
but Power and
Heaters witches
are in the “ON”
position and
thermostat is set on
the highest level.
16. e thermal protector has
tripped.
16. Turn all switches to the “OFF” position and unplug the unit from the wall
outlet for 5 minutes. Aer 5 minutes, plug the unit back into wall outlet
and operate as normal.
TROUBLESHOOTING GUIDE
https://manual-hub.com/
www.tsicustomerservice.comA488
8
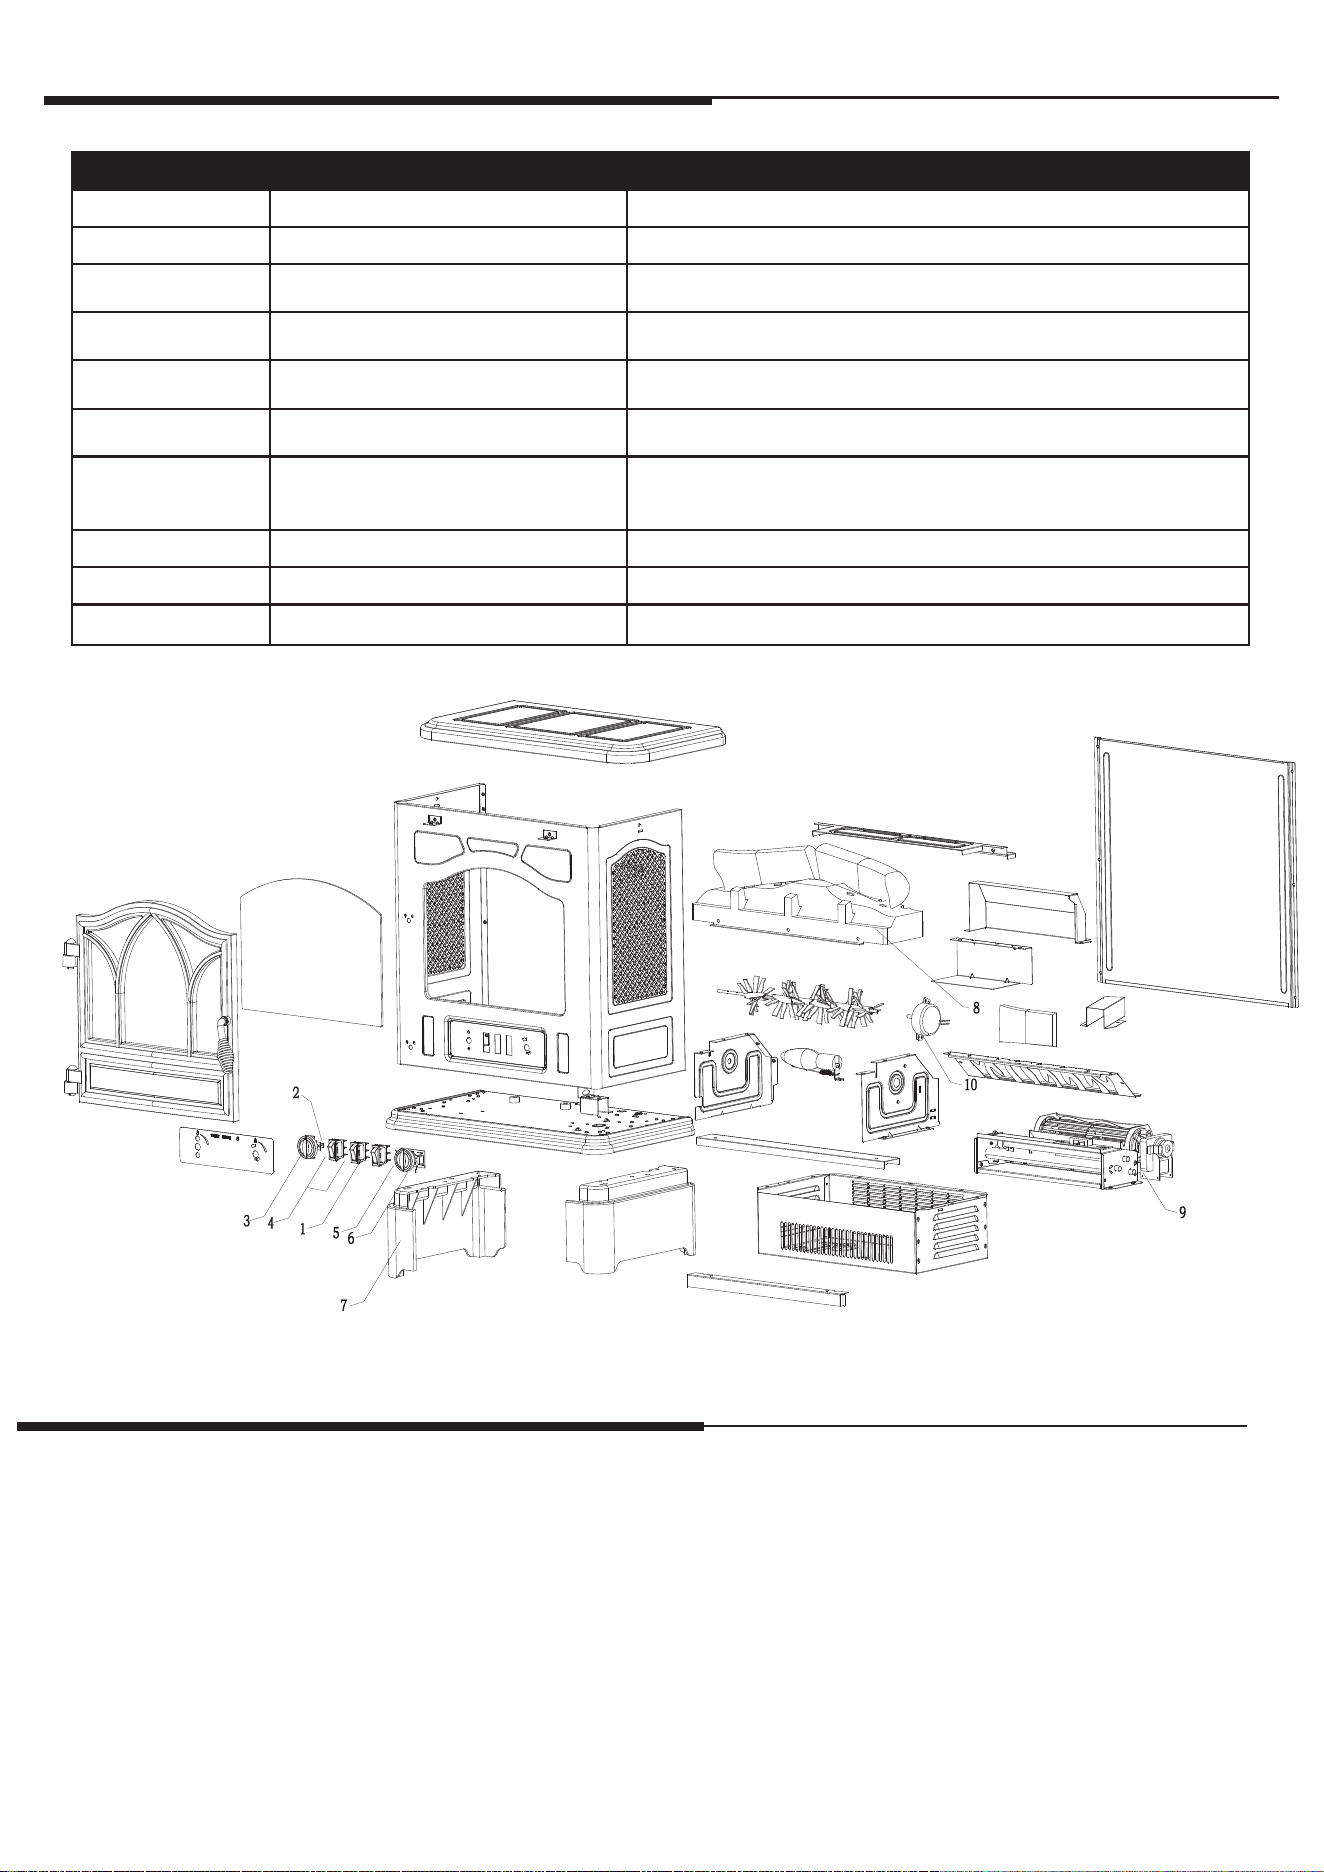
REPLACEMENT PARTS
Part Part Name Part Number
1 Power Switch P06-S
2 ermostat P03-S
3 ermostat knob P05-S
4 Heater Switch P06-S
5 Dimmer Knob P04-S
6 Dimmer Switch P07-S
7 Feet (Le/Right)
SF-S236-BLK(DFI-470-06)/ SF-S236-BRZ(DFI-470-07)
SF-S236-CIN(DFI-470-08)/ SF-S236-CRY(DFI-470-09)
8 Logset Y17-S236-LOG
9 Heater/Blower Assembly Y16-S181-P01
10 Flame Generator Drive Motor P10-Q-S
CARE AND MAINTENANCE
• Clean the trim using a so cloth, slightly dampened with citrus oil based product and bu with a clean so cloth.
• DO NOT use brass polish or household cleaners as these products will damage the metal trim. Citrus oil based
products can be obtained at supermarkets or hardware stores.
• WARNING: Electrical outlet wiring must comply with local building codes and other applicable regulations to
reduce the risk of re, electrical shock and injury to persons.
• Warning: Disconnect power before attempting any maintenance or cleaning to reduce the risk of re, electrical
shock or personal injury.
https://manual-hub.com/

www.tsicustomerservice.comA488
9
Part Part Name Part Number
1 Power Switch P06-S
2 ermostat P03-S
3 ermostat knob P05-S
4 Heater Switch P06-S
5 Dimmer Knob P04-S
6 Dimmer Switch P07-S
7 Feet (Le/Right)
SF-S236-BLK(DFI-470-06)/ SF-S236-BRZ(DFI-470-07)
SF-S236-CIN(DFI-470-08)/ SF-S236-CRY(DFI-470-09)
8 Logset Y17-S236-LOG
9 Heater/Blower Assembly Y16-S181-P01
10 Flame Generator Drive Motor P10-Q-S
1-YEAR LIMITED WARRANTY
e manufacturer warrants that your new Electric Stove is free from manufacturing and material defects for a period of one
year from date of puchase, subject to the following conditions and limitations.
1. Install and operate this appliance in accordance with the installation and operating instructions furnished with the
product at all times. Any unauthorized repair, alteration, willful abuse, accident, or misuse of the product shall nullify
this warranty.
2. is warranty is non-transferable, and is made to the original owner, provided that the purchase was made through
an authorized supplier of the product.
3. e warranty is limited to the repair or replacement of part(s) found to be defective in material or workmanship,
provided that such part(s) have been subjected to normal conditions of use and service, aer said defect is conrmed
by the manufacturer’s inspection.
4. e manufacturer may, at its discretion, fully discharge all obligations with respect to this warranty by refunding
the wholesale price of the defective part(s).
5. Any installation, labor, construction, transportation, or other related costs/expenses arising from defective part(s),
repair, replacement, or otherwise of same, will not be covered by this warranty, nor shall the manufacturer assume
responsibility for same.
6. e owner/user assumes all other risks, if any, including the risk of any direct, indirect or consequential loss or
damage arising out of the use, or inability to use the product,except as provided by law.
7. All other warranties – expressed or implied –with respect to the product, its components and accessories, or any
obligations/liabilities on the part of the manufacturer are hereby expressly excluded.
8. e manufacturer neither assumes, nor authorizes any third party to assume on its behalf, any other liabilities with
respect to the sale of the product.
9. e warranties as outlined within this document do not apply to non accessories used in conjunction with the
installation of this product.
10.is warranty gives you specic legal rights, and you may also have other rights which vary from state to state.
is warranty is void if:
a. e stove subjected to prolonged periods of dampness or condensation.
b. Any unauthorized alteration, willful abuse, accident, or misuse of the product.
c. You do not have the original receipt of purchase.
CUSTOMER SERVICE
www.tsicustomerservice.com
For Customer Service Call 1-888-674-7517
Questions? Our message centers are available 7 days a week 24 hours a day at our toll-free help line. Our
Consumer Service department is available Monday – Friday 8:30 am – 5:30 pm EST. We can help you with
assembly and if necessary, replace damaged/missing parts.
IMPORTANT:
Before contacting Customer Service please have this information available:
• Serial Number
• Model Number
• Sales Receipt or Proof of Purchase
• Clean the trim using a so cloth, slightly dampened with citrus oil based product and bu with a clean so cloth.
• DO NOT use brass polish or household cleaners as these products will damage the metal trim. Citrus oil based
products can be obtained at supermarkets or hardware stores.
• WARNING: Electrical outlet wiring must comply with local building codes and other applicable regulations to
reduce the risk of re, electrical shock and injury to persons.
• Warning: Disconnect power before attempting any maintenance or cleaning to reduce the risk of re, electrical
shock or personal injury.
https://manual-hub.com/
www.tsicustomerservice.comA488
10
www.tsicustomerservice.com
https://manual-hub.com/