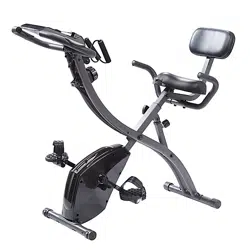
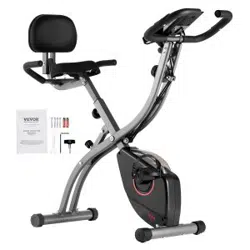
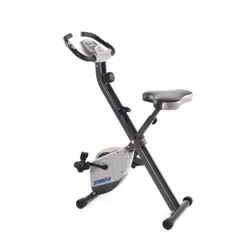
User ManualPARTS LIST
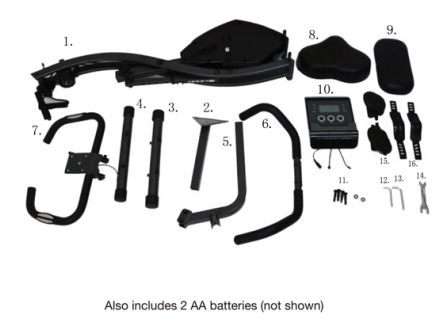
- Main frame
- Seat post
- Rear foot
- Front foot with rollers
- Backrest support
- Seat handles
- Handlebars
- Seat
- Backrest
- Control panel
- Washers and screws -2 washers for seat handles -2 screws for seat handles -2 screws for backrest
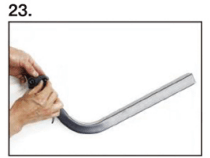
- Small hex key tool
- Large hex key/ screwdriver tool
- Wrench
- Pedals
- Pedal straps
ASSEMBLY INSTRUCTIONS
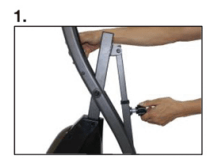
Loosen circular knob on main frame and pull outward to adjust recline angle to 1 (tallest setting)
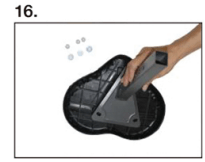
Take both nuts and washers off of rear foot.
Place the nuts and washers to the side for now.
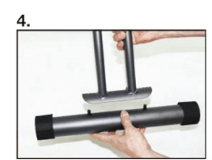
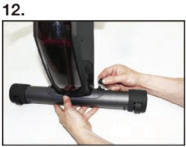
Install rear foot into rear main frame leg. See image to ensure rear foot is installed on correct leg
Place the washer onto screw.
Screw on the nut
Tighten nut onto screw with included wrench. Repeat on other side
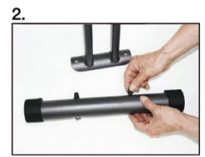
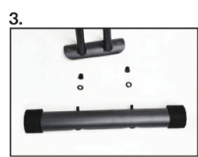
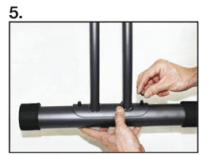
Take both nuts and washers off of front foot with rollers
Place the nuts and washers to the side for now.
Install front foot onto front main frame leg.
The rollers help to move the bike when it is tilted forward and should not touch the floor when the bike is in a regular standing position. When property installed, the rollers will face outward from the front of the bike (see images). If the rollers touch the floor, uninstall the foot, turn around, and reinstall.
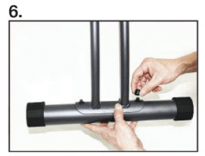
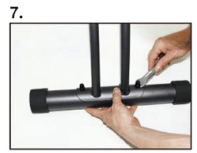
Place the washer onto screw.
Screw on the nut.
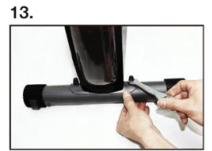
Tighten nut onto screw with included wrench. Repeat on other side.
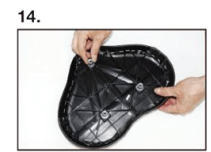
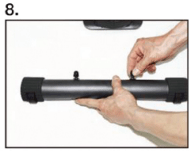
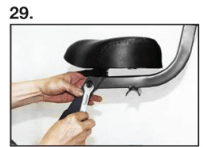
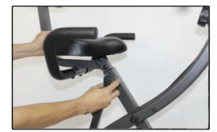
Take nuts and washers off of the seat cushion.
Place the nuts and washers to the side for now.
Fit seat post onto seat cushion screws.
Place the washers over the screws from seat cushion.
Finger tighten each nut onto the screws from seat cushion. If difficult to tighten, nut may be upside-down.
Tighten nut onto screw with included wrench. Repeat on other two nuts.
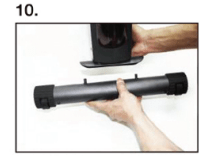
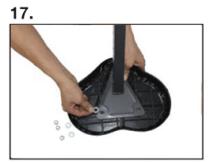
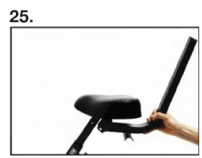
Loosen triangular knob and remove from the main frame.
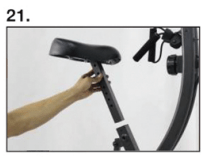
Insert seat post into main frame.
Secure knob back into place at desired height.
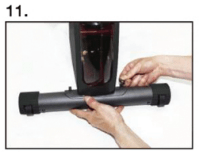
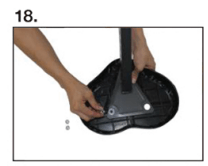
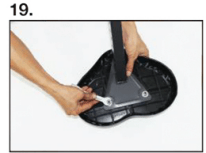
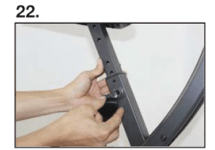
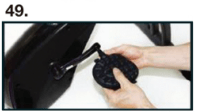
Remove screw, nut, and washer from the backrest support.
Place the screw, nut, and washer to the side for now.
Align backrest support with hole in the seat post.
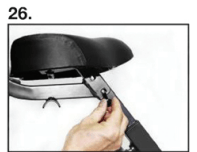
Insert screw through hole in backrest support.

Place washer onto the screw.
Place nut on screw and finger tighten. If difficult to tighten, nut may be upside-down.
Tighten the nut with the included wrench.
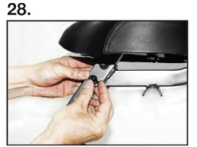
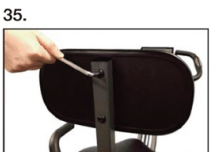
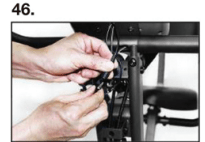
Place washers onto screws for the seat handles (see parts diagram).
Align the seat handles with holes on the bottom of the backrest support.
Place screws into holes and finger tighten.
Tighten down screws with included large hex key/screwdriver tool.

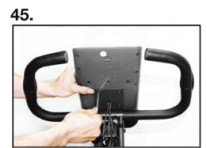
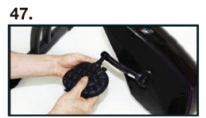
Align backrest against backrest support. Insert screws and finger tighten (see parts diagram).
Tighten down screws with included large hex key/screwdriver tool.
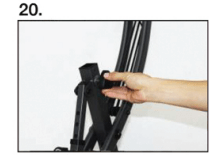
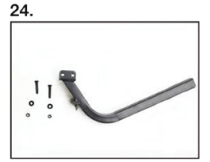
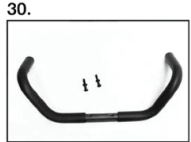
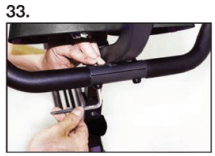
Remove screws from handle bar
Place screws to the side for now.
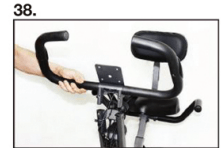
Feed handle bar posts into the slots on the top of the main frame.
Place screws into holes and finger tighten.
Tighten down screws with included small hex key tool.
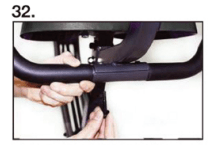
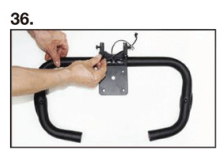
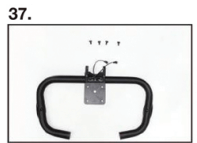
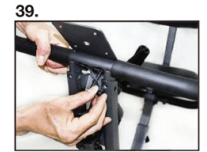
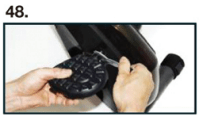
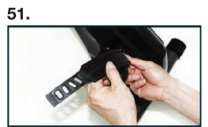
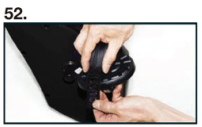
Remove screws from the back of the control panel.
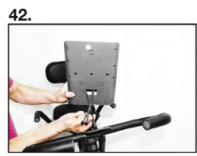
Starting with the largest connector, feed each of the three wires through the hole in the center of handle bar bracket
Place control panel onto the handle bar bracket.

Insert screws and finger tighten
Tighten screws with included large hex key/screwdriver tool
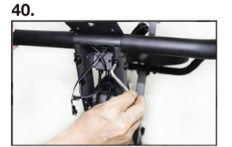
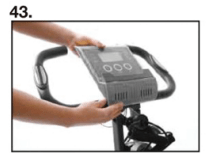
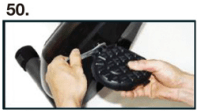
Connect each of the three wires from bike to the control panel. Either of the 2 small female connectors can connect to either of the 2 small male connectors
Connect the right pedal to the right crank arm. Both parts are marked R
 RIGHT bolt screws in CLOCKWISE (standard direction)
Hold the right pedal with one hand and screw the pedal bolt onto the crank arm with the other hand in a standard clockwise motion. Finish tightening with the included wrench
Connect the left pedal to the left crank arm. Both parts are marked L.
Hold the left pedal with one hand and screw the pedal bolt onto the crank arm with the other hand in a non-standard counterclockwise motion. Finish tightening with the included wrench
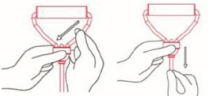
The strap marked R goes on the right pedal. The strap marked L goes on the left pedal. With the R or L marking facing upward, attach the end of the strap with 3 holes to the inside of the pedal.
 LEFT bolt screws in COUNTERCLOCKWISE (NON-standard direction)
Attach the end of the strap with 4 holes to the outside of the pedal. Adjust to your preference.
CONTROL PANEL BATTERY INSTALLATION
Requires 2 AA batteries (included).
Do not mix old and new batteries.
Do not mix alkaline, standard (carbon-zinc), or rechargeable (NiCd, Ni-Mh, etc) batteries.
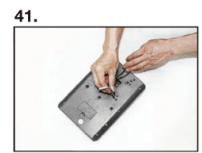
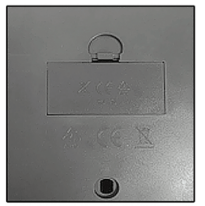
1. Open battery compartment door on the back of the Slim Cycle ™M control panel.

2. Note the diagram inside the compartment that shows the correct battery installation polarity.
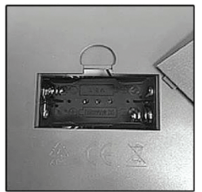
3. Install 2 AA batteries (included) according to the correct polarity.
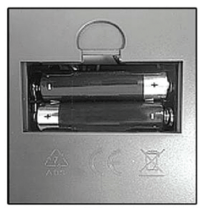
4. Replace the battery compartment door.
CONTROL PANEL
BUTTONS:
[RESET] clears data from selected mode.
- To reset all stored information from previous workout, press for 3 seconds.
- Does not clear total exercise miles (ODO).
[MODE] selects mode.
- To reset all stored information from previous workout, press for 3 seconds.
- Does not clear total exercise miles (ODO).
[SET] programs new setting for selected mode.
- To increase setting more quickly, press for 3 seconds.
- Release and press again to program.
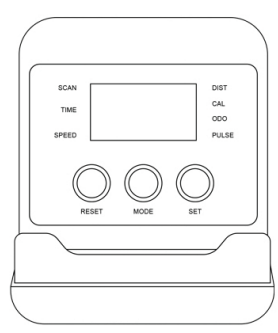
DISPLAY:
Display turns off after 4 minutes when not in use.
TIME, DIST, CAL, and PULSE: Default to previous setting until reset ([RESET]) or programmed with new setting ([SET]).
SCAN: Cycles through all functions below. Press [MODE] to make selection.
TIME: Press [RESET] to time workout or [SET] to program a countdown timer. When countdown reaches 0, alarm will sound. Press any button to silence.
SPEED: Displays estimated MPH.
DIST: Press [RESET] to display distance in miles for current workout or [SET] to program a countdown from distance goal. When countdown reaches 0, alarm will sound. Press any button to silence.
CAL: Press [RESET] to display estimated calories expended or [SET] to program a countdown from calorie goal. When countdown reaches 0, alarm will sound. Press any button to silence.
ODO: Displays total exercise miles of all workouts.
PULSE: Press [RESET] to display heart rate or [SET] to program a target heart rate. User must hold the heart rate monitor grips on the handle bars for heart rate to display. Whenever target heart rate is surpassed, alarm will sound. To silence, remove hands from heart rate monitor grips or press [RESET].
ADJUSTING RECLINE ANGLE

Twist circular knob on main frame to the left to loosen the bolt (do not fully remove). While stepping on the rear foot, lift up on the bike while pulling the knob to adjust angle.
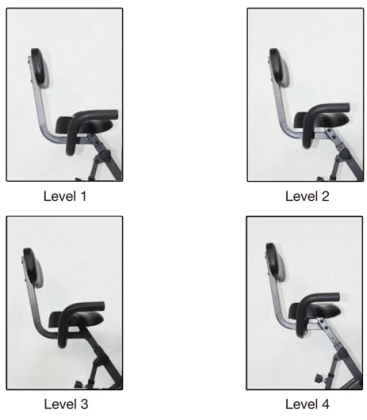
ADJUSTING SEAT HEIGHT
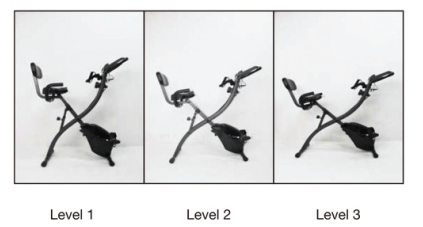
Level 1: Seat is lowered as far as the seat post will go. Unscrew and remove triangular knob. Pull up on seat to move levels. Screw knob back into place at desired level.
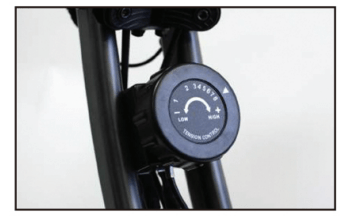
ADJUSTING PEDAL TENSION
Turn the tension control knob to adjust pedal tension from 1 to 8.
ADJUSTING RESISTANCE BANDS
SHORTEN BANDS INCREASES RESISTANCE

Push the band up into the band locking compartment. Hold the band underneath the handle and pull out. Only one side adjusts, so if the band cannot be pulled from one side of the handle, pull from the other side.
LENGTHEN BANDS DECREASES RESISTANCE
Push the band on one side of handle down into the band locking compartment. Only one side adjusts, so if the band cannot be pushed from one side of the handle, push from the other side. Pull the band out of the other side of the locking compartment.
When desired length and resistance is reached, grab band on either side of locking compartment and pull tight to lock band into place. If band slips during workout, it may need to be pulled more tightly.
USING SLIM CYCLE™
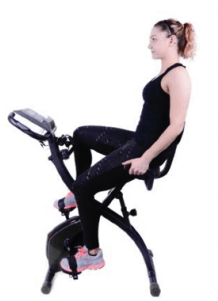
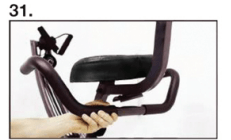
Lean back against backrest and grab handles attached under seat. Keeping your back straight, pedal at desired pace.

Lean forward and grab onto handlebars where the heart rate monitor grips are located. Keeping your back straight, pedal at desired pace.

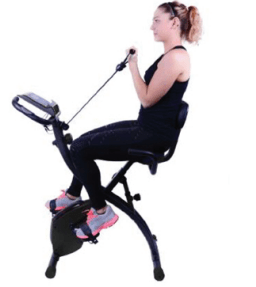
Lean back against backrest and grab both resistance band handles. Keeping your back straight and elbows close to torso, pull the right handle towards right shoulder. Repeat with left arm.
Lean back against backrest and grab both resistance band handles. Keeping your back straight and elbows close to torso, pull both resistance band handles toward body. Lower slowly and repeat.
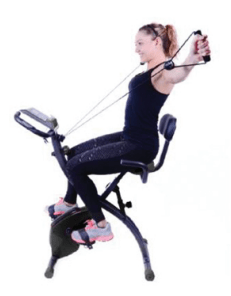
Keeping your back straight and arms locked out straight, grab the resistance band handles and pull to shoulder height. Lower slowly and repeat.