Loading ...
Loading ...
Loading ...
18
Rotisserie Assembly
1. Remove both crisping trays from the Air Fryer Pizza Oven. Make sure the drip pan is in place
on the Oven oor.
2. It is best to secure meat on the rotisserie bar with butcher’s cooking twine.
3. When preparing rotisserie chicken or game birds, truss the bird into a tight package.
Tie both chicken legs together, tie the breast area together with the wings, then wrap more
string around the middle
4. Push the rotisserie bar through the center of meat or poultry to be cooked. Make sure food is
centered on the bar.
IMPORTANT: If the food is not centered it will cause a jerking motion during cooking.
This results in undue stress on the motor.
5.
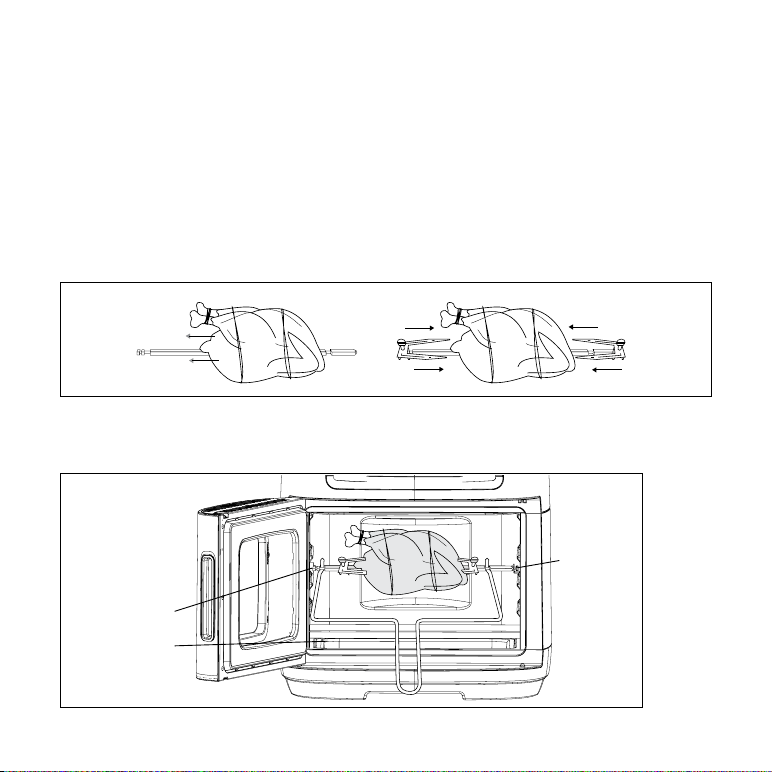
Thread the square hole of the meat tine over the end of the bar and press into food to secure.
Tighten nger screw to hold food in place. Repeat with the second meat tine. (See Fig.4.)
Figure 4
6. Plug the power-supply cord into a 120V AC electrical wall outlet.
7. Open the Oven door. The Oven light will illuminate. insert one square end of the rotisserie bar
into the rotisserie slot on the left side of the Oven’s interior. Rest the other square end into the
metal notch on the right side of the Air Convection Fryer Oven’s interior. (See Fig.5.)
Figure 5
TIME
LIGHT
DEHY-
DRATE
TEMP
˚F
MIN.
BROIL BAKEROASTAIR FRY REHEAT
KEEP
WARM
PIZZA BACON
ROTIS-
SERIE
Rotisserie Slot
Drip Pan
Metal Notch
Loading ...
Loading ...
Loading ...