Loading ...
Loading ...
Loading ...
English | 19
Bosch Power Tools 1 609 92A 1LB | (16.11.15)
– Turn the suction tube 12 so that the spray material can be
sprayed with almost no residue:
– Carry out a test-spray run on a test surface. (see “Spray-
ing”, page 19)
When the spraying pattern is perfect, start the spray job.
or
When the spraying result is not satisfactory or when no paint
comes out, please continue as described under “Correction of
Malfunctions” on page 21.
Starting Operation (see figure E)
Observe the mains voltage! The voltage of the power
source must correspond with the data on the type plate of
the machine.
Pay attention that the base unit cannot draw in dust or
other contamination during operation.
Make sure never to spray on the base unit.
Stop spraying if fluid escapes from places other than
the intended nozzle during spraying, and restore the
spray gun to its proper condition. There is a risk of elec-
tric shock.
Do not direct the fine-spray system against yourself,
other persons or animals.
Switching On
To save energy, only switch the fine-spray system on when
you are using it.
– PFS 2000: Check whether the correct nozzle cap is
mounted (see “Changing the Nozzle Cap”, page 18).
– Plug the mains plug into a socket outlet.
– Grasp the spray gun by the handle and point it at the spray
surface.
– Slide the On/Off switch 20 forwards.
– Pull the trigger switch 6 on the spray gun.
Note: Air always flows out at the air cap 2 when the base unit
is switched on.
Switching Off
– Let go of the trigger switch 6 and slide the On/Off switch
20 backwards.
– Pull the mains plug from the socket outlet.
Working Advice
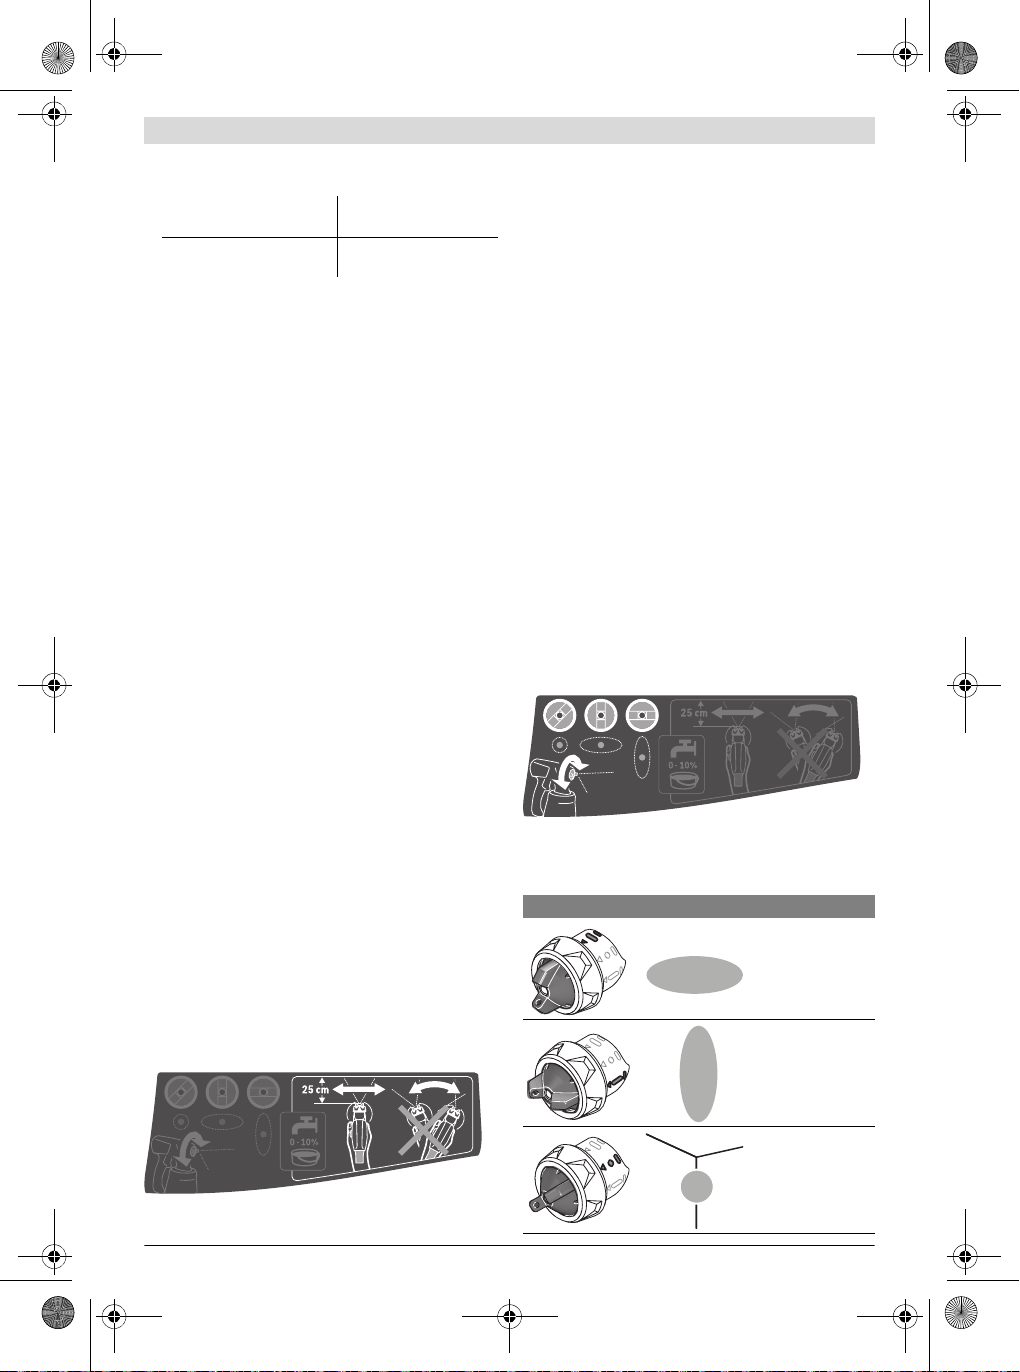
Spraying (see figure F)
Note: Observe the wind direction when operating the power
tool outdoors.
– Firstly, carry out a test-spray run and adjust the spray pat-
tern and the spray material quantity according to the spray
material. (For adjustments, see the following sections)
– Be absolutely sure to hold the spray gun at a consistent dis-
tance of 20–25 cm perpendicular to the spray object.
– Begin the spraying procedure outside the target area.
– Bewegen Sie die Sprühpistole je nach Sprühbild-Einstel-
lung gleichmäßig waagerecht oder senkrecht.
Eine gleichmäßige Oberflächenqualität entsteht, wenn
sich die Bahnen um 4 – 5 cm überlappen.
– When spraying horizontal objects or spraying overhead,
hold the spray gun at a slight angle and back away from the
sprayed surface.
Risk of stumbling! Pay attention to possible obstacles
in the room.
– Avoid interruptions within the spray surface.
Guiding the spray gun evenly will provide uniform surface
quality.
Non-uniform clearance and spray angle lead to heavy forma-
tion of paint mist and thus to an uneven surface.
– End the spraying procedure outside the target area.
Never completely empty the container for the spray material
by spraying. If the suction tube is no longer immersed in the
spray material, the spray jet will be interrupted and this will
result in an inconsistent surface.
If the spray material settles on the nozzle cap and air cap,
clean both parts with the diluting agent used.
Adjusting the Spray Pattern
Never actuate the trigger switch 6 while adjusting the
air cap 2.
–Turn the air cap 2 to the requested position.
For spray jobs on horizontal
surfaces/objects
toward the front in noz-
zle/air cap direction
For spray jobs overhead toward the rear in handle
direction
Air cap Spray jet pattern Application
Horizontal flat jet
for vertical working
direction
Vertical flat jet for
horizontal working
direction
Round jet for cor-
ners, edges and
hard to reach loca-
tions
OBJ_BUCH-2216-004.book Page 19 Monday, November 16, 2015 9:14 AM
Loading ...
Loading ...
Loading ...