
Loading ...
Loading ...
Loading ...
10
Assembly
m
WARNING! To avoid serious personal injury, read and
understand all safety instructions provided.
mWARNING! Do not insert the batteries until assembly is
complete. Failure to comply could result in accidental starting
and possible serious personal injury.
mWARNING! Before performing any maintenance, make
sure the tool is o and batteries are removed. Failure to heed
this warning could result in serious personal injury.
mWARNING! To prevent serious personal injury, make
sure the switch is not squeezed, the batteries are removed and
the impeller has come to a complete stop before attaching or
removing the collection bag.
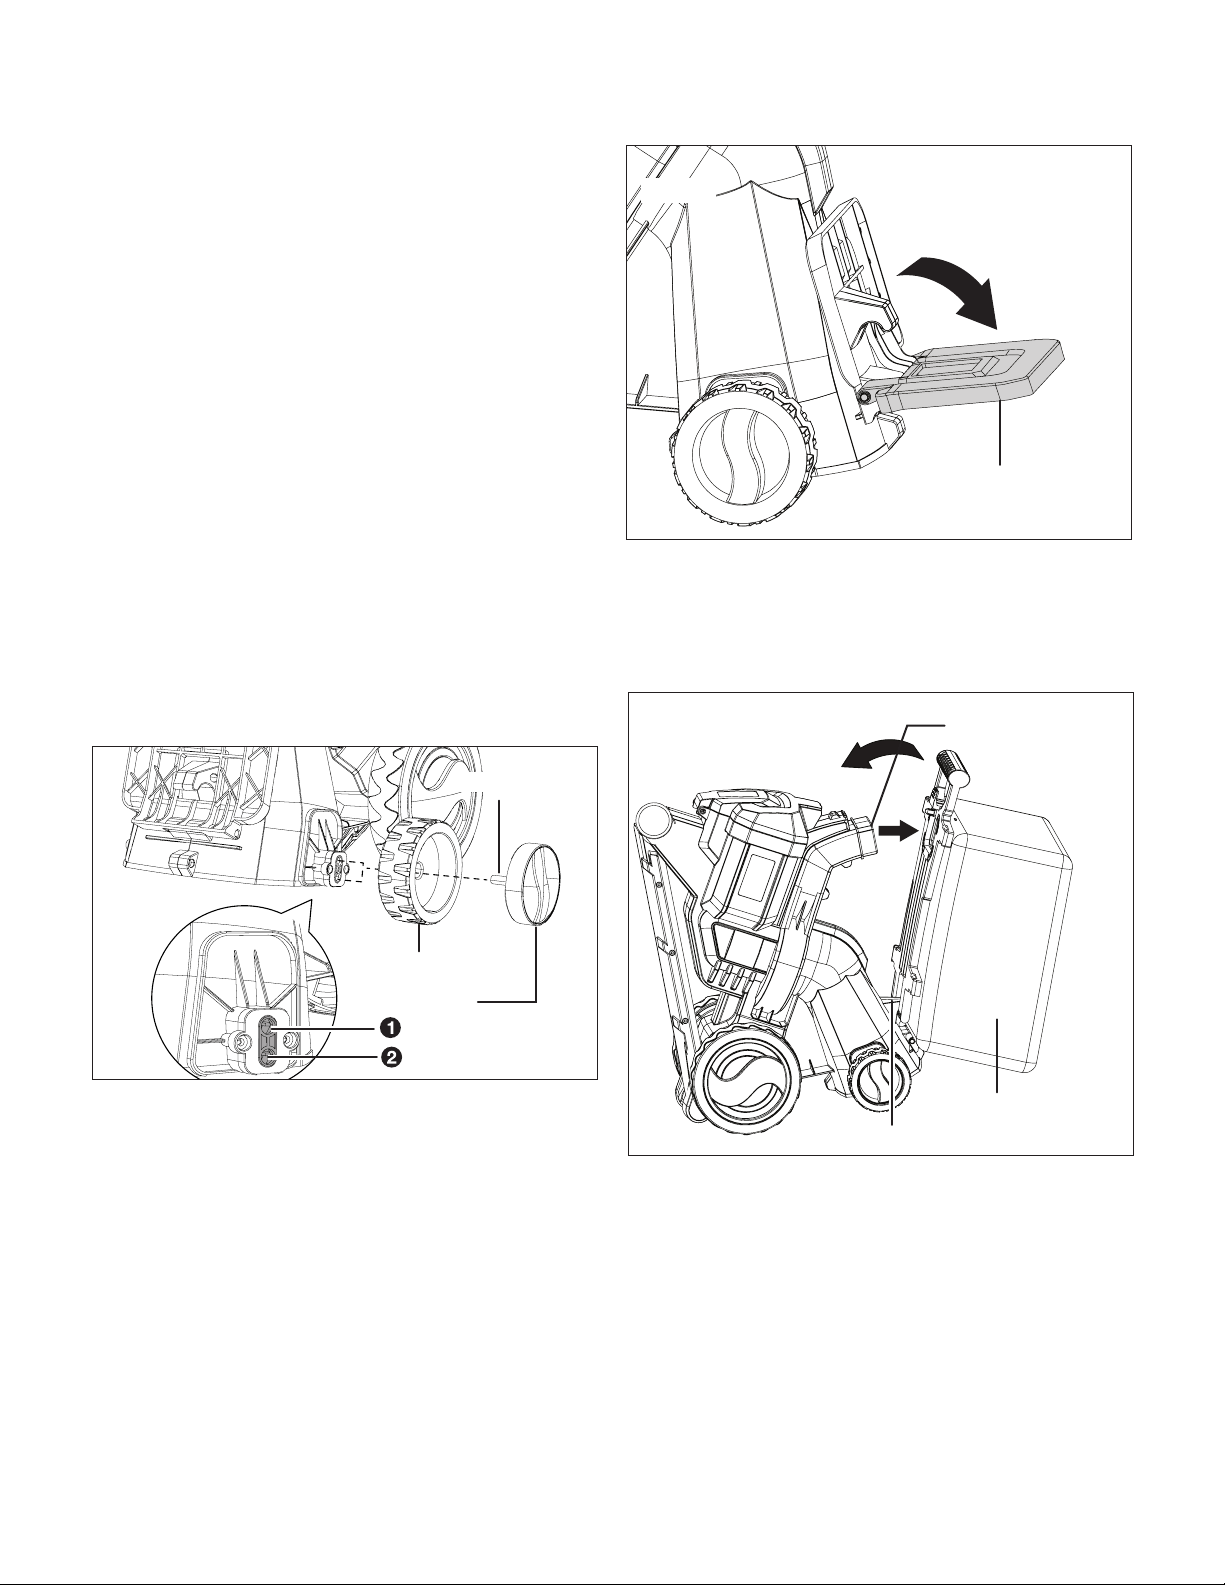
1. Assemble the front wheel with the wheel hub as shown
below. Insert the shaft of the wheel hub into one of the
holes located on the side of the vacuum chute, and
rotate the wheel hub clockwise until it cannot be rotated
anymore (Fig. 5).
NOTE: Adjust the vacuum to obtain the optimal air inlet
height by aligning the wheel shaft to the hole at the
corresponding height.
2. Repeat the above assembly step for the other wheel,
make sure both wheels are set to the same height.
2-Position Height Adjustment:
1) Low: 1.4 in. (3.6 cm)
2) High: 2.2 in. (5.6 cm)
NOTE: Choose the air inlet height according to the
terrain that the vacuum will be working on. To work on
at surface, lower the air inlet height. To work on lawn or
uneven surface, increase the air inlet height.
3. Flip down the collection bag support located on the
bottom of the chute (Fig. 6).
4. To attach the collection bag, rst place the bottom of the
collection bag on the collection bag support and insert
the tab on the chute into the hole on the bottom of the
collection bag, then align and insert the air outlet into the
hole on the top of the bag. Press rmly until it clicks and
locks securely into place (Fig. 7).
NOTE: The collection bag must be attached any time
the unit is being operated. The unit cannot start if the
collection bag is not attached properly.
5. Press on the handle pivoting button and rotate the handle
at the same time, until the handle is fully extended and
clicks into the working position (Fig. 8).
Fig. 5
Front wheel
Wheel shaft
Wheel hub
Fig. 6
Collection bag
support
Fig. 7
Collection bag
Tab
Air outlet
Loading ...
Loading ...
Loading ...