Loading ...
Loading ...
Loading ...
9
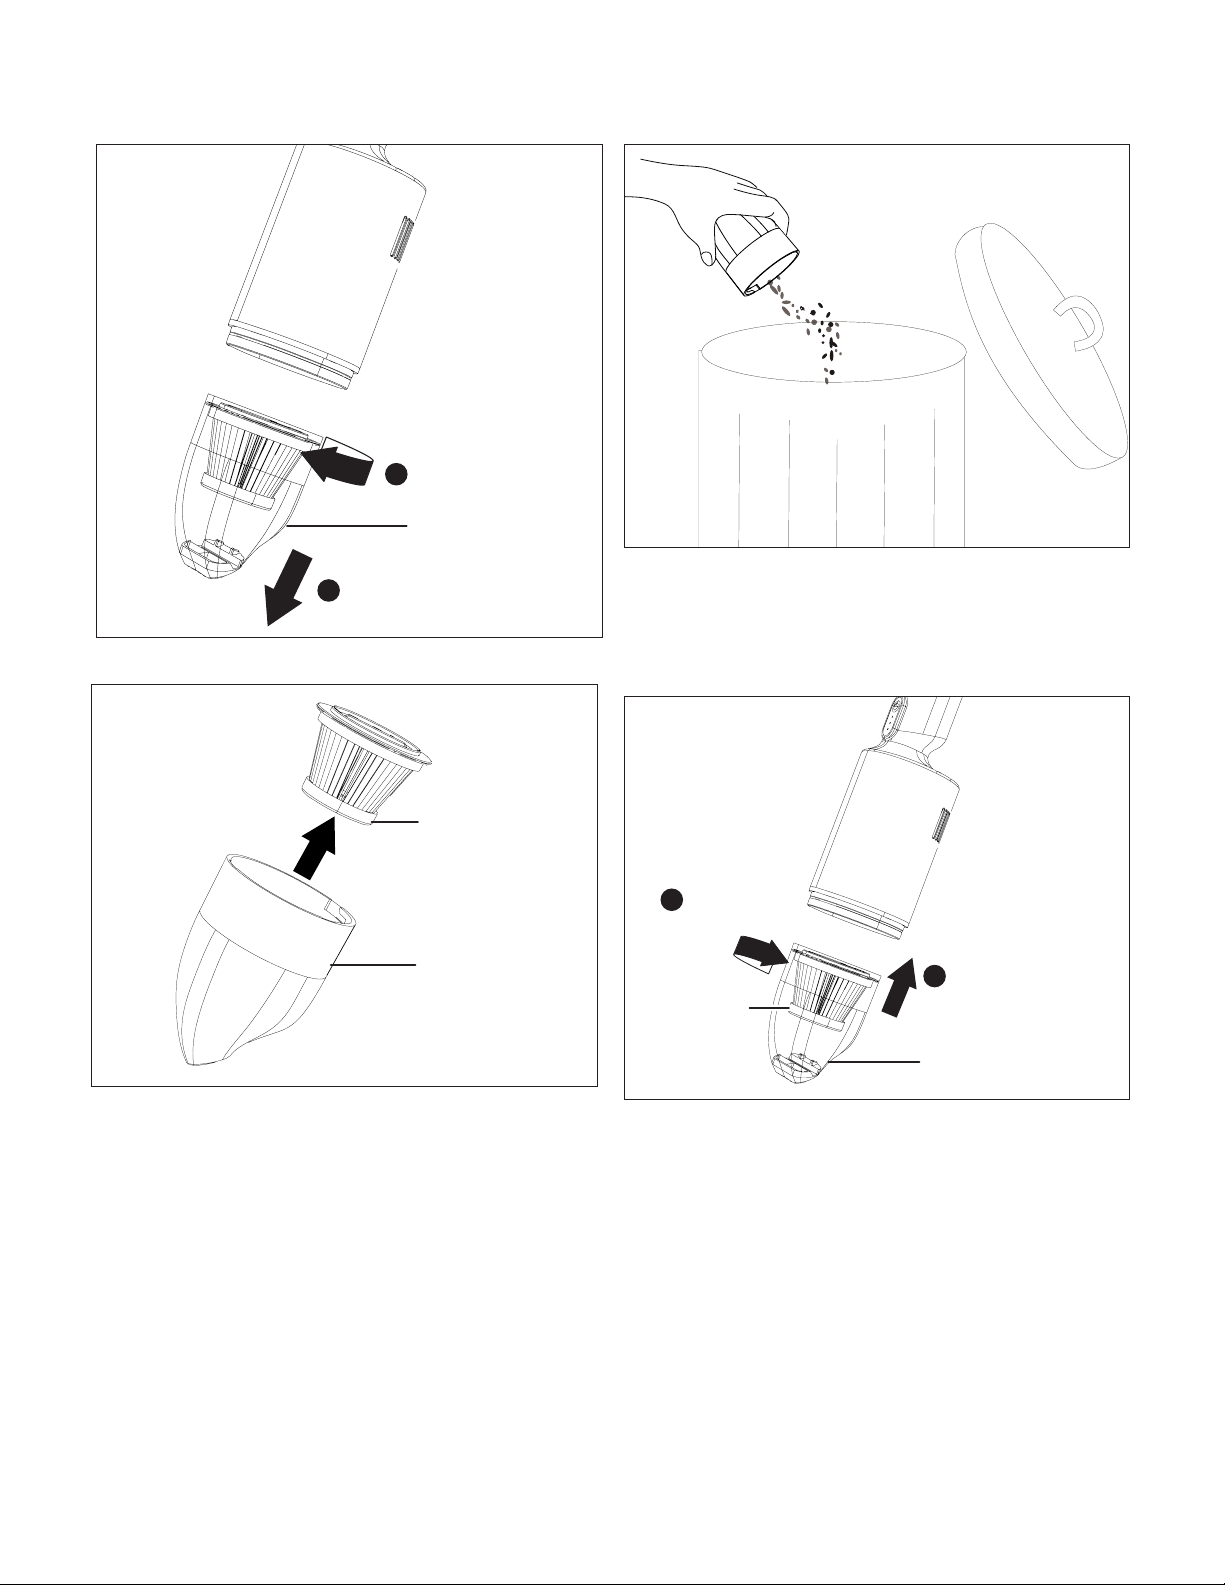
3. Remove the HEPA lter from the dust tank (Fig. 5).
4. Discard the debris and dust from the dust tank according
to local laws and regulations (Fig. 5).
5. Reassemble the lter and the dust tank when all debris/
dust are removed. Insert the HEPA lter inside the dust
tank, and reattach the dust tank to the vacuum. Push in
and turn the tank counterclockwise until it locks in place
(Fig. 7).
Use the 2-in-1 Nozzle + Brush
attachment
The included 2-in-1 nozzle + brush attachment is suitable for
cleaning small areas and collecting ne dust. To use the nozzle
+ brush attachment, follow the instructions below.
1. Turn o the vacuum and wait until it completely stops.
2. Insert the 2-in-1 nozzle + brush attachment into the
vacuum nozzle, press rmly until it's locked in place (Fig.
8)
Fig. 4
Dust tank
Twist clockwise1
Pull out
2
Fig. 5
Dust tank
HEPA lter
Fig. 6
Fig. 7
Dust tank
HEPA lter
Insert in
1
Twist
counterclockwise
2
Loading ...
Loading ...
Loading ...