Loading ...
Loading ...
Loading ...

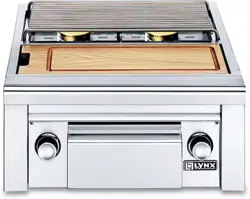
Lynx Side Burners & Grill Extender
34
LP GAS HOOK-UP (see diagram on page 10)
1. Remove the rear access panel ( cart models only -4 screws)
2. Remove the propane hose assembly.
3. Remove the 90 degree elbow from the BBQ manifold.
4. Assemble 1/2” TEE fitting (provided) to the BBQ manifold.
5. Assemble 15/16” MIP Flare x 1/2”MIP to the TEE outlet closest to the side burner.
6. Assemble SS flex hose to the fitting just assembled.
7. Assemble 15/16” MIP Flare x 1/2” FIP to the 1/2” Male-Female elbow already
installed on the side burner manifold.
8. Assemble 1/2” MIP x 3/8” Flare Fitting to 1/2” Close Nipple.
9. Assemble propane hose / regulator assembly to fitting just assembled.
NATURAL GAS GAS HOOK-UP (see diagram on page 11)
1. Remove the rear access panel ( cart models only -4 screws)
2. Remove 90 degree elbow and natural gas regulator from BBQ manifold.
3. Assemble 1/2” TEE fitting (provided) to the BBQ manifold.
4. Assemble 1/2” MIP x 3/8” to the TEE outlet closest to the side burner.
5. Assemble SS flex hose to the fitting just assembled. Assemble other end to the 1/2”
MIP x 3/8” fitting on the side burner manifold.
6. Assemble 1/2” close Nipple to other side of the 1/2” TEE.
8. Assemble NG regulator to 1/2” close Nipple. (observe gas flow directional arrow)
9. Assemble gas supply piping to reulator.
10. Ensure a gas shut-off valve is located upstream from the regulator.
SPECIAL NOTES:
A) Use pipe dope or teflon tape on all black iron pipe fittings. Do not apply sealant on
first two threads of a fitting.
B) Do not
put sealant on any male end of flare fittings.
C) Check all joints for gas leaks. - see page 6 for instructions.
Connecting Side Burners
Loading ...
Loading ...
Loading ...