A Division of Snow Joe
®
, LLC
OPERATOR’S MANUAL
Model SPX-SRL9-RM Form No. SJ-SPX-SRL9-RM-880E-M-V1
R
PRESSURE WASHER SKY LANCE
9 FT UNIVERSAL | 120° GUTTER ADAPTER |30° ANGLED ADAPTER
© 2021 by Snow Joe
®
, LLC
All rights reserved. Original instructions.
SAVE THESE INSTRUCTIONS
A Division of Snow Joe
®
, LLC
OPERATOR’S MANUAL
Model SPX-SRL9-RM Form No. SJ-SPX-SRL9-RM-880E-M-V1
R
PRESSURE WASHER SKY LANCE
9 FT UNIVERSAL | 120° GUTTER ADAPTER |30° ANGLED ADAPTER
© 2021 by Snow Joe
®
, LLC
All rights reserved. Original instructions.
SAVE THESE INSTRUCTIONS
1
IMPORTANT!
Safety Instructions
All Users Must Read These
Instructions Before Use
To reduce the risk of injury, the user must read and understand
this operator’s manual as well as the operator’s manual for
their pressure washer before using this product. Failure to
follow all warnings and precautions may result in death,
serious personal injury, or property damage.
1. A nozzle tip must be used with this pressure washer
sky lance. You may use the one included or any other
standard pressure washer tip.
2. Keep at least 50 feet away from power lines. Do not touch
or aim spray at electrical wiring of any kind.
3. Do not operate the sky lance, change nozzles or
accessories while spraying or while the wand is under
pressure. Turn o the pressure washer, shut o the water
supply, point the nozzle in a safe direction, and pull the
trigger to release water pressure before making any
changes.
4. Do not use the sky lance while on a ladder or scaolding.
5. When using the sky lance, make sure the high pressure
hose is located so that it will not be stepped on, tripped
over, or otherwise subjected to damage or stress. Keep
the hose clear of the working area.
6. Do not exceed the maximum pressure, volume, or
temperature listed in the product specications.
7. Do not remove or alter any warning labels included on the
sky lance.
8. Before operation, make sure the working area is clear of
obstructions or hazards.
9. Maintain proper balance and control of the sky lance at all
times.
10. To minimize the risk of kickback, grip the sky lance rmly
with both hands. A rm grip together with a sti arm will
help you maintain control of the sky lance if kickback
occurs.
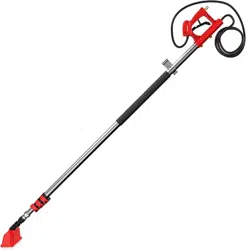
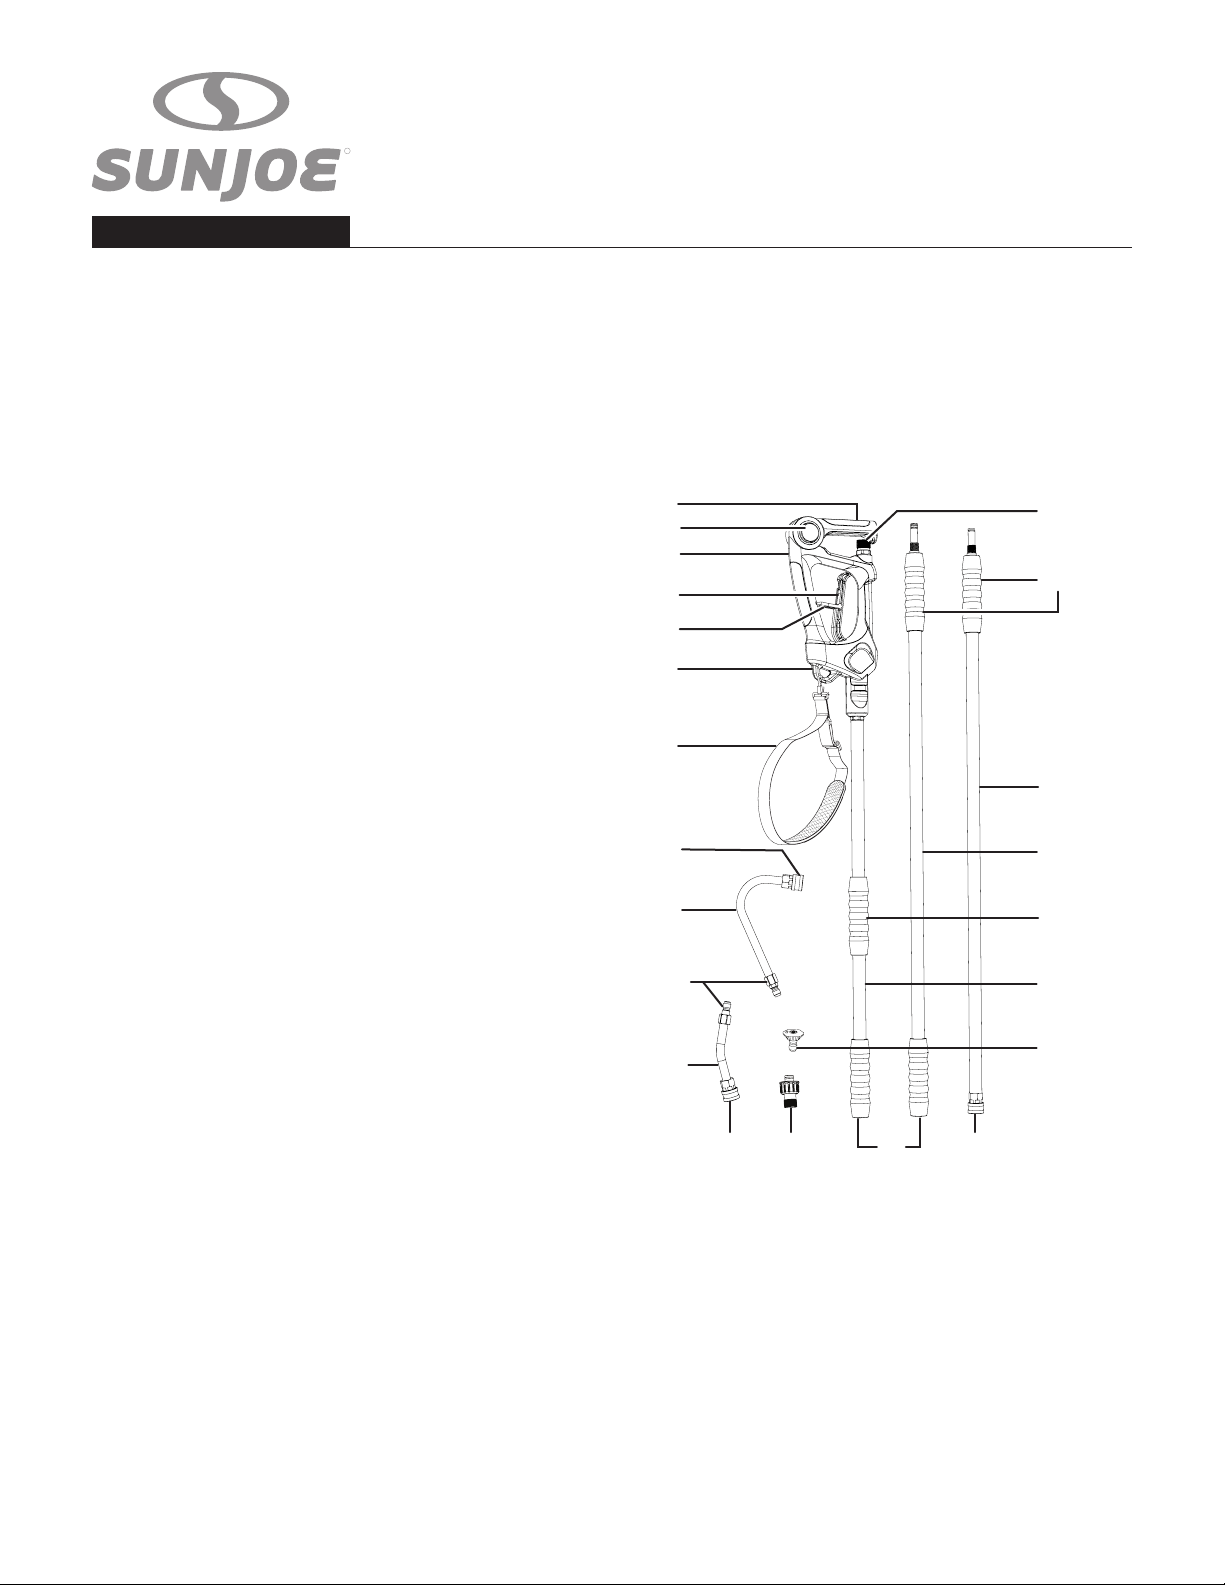
Know Your Sky Lance
Read the owner’s manual and safety rules carefully before
operating the sky lance. Compare the illustration below to
the unit in order to familiarize yourself with the location of the
various controls and adjustments. Save this manual for future
reference.
1
2
3
4
5
6
7
8
9
10
11
8 12 13 8
13
15
16
17
13
18
1. Hose handle rest
2. Hose handle rest lock
button
3. Trigger gun
4. Trigger
5. Safety lock
6. Support bracket
7. Shoulder strap
8. Quick-Connect collar
9. 120° gutter adapter
10. Quick-Connect tip
11. 30° angled adapter
12. Hose adapter
13. Soft grip
14. 25° Quick-Connect
nozzle tip
15. Top extension lance
16. Middle extension lance
17. End extension lance
18. High-pressure hose
connection
14
2
Technical Data
Connections .......................... M22 15 mm Male Inlet
Quick-Connect Outlet
Threaded Accessory Port
Compatible Pressure ............. 1800 PSI – 4000 PSI
Max Water Flow ..................... 6 GPM
Max Water Temperature ........ 140°F (60°C)
Shoulder Strap Length .......... 6.2 ft (1.9 m)
Length ................................... Partially Connected: 6 ft. (1.8 m)
Fully Connected: 9 ft. (2.7 m)
Top Extension Lance ............. 35.4 in (90 cm)
Middle Extension Lance ........ 34.4 in (87.5 cm)
End Extension Lance ............. 38.4 in (97.5 cm)
Adapter .................................. M22 15 mm connection to
M22 14 mm connection
Net Weight ............................. 6.4 lbs (2.9 kg)
Unpacking
Carton Contents
• Trigger gun with top extension lance
• Shoulder strap
• 120° gutter adapter
• 30° angled adapter
• 25° Quick-Connect nozzle tip
• Middle extension lance
• End extension lance
• Hose adapter
• Manual + registration card
1. Carefully remove the sky lance and check to see that all of
the above items are supplied.
2. Inspect the product carefully to make sure no breakage or
damage occurred during shipping. If you nd damaged or
missing parts, DO NOT return the unit to the store. Please
call the Snow Joe
®
+ Sun Joe
®
customer service center at
1-866-SNOWJOE (1-866-766-9563).
NOTE: Do not discard the shipping carton and packaging
material until you are ready to use your new sky lance.
The packaging is made of recyclable materials. Properly
dispose of these materials in accordance with local
regulations.
IMPORTANT! The equipment and packaging material are not
toys. Do not let children play with plastic bags, foils, or small
parts. These items can be swallowed and pose a suocation
risk!
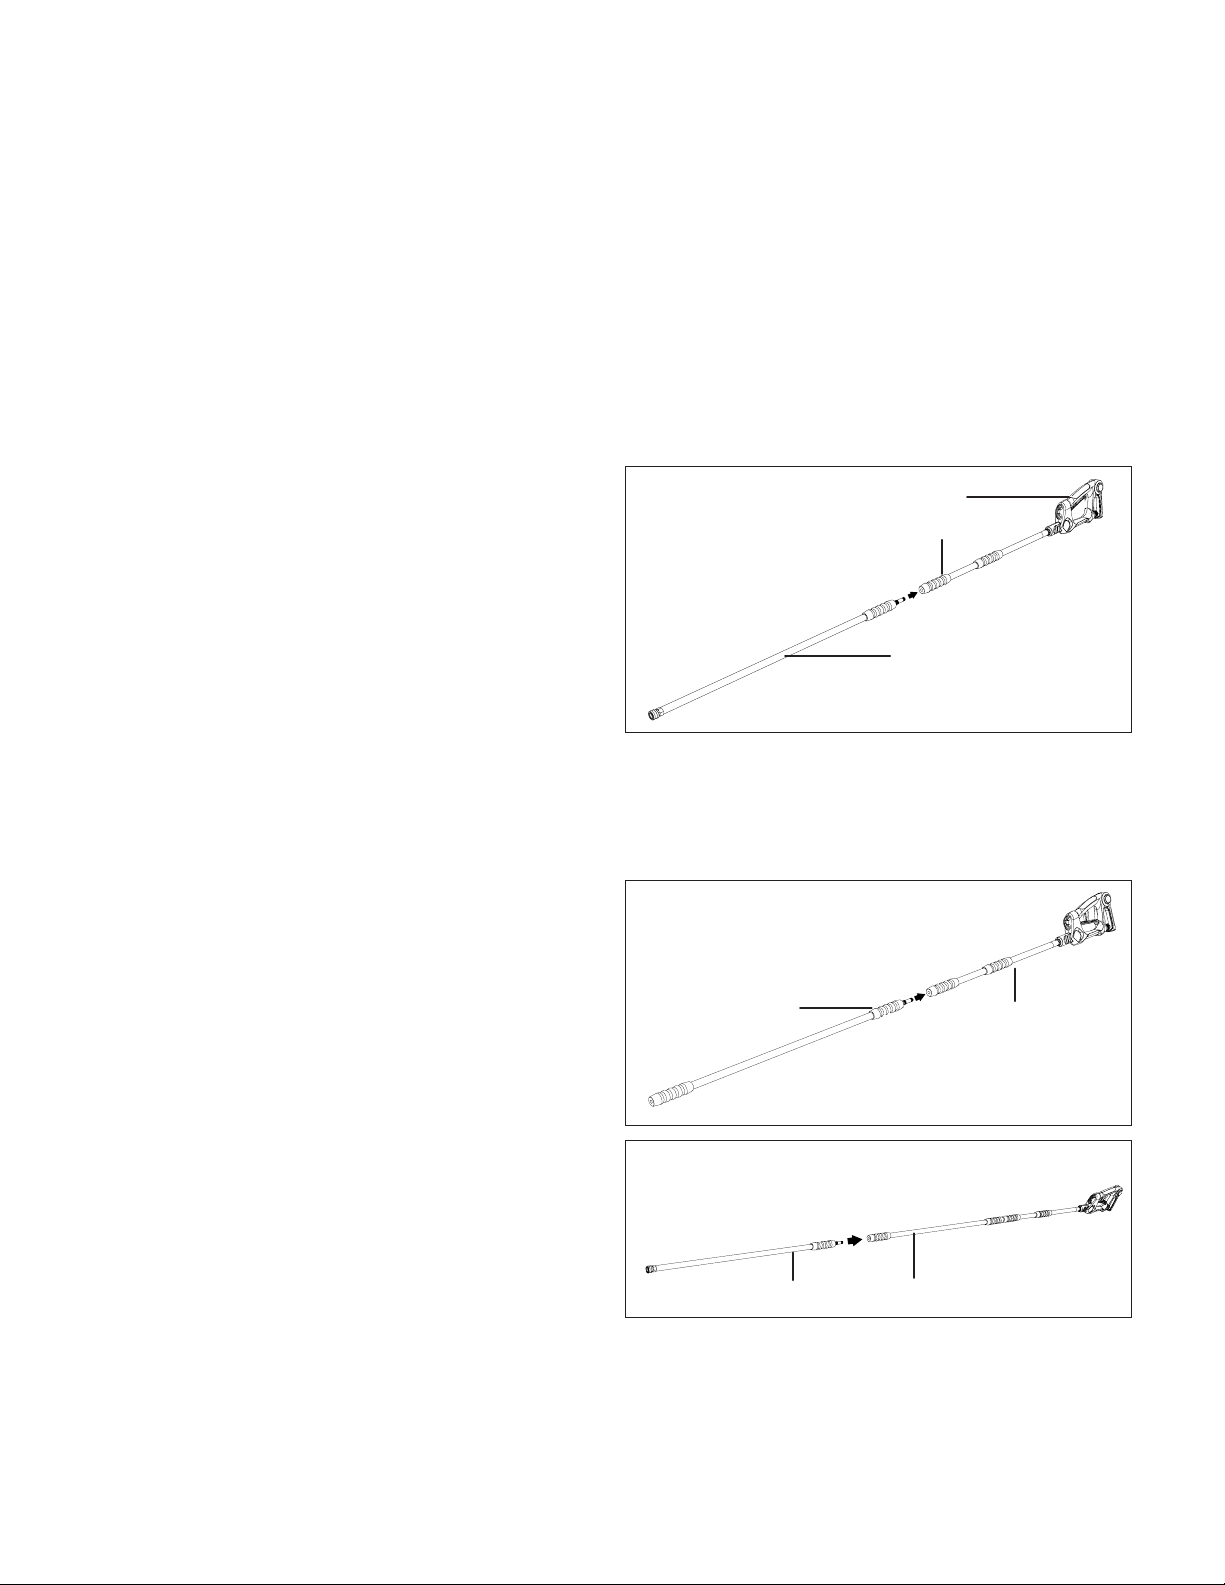
Assembly
Connect the Lance
The sky lance can be used when partially connected or fully
connected. Follow the instruction below to connect the
extension lances.
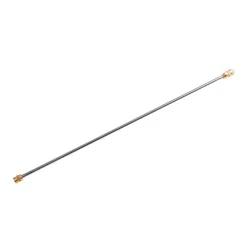
1. The sky lance can be partially connected using only the
top and the end extension lance. Insert the threaded end
of the end extension lance into the opening of the top
extension lance, and twist to secure (Fig. 1). A partially
connected sky lance will provide a total of 6 ft (1.8 m)
extension.
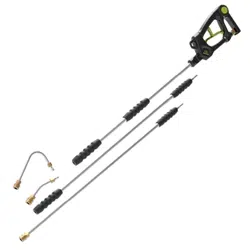
2. To fully connect the sky lance, insert the threaded end
of the middle extension lance into the opening of the top
extension lance and twist to secure (Fig. 2). Then connect
the end extension lance to the middle extension lance and
twist to secure (Fig. 3).
3. A fully connected sky lance will provide a total of 9 ft
(2.7 m) extension.
Fig. 1
Trigger gun
Top extension lance
End extension lance
Fig. 2
Top extension
lance
Middle extension
lance
Fig. 3
End extension lance Middle extension lance
3
mWARNING! Connect the lance only as much as
necessary for the cleaning job. Remain in full control of the
telescoping pole at all times. Loss of control of the sky lance
could result in possible serious personal injury.
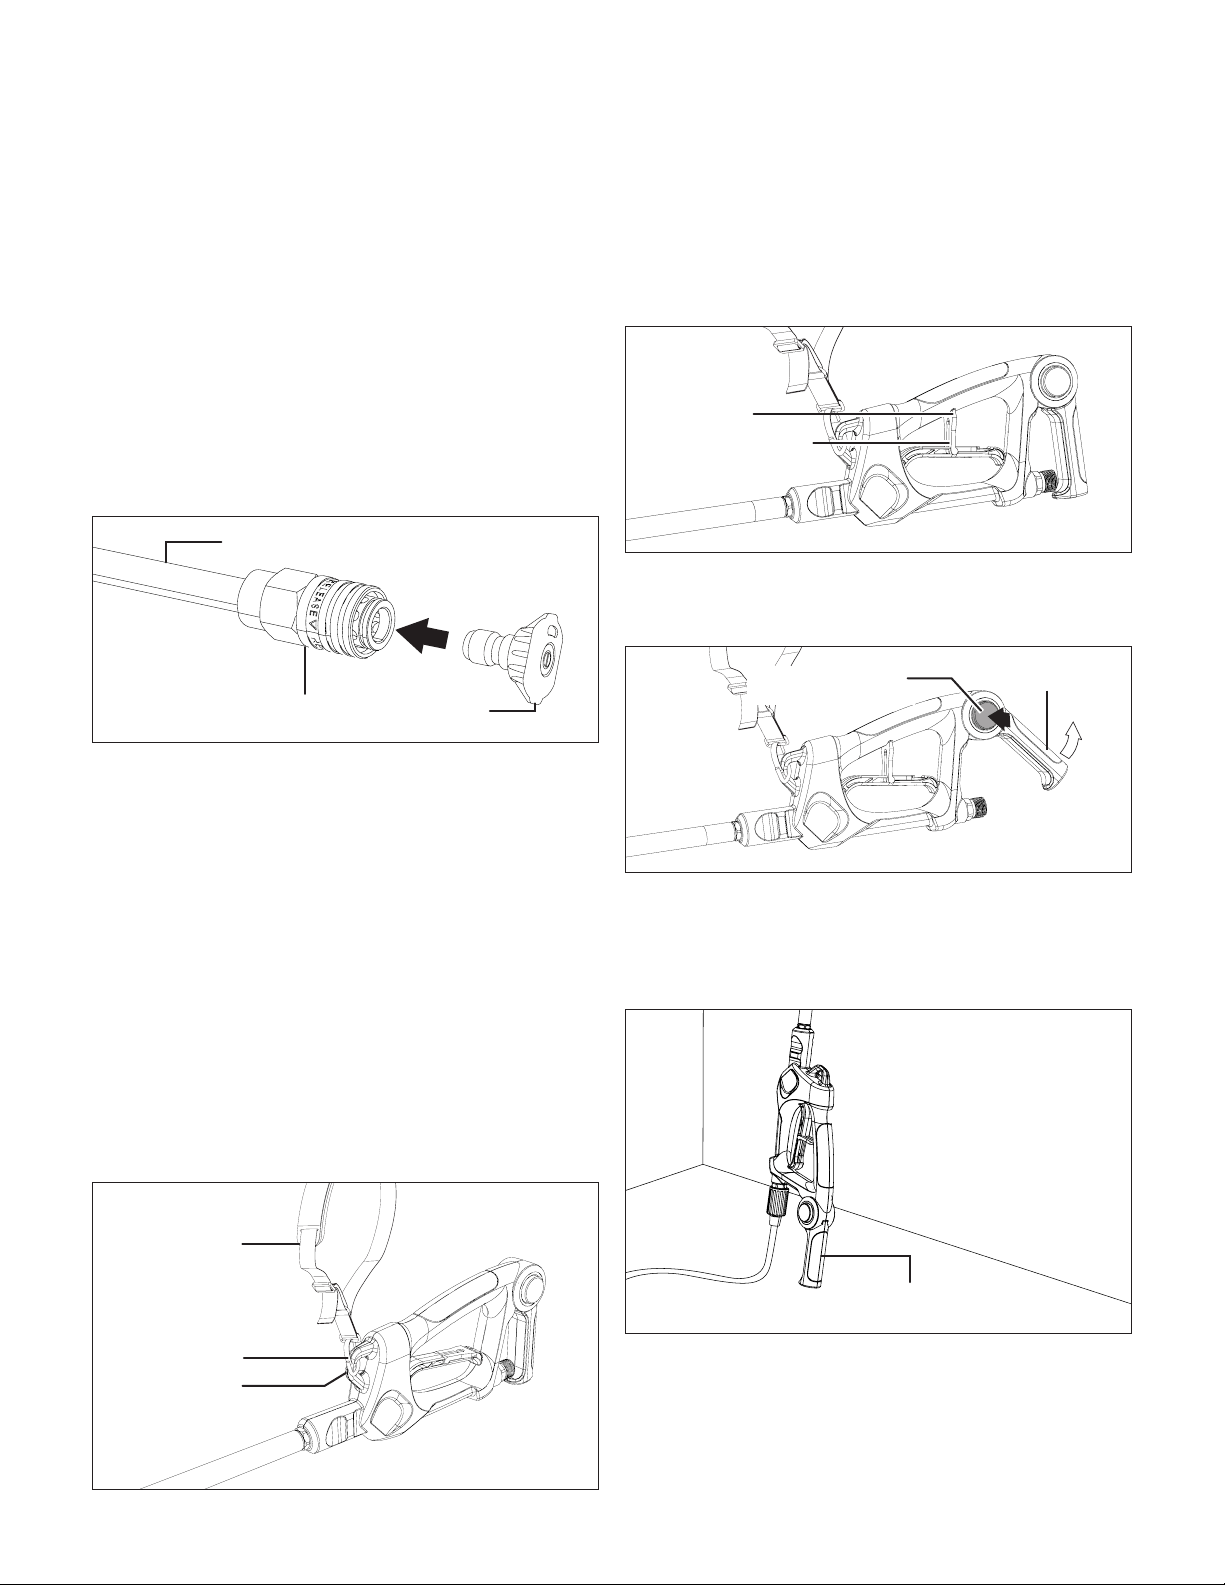
Connect the Nozzles/Adapters
NOTE: We've included one Quick-Connect nozzle to get you
started but use any of your favorite Quick-Connect nozzle tips.
The end extension lance is featured with a standard Quick-
Connect collar that can be connected with nozzles and
adapters. Follow the instructions below to use compatible
nozzles or adapters.
Snap the desired nozzle onto the Quick-Connect collar until it
clicks into place (Fig. 4).
mWARNING! Do not make changes to the nozzle while
the trigger is engaged. Doing so could result in damage to the
pressure washer or injury to the user.
The Quick-Connect collar can only be connected with nozzles
or adapters that are also equipped with the standard Quick-
Connect Tip, such as Sun Joe
®
Quick-Connect Spray Tip Set
(SPX3000-TPS). Visit sunjoe.com or contact the Snow Joe
®
+
Sun Joe
®
customer service center at 1-866-SNOWJOE
(1-866-766-9563) to purchase this spray tip set.
Attach the Shoulder Strap
The sky lance comes with an adjustable shoulder strap.
The shoulder strap should be installed and adjusted to a
comfortable position before operating.
1. To attach the shoulder strap, attach the buckle of the
shoulder strap to the support bracket as shown (Fig. 5).
2. To tighten the shoulder strap, pull down on the loose end
of the strap .
Connect with Pressure Washer
1. Shut o the pressure washer and the water supply.
2. Engage the safety lock on the trigger gun by pushing up
on the safety lock until it clicks into the slot (Fig. 6).
3. Press the hose handle rest lock button, and rotate the
hose handle rest to expose the high-pressure hose
connection (Fig. 7).
NOTE: The hose handle rest is used to protect the hose
and the connection when the sky lance is not in use.
When leaning the sky lance against a wall during breaks,
stand the sky lance on the hose handle rest so the hose
will not become bent (Fig. 8).
4. Connect a M22 15 mm pressure hose to the high-pressure
hose connection, thread to secure (Fig. 9).
Fig. 4
Nozzle Tip
“Click”
Quick-Connect collar
End extension lance
Fig. 5
Buckle
Shoulder strap
Support bracket
Fig. 6
Safety lock
Slot
Fig. 7
Hose handle rest
lock button
Hose handle rest
Fig. 8
Hose handle rest

NOTE: To connect with a M22 14 mm pressure hose, rst
attach the included hose adapter to the high-pressure
hose connection, then thread the pressure hose on the
adapter, as shown (Fig. 10).
5. Connect the other end of the pressure hose to the water
outlet of the pressure washer. Turn on the water supply
and start the pressure washer.
Operation
mWARNING! To reduce the risk of electrocution, possible
serious personal injury or property damage, spray the pressure
stream in a safe direction away from all electrical devices
and bystanders. Ensure proper connection of all accessories
before starting any cleaning project. Ensure compatibility and
proper t before using this sky lance. Wear eye protection with
side shields. Risk of uid injections; do not point at people,
pets, electrical devices or the unit itself. Turn o the pressure
washer before changing or adjusting accessories. For cold
water use only. For outdoor use only – store indoors. Save
these instructions. Refer to them frequently and use them to
instruct other users. If you loan someone this tool, loan them
these instructions also.
mWARNING! The sky lance will ex as pressure is added
or lost. Fully understand how the pole moves when adding or
lessening pressure before attempting a cleaning project. If you
are not completely comfortable with the movement of the pole
under changing pressure conditions, do not use this product.
Loss of control of the sky lance could result in possible serious
personal injury.
General Operation
1. The trigger gun features a safety lock to prevent
unintentional use. To lock, push up the safety lock until it
clicks into place. To unlock, release the safety lock so it
lies in its original position on the trigger (Fig. 11).
NOTE: Always engage the safety lock before moving or
adjusting the sky lance.
2. Before working on the cleaning project, test the sky lance
in an area away from the project. Get a feeling of how
the lance will move when the trigger is squeezed. Before
starting, make sure the safety lock is down and in its
original position (Fig. 11), hold the sky lance on the trigger
gun and one soft grip, squeeze the trigger to start
(Fig. 12).
NOTE: The gun will kick back when the trigger is
squeezed and released. Before starting/releasing the
trigger, move the nozzle about 10 feet away from the
cleaning surface and stand stably.
3. Move to the project area, raise the pole and aim toward
the area to be cleaned. Squeeze the trigger to begin
spraying.
Fig. 9
High-pressure
hose connection
High-pressure hose
Fig. 10
Hose adapter
High-pressure hose
High-pressure hose connection
Fig. 11
Slot
Trigger
Safety lock
Fig. 12
Squeeze the trigger
Soft grip
4
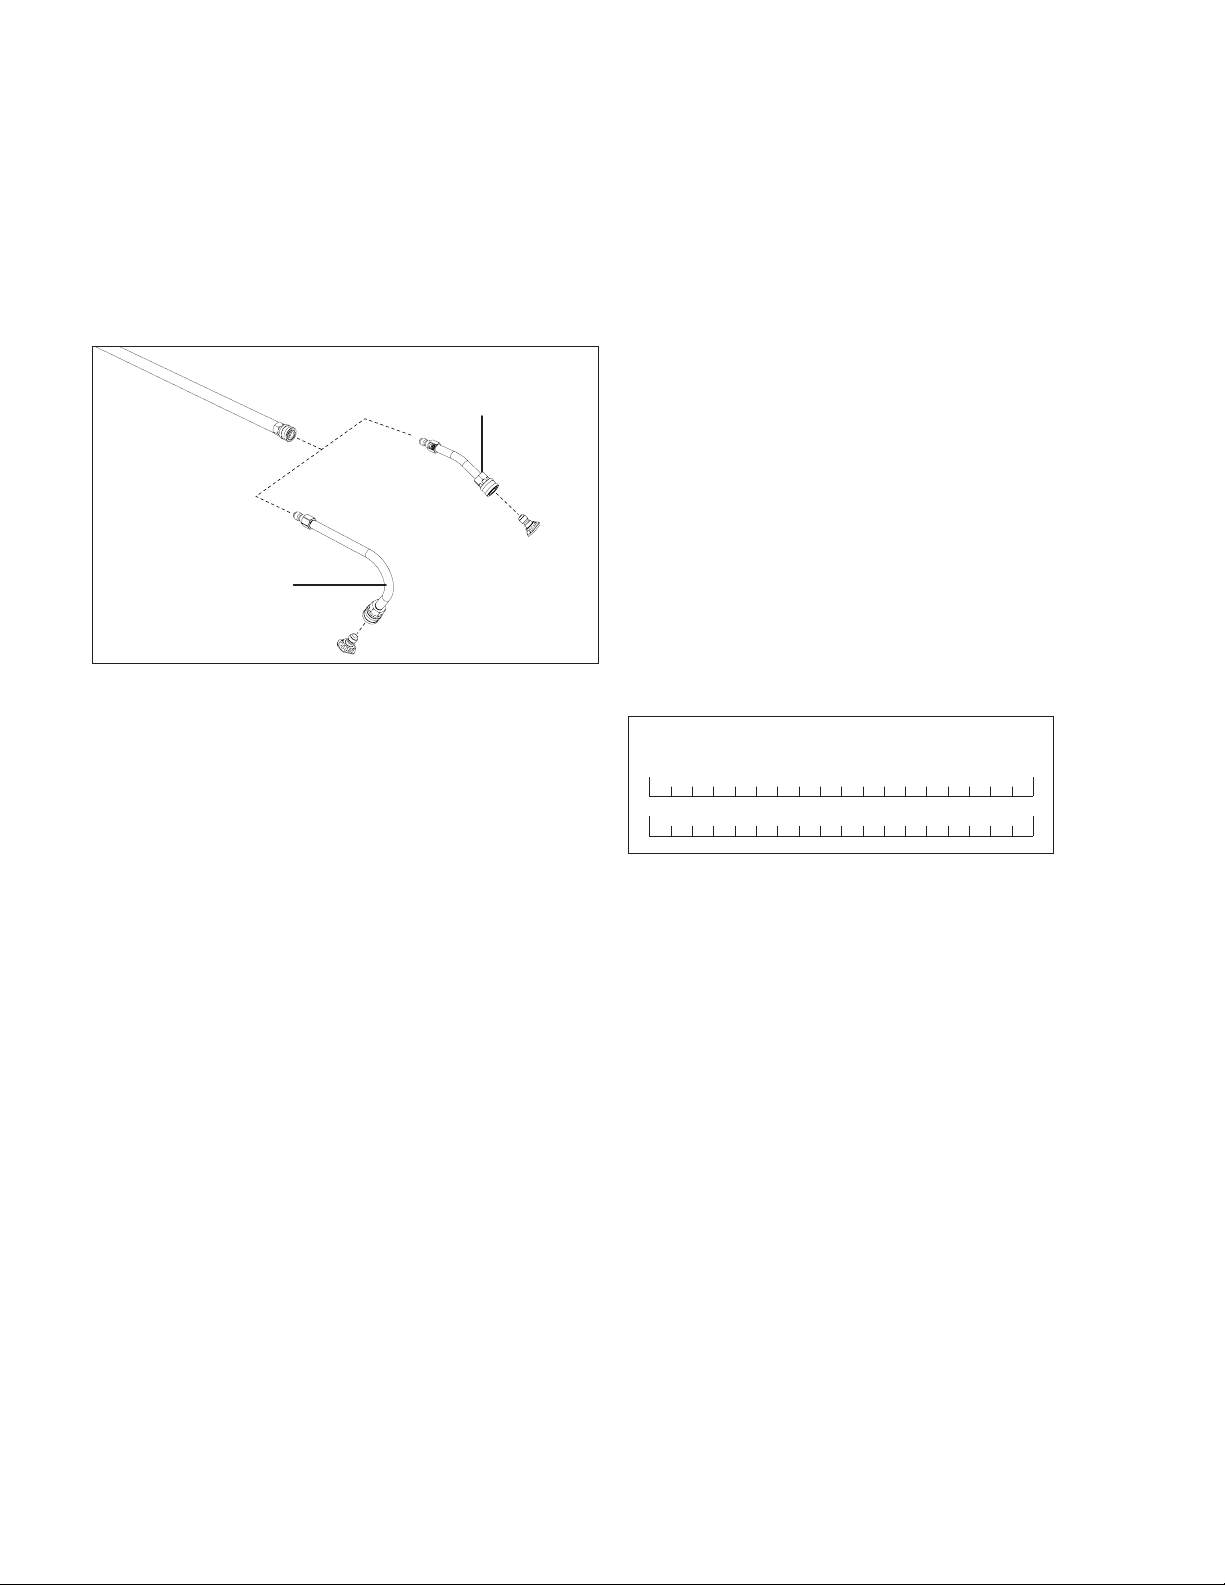
Using the Attachments
The sky lance comes with two additional spray attachments:
a 30° angled adapter and a 120° gutter adapter that can
aim at hard-to-reach areas. Both attachments are featured
with quick-connect tips that can be snapped directly on the
Quick-Connect collar on the end extension lance. Follow the
illustration below to assemble the attachments (Fig. 13).
NOTE: Other accessories are commercially available that can
be used with this sky lance by tting on the Quick-Connect
collar. Follow all manufacturer’s instructions for the accessory
being installed to assemble and use.
To order accessories for the Sun Joe
®
SPX-SRL9-RM pressure
washer sky lance, please visit sunjoe.com or contact the
Snow Joe
®
+ Sun Joe
®
customer service center at
1-866-SNOWJOE (1-866-766-9563).
Shutting Down
1. Turn o the pressure washer and disconnect it from power
supply.
2. Turn o the water source.
3. Hold the trigger to release water pressure.
4. Disconnect the garden hose from the water inlet on the
unit.
5. Disconnect the high-pressure hose connection on the
trigger gun handle.
6. Release the trigger and engage the safety lock.
mWARNING! Turn o the water supply and squeeze the
trigger to depressurize the unit. Failure to do so could result in
personal injury due to discharge of high-pressure water.
Storage
• Examine the sky lance thoroughly for worn, loose or
damaged parts. Should you need to repair or replace a
part, contact an authorized Snow Joe
®
+ Sun Joe
®
dealer
or call the Snow Joe
®
+ Sun Joe
®
customer service center
at 1-866-SNOWJOE (1-866-766-9563) for assistance.
• Store the sky lance indoors in a clean, dry and locked
location that cannot be reached by children.
Service + Support
If your Sun Joe
®
SPX-SRL9-RM pressure washer sky lance
requires service or maintenance, please call the Snow Joe
®
+
Sun Joe
®
customer service center at 1-866-SNOWJOE
(1-866-766-9563).
Model + Serial Numbers
When contacting the company, reordering parts, or arranging
service from an authorized dealer, you will need to provide the
model and serial numbers, which can be found on the decal
located on the housing of the unit. Copy these numbers into
the space provided below.
S P X - S R L 9 - R M
Record the following numbers from the housing or handle of your
new product:
Model #:
Serial #:
Fig. 13
30° angled adapter
120° gutter adapter
5
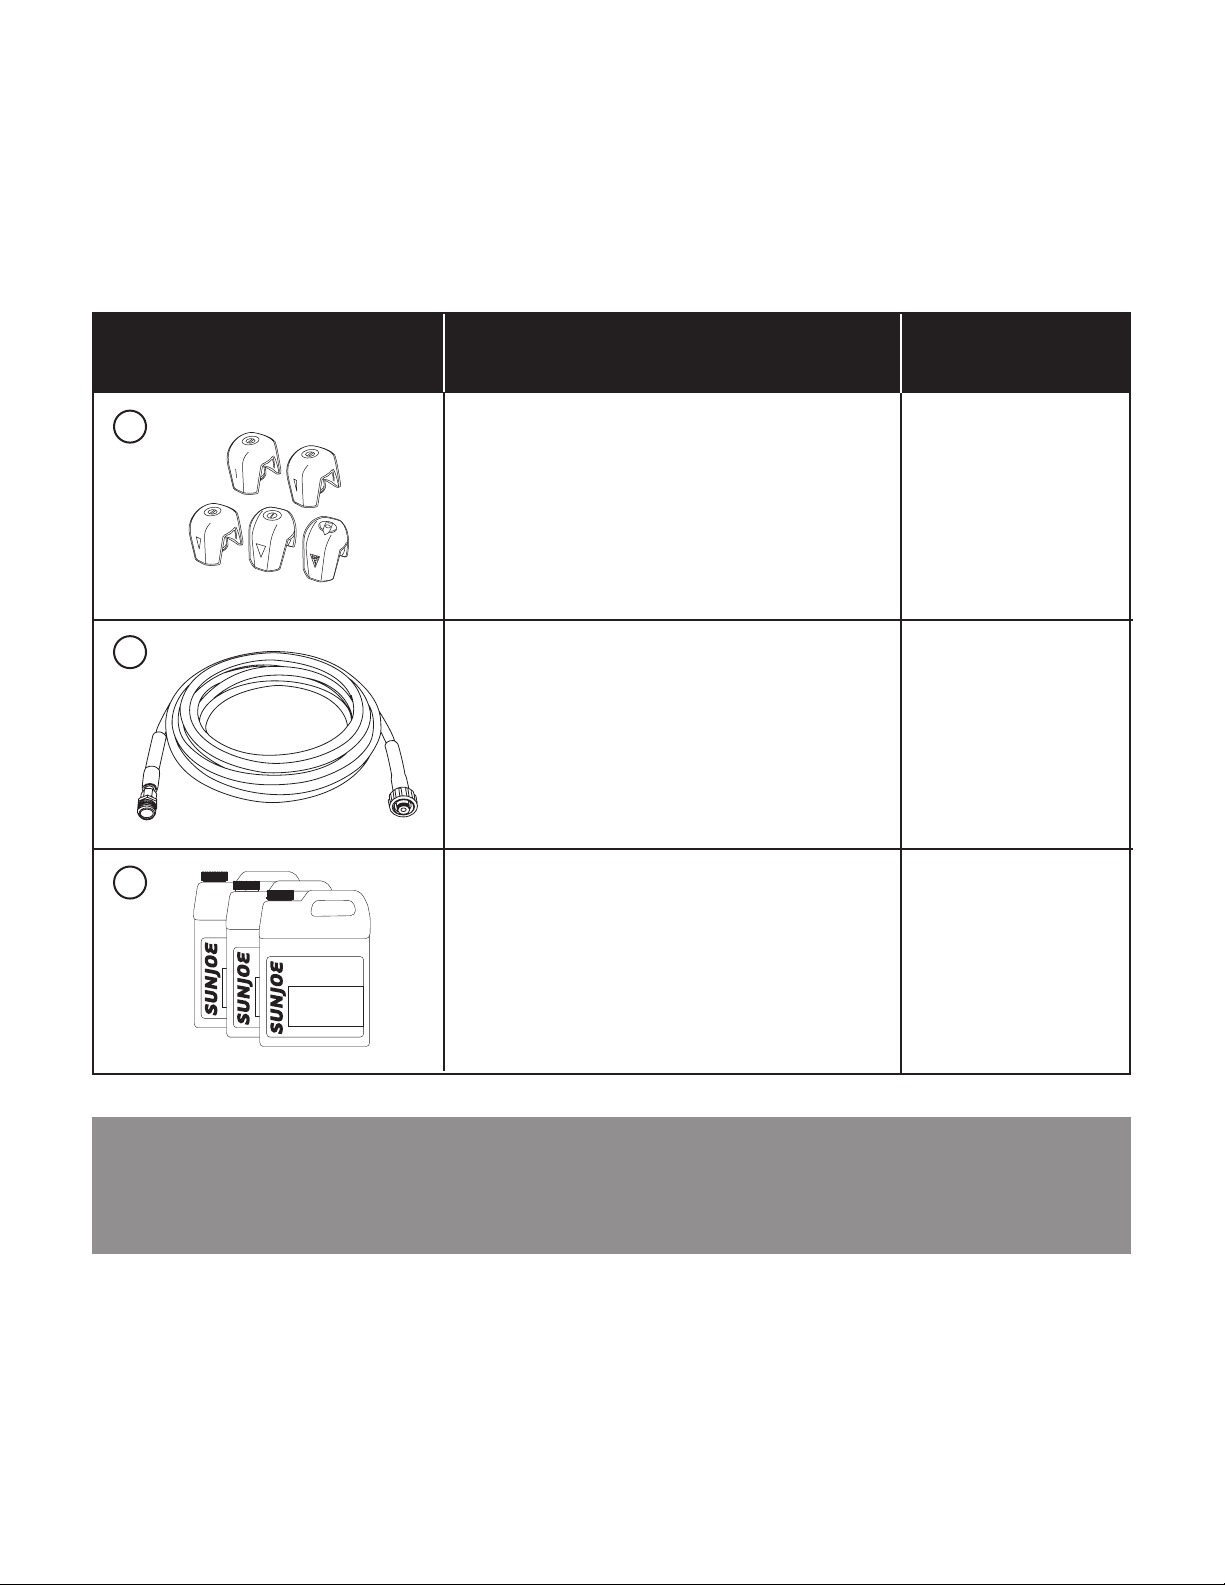
Optional Accessories
mWARNING! ALWAYS use only authorized Snow Joe
®
+ Sun Joe
®
replacement parts and accessories. NEVER use
replacement parts or accessories that are not intended for use with this pressure washer sky lance. Contact Snow Joe
®
+
Sun Joe
®
if you are unsure whether it is safe to use a particular replacement part or accessory with your pressure washer sky
lance. The use of any other attachment or accessory can be dangerous and could cause injury or mechanical damage.
Spray Tip Set
(Fits all SPX3000 + SPX6000 + SPX9000
and most SPX4000 series pressure washers)
25 ft Medium-Duty
High Pressure Extension Hose
(For SPX Pressure Washer Series)
SPX3000-TPS
SPX-25H
ModelAccessories Item
1
2
3
1155ºº
SOSO
AA
PP
2255ºº
4400ºº
00ºº
SPX-HDC1G
SPX-FCS1G
SPX-APC1G
Sun Joe
®
House + Deck All-Purpose Pressure
Washer Rated Concentrated Cleaner
Sun Joe
®
Premium Snow Foam Pressure Washer
Rated Car Wash + Cleaner
Sun Joe
®
All-Purpose Heavy Duty Pressure
Washer Rated Cleaner + Degreaser
NOTE: Accessories are subject to change without any obligation on the part of Snow Joe
®
+ Sun Joe
®
to provide notice of such
changes. Accessories can be ordered online at sunjoe.com or via phone by contacting the Snow Joe
®
+ Sun Joe
®
customer
service center at 1-866-SNOWJOE (1-866-766-9563).
Sun Joe’s complete line of premium pressure washer accessories and attachments
make it easy to get your dirty work done, and also help you get the most out of your model!
SHOP ONLINE now at sunjoe.com
6

7
SNOW JOE
®
+ SUN JOE
®
REFURBISHED GOODS WARRANTY
GENERAL CONDITIONS:
Snow Joe
®
+ Sun Joe
®
operating under Snow Joe
®
, LLC warrants
this refurbished product to the original purchaser for 90 days
against defects in material or workmanship when used for normal
residential purposes. If a replacement part or product is needed,
it will be sent free of charge to the original purchaser except as
noted below.
The duration of this warranty applies only if the product is put to
personal use around the household. It is the owner’s responsibility
to correctly perform all maintenance and minor adjustments
explained in the owner’s manual.
HOW TO OBTAIN YOUR REPLACEMENT PART OR PRODUCT:
To obtain a replacement part or product, please visit
snowjoe.com/help or email us at [email protected] for
instructions. Please be sure to register your unit beforehand
to speed up this process. Certain products may require a serial
number, typically found on the decal afxed to the housing
or guard of your product. All products require a valid proof
of purchase.
EXCLUSIONS:
• Wearing parts like belts, augers, chains and tines are
not covered under this warranty. Wearing parts can be
purchased at snowjoe.com or by calling 1-866-SNOWJOE
(1-866-766-9563).
• Batteries are covered in full for 90-days from the date of
purchase.
Snow Joe
®
+ Sun Joe
®
may from time to time change the design of
its products. Nothing contained in this warranty shall be construed
as obligating Snow Joe
®
+ Sun Joe
®
to incorporate such design
changes into previously manufactured products, nor shall such
changes be construed as an admission that previous designs
were defective.
This warranty is intended to cover product defects only.
Snow Joe
®
, LLC is not liable for indirect, incidental or
consequential damages in connection with the use or misuse of
the Snow Joe
®
+ Sun Joe
®
products covered by this warranty.
This warranty does not cover any cost or expense incurred
by the purchaser in providing substitute equipment or service
during reasonable periods of malfunction or non-use of this product
while waiting for a replacement part or unit under this warranty.
Some states do not allow exclusions of incidental or consequential
damages so the above exclusions may not apply in all states. This
warranty may give you specic legal rights in your state.
HOW TO REACH US:
We’re here to help Monday through Friday from 9AM to 7PM EST
and Saturday and Sunday 9AM to 4PM. You can reach us at
1-866-SNOWJOE (1 866-766-9563), online at snowjoe/com, via
email at [email protected] or tweet us @snowjoe.
EXPORTS:
Customers who have purchased Snow Joe
®
+ Sun Joe
®
products exported from the United States and Canada should
contact their Snow Joe
®
+ Sun Joe
®
distributor (dealer) to obtain
information applicable to your country, province or state. If for
any reason, you are not satised with the distributor’s service,
or if you have difculty obtaining warranty information, contact
your Snow Joe
®
+ Sun Joe
®
seller. If in the event your efforts are
unsatisfactory, please reach out to us directly.

8
9

10

sunjoe.com