
Loading ...
Loading ...
Loading ...
8
Cleaning/Maintenance
Disconnect the extension cord before performing any
maintenance task. If the extension cord is plugged into the
unit, someone could accidentally operate it while you are
performing maintenance on it, resulting in serious personal
injury.
mWARNING! Never hose the appliance down with
water. Never use aggressive cleaning agents or solvents.
These substances can damage the appliance.
General Cleaning
Clean the equipment routinely after each use:
• Take the unit outside to clean it to avoid creating a mess
indoors.
• Remove the container lid and empty the metal container.
Clean the metal container with water and allow it to dry
completely.
• Clean the wire lter basket and the pleated lter as
described below.
Cleaning the Wire Filter Basket and
Pleated Filter
NOTE: Replace the pleated lter if it is worn, damaged or
heavily soiled. Visit snowjoe.com to purchase replacement
lters.
1. Take o the container cover.
2. Remove the wire lter basket by turning it
counterclockwise. Tap out the basket to remove any
accumulated residue (Fig. 9).
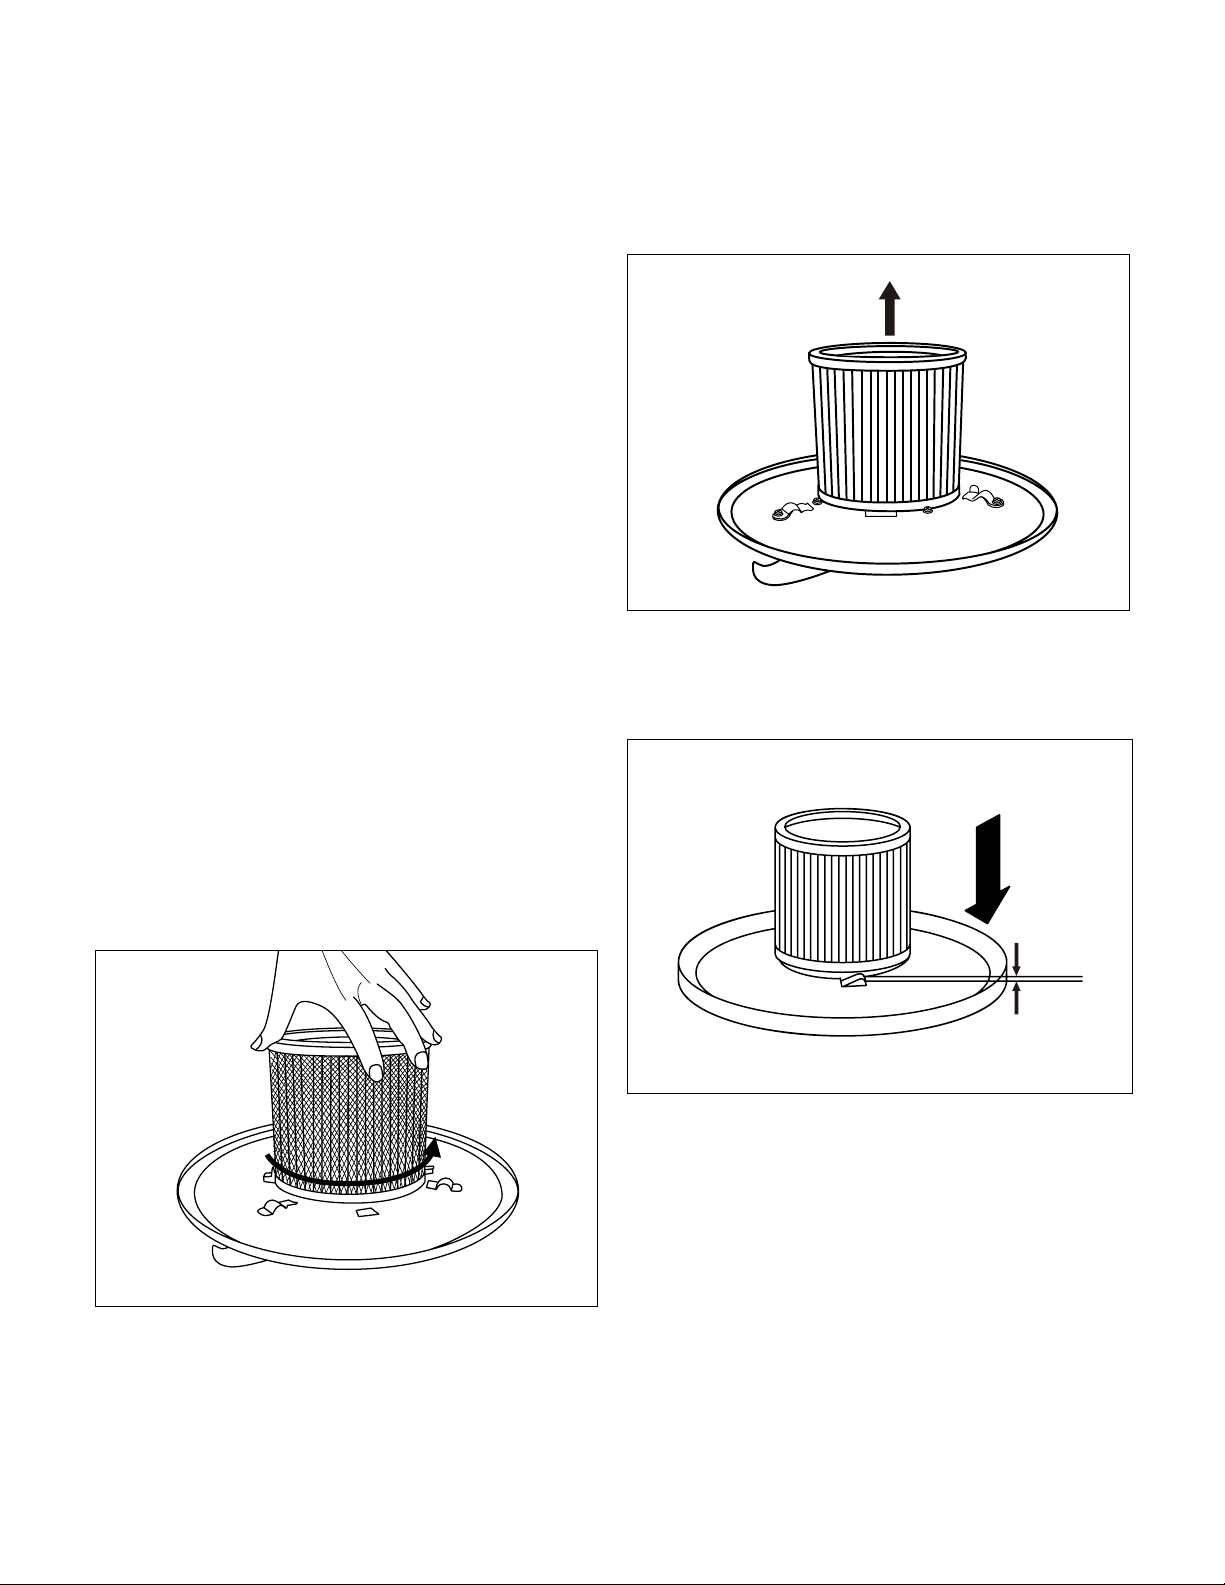
3. Take out the pleated lter and tap it clean. Remove any
debris with a clean and dry paintbrush or hand brush
(Fig. 10).
NOTE: Do not wash the pleated lter in water.
4. Replace the pleated lter on the motor and lter housing
located on the underside of the container lid (Fig. 11).
Check that the rubber rim of the pleated lter is seated
ush against the container lid.
5. Fit the wire lter basket over the pleated lter and turn it
clockwise until it stops. The wire lter basket tabs must
cover and depress the safety stop switch.
NOTE: Make sure the wire lter basket tabs are under the
metal retainer clips.
Cleaning the Air Filter
1. Take o the container cover, wire lter basket and
pleated lter.
2. Take the air lter out of the lter housing (Fig. 12).
Fig. 9
Fig. 10
Fig. 11
0 mm
Loading ...
Loading ...
Loading ...