Loading ...
Loading ...
Loading ...
6 7
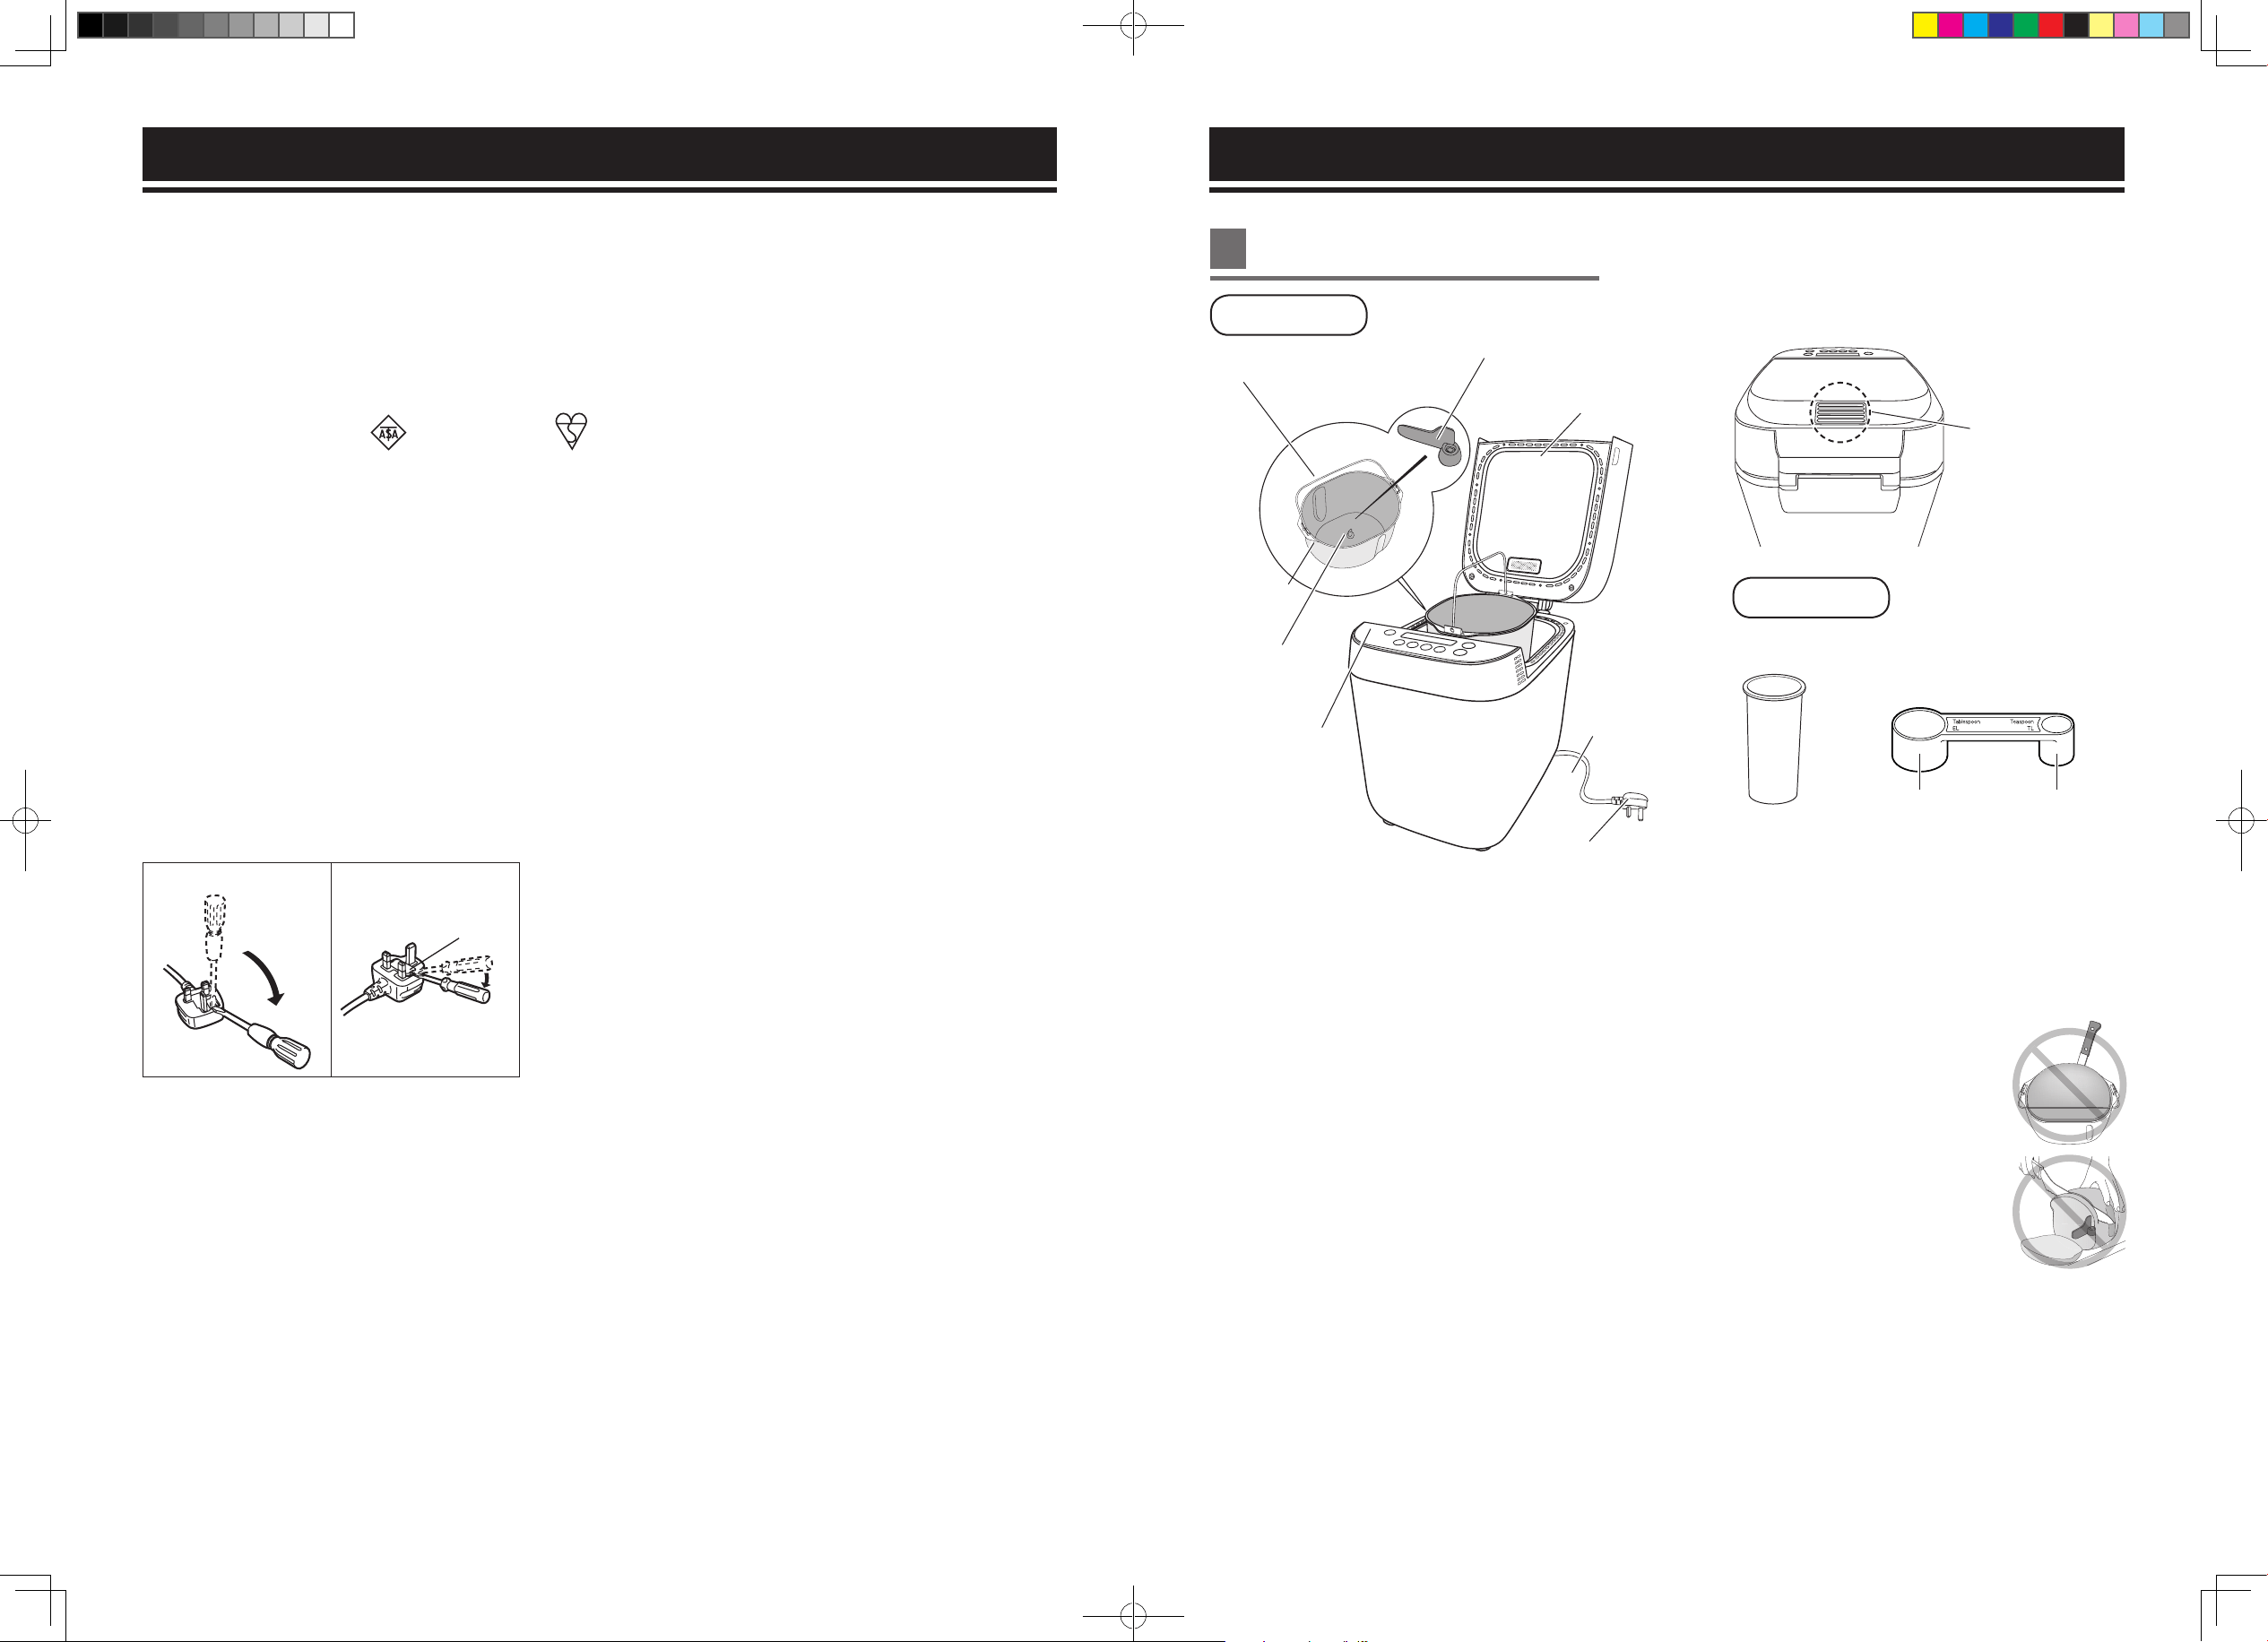
Parts Names and Instructions
Bread pan and kneading blade are coated with ceramic to avoid stains and to make bread easier to remove.
n
To avoid damaging their ceramic coating, please follow the instructions below:
●
Do not use hard or sharp utensils such as a knife or a fork when removing the bread from the bread pan or / and
removing the kneading blade from the bread or bread pan.
•
If bread sticks to bread pan and is difcult to be taken out, leave the bread pan for 5 minutes – 10 minutes to cool.
Turn the bread pan upside down using oven gloves (see P. 13). Tap holding both hands onto a clear cooking
surface covered with kitchen towel until the bread comes out.
●
The kneading blade may remain stack in the bread. If still remains, wait for the bread cool down and take it out
before slicing.
•
If the kneading blade cannot be removed from bread pan, pour warm water into the bread pan and wait 5 minutes –
10 minutes.
Still difficult to remove, turn kneading blade laterally and pull it out.
●
Use the soft sponge when cleaning the bread pan and the kneading blade.
Do not use anything abrasive such as cleansers or scouring pads.
●
Hard, coarse or large ingredients such as flours with whole or ground grains, sugar, or the addition of nuts and seeds may damage their
ceramic coating. If using large chunk of ingredient, break or cut into small pieces. Please follow the information of Additional Ingredients
(see P. 10) and the recipe quantities stated.
●
Use only supplied kneading blade for this appliance.
The bread pan, kneading blade, and bread may be very hot after baking. Always handle with care.
Steam vent
Measuring cup Measuring spoon
●
10 mL increments
(Max. 310 mL)
(15 mL) (5 mL)
Tablespoon
●
½ marking
Teaspoon
●
¼, ½, ¾
markings
Mains plug *
* The shape of mains plug may be different from illustration.
Lid
Handle
Kneading blade
Control panel
Mains lead
Main Unit
Accessories
Main Unit & Accessories
Bread pan
Kneading
mounting shaft
Electrical Requirement
FOR YOUR SAFETY PLEASE READ THE FOLLOWING TEXT CAREFULLY.
This appliance is supplied with a moulded three pin mains plug for your safety and convenience.
A 13-amp fuse is tted in this mains plug. Should the fuse need to be replaced please ensure that
the replacement fuse has a rating of 13-amp and that it is approved by ASTA or BSI to BS1362.
Check for the ASTA mark or the BSI mark on the body of the fuse.
If the plug contains a removable fuse cover, you must ensure that it is retted when the fuse is replaced.
If you lose the fuse cover, the mains plug must not be used until a replacement cover is obtained.
A replacement fuse cover can be purchased from your local Panasonic Dealer.
If the tted moulded mains plug is unsuitable for the socket outlet in your home, then the fuse should be
removed and the mains plug cut off and disposed of safely. There is a danger of severe electrical shock
if the cut off plug is inserted into any 13-amp socket.
How to replace the fuse
The location of the fuse differs according to the type of AC mains plug (figures A and B). Confirm the AC mains
plug fitted and follow the instructions below. Illustrations may differ from actual AC mains plug.
Open the fuse cover with a screwdriver and replace the fuse and close or attach the fuse cover.
Figure A Figure B
Fuse cove
r
Figure A Figure B
Fuse cover
SD-ZP2000 EN_UK_OI1.indd 6-7 18/7/2018 9:33:03
Loading ...
Loading ...
Loading ...