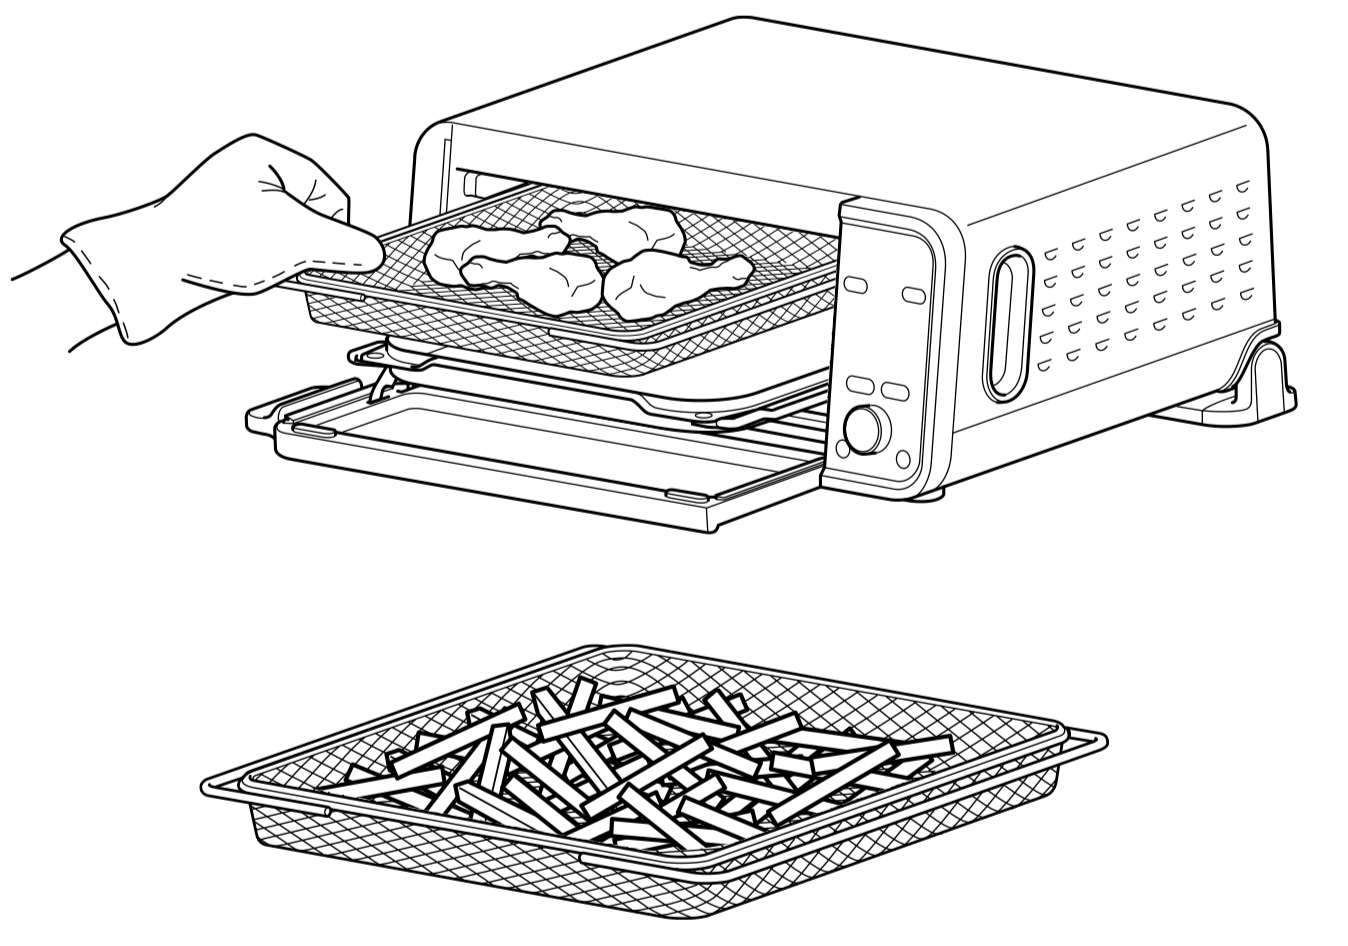
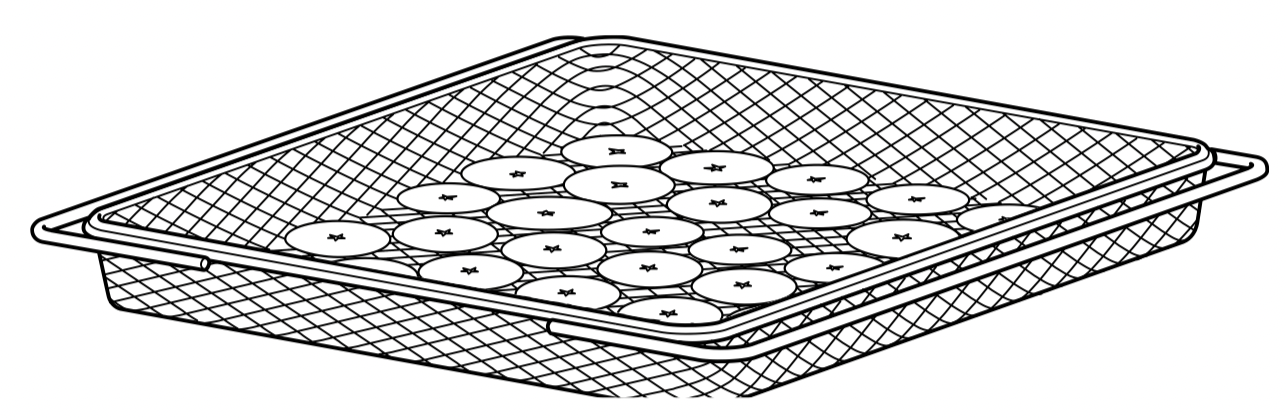
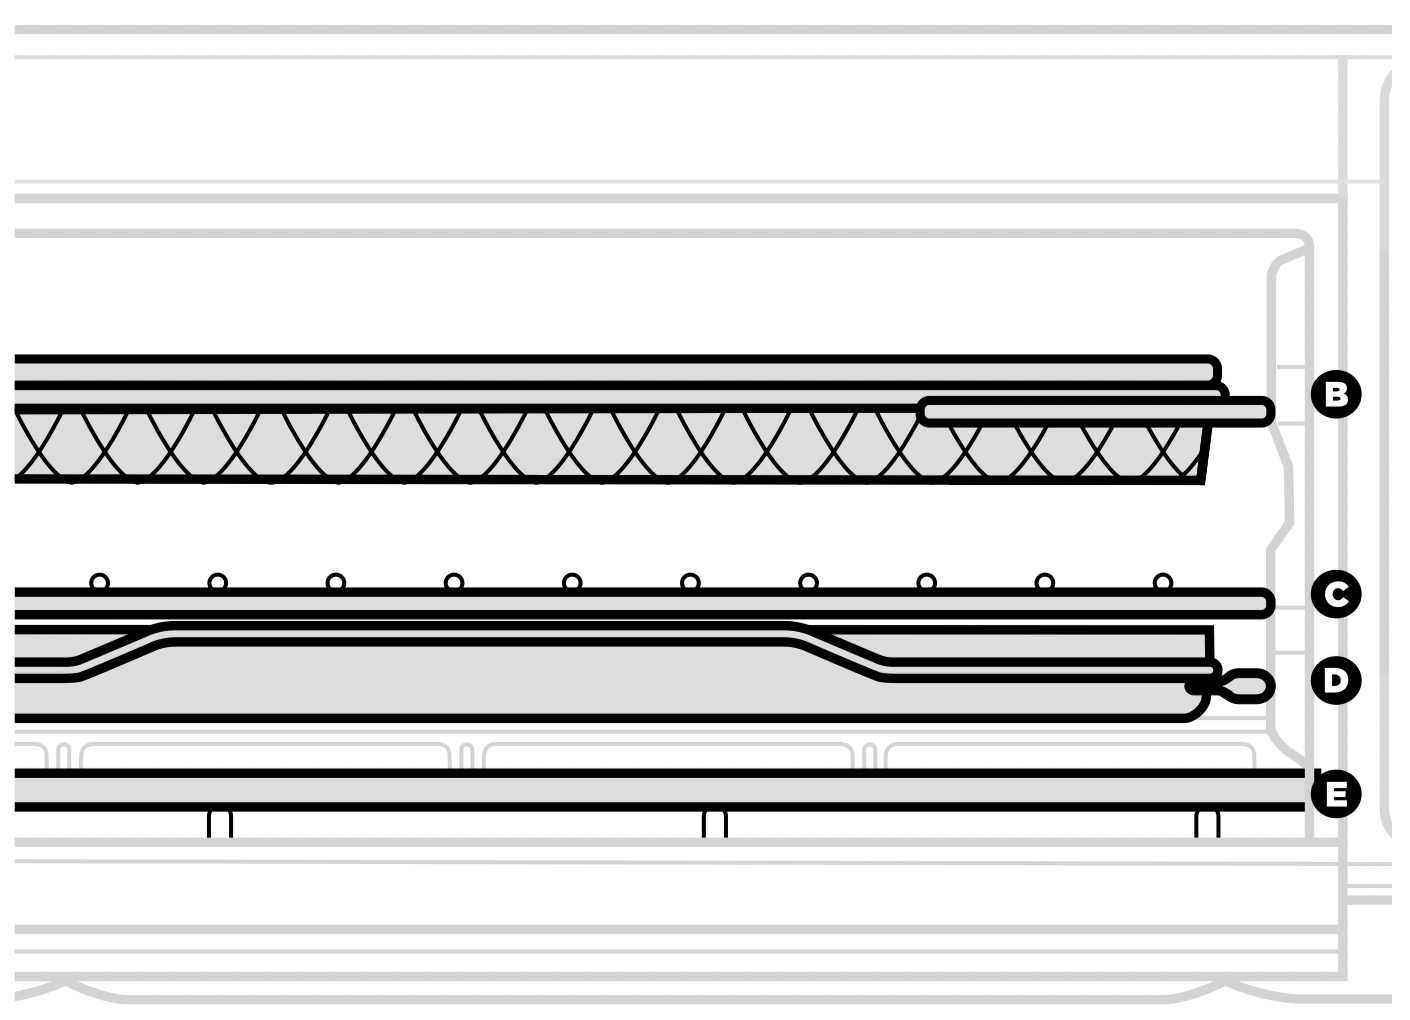
Use in the top rail position for Air Fry and Dehydrate. Slide into top rails for storage. Hand-wash recommended.
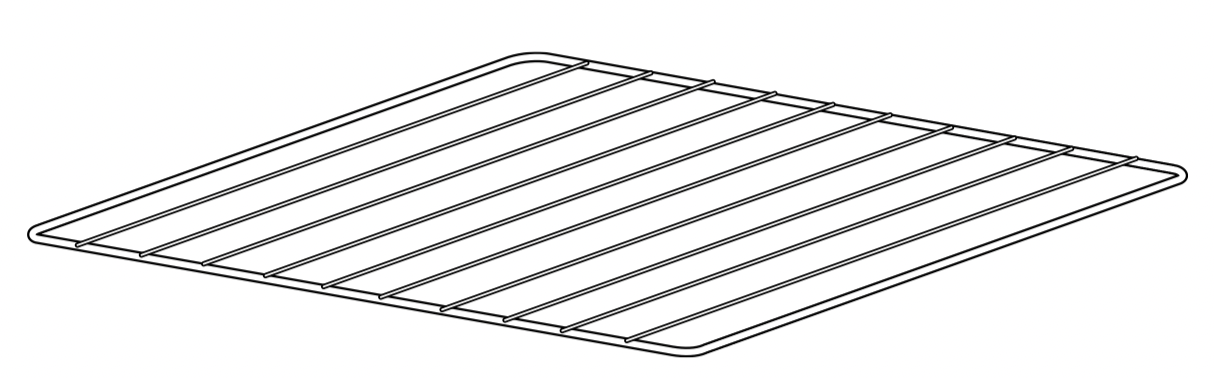
C. Wire Rack :
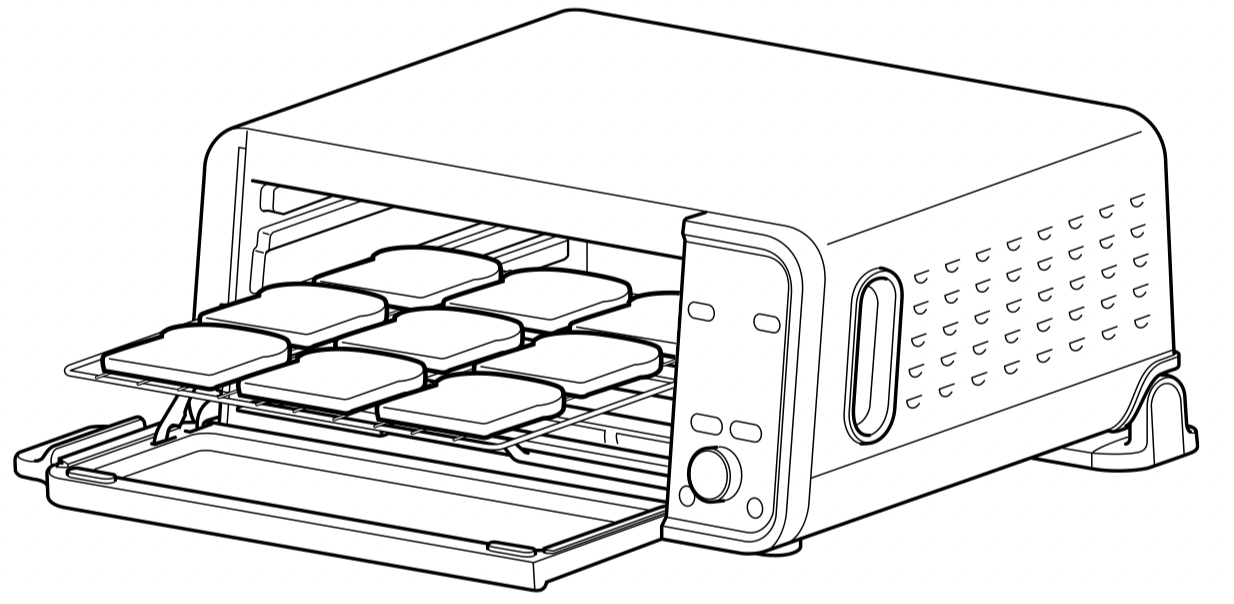
Slide into middle rails for Toast and Bagel. If using other oven accessories, slide into bottom rails for Reheat, Broil and Bake. Slide into middle rails for storage. Hand-wash recommended.
NOTE: Dehydrate and Reheat are not included with all models.
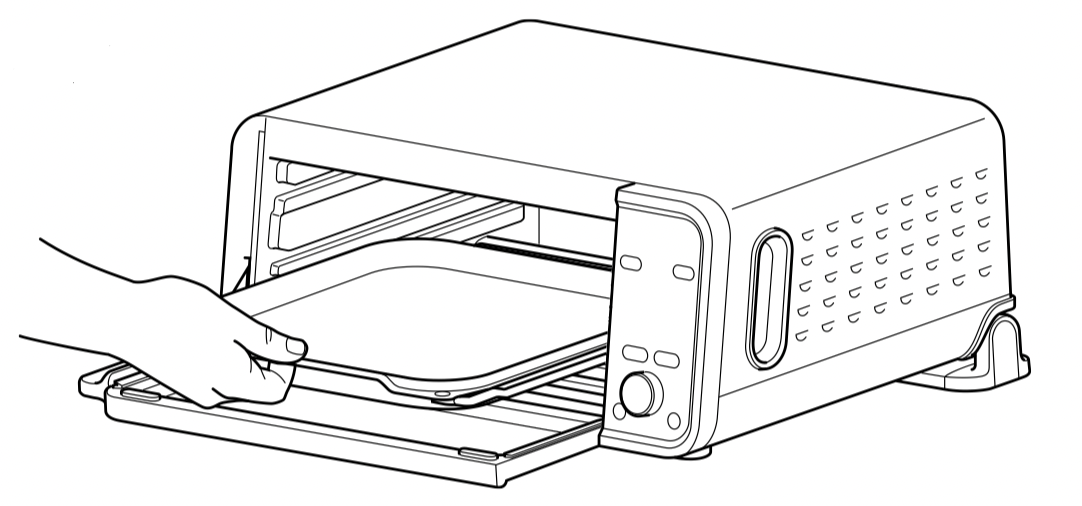
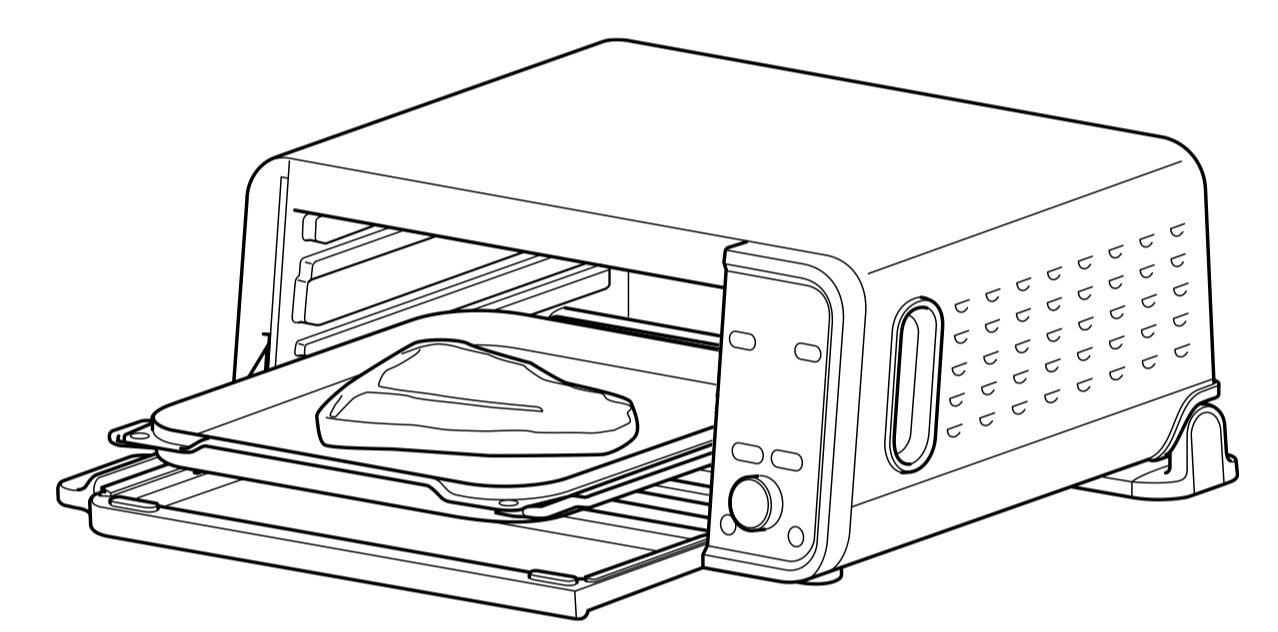
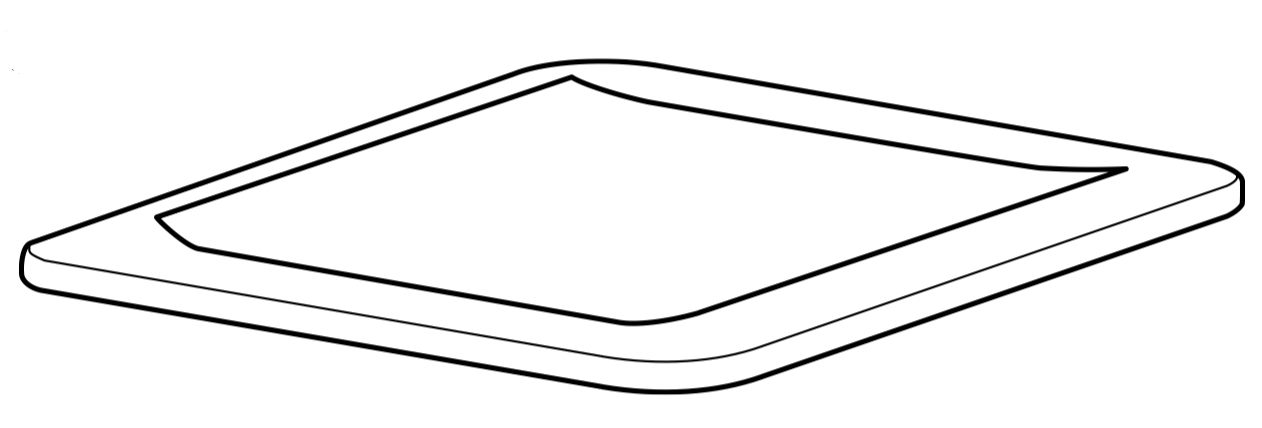
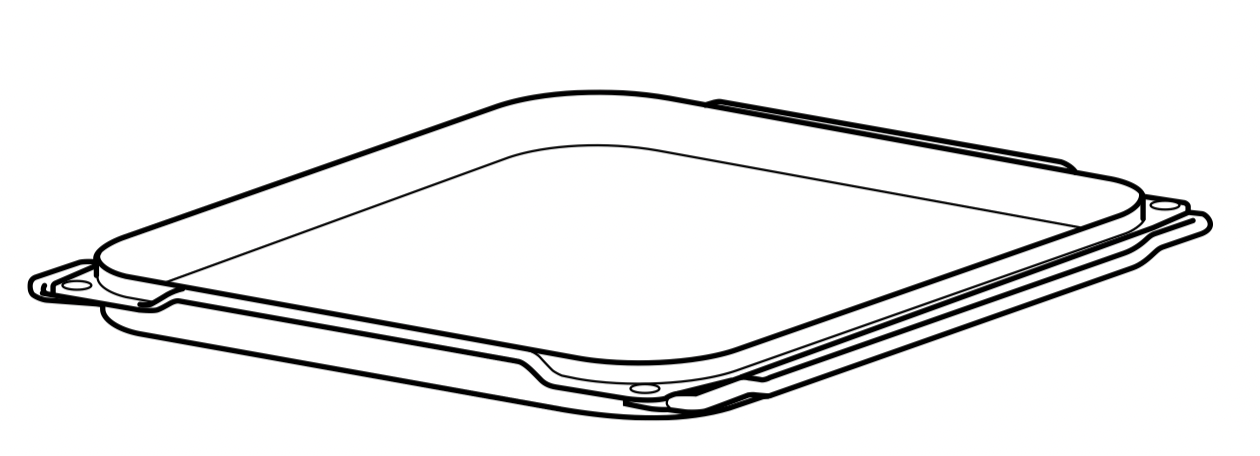
D. SearPlate :
Slide into bottom rails for Fresh Pizza, Frozen Pizza, Sear Crisp, Rapid Bake, Griddle, Air Roast, Broil, and Bake. ALWAYS slide the SearPlate into bottom rails on Dual Heat functions or temperature reading will not work properly. Slide into bottom rails for storage. Hand-wash recommended.
E. Removable Crumb Tray :
Always place below the bottom heating element. Hand-wash only.
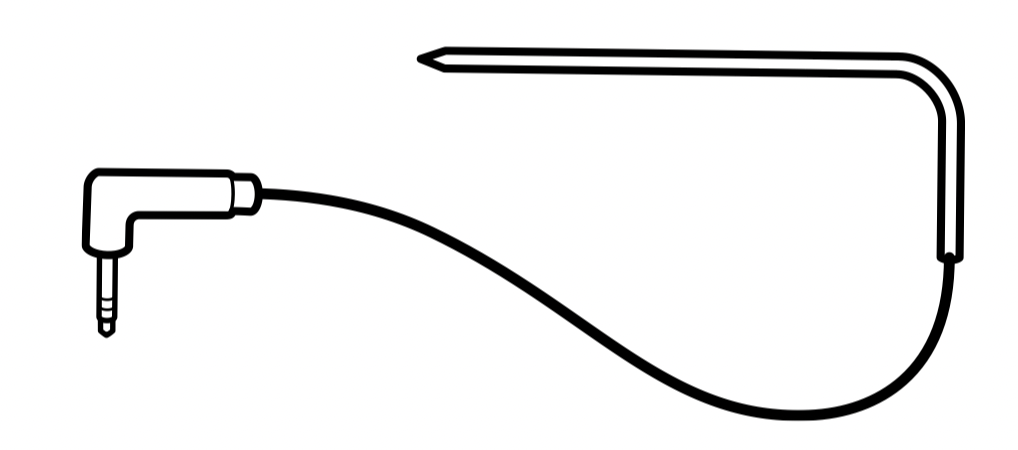
F. FoodiTM Smart Thermometer :
NOTE: DO NOT use metal or sharp utensils or cut foods on SearPlate. For drippy, greasy foods, slide the SearPlate into the bottom rails to catch any droppings.
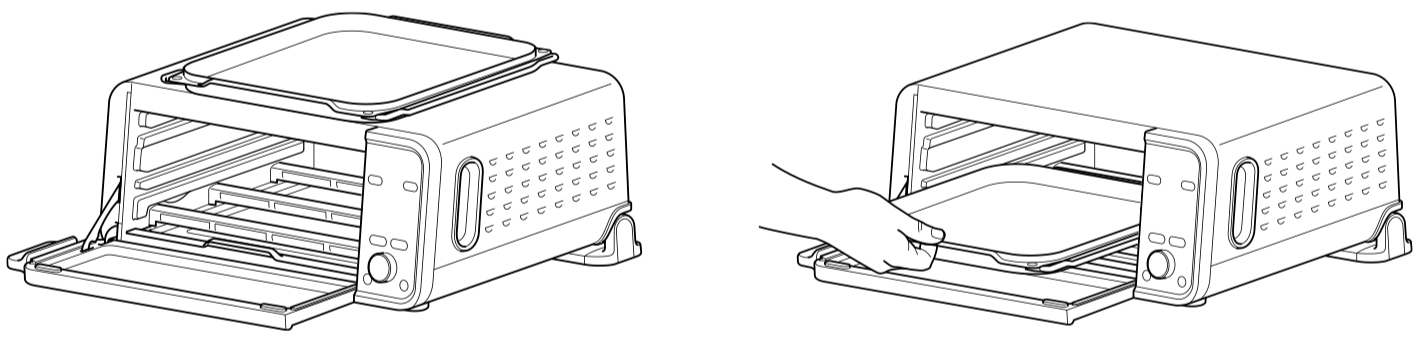
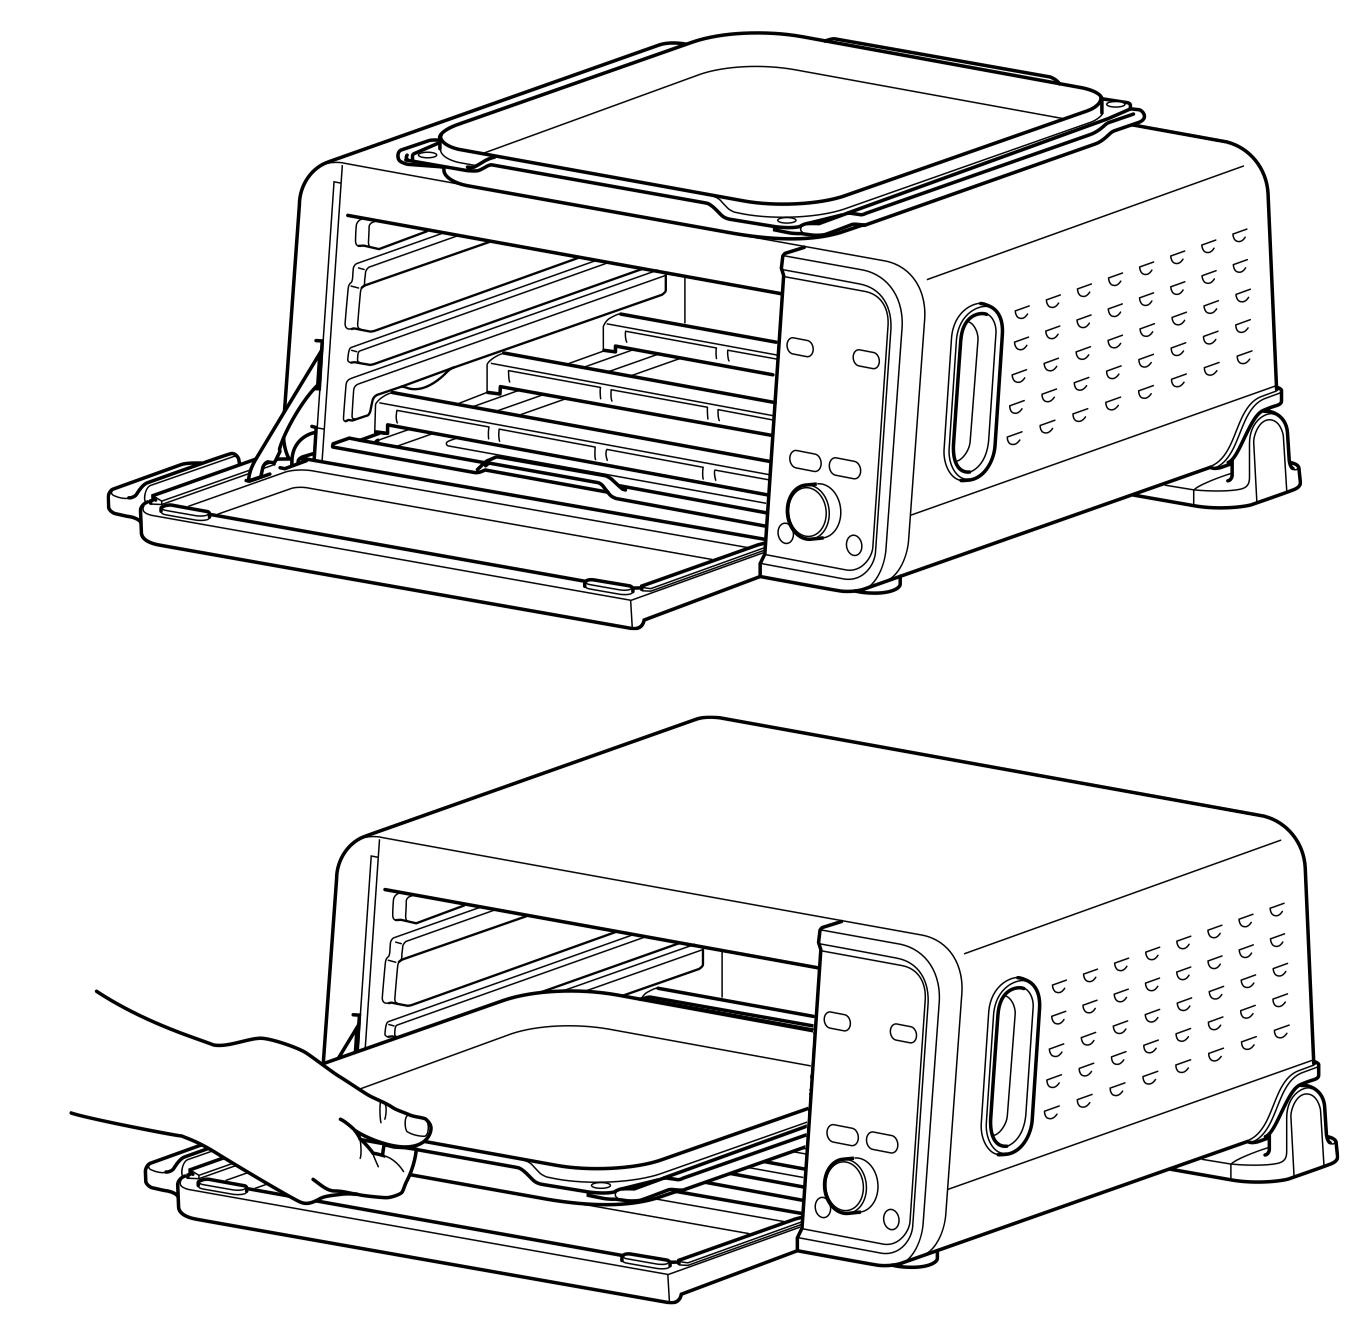
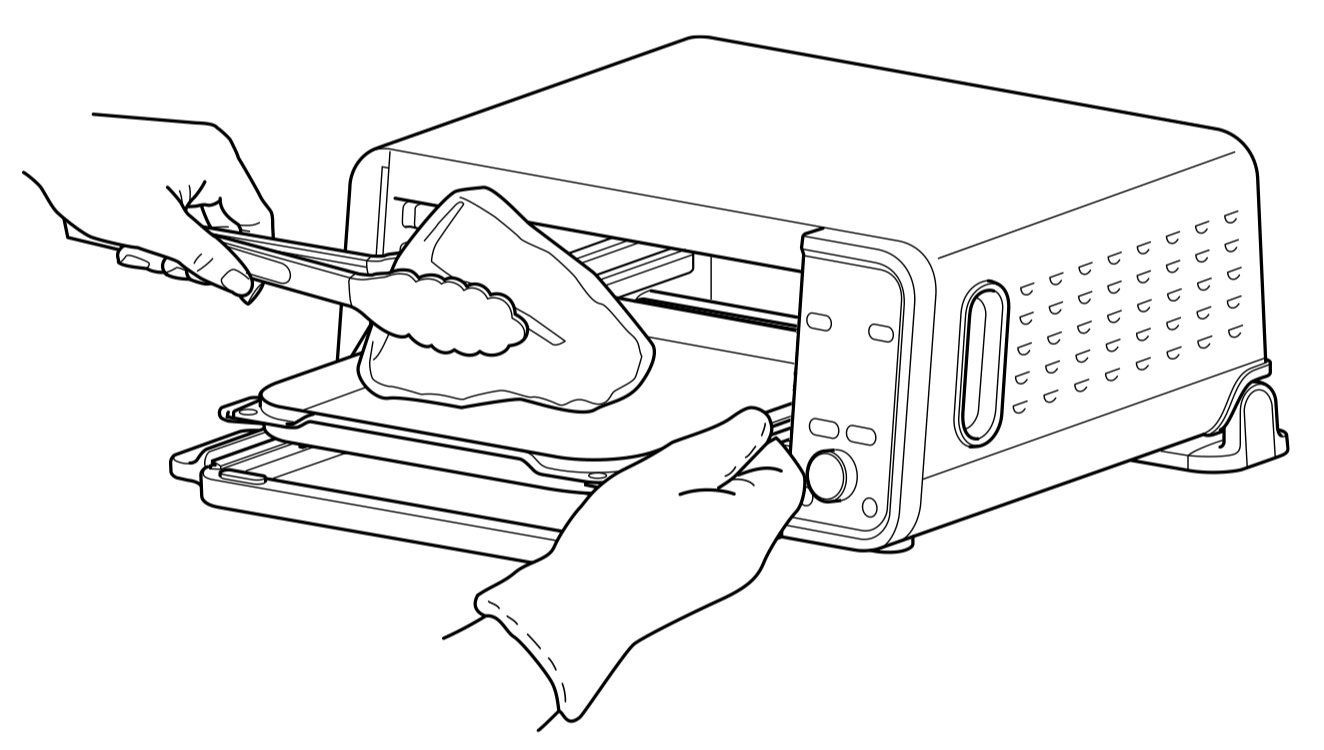
TIP: There is a hook on the left side of the bottom rails of the oven. This tool is designed to stabilize the wire rack or SearPlate when pulling partially out of oven. Always pull out tray carefully when removing and installing to prevent spills.
ACCESSORY STORAGE PLACEMENT
BEFORE FIRST USE :
Remove and discard any packaging material, promotional labels, and tape from the unit.
Remove all accessories from the package and read this manual carefully. Please pay particular attention to operational instructions, warnings, and important safeguards to avoid any injury or property damage.
Wash the air fry basket, wire rack, and removable crumb tray in warm, soapy water, then rinse and dry thoroughly with non-abrasive sponge. Wash the SearPlate thoroughly in hot, soapy water.
NEVER submerge the main unit in water or place in dishwasher.
We recommend placing the wire rack, SearPlate, and air fry basket inside the oven and running it on Air Fry at 450˚F for 20 minutes without adding food. Make sure the area is well ventilated, as some odor may be released.. This removes any packaging residue and odor traces that may be present. This is completely safe and not detrimental to the performance of the oven.
NOTE: For longest use, we recommend hand-washing the accessories. The air fry basket and wire rack can be put in the dishwasher, but this may cause them to wear more quickly over time.
USING THE CONTROL PANEL
FUNCTIONS:
SEAR CRISP: Achieve contact searing with larger proteins, and large-cut sheet pan meals.
RAPID BAKE: Contact cooking to jumpstart doughs for extra rise and external texturedevelopment.
GRIDDLE: Achieve light browning on breakfast foods, quesadillas, sandwiches, and more.
FROZEN PIZZA: Cook frozen pizza from thin to thick crust.
FRESH PIZZA: Quickly cook homemade pizzas with deliciously crisp crusts.
AIR FRY: Make fast, extra-crispy foods—such as chicken wings, French fries, and chicken nuggets—with little to no added oil.
AIR ROAST: Achieve a crispy outside and perfectly cooked inside for full-sized sheet pan meals, thicker proteins, and roasted veggies.
BROIL: Broils meat and fish and evenly browns the tops of casseroles.
BAKE: Evenly bakes cookies, brownies, cakes, and more.
TOAST: Evenly toasts up to 9 slices of bread to your perfect level of darkness.
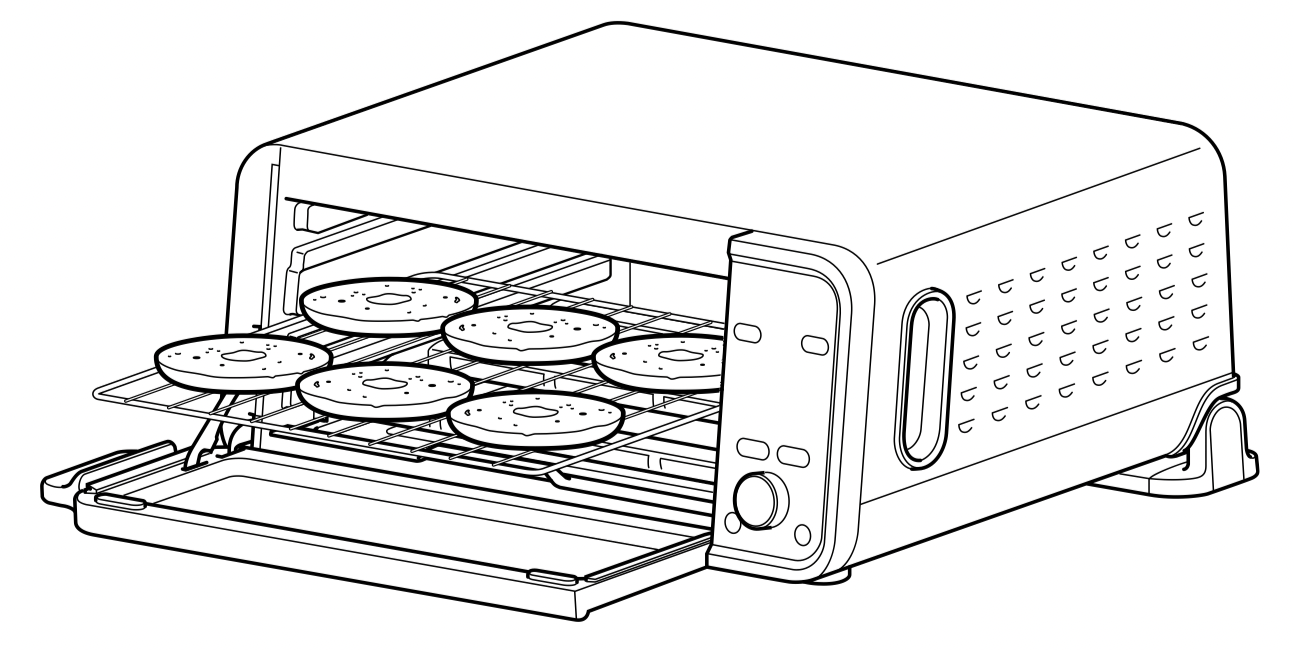
BAGEL: Perfectly toast up to 6 bagel halves when they’re placed cut-side up on the wire rack.
REHEAT: Heat leftovers without over cooking.
DEHYDRATE: Dehydrates meats, fruits, and vegetables for healthy snacks.
NOTE: The Dehydrate and Reheat functions are not included on all models.
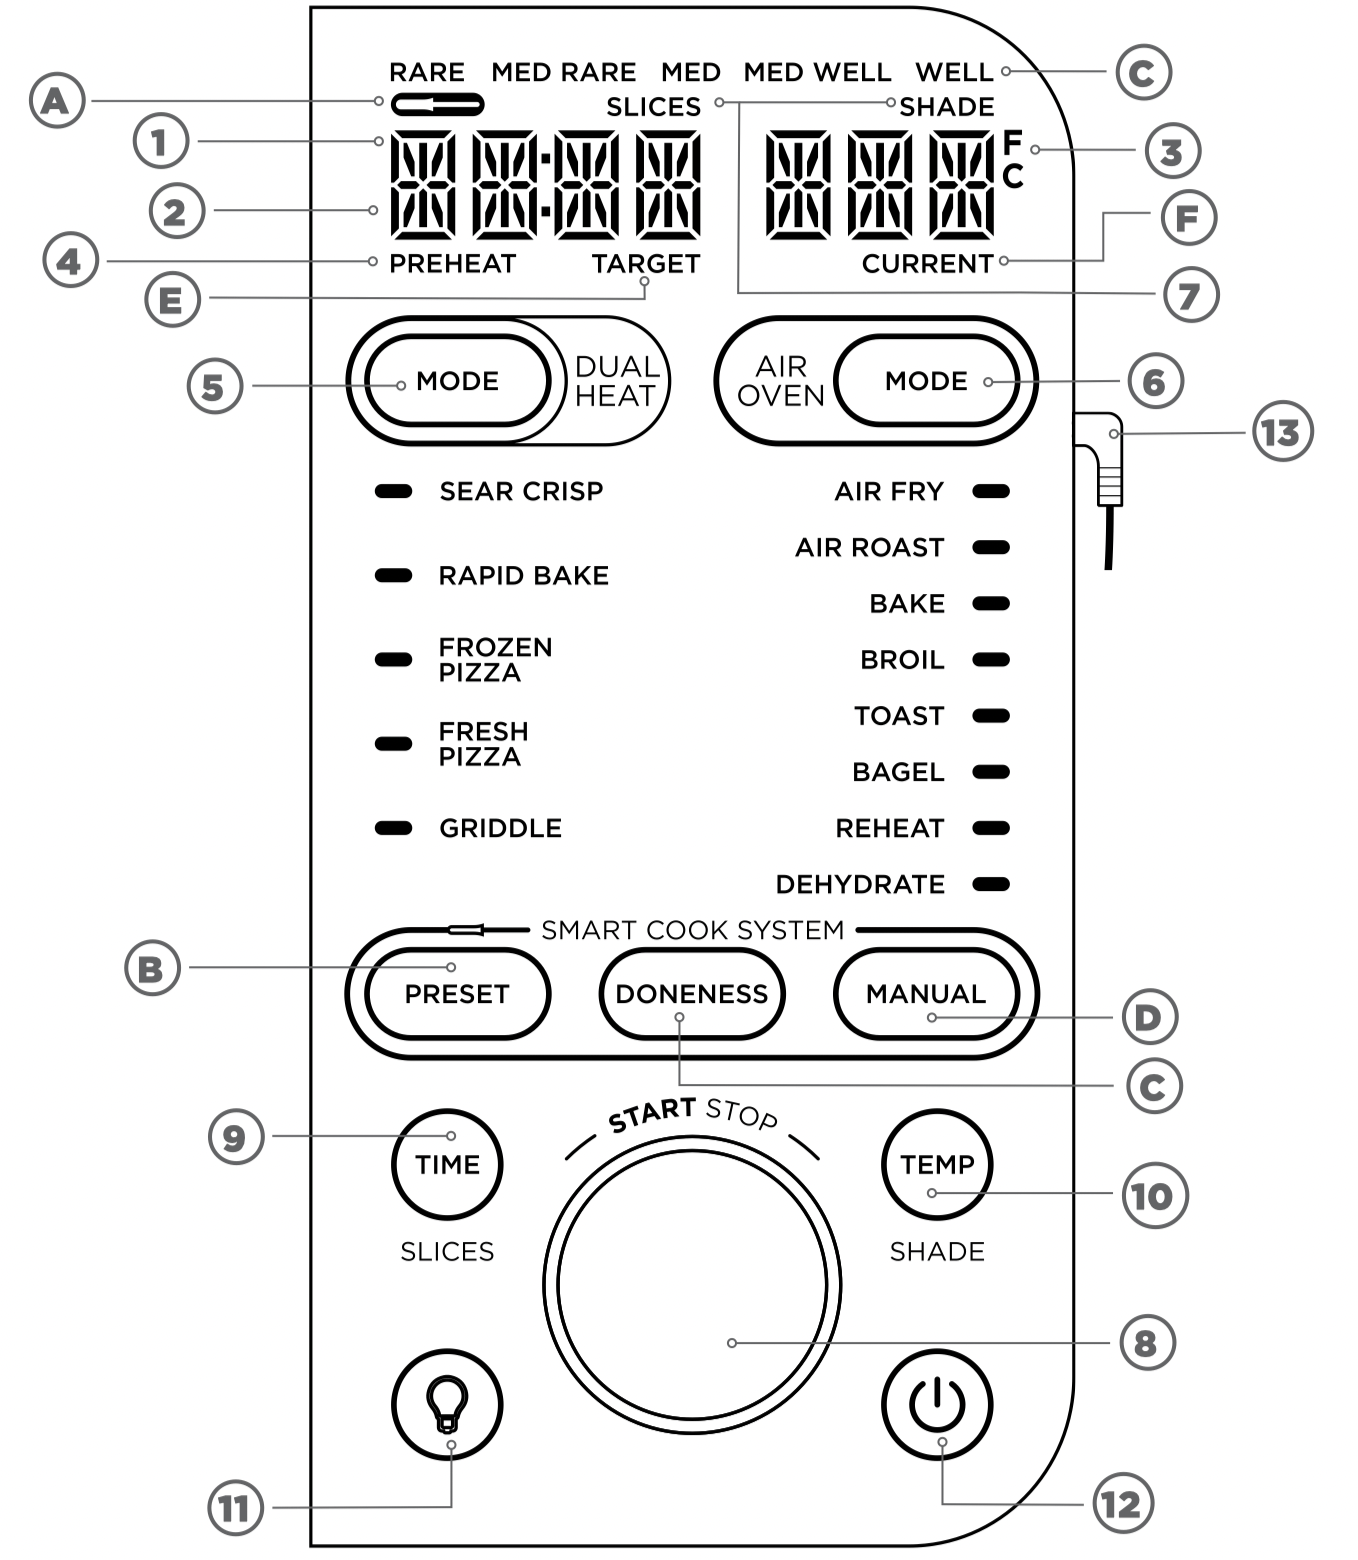
SMART COOK SYSTEM DISPLAY & OPERATING BUTTONS:
A. Thermometer: Illuminates when thermometer mode is enabled by plugging in the thermometer then pressing the PRESET or MANUAL button. Flashes when setting thermometer settings and will stay illuminated once cooking has started.
B. PRESET button: Press to switch the display to the food type settings for the thermometer. Rotate the dial to scroll through food types, then press PRESET again to make a selection.
C. DONENESS display & button: Press DONENESS to switch the display to the internal doneness settings for the thermometer. The display will show the different doneness levels. Rotate the dial to scroll through the doneness levels, then press DONENESS again to make a selection. DONENESS can only be selected if a food type has previously been selected with the PRESET button.
D. MANUAL button: Press to switch the display to the manual temperature setting for the thermometer. Rotate the dial to adjust the temperature, then press MANUALagain to make a selection.
E. TARGET: Illuminates when using thermometer to show target temperature.
F. CURRENT: Illuminates when using thermometer to show current temperature of thermometer.
TIP: Press TEMP button to view oven temperature. Press TIME button to view time elapsed once cooking has started.
CONTROL PANEL DISPLAY & OPERATING BUTTONS:
Time display: Shows the cook time. The time will count down when cooking is in progress.
will appear on the time display when the unit is cool enough to flip up for storage or cleaning.
Temperature display: Shows the cook temperature. NOTE: Time and temperature will always default to the cook time and temperature that was set the last time the oven was in use. On first use, the default time and temperature should be adjusted for your cook cycle. Refer to Inspiration Guide to learn more on best cook times and temperatures.
PREHEAT: Illuminates and shows progress bar (for Dual Heat functions) when the unit is preheating. Preheat will take up to 60 seconds on Air Oven Mode functions. Toast, Bagel, and Broil do not have preheat. Preheat will take 5–10 minutes with Dual Heat functions. NOTE: Preheat time may vary if unit is already warm.
DUAL HEAT MODE button: Press to enable selection of Dual Heat functions (Sear Crisp, Rapid Bake, Fresh Pizza Frozen Pizza, and Griddle) and use dial to cycle through functions. Press DUAL HEAT MODE button again to confirm selection. These functions REQUIRE the SearPlate to preheat while oven is preheating.
AIR OVEN MODE button: Press to enable selection of Air Oven Mode functions (Air Fry, Air Roast, Bake, Broil, Toast, Bagel, Reheat, and Dehydrate) and use dial to cycle through functions. Press AIROVEN MODE button again to confirm selection. These functions do not require the SearPlate to preheat while the oven is preheating. NOTE: During the cook cycle, press DUAL HEAT MODE to return to the Dual Heat function selection or AIR OVEN MODE to return to the Air Oven Mode functions. Cook cycle will stop.
SLICES and SHADE will illuminate when using the Toast or Bagel function.
Setting dial (START/STOP button): Push to start or pause cooking. Rotate to adjust selected mode or setting.
TIME/SLICES button: To select a cook time, press the TIME/SLICES button, then use the dial to adjust the time. Press TIME/ SLICES button again to confirm. When using the Toast or Bagel function, this button will adjust the number of slices instead of the time. If cooking for 1 hour or less, the clock will count down by minutes and seconds. If cooking for more than 1 hour, the clock will count down by hours and minutes.
TEMP/SHADE button: To adjust temperature, press the TEMP/SHADE button and use the dial to adjust the temperature. Press TEMP/SHADE button again or to confirm. When using the Toast or Bagel function, this button will adjust the darkness (SHADE) level instead of the temperature. NOTE: The cook time and temperaturemay be adjusted at any time during thecooking cycle. To switch from Fahrenheit to Celsius, press and hold the TEMP/SHADE button for 5 seconds while the unit is not in cook mode.
(Light) button: Press to turn the oven’s interior light on and off. Light will automatically turn on when 1 minute of cook time remains.
(Power) button: Press to turn the unit on and off.
Foodi® Smart Thermometer plugs in here as shown in the image on Page 7.
USING YOUR FOODI® SMART DUAL HEAT AIR FRY OVEN
USING THE FOODI SMART THERMOMETER:
Before First Use:
Make sure the thermometer jack is free of any residue and the cord is free of knots before plugging it into the jack.
NOTE: Only Sear Crisp, Air Fry, Air Roast, Bake, and Broil functions can be used with the thermometer.
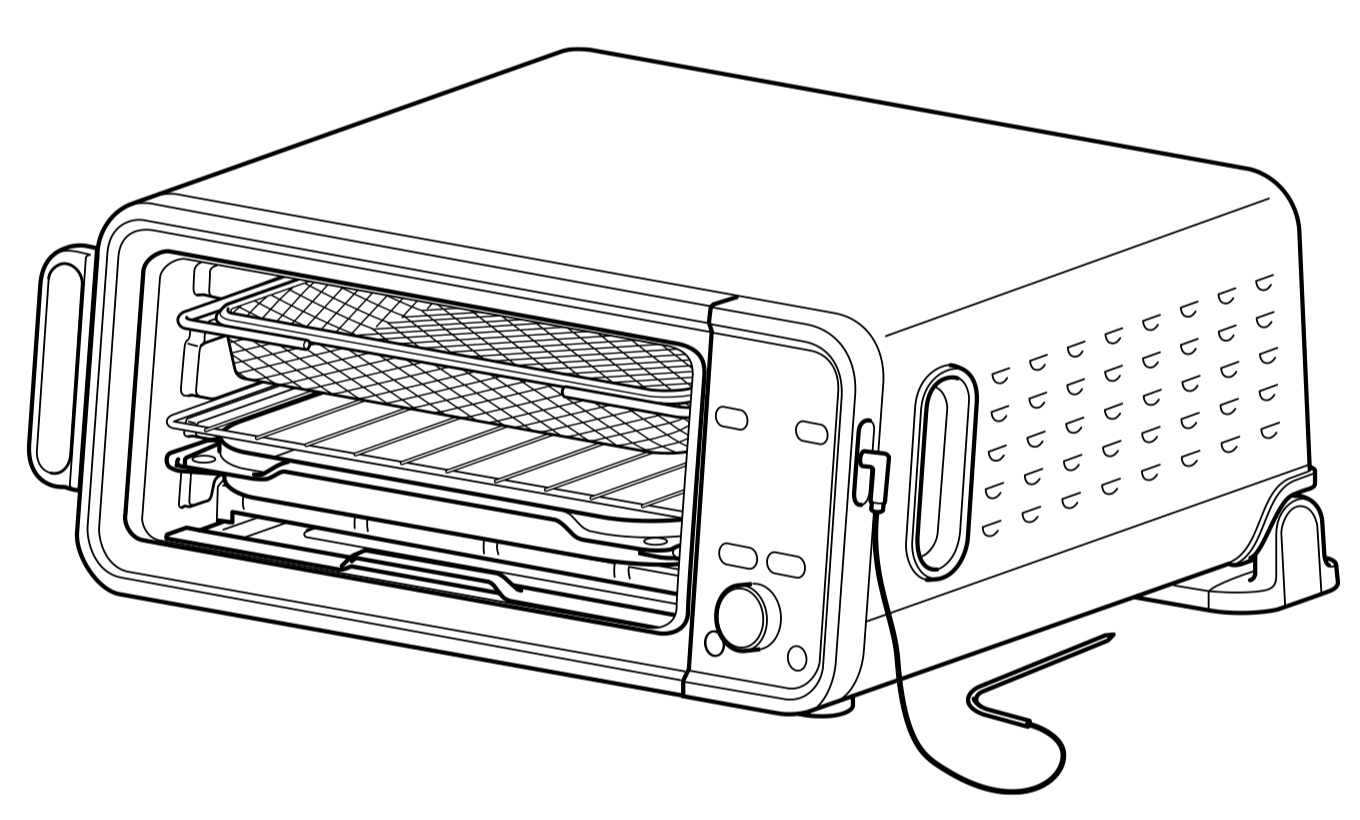
Remove the thermometer from storage. Then unwind the cord from the cord wrap to remove the thermometer on the right side of the unit.
Select the desired cook function (e.g., Sear Crisp) and press TEMP/SHADEbutton to set the oven temperature.
Plug the thermometer into the jack. Push firmly on the plug until it cannot go into the jack any further and you hear the plug click into place.
The thermometer icon on the display will illuminate once the thermometer is plugged in and thermometer mode is enabled by pressing the PRESETorMANUAL button. NOTE: There is no need to set a cook time, as the unit will automatically turn off the heating element and alert you when your food has finished cooking.
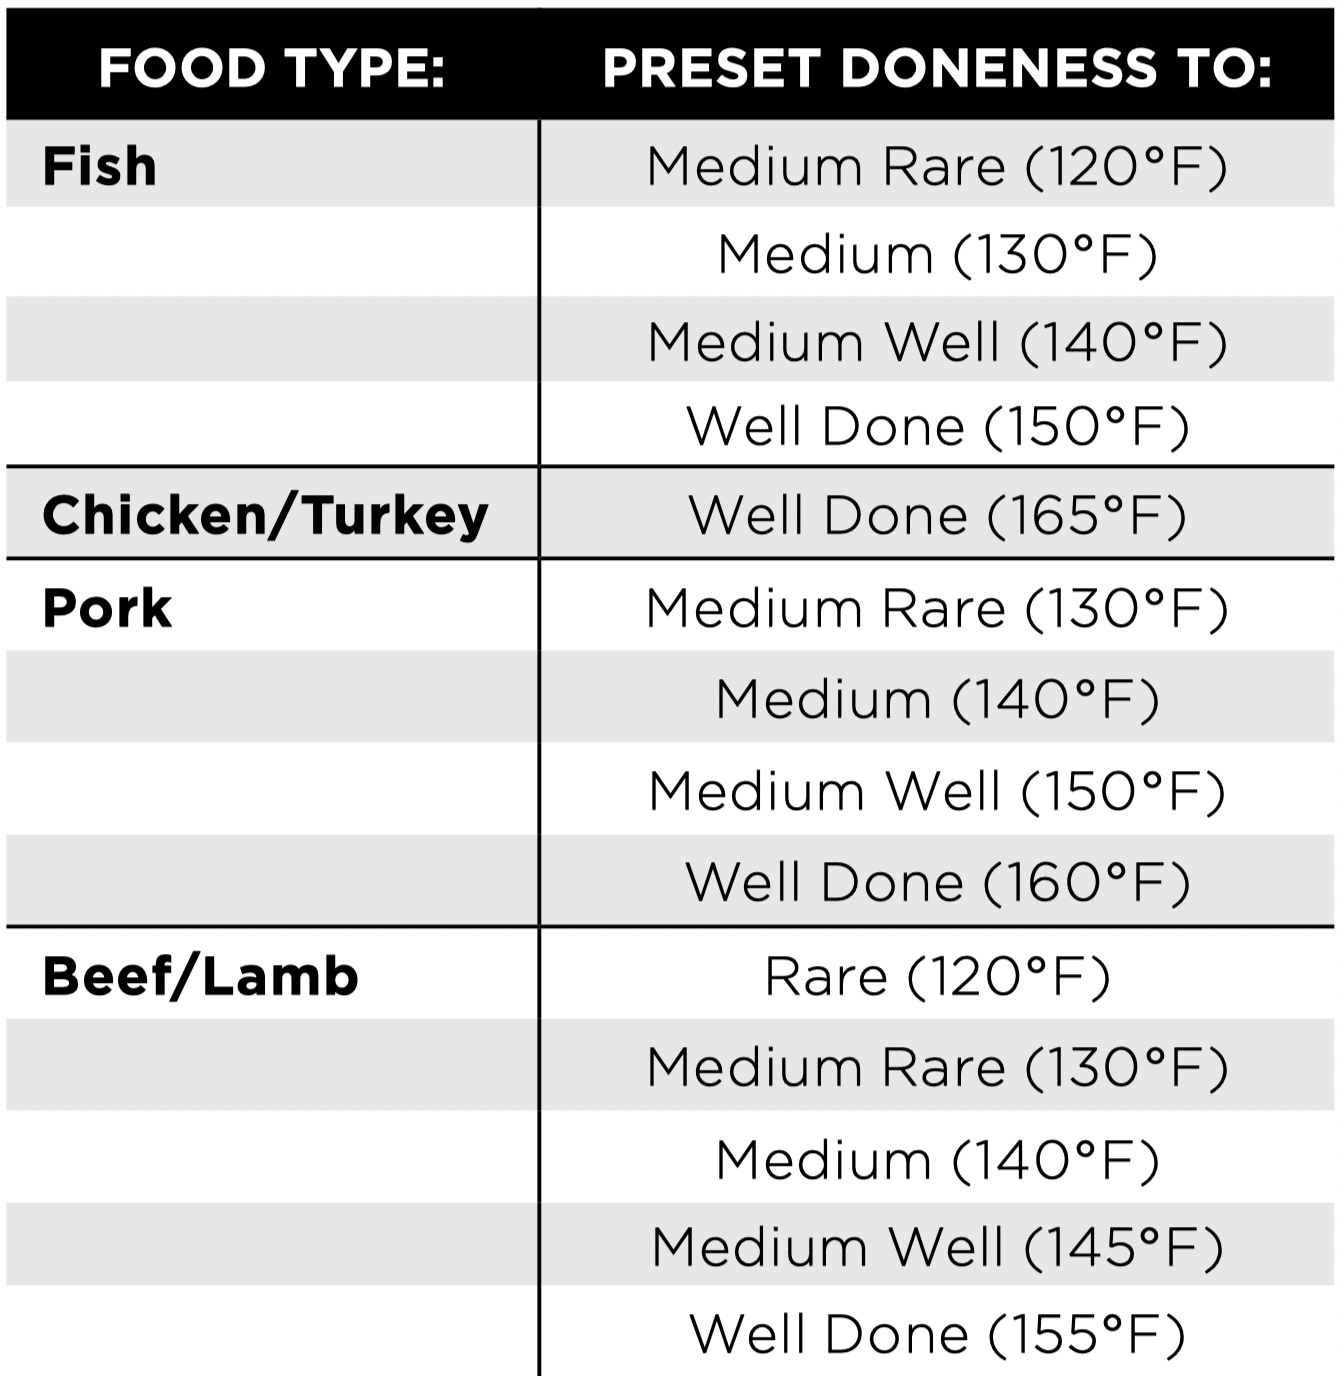
If using a food type/temperature preset, press the PRESET, then rotate the dial to select your desired food type. Press PRESET again to confirm your selection. Press the DONENESS button, then rotate the dial to set the internal doneness of your food (Rare through Well). Press DONENESS again to confirm your selection. If manually setting the target temperature, press the MANUAL button and use the preset temperature chart as a guide when rotating the dial to select the temperature. NOTE: Default Preset doneness is different for each food type.
Place the accessory required for your selected cook function in the unit and close the door. Press the setting dial to begin preheating.
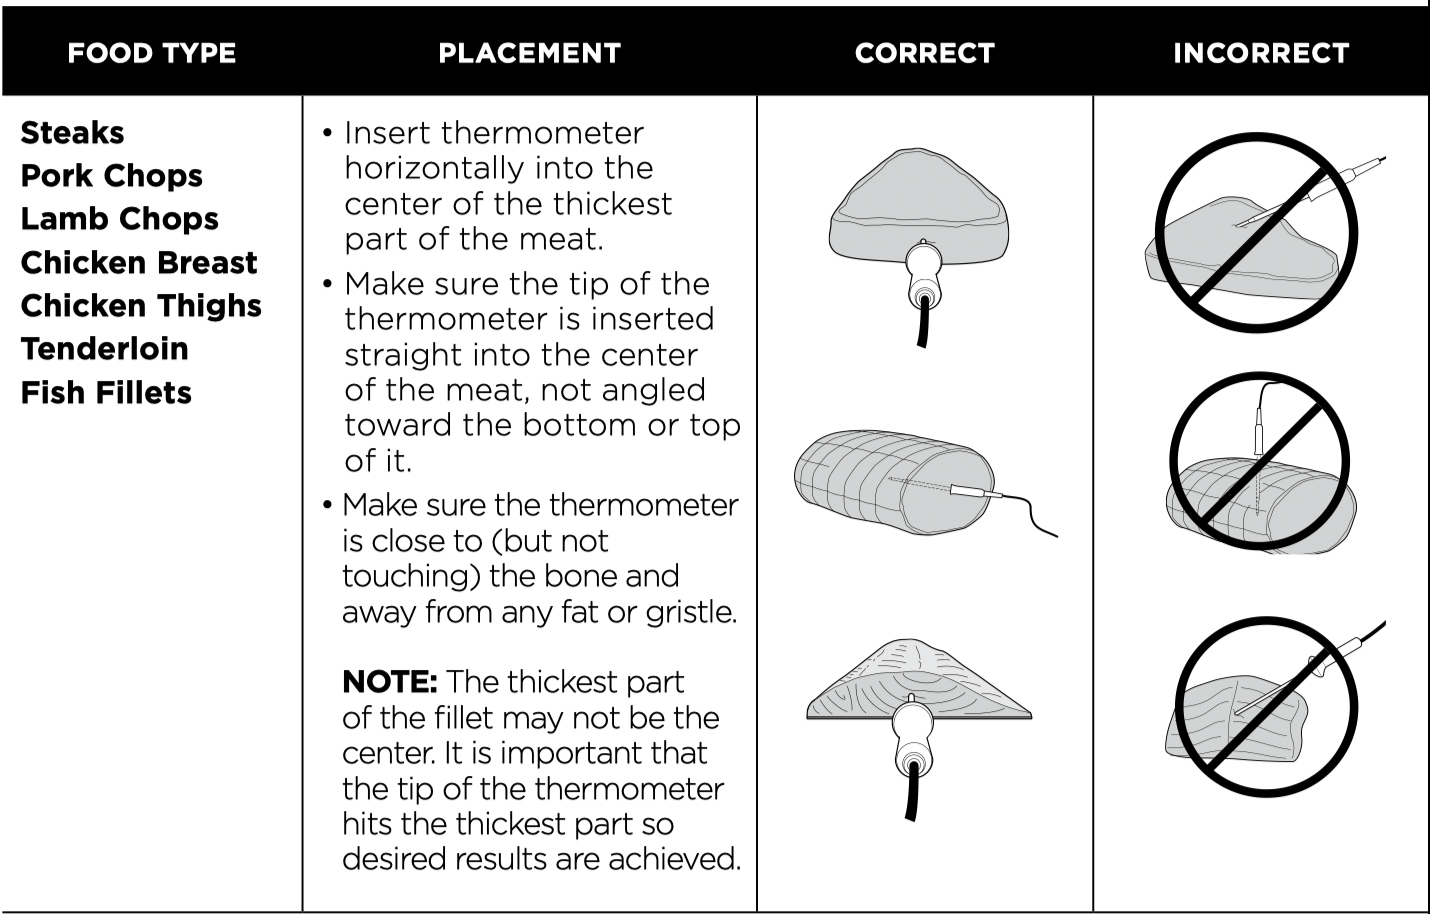
While the unit is preheating, insert the thermometer horizontally into the center of the thickest part of the piece of protein. Refer to the chart on the next page for further thermometer placement instructions.
When the unit has preheated and the unit beeps, open the door, place food with inserted thermometer in the unit, and route the thermometer cord over the top of the door. Then close the door.
The display will show the current thermometer temperature and target thermometer temperature to track progress. Press TEMP button to view the oven temperature. Press TIME button to view time elapsed.
The unit will automatically stop when thermometer temperature has reached the target. Display will beep and show “END HOT”.
Transfer protein to a plate and allow to rest for 5 minutes before serving. The protein will continue to carry-over cook once it’s reached the target temperature. This can cause the protein to reach a higher temperature. Carry-over cook times can vary based on size of protein, cut of protein, and type of protein. NOTE: The thermometer will be HOT. Wait for the thermometer to cool before cleaning and storing. Use either oven mitts or tongs to take the thermometer out of the protein.
HOW TO CORRECTLY INSERT THE THERMOMETER:
NOTE: DO NOT use the thermometer with frozen protein or for cuts of meat 1 inch thick or thinner.
USING THE THERMOMETER IN DIFFERENT COOKING SCENARIOS:
Cooking 2 or More Proteins of the Same Size to Different Levels of Doneness:
Set the Preset feature to the highest desired level of doneness.
Insert the thermometer in the protein with the higher desired level of doneness.
When the lower desired level of doneness is reached, remove the protein without thermometer.
Continue cooking the remaining protein until the next desired level of doneness is reached.
Cooking 2 or More Proteins of Different Sizes:
Insert thermometer in the smaller protein and use the Preset feature to choose the level of doneness.
When that protein is done cooking, remove it from the oven.
Using oven mitts, transfer thermometer to the larger protein and press the DONENESS button and rotate dial to choose desired doneness.
Cooking 2 or More Different Types of Protein:
Insert thermometer in the protein with the lower desired level of doneness.
Use the Manual feature to choose the desired internal temperature.
When that protein is done cooking, remove it from the oven.
Using oven mitts, transfer thermometer to the other protein and use the Manual feature to choose the desired internal temperature.
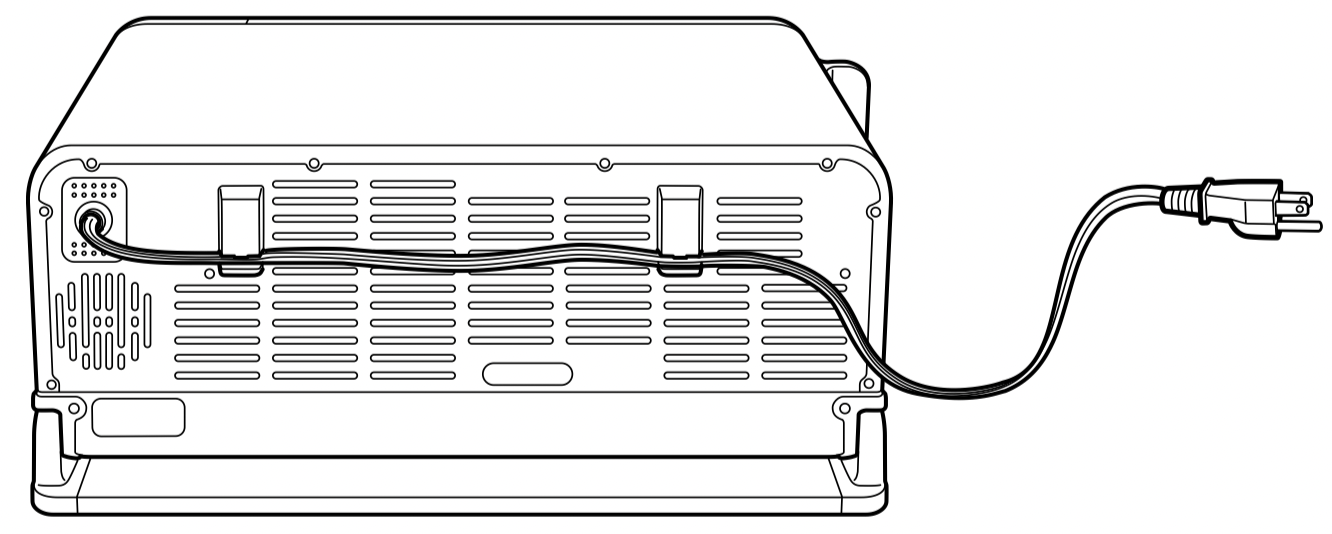
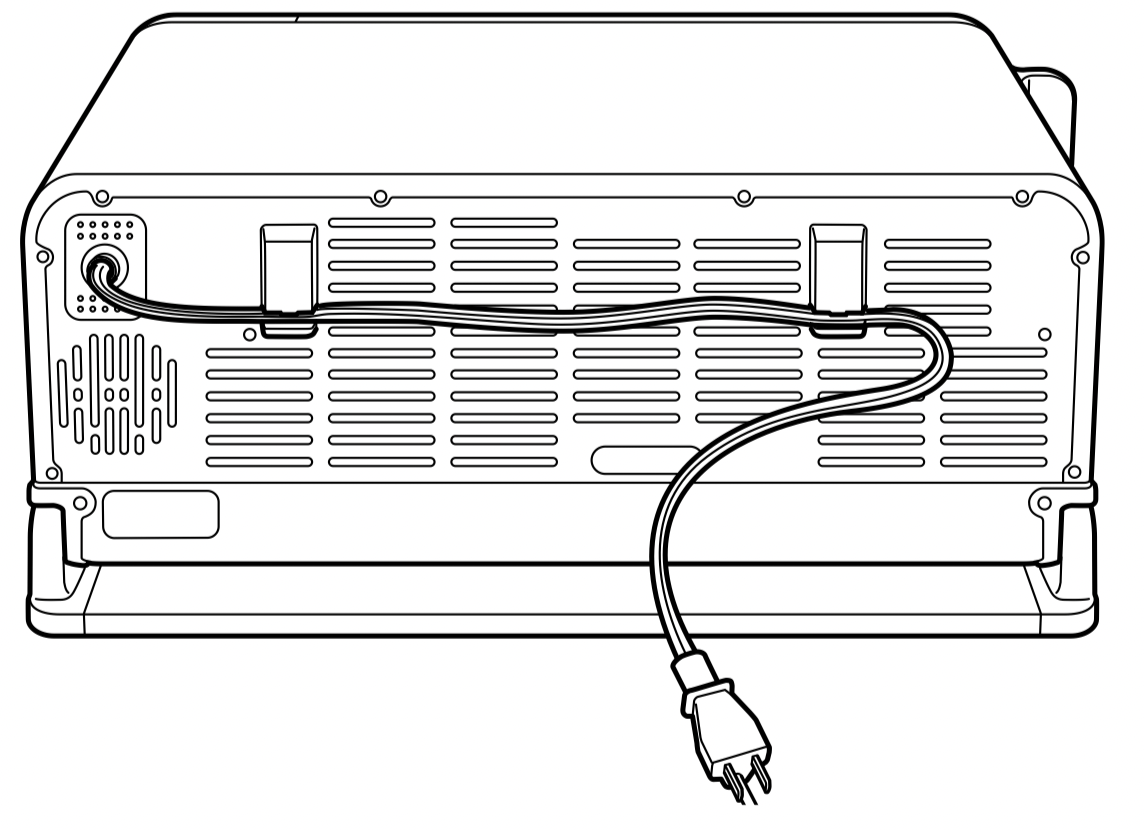
POWER CORD MANAGEMENT:
Our cord-management system is designed so it will not interfere with the oven’s flip-away functionality.
Option 1: Outlet on the left
Option 2: Outlet behind the oven
USING THE COOKING FUNCTIONS
To turn on the oven, plug the power cord into the wall, flip oven down into cooking position, and press the button.
DUAL HEAT FUNCTIONS:
Press the MODE button to select the following Dual Heat functions. Dual Heat functions require preheating the SearPlate, which can take 5 to 10 minutes. Ensure SearPlate is inserted in the unit before preheating. The oven will show a progress bar then beep to signify it has preheated and time will start counting down. DO NOT place food inside unit until preheat is complete.
NOTE: Results may vary if unit is already warm.
SEAR CRISP:
To select the function, press the DUAL HEAT MODE button then turn the dial until SEAR CRISP illuminates.
Press the TIME/SLICES button and use the dial to select your time up to 2 hours. Time will adjust in 1-minute increments under 1 hour and 5-minute increments over 1 hour.
Press the TEMP/SHADE button and use the dial to set temperature between 250°F and 500°F. Temperature will adjust in 5-degree increments.
Insert the SearPlate into the bottom rails of the oven to let the SearPlate preheat with oven.
Press the setting dial to begin preheating. This can take 5 to 10 minutes.
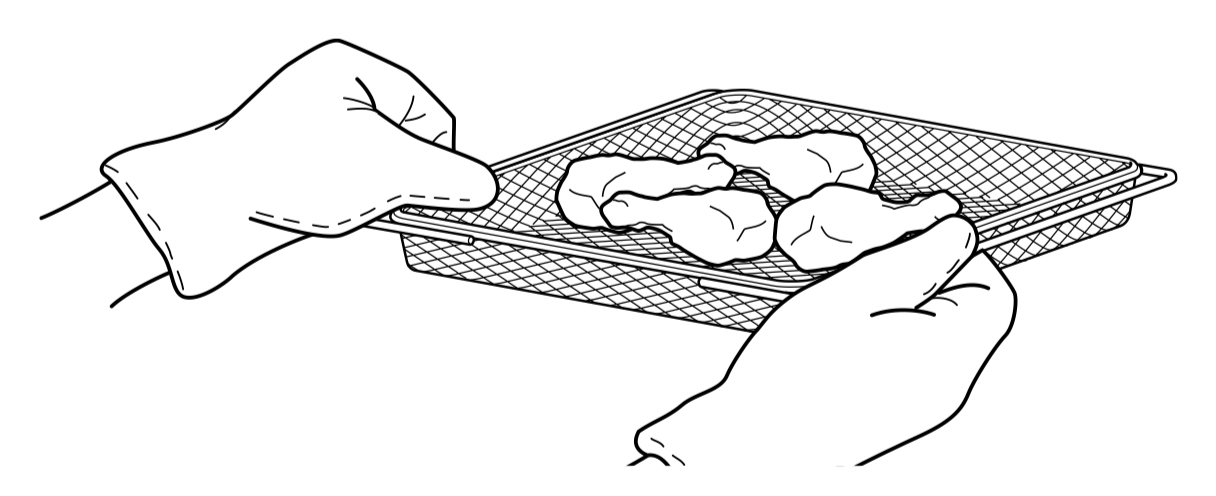
When the unit beeps to signify it has preheated, immediately open the oven door and, using oven mitts, place ingredients on the SearPlate and slide back into bottom rails. Close oven door. NOTE: If preferred, place the SearPlate on top of the oven after preheating to load food. To flip or slide food onto SearPlate, pull 3/4 out until you feel hook on left side of oven. This mechanism is designed to stabilize the SearPlate if pulled out partially.
Time will immediately start counting down once the oven has signified it has preheated. Simply turn the dial during cooking to adjust time.
When cooking is complete, the oven will beep and “END HOT” will appear on the display.
RAPID BAKE:
NOTE: Food cooks 30%-50% faster than average box instructions. Refer to the Rapid Bake chart in the Quick Start & Inspiration Guide for more guidance on times and temperature adjustments.
To select the function, press the DUALHEAT MODE button then turn the dial until RAPID BAKE illuminates.
Press the TIME/SLICES button and use the dial to select your time up to 2 hours. Time will adjust in 1-minute increments under 1 hour and 5-minute increments over 1 hour.
Press the TEMP/SHADE button and use the dial to set oven temperature between 250°F and 450°F. Temperature will adjust in 5-degree increments.
Insert the SearPlate into the bottom rails of the oven to let the SearPlate preheat with oven.
Press the setting dial to begin preheating. This can take 5 to 10 minutes.
When the oven beeps to signify it has preheated, immediately open the oven door and, using oven mitts, place ingredients on the SearPlate and slide back into bottom rails. Close oven door. NOTE: If preferred, place the SearPlate on top of the oven after preheating to load food. To flip or slide food onto SearPlate, pull 3/4 out until you feel hook on left side of oven. This mechanism is designed to stabilize the SearPlate if pulled out partially.
Time will immediately start counting down once the oven has signified it has preheated. Simply turn the dial during cooking to adjust time.
When cooking is complete, the oven will beep and “END HOT” will appear on the display.
FRESH PIZZA:
To select the function, press the DUAL HEAT MODE button then turn the dial until FRESH PIZZA illuminates.
Press the TIME/SLICES button and use the dial to select your time up to 2 hours. Time will adjust in 1-minute increments under 1 hour and 5-minute increments over 1 hour. NOTE: We recommend a pizza peel as the best method for transferring fresh dough onto the preheated SearPlate. If you do not have a pizza peel, you can use parchment paper. Refer to page 19 for details on using parchment in the Alternative to Pizza Peel section.
Press the TEMP/SHADE button and use the dial to set oven temperature between 250°F and 500°F. Temperature will adjust in 5-degree increments. NOTE: For time and temperature recommendations on different crust types, refer to the Quick Start & Inspiration Guide.
Insert the SearPlate into the bottom rails of the oven to let the SearPlate preheat with oven.
Press the setting dial to begin preheating. This can take 5 to 10 minutes. NOTE: For cooking multiple pizzas back to back, we recommend fully preheating the unit before each use for best results. If you do not want to preheat after the first pizza, you may skip it by holding the setting dial for 3 seconds when starting the cook cycle. Skipping preheat may impact cook time and quality.
When the oven beeps to signify it has preheated, immediately open the oven door and, using oven mitts, place the pizza on the SearPlate and slide back into bottom rails. Close oven door. NOTE: If preferred, place the SearPlate on top of the oven after preheating to load food. To flip or slide food onto SearPlate, pull 3/4 out until you feel hook on left side of oven. This mechanism is designed to stabilize the SearPlate if pulled out partially.
Time will immediately start counting down once the unit has signified it has preheated. Simply turn the dial during cooking to adjust time.
When cooking is complete, the oven will beep and “END HOT” will appear on the display.
FROZEN PIZZA:
To select the function, press the DUAL HEAT MODE button then turn the dial until FROZEN PIZZA illuminates.
Insert the SearPlate into the bottom rails of the oven to let the SearPlate preheat with oven. NOTE: Frozen pizzas will cook 30%-50% faster than average box recommended time. Use box recommended temperature. Always keep an eye out on food while cooking.
Press the TIME/SLICES button and use the dial to select your time up to 2 hours. Time will adjust in 1-minute increments under 1 hour and 5-minute increments over 1 hour.
Press the TEMP/SHADE button and use the dial to set temperature between 250°F and 500°F. Temperature will adjust in 5-degree increments. Set temperature of the oven based on box instructions. Time will cook faster than the recommended time on the box, so keep an eye on food while cooking.
Press the setting dial to begin preheating. This can take 5 to 10 minutes.
When the oven beeps to signify it has preheated, immediately open the oven door and, using oven mitts, place pizza on the SearPlate and slide back into bottom rails. Close oven door. NOTE: If preferred, place the SearPlate on top of the oven after preheating to load food. To slide pizza onto SearPlate without removing, pull 3/4 out until you feel hook on left side of oven. This mechanism is design to stabilize the SearPlate if pulled out partially.
Time will immediately start counting down once the oven has signified it has preheated. Simply turn the dial during cooking to adjust time.
When cooking is complete, the oven will beep and“END HOT”will appear on the display.
GRIDDLE:
To select the function, press the DUAL HEAT MODE button then turn the dial until GRIDDLE illuminates.
Press the TIME/SLICES button and use the dial to select your time up to 30 minutes. Time will adjust in 1-minute increments.
Press the TEMP/SHADE button and use the dial to to select a temperature between 300°F and 450°F. Temperature will adjust in 5-degree increments. Time will adjust in 1-minute increments.
Insert the SearPlate into the bottom rails of the oven to let the SearPlate preheat with oven.
Press the setting dial to begin preheating. This can take from 5 to 10 minutes.
When the oven beeps to signify it has preheated, immediately open the oven door and, using oven mitts, place ingredients onto the SearPlate and slide back into bottom rails. Close oven door.
Time will immediately start counting down once the oven has signified it has preheated. Simply turn the dial to adjust time.
When cooking is complete, the oven will beep and “END HOT” will appear on the display.
AIR OVEN MODE FUNCTIONS:
Press the AIR OVEN MODE button to select the following Air Oven Mode functions. Preheat will take 60 seconds. Preheating with the SearPlate is not required with these functions.
Air Fry:
To select the function, press AIR OVEN MODE, then turn the dial until AIR FRY illuminates. The default time and temperature settings will display.
Press the TIME/SLICES button and use the dial to select your time up to 1 hour. Time will adjust in 1-minute increments under 1 hour. To set the time, press the TIME/SLICES button again.
Press the TEMP/SHADE button and use the dial to select a temperature between 250˚F and 450˚F. Temperature will adjust in 5-degree increments. To set the temperature, press the TEMP/SHADE button again.
Press the setting dial to begin preheating.
Place ingredients in the air fry basket. If ingredients are fatty, oily, or marinated, place the basket on the top rails and the SearPlate on the bottom rails. Use air fry basket for dry ingredients. Use air fry basket with SearPlate underneath for fatty, oily, or marinated ingredients. When using the SearPlate underneath, you may need to flip food over halfway through cooking for more even cooking.
When the oven beeps to signify it has preheated, immediately slide the basket into the upper rails of the oven. If also using the SearPlate, slide the SearPlate into the bottom rails. NOTE: The timer will start counting down as soon as the unit has preheated. If ingredients are not ready to go into the oven, simply turn the dial to add more time.
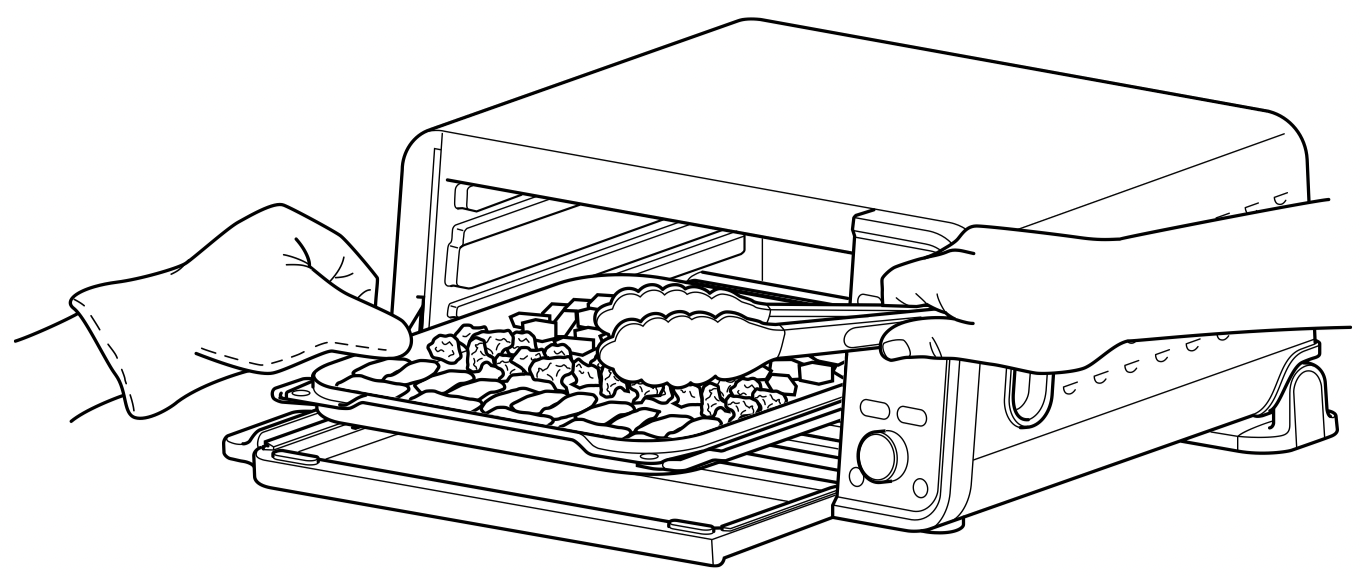
For more even browning and crispiness, flip ingredients using non-metal tongs or spatula halfway through cooking cycle.
When cook time is complete, the oven will beep and “END HOT” will appear on the display.
Air Roast:
To select the function, press the AIR OVEN MODE button, then turn the dial repeatedly until AIR ROAST illuminates. The default time and temperature settings will display.
Press the TIME/SLICES button and use the dial to select your time up to 2 hours. Time will adjust in 1-minute increments under 1 hour and 5-minute increments over 1 hour. To set the time, press TIME/SLICES button again.
Press the TEMP/SHADE button and use the dial to select a temperature between 250°F and 450°F. Temperature will adjust in 5-degree increments. To set the temperature, press the TEMP/SHADE button again.
Press the setting dial to begin preheating. Place ingredients on the SearPlate. NOTE: Food cooks faster when using the Air Roast function than when using the Bake function, so for traditional oven recipes, refer to the Inspiration Guide for guidance on cook times and temperatures.
When the oven beeps to signify it has preheated, immediately open the oven door and use an oven mitt to slide the SearPlate into the bottom rails with ingredients. Close oven door. NOTE: The timer will start counting down as soon as the oven has preheated. If ingredients are not ready to go into the oven, simply turn the dial to add more time.
During cooking, you can open the oven door to check on or flip ingredients.
When cook time is complete, the oven will beep and “END HOT” will appear on the display.
Bake:
NOTE: Use recommended times and temperatures with boxed foods. Time and temperature will vary when using different types of baking accessories from box instructions. Always keep an eye on your food while cooking.
To select the function, press the AIR OVEN MODE button, then turn the dial until BAKE illuminates. The default time and temperature settings will display.
Press the TIME/SLICES button and use the dial to select your time up to 2 hours. Time will adjust in 1-minute increments under 1 hour and 5-minute increments over 1 hour. To set the time, press the TIME/SLICES button again.
Press the TEMP/SHADE button and use the dial to select a temperature between 250°F and 450°F. Temperature will adjust in 5-degree increments. To set the temperature, press the TEMP/SHADE button again.
Press the setting dial to begin preheating.
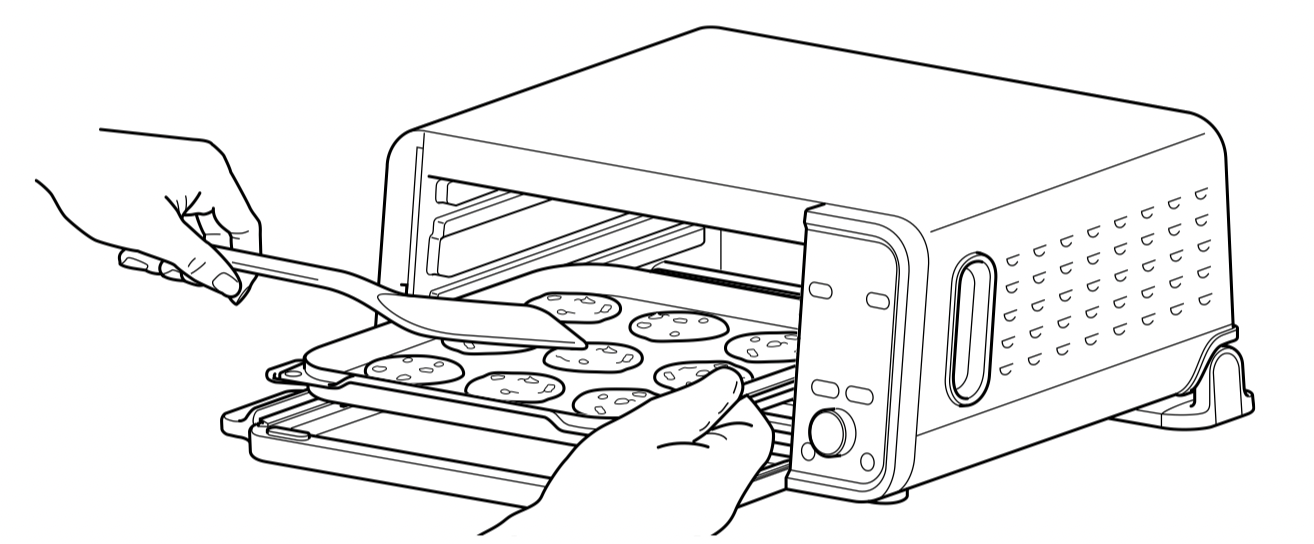
Place ingredients on the SearPlate. When the oven beeps to signify it has preheated, immediately slide the SearPlate into the bottom rails. Close oven door. NOTE: The timer will start counting down as soon as the oven has preheated. If ingredients are not ready to go into the oven, simply turn the dial to add more time. If using another baking accessory, slide the wire rack into the bottom rails with the accessory on top.
During cooking, you can open the oven door to check on or flip ingredients.
When cook time is complete, the oven will beep and “END HOT” will appear on the display.
Broil:
To select the function, press the AIR OVEN MODE button, then turn the dial untilBROIL illuminates. The default time and temperature settings will display.
Press the TIME/SLICES button and use the dial to select your time up to 30 minutes. Time will adjust in 30-second increments. To set the time, press the TIME/SLICESbutton again.
Press the TEMP/SHADE button and use the dial to select either HI (450°F) or LO (400°F). To set the temperature, press theTEMP/SHADE button again. NOTE: There is no preheat for the Broil function.
If using the wire rack, slide wire rack into middle rails with or without SearPlate in bottom rails to catch drippings, then add ingredients. If using the SearPlate, place ingredients on the SearPlate and slide into bottom rails, then add ingredients. If using wire rack with other baking accessory, slide wire rack into bottom rails, then add ingredients. Close oven door. Press the setting dial to begin cooking.
During cooking, you can open the oven door to check on or flip ingredients.
When cook time is complete, the oven will beep and“END HOT” will appear on the display.
Toast:
To select the function, press theAIR OVEN MODE button, then turn the dial until TOAST illuminates. The default amount of slices and shade will be displayed.
Press the TIME/SLICES button and use the dial to select the number of bread slices. You may toast up to 9 slices at once. To set the number of slices, press the TIME/SLICES button again.
Press the TEMP/SHADE button and use the dial to select a shade level. To set the shade level, press theTEMP/SHADE button again. NOTE: There is no temperature adjustment available for the Toast function, and the unit does not preheat in Toast mode. It is very important to select the exact number of slices to avoid over- or under-toasting. Results may vary when unit is already warm.
Place bread slices on the wire rack into middle rails. Close oven door and press the setting dial to begin cooking. You do not need to flip the slices during cooking. NOTE: You can also manually adjust the time once cooking has started to better choose your preferred shade.
When cook time is complete, the oven will beep and “END HOT”will appear on the display.
Bagel:
To select the function, press the AIR OVEN MODE button, then turn the dial untilBAGELilluminates. The default number of slices and shade level will display.
Press the TIME/SLICES button and use the dial to select the number of slices. You may toast up to 6 bagel halves at once. To set the number of slices, press the TIME/SLICESbutton again.
Press the TEMP/SHADE button and use the dial to select a shade level. To set the shade level, press the TEMP/ SHADEbutton again. NOTE: There is no temperature adjustment available for the Bagel function, and the unit does not preheat in Bagel mode. It is very important to select the exact number of slices to avoid over- or under-toasting. Results may vary when unit is already warm.
Place bagel slices, cut-side up, on the wire rack into middle rails. Close oven door and press the setting dial to begin cooking. You do not need to flip the slices during cooking.
When cook time is complete, the oven will beep and “END HOT” will appear on the display. NOTE: You can also manually adjust the time once cooking has started to better achieve your preferred shade.
REHEAT:
NOTE: The REHEAT function is not included on all models.
To select the function, press the AIR OVEN MODE button, then turn the dial until REHEAT illuminates.
Press the TIME/SLICES buttons to select a reheat time up to 2 hours. Time will adjust in 1-minute increments under 1 hour and 5-minute increments over 1 hour.
Press theTEMP/SHADE button to select a temperature between 100°F and 450°F. Temperature will adjust in 5-degree increments.
Place food on the SearPlate or in an oven-safe container and place the pan or container on the wire rack into the bottom rails. Close oven door and press the setting dial to begin cooking.
When cook time is complete, the oven will beep and “END HOT” will appear on the display. NOTE: There is no preheat with Reheat.
Dehydrate:
NOTE: The DEHYDRATE function is not included on all models.
To select the function, press the AIR OVEN MODE button, then turn the dial until DEHYDRATE illuminates. The default time and temperature settings will display. NOTE: There is no preheat with Dehydrate.
Press theTIME/SLICES button and use the dial to select a time up to 12 hours. Time will adjust in 15-minute increments. To set the time, press the TIME/SLICES button again.
Press the TEMP/SHADE button and use the dial to select a temperature between 100°F and 200°F. Temperature will adjust in 5-degree increments. To set the temperature, press the TEMP/SHADEbutton again.
Place ingredients in the air fry basket and place basket into top rails of oven. Close oven door and press the setting dial to begin cooking.
During cooking, you can open the oven door to check on or flip ingredients halfway through cooking.
When cook time is complete, the oven will beep and “END HOT” will appear on the display.
ALTERNATIVE TO PIZZA PEEL:
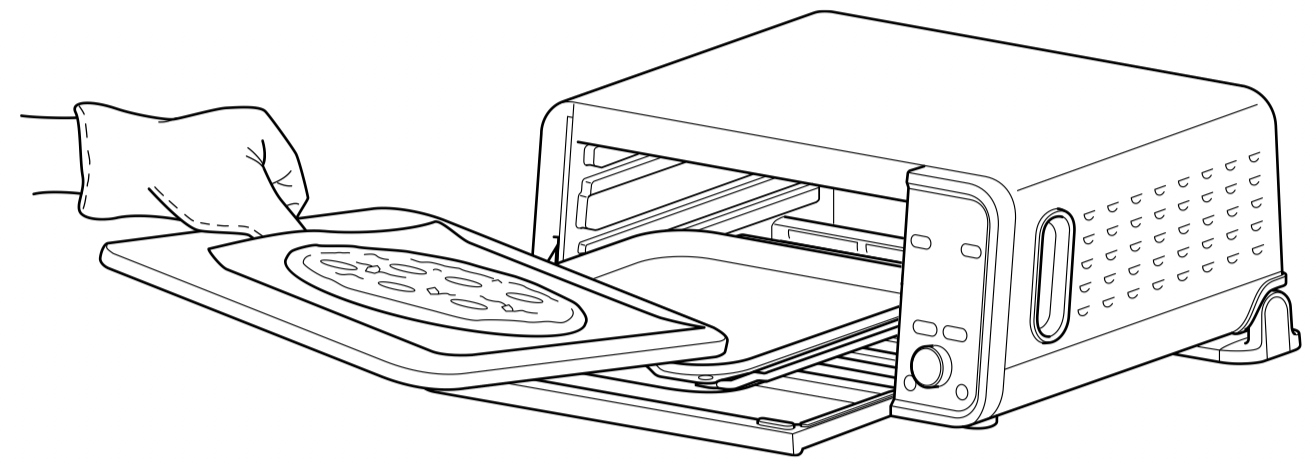
We recommend a pizza peel as the best method for transferring fresh dough onto the preheated SearPlate. If you do not have a pizza peel, use the following instructions.
Measure a large sheet of parchment paper to match the size of the SearPlate. Then take the parchment paper and set it on a cutting board or other flat surface to roll out your fresh pizza dough with flour to your desired thickness.
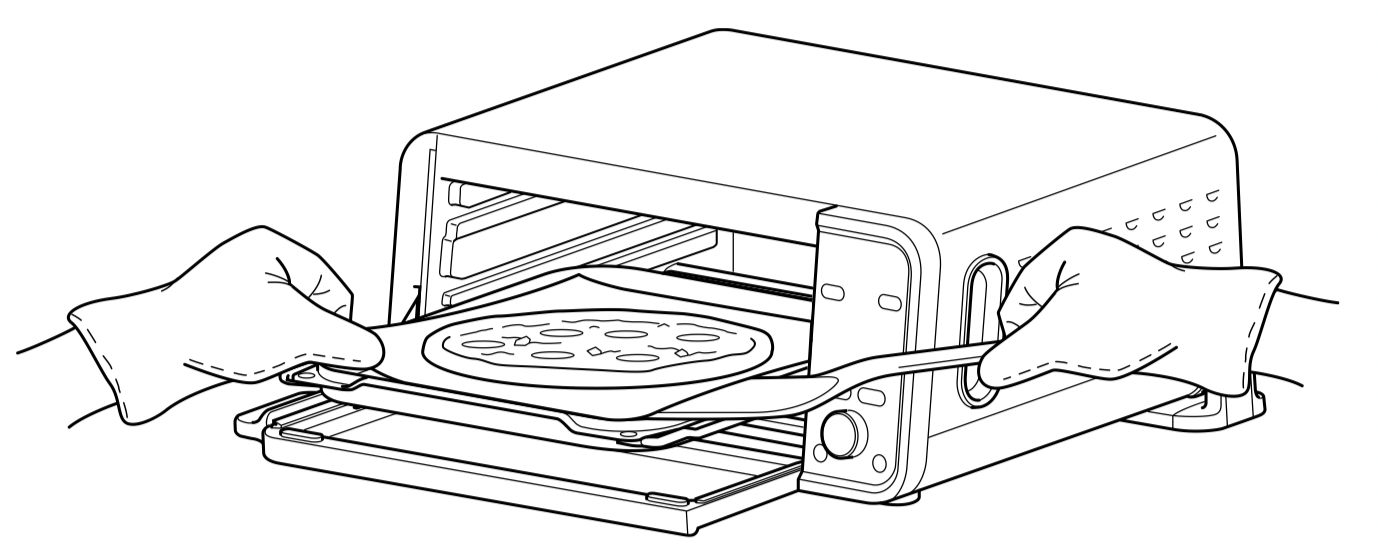
Place your toppings and ingredients on the fresh dough. Once the SearPlate has preheated, using oven mitts, slide the SearPlate partially out of the oven and transfer the fresh pizza with the parchment paper onto the SearPlate. Slide the SearPlate back into the oven and close the door.
After 3 to 4 minutes of cook time, you can remove the parchment paper from the bottom of the pizza. Use oven mitts to slide the SearPlate partially out of the oven and carefully slide the parchment out from underneath pizza by grabbing one of the corners. Slide the SearPlate back into the oven and close the door. If you leave the parchment paper during the cook cycle, the paper may become brittle. NOTE: The parchment paper should not touch any of the heating elements or the inside oven walls as it could cause smoke. DO NOT use parchment paper on Broil or with temperatures above the recommended manufacturer’s instructions.
CLEANING, MAINTENANCE & STORAGE
EVERYDAY CLEANING:
The oven should be cleaned thoroughly after every use.
Unplug the oven from the outlet and allow it to cool down before cleaning.
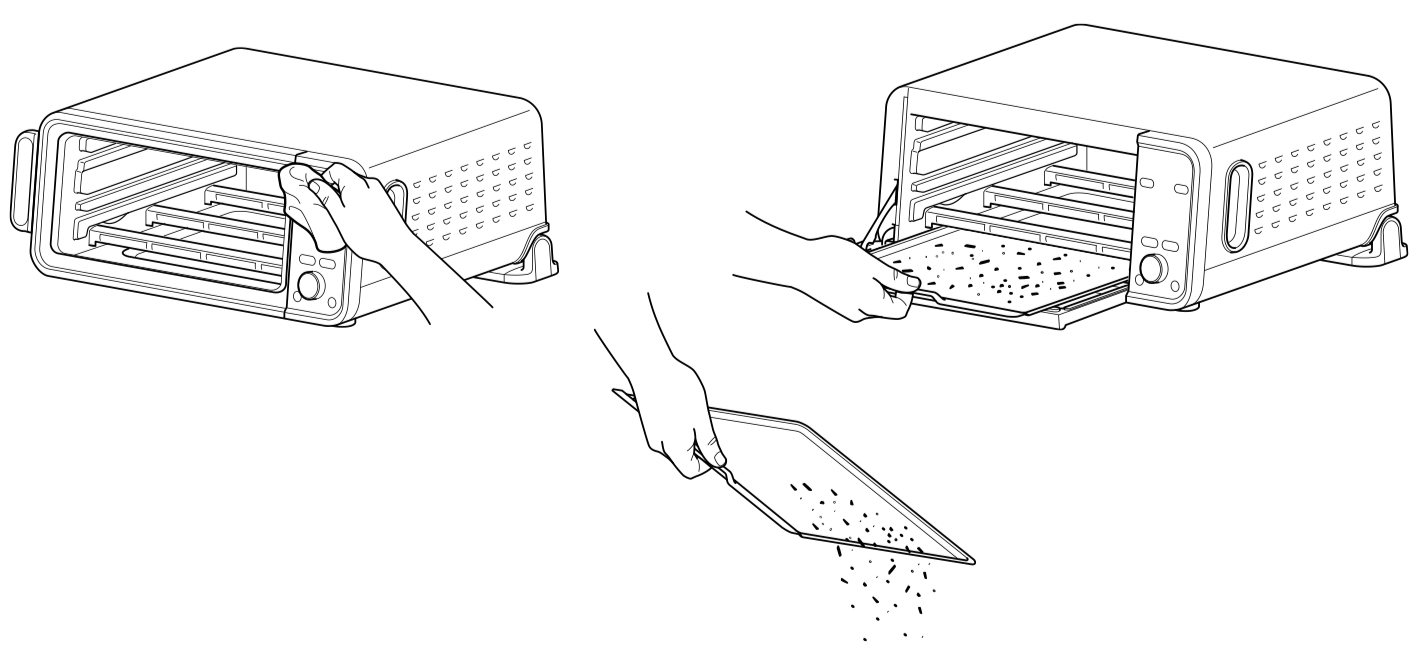
Empty crumb tray by sliding it out of the oven when the oven is in the flipped down position. Clean accessories after each use. Accessories are hand-wash recommended. The air fry basket and wire rack can be put in the dishwasher, but may wear more quickly over time. NOTE: Empty crumb tray frequently. Hand-wash when necessary.
To clean any food splatter on the interior walls of the oven, wipe them with a soft, damp sponge. DO NOT use abrasive cleaners, scrubbing brushes, or chemical cleaners, as they will damage the oven
To clean the exterior of the main oven and the control panel, wipe them clean with a damp cloth. A non-abrasive liquid cleanser or mild spray solution may be used. Apply the cleanser to the sponge, not the oven surface, before cleaning. NOTE: DO NOT submerge oven in water or place in dishwasher.
SEARPLATE CLEANING:
The SearPlate should be cleaned thoroughly after every use.
Remove the SearPlate from the oven and allow it to cool down before cleaning. NOTE: Always allow the SearPlate to cool before immersing in water. Temperature shock could cause the SearPlate to be damaged or warp.
Use hot, soapy water and a non-abrasive sponge to wash the SearPlate. DO NOT place SearPlate in the dishwasher.
For deep cleaning, soak the SearPlate overnight in hot, soapy water, and then wash it in the morning. This can also help restore nonstick performance.
SEARPLATE CARE:
1. To extend the life of the SearPlate, DO NOT use metal or sharp utensils or cut foods on it.
2. Make sure to wash after every use. The nonstick performance can wear if there is burned grease or food residue built up on the surface.
3. DO NOT store food on the SearPlate as it can cause staining. It should remain clean when not in use.
CLEANING THE THERMOMETER:
DO NOT place the thermometer or holder in the dishwasher.
Unplug the thermometer from the unit and allow it to cool down before cleaning.
Hand wash the thermometer.
To deep clean the thermometer, soak the stainless steel tip in warm, soapy water. DO NOT immerse the cord or jack in water or any other liquid. NEVER use liquid cleaning solution near the thermometer jack. We recommend using compressed air or a cotton swab to avoid damaging the jack.
DEEP CLEANING:
Allow the oven to cool down, then unplug the oven from the outlet before cleaning.
Remove all accessories from the oven, including the crumb tray, and wash separately. Use a non-abrasive cleaning brush to wash the air fry basket more thoroughly. Soak accessories overnight in hot, soapy water. The air fry basket and wire rack can be put in the dishwasher, but may wear more quickly over time.
Use warm, soapy water and a soft cloth to wash the oven’s interior. DO NOT use abrasive cleaners, scrubbing brushes, or chemical cleaners, as they will damage the oven. NOTE: NEVER put the main unit in the dishwasher or immerse it in water or any other liquid.
To prolong use of accessories, hand-wash with warm, soapy water.
Thoroughly dry all parts before placing them back in the oven.
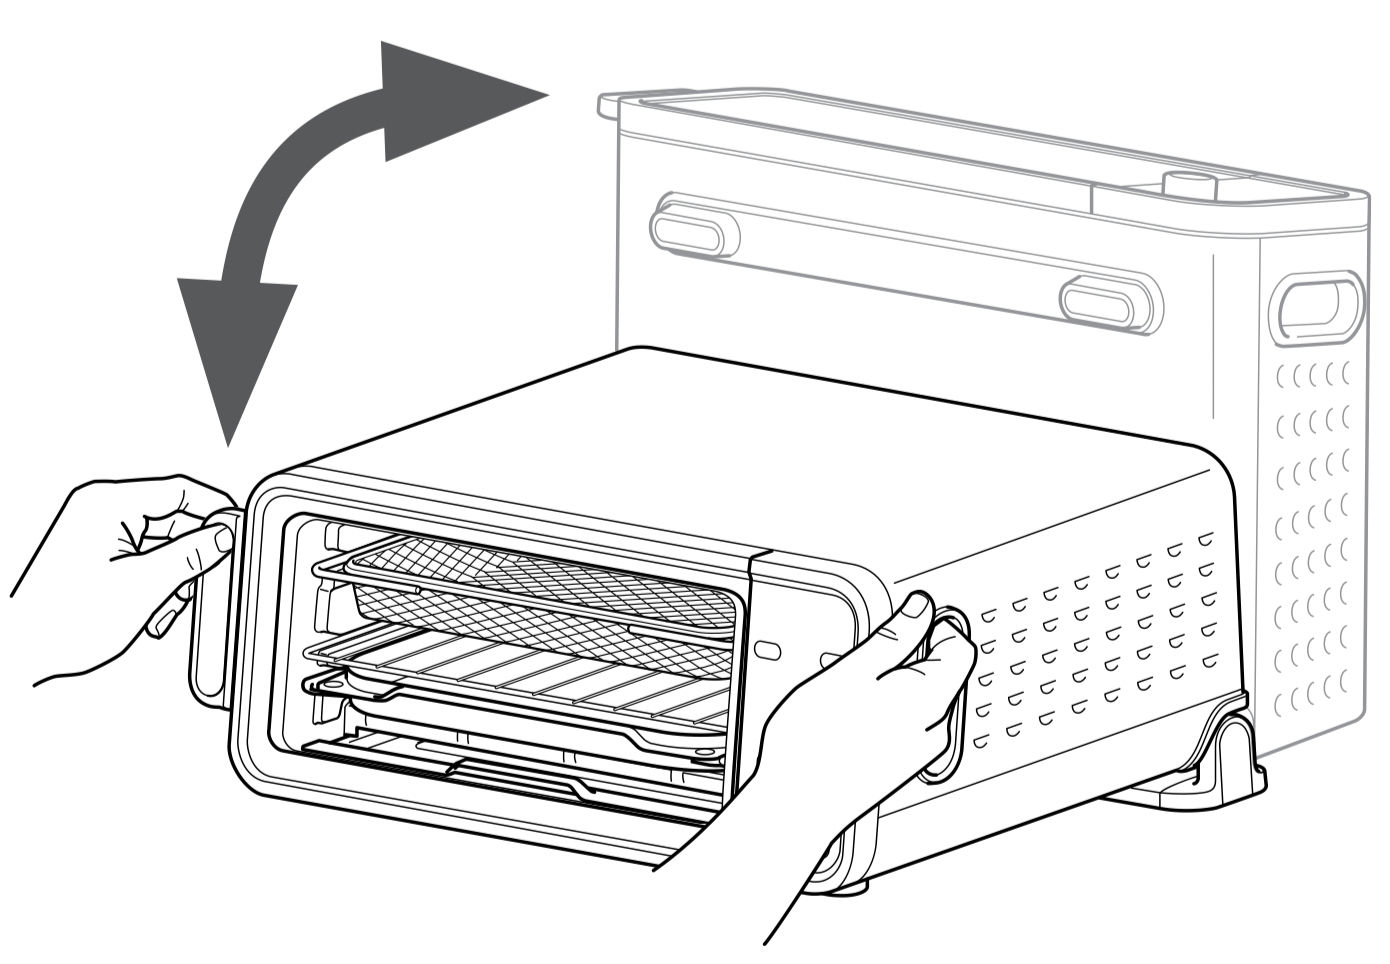
FLIP-UP-AND-AWAY STORAGE:
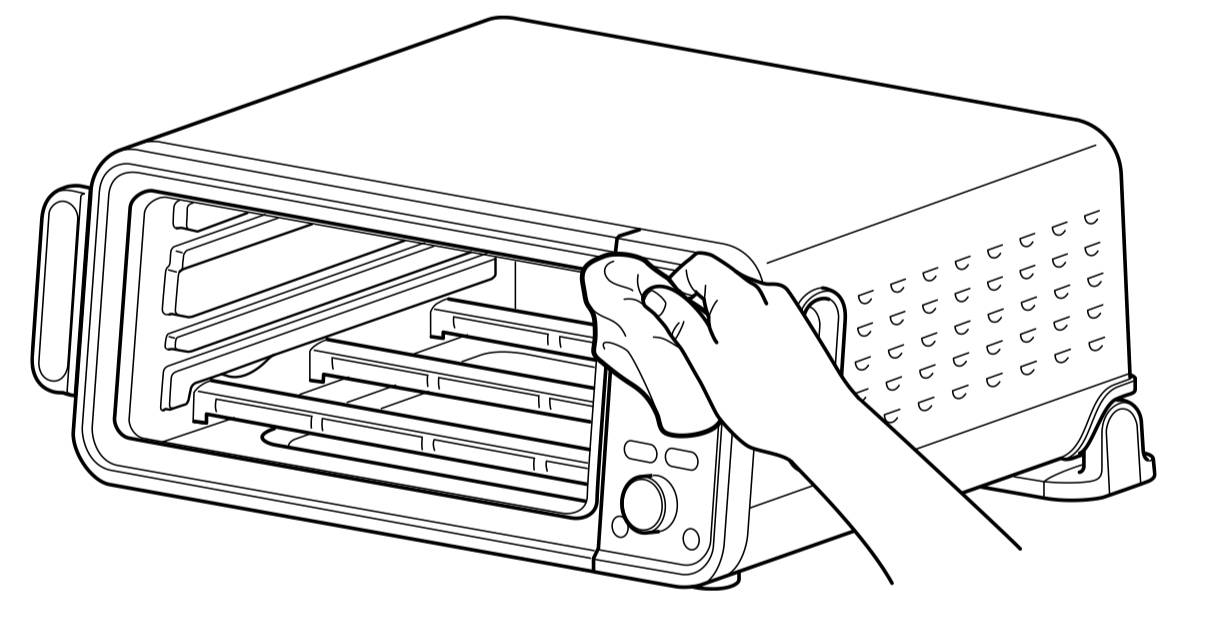
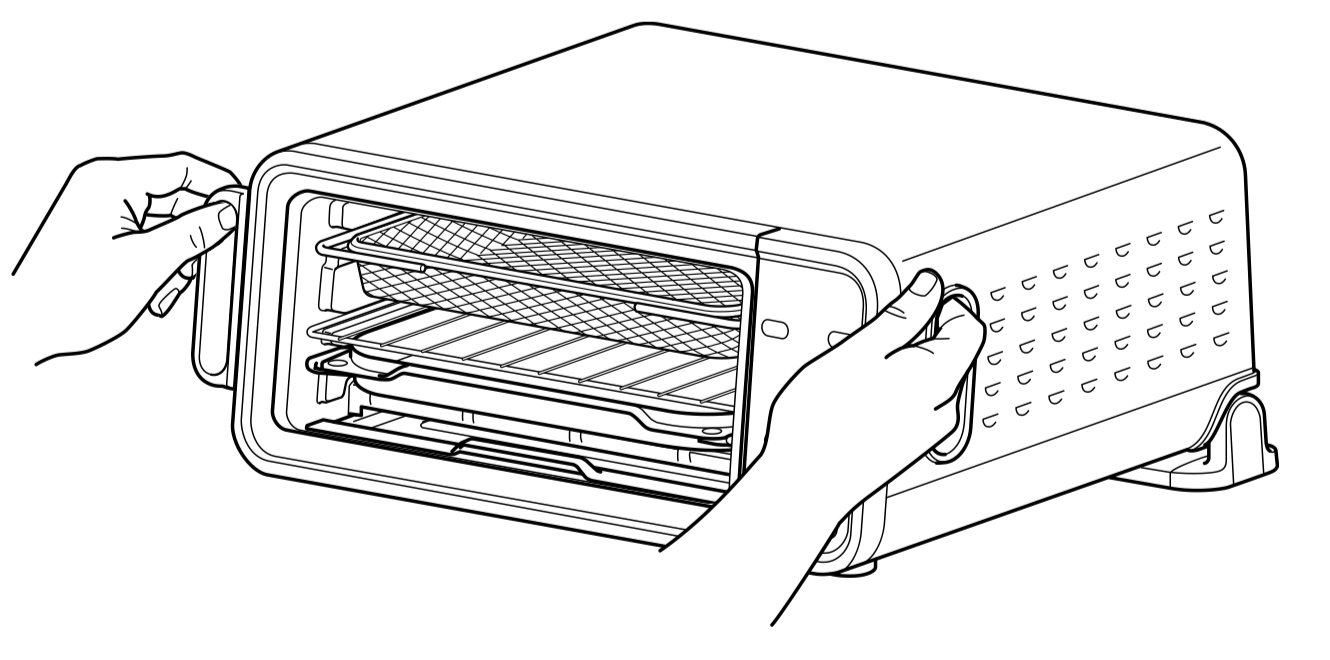
DO NOT flip oven up when it is hot or in use.FLIP will appear on the display when unit is cooled and ready to flip. Wait for oven to cool down before handling. Hold handles on each side of the oven. DO NOT unplug the oven after use until FLIP appears. The fan will continue to run after cooking has completed for about 15 minutes or until the oven temperature is 95°F. This is normal and not a cause for concern.
Lift and flip oven upward using the handles on each side of the unit.
Leave the oven in the upright position when storing or for deep cleaning. Accessories can be stored inside while in the upright position. See Accessory Storage Placement section on page 5 for correct placement.
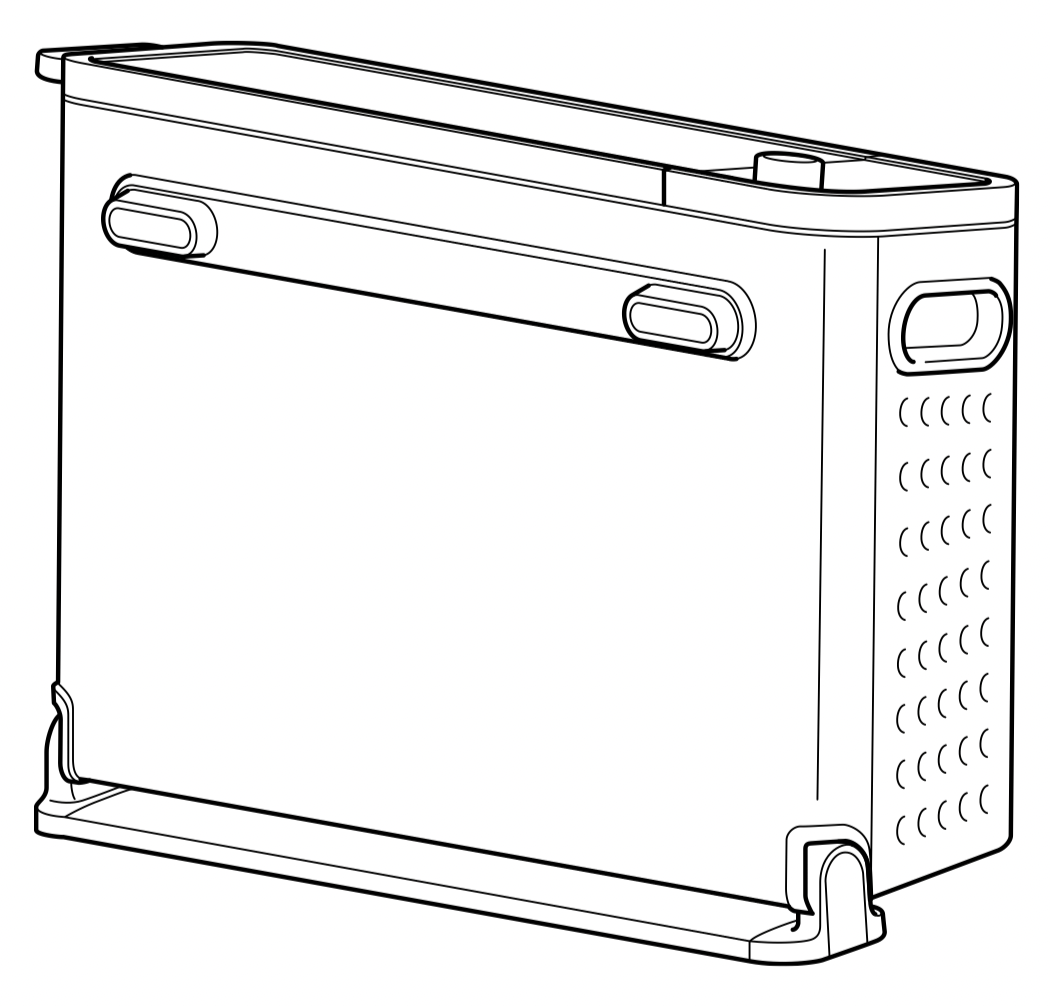
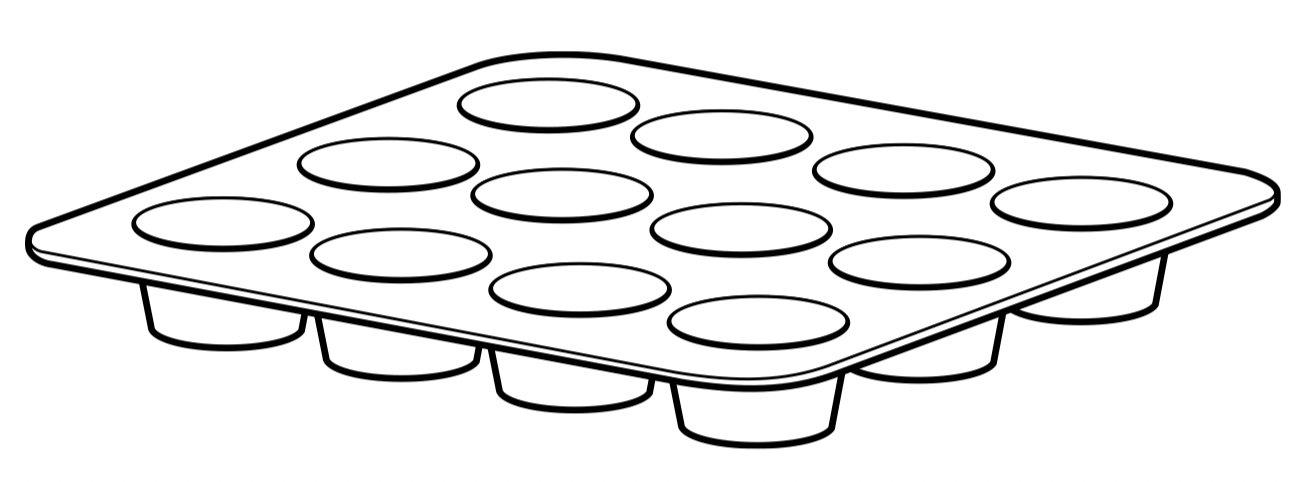
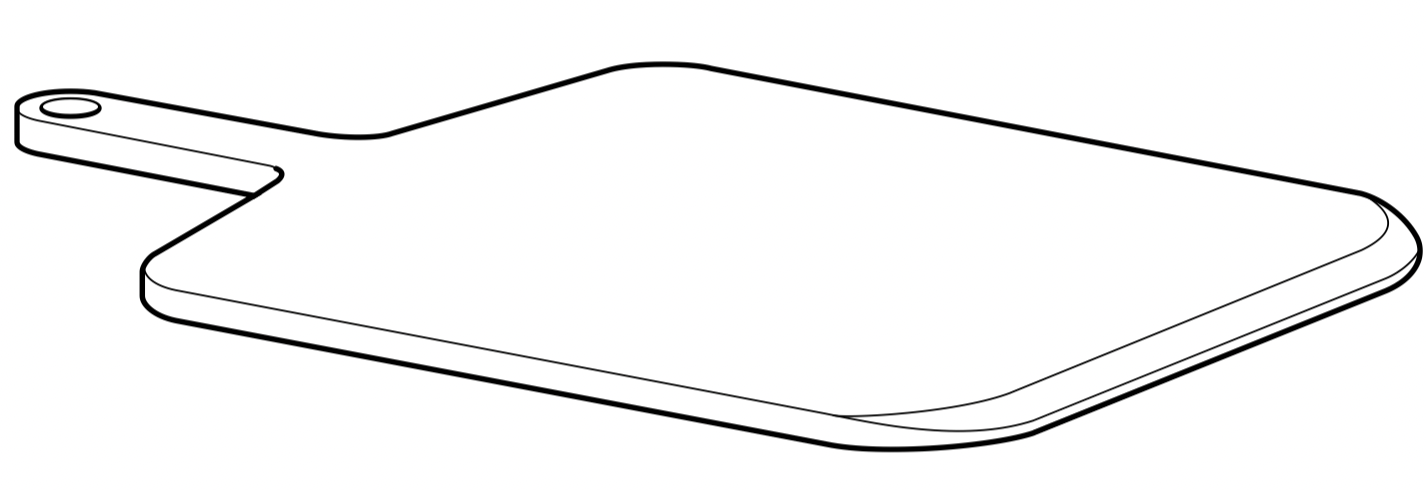
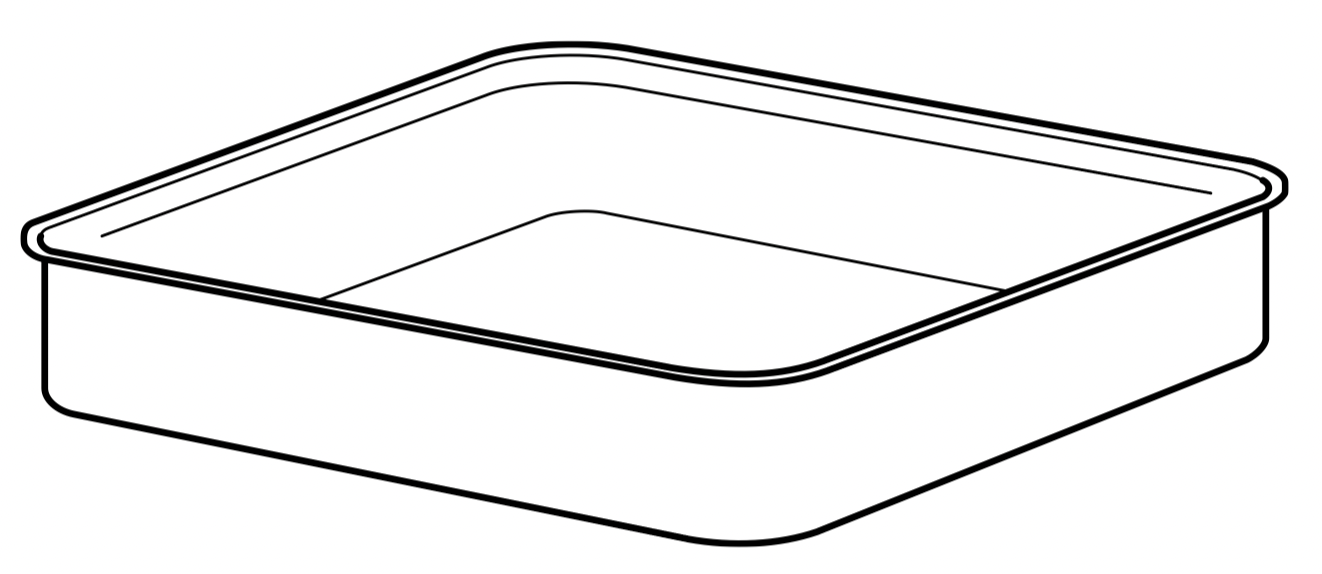
ACCESSORIES FOR PURCHASE
We offer a suite of accessories custom made for your Ninja® Foodi® Smart Dual Heat Air Fry Oven. Visit ninjaaccessories.com to expand your capabilities and take your cooking to the next level.
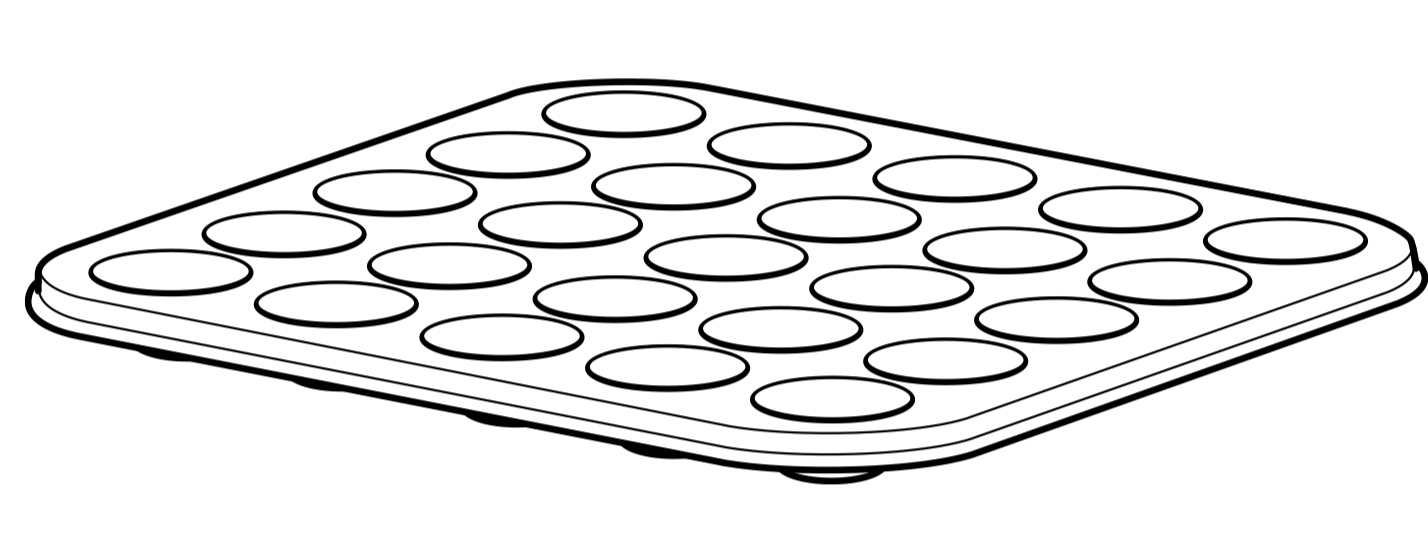
Egg Bite/Muffin Tray
Pizza Peel
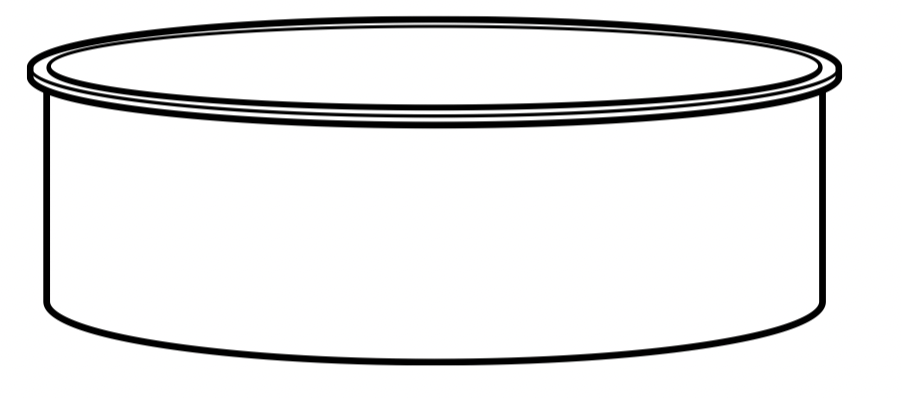
2" Casserole Dish
Multi-Purpose Pan
Mini Morsel Tray
TROUBLESHOOTING & FAQ
ERROR MESSAGES:
“Er0,” “Er1,” “Er2,” “Er3,” “Er4,” “Er5,” “Er6,” or “Er7”
Power off the unit and call Customer Service at 1-877-646-5288.
FAQ
Why won’t the oven turn on?
Oven needs to be in flipped-down position in order to power it on.
Make sure the power cord is securely plugged into the outlet.
Insert the power cord into a different outlet.
Reset the circuit breaker if necessary.
Press the power button.
Can I use the SearPlate instead of the air fry basket with air fry function?
Yes, but flipping ingredients during cooking is required, and levels of crispiness may vary.
Do I need to adjust the cook times and temperatures of traditional oven recipes?
For best results, keep an eye out on your food while cooking. Refer to cook charts in the Inspiration Guide for more guidance on cook times and temperatures.
Should I add my ingredients before or after preheating?
For Dual Heat functions, preheating the SearPlate is required before adding ingredients. If you do not preheat the SearPlate, food may be cooked improperly.
For Oven Mode functions, preheating the SearPlate or other accessories is not required, but adding ingredients before the unit finishes preheating may impact cooking performance.
Why is my food undercooked or overcooked?
Do not add food until recommended preheat time is complete. For best results, check progress throughout cooking, and remove food if desired level of brownness has been achieved. Remove food immediately after the cook time is complete to avoid overcooking.
This unit cooks faster than a traditional oven. Always keep an eye on your food while cooking.
Can I restore the unit to its default settings?
The oven will remember the last setting used for each function, even if you unplug it. To restore the oven’s default settings for each function, press the TIME/SLICE and TEMP/SHADE buttons simultaneously for 5 seconds.
Why do the heating elements appear to be turning on and off?
This is normal. The oven is designed to control temperature precisely for every function by adjusting the heating elements’ power levels.
Why is steam coming out from the oven door?
This is normal. The door is vented to release steam created by foods with a high moisture content.
Why is water dripping onto the counter from under the door?
This is normal. The condensation created by foods with a high moisture content (such as frozen breads) may run down the inside of the door and drip onto the counter.
Why is there noise coming from from the control panel or back of unit?
When the oven is hot, a fan turns on to cool down the control panel.
Why does the unit sound like it is still running even though the power is off?
The cooling fan may continue to run even after the unit has been turned off. This is a normal function and should not be a source of concern. The cooling fan will stop after the temperature of the unit is below 95°F.
#1 Where do the crumbs go if you fip.up the unit to store away
Once the unit has cooled and prior to flipping the unit for storage, we recommend removing the Crumb Tray and dumping the crumbs in the trash. Wipe off the tray if needed, return it to the machine, and then flip for storage.
#2 Does This Pause When You Open The Door, And Have The Access Panel On The Bottom For Cleaning?
It does NOT pause. There is a pan located right below the heater that will protect the oven's bottom and, if you have the sear plan in, it will act as a crumb catcher for the fry basket. There is no bottom access panel, just the oven door.
#3 Why does the unit sound like it is still running even though the power is off?
The cooling fan may continue to run even after the unit has been turned off. This is a source of concern. The cooling fan will stop after the temperature of the unit is below 95°F.
#4 Does the unit pause when I open the door during cooking?
No. To pause the unit, simply press the dial, which serves as the START/STOP button.


 Thermometer: Illuminates when thermometer mode is enabled by plugging in the thermometer then pressing the PRESET or MANUAL button. Flashes when setting thermometer settings and will stay illuminated once cooking has started.
 will appear on the time display when the unit is cool enough to flip up for storage or cleaning.
 (Light) button: Press to turn the oven’s interior light on and off. Light will automatically turn on when 1 minute of cook time remains.
 (Power) button: Press to turn the unit on and off.