Loading ...
Loading ...
Loading ...
EN
©2019 Hestan Commercial Corporation
11
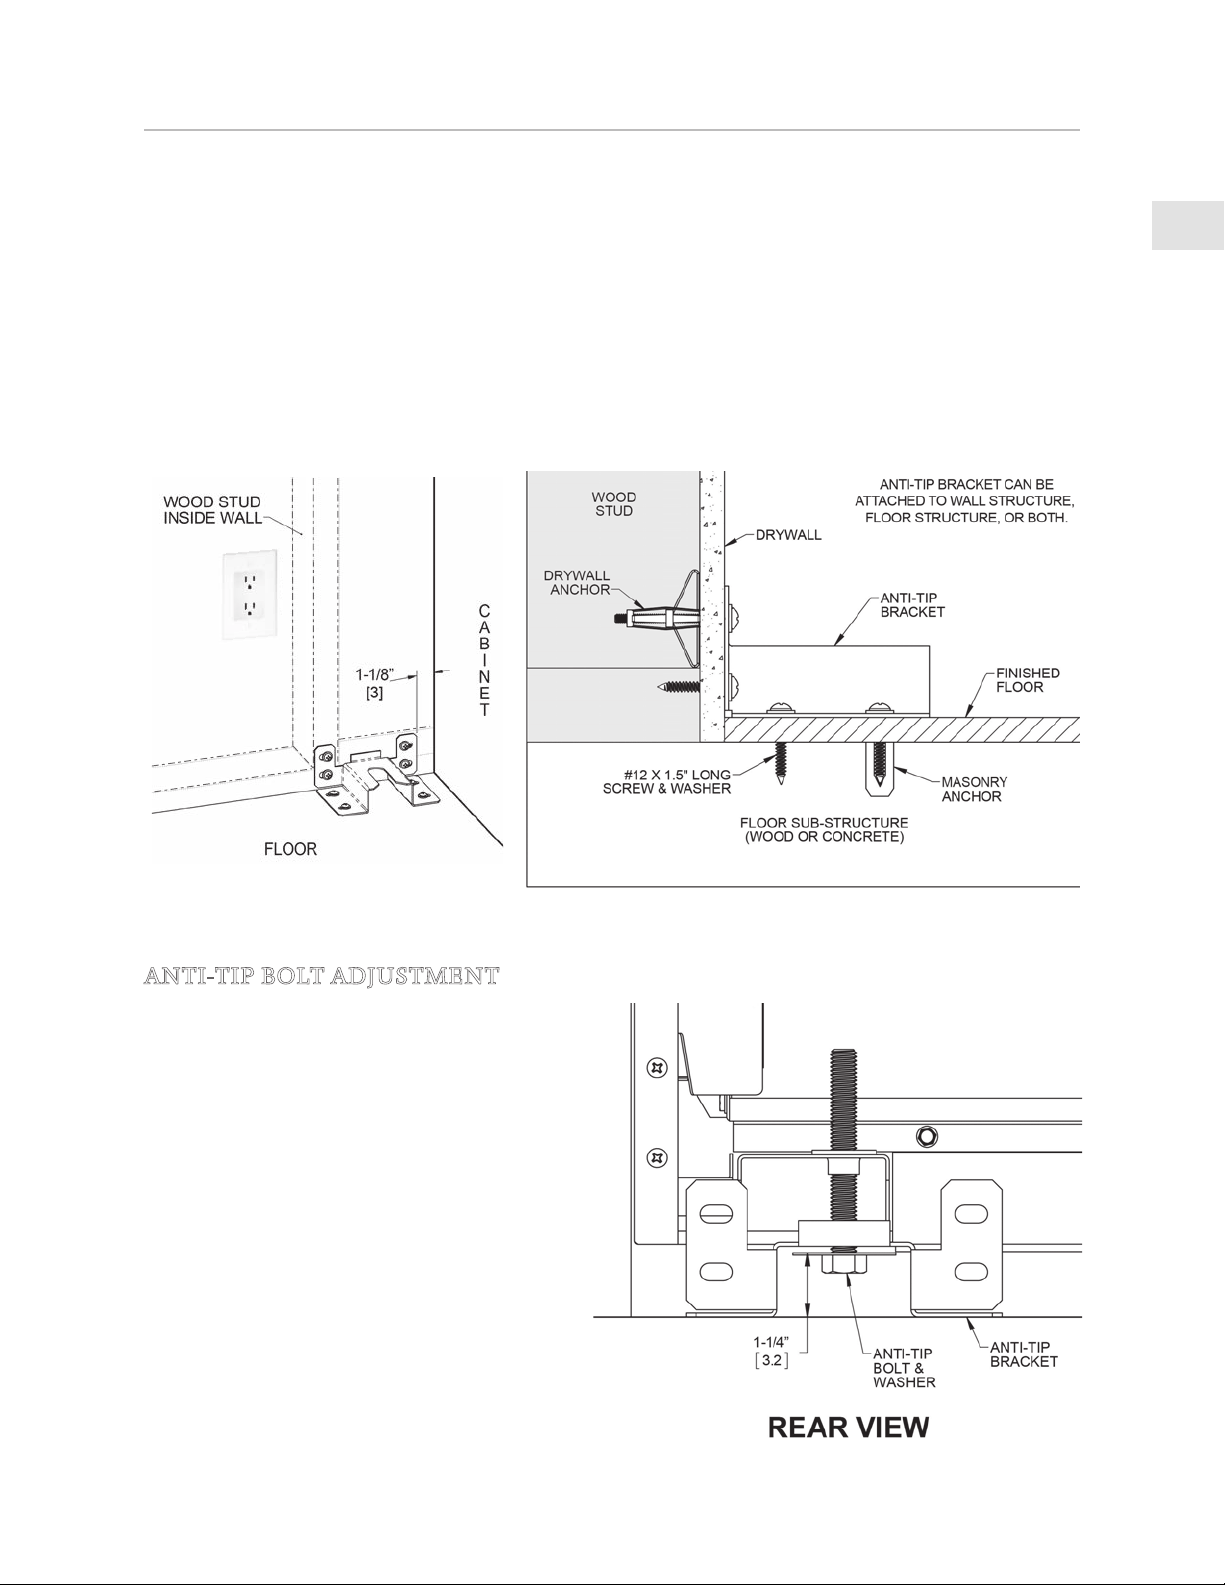
INSTALLATION OF ANTI-TIP DEVICE
(CONTINUED)
DRYWALL INSTALLATION: After positioning the bracket as per the diagram below, mark the holes
and drill the appropriate holes as per the instructions supplied with the wall anchors. For hardboard
or solid plaster walls, you may need different wall anchors, available at your local hardware store or
home center.
WOOD FLOOR INSTALLATION: After positioning the bracket as per the diagram below, mark the
holes and drill the appropriate holes for #12 or similar, large wood screws, at least 1.5” [3.8 cm] in
length. Use washers as well. All hardware is available at your local hardware store or home center.
CONCRETE FLOOR INSTALLATION: After positioning the bracket as per the diagram below, mark
the holes and drill the appropriate holes for #12 or similar large masonry anchors, at least 1.5” [3.8
cm] in length. Use washers as well. All hardware is available at your local hardware store or home
center.
ANTI-TIP BOLT ADJUSTMENT
After leveling the range, and after the bracket
has been attached, adjust the anti-tip bolt and
large washer under the range so the top of the
washer is 1-1/4” [3.2 cm] maximum from the
floor. Slide the range into the opening of the
bracket and verify the bolt is engaged in the
bracket as seen below. Carefully tip the range
forward to check. The range should not move
more than 1” [2.5 cm].
Loading ...
Loading ...
Loading ...