
Introduction .................................................................
Warranty ....................................................................
Technical Data ..............................................................
Important Safety Instructions..................................................
Helpful Hints ................................................................
Pre-installation ..............................................................
Diagram of the Washer .......................................................
Installation Instructions.......................................................
1
2
3
4
5
6
6
7
8
9
10
11
12
13
14
15
16
17
18
21
23
24
Unpacking and Leveling .....................................................
Electrical ...................................................................
Plumbing ...................................................................
Built-In, Recessed, Closet, Alcove Installation .................................
Program Selection Chart ....................................................
Operating Instructions .......................................................
Control Panel ...............................................................
Display Panel ...............................................................
Useful Tips & Understanding Fabric Care Label ...............................
Maintenance ................................................................
Stain Removal Chart ........................................................
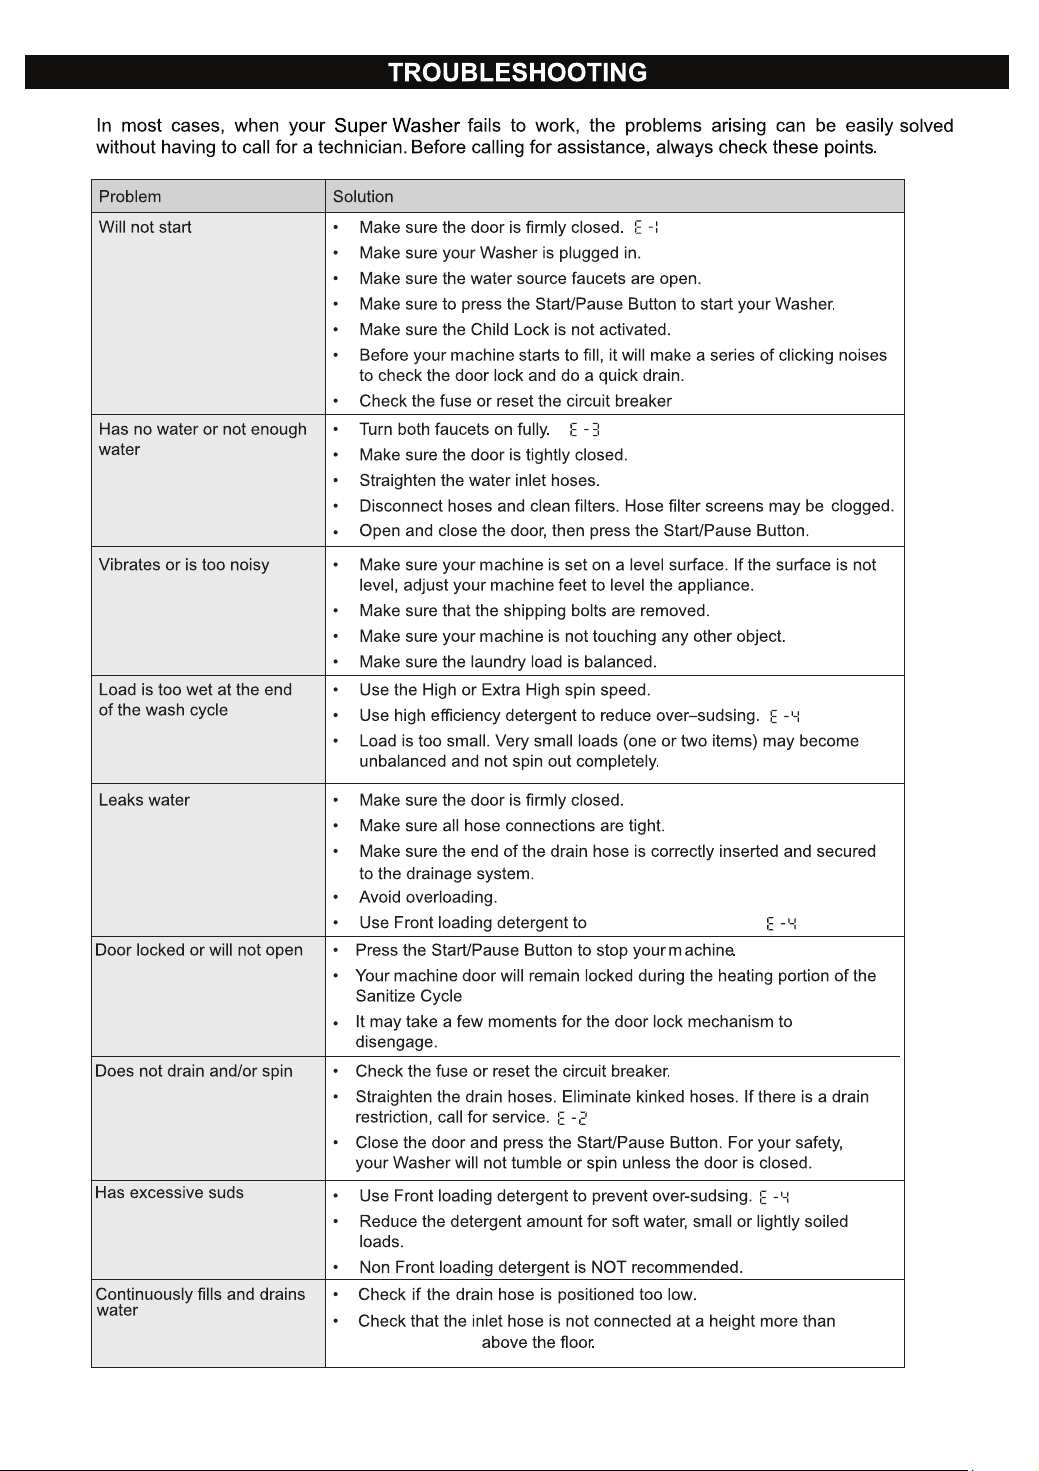
Troubleshooting .............................................................
Diagnostic Menu ............................................................
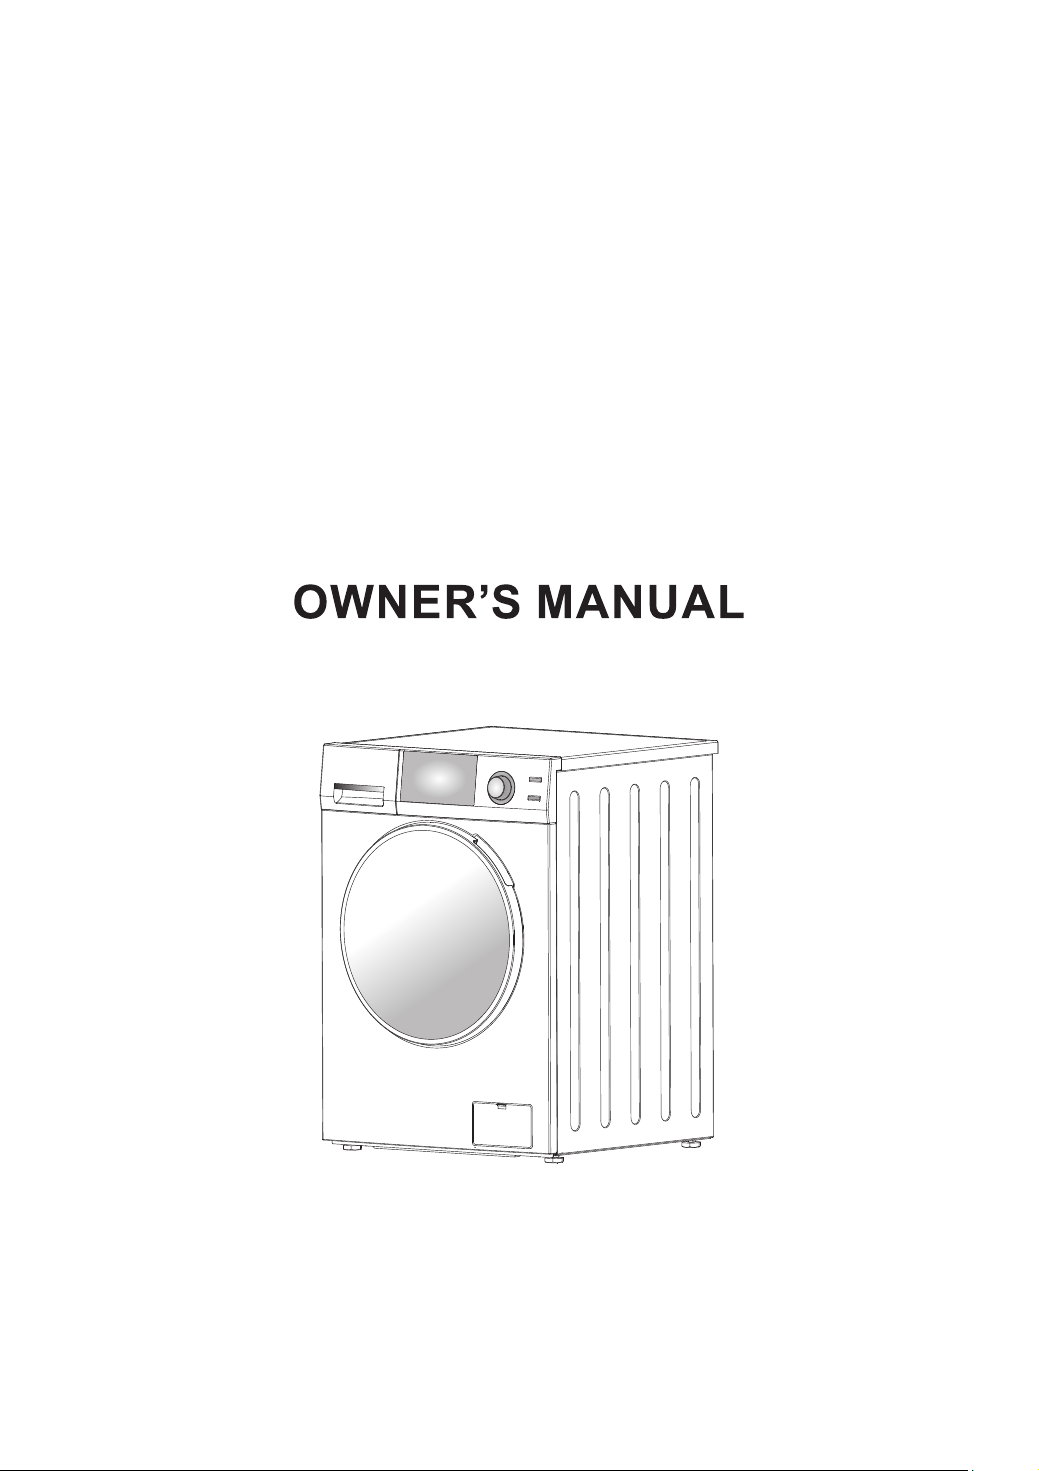
Please read the Owner’s Manual carefully before using your
Fully Automatic Washer
Exclusions ...................................................................

1
Efficient Operation
shorter
which only needs to be cleaned every few months.

Your appliance is protected by this warranty under normal, personal,
family or household use for 1 Year Parts & Labor and limited
commercial use (90 days) in USA and Canada.
WARRANTY
Consolidated Brands undertakes to the consumer/owner to repair or, at our option, to replace any
part of this product which proves to be defective in workmanship or material under normal personal,
family or household use in USA and Canada, for a period of one years parts & labor
from the date of original purchase. For commercial use, the product is warranted for a period of
90 days. During this period, we will provide all labor and parts necessary to correct such defect,
free of charge, if the appliance has been installed and operated in accordance with the written
instructions provided with the appliance. Ready access to the appliance, for service, is the
responsibility of the consumer/owner. We may require return of products or parts to our warranty
department for which the shipping charges are to be incurred by the consumer. If a return or
replacement is required, allow 3-4 weeks to process. All repairs or replacements are warranted
only for the remainder of the original warranty period. Charges may incur if warranty coverage is
not applicable. Service would be provided from Monday to Friday between normal business hours.
WARRANTY INFORMATION
Consolidated Brands
10216 Georgibelle Drive, Suite 900D
Houston, TX 77043-5249
Since it is the responsibility of the consumer/owner to establish the warranty period by verifying the
original purchase date, Consolidated Brands recommends that a receipt, delivery slip or some other
appropriate payment record be kept for that purpose. This warranty gives you specific legal rights,
and you may also have other rights which vary from State to State.
2
QUESTIONS / SERVICE
Ph o n e / Te x t : 1- 8 0 0 - 7 7 6 - 3 5 3 8
Email: Service@ApplianceDesk.com
Web: www.ApplianceDesk.com
You can register your Warranty by any of the following methods:
1. Mail in the Warranty Registration Card
2. Register online at www.ApplianceDesk.com
3. Take a picture of the bar code and text it to Appliance Desk
4. Scan the QR Code

Installation
1. Non-removal of shipping rods, causing vibration / internal damage.
2. Non-adjustment of feet to level machine, causing vibration / internal damage.
3. Not conforming to minimum space requirements for Built-in installation, causing excess heat
and resulting in damage to internal components.
4. Installation in a corrosive environment
5. Incorrect water pressure i.e below 7.25 psi or above 145 psi
6. Incorrect water inlet hose installation (use only factory supplied hoses with metric threads on
the L shaped side to fit water valves)
Maintenance
1. Non-cleaning of coin trap for debris, causing the unit to not drain out water and resulting in
drain pump malfunction.
2. Improper maintenance (such as but not limited to scale build-up, freeze damage)
Damage
1. Breakage of cosmetic parts eg. Door handle, knob.
Other
1. Accident, abuse or misuse
2. Using of solvents to clean the machine or wash clothes causing damage.
3. Misapplication of this product e.g. Use in a non household/commercial
environment.
4. Any other cause not due to defects in materials or workmanship
5. Problems or damage due to fires, flooding, electrical surges, freezing or any
acts of God
6. Any damage cause by poor water quality
7. Operating the appliance with anything other than potable water at all times
8. Force majeure
THE FOLLOWING WORK ARE NOT COVERED UNDER WARRANTY:
In no event shall Consolidated Brands be liable for incidental or consequential damages or for
damages resulting from external causes such as abuse, operation misuse, neglect, alterations,
normal wear and tear, incorrect voltage or acts of God. This warranty does not cover service calls
which involve defective workmanship, damage due to other products while combined use with this
product or materials covered by this warranty. Accordingly, diagnosis and repair costs for a service
call which involves defective workmanship or materials will be the responsibility of the consumer-
owner.
EXCLUSIONS
3
Most work is covered. The defining factor is has the machine malfunctioned (Consolidated Brands
is responsible) or has the customer omitted or done something to cause malfunction (customer is
responsible).

Electrical Testing Laboratories
Note: All rights reserved.
Designs, Specifications and Manual subject to change without notice
4
Inlet and Drain Hose length
Power cable length
6 Feet
6 Feet
23.6 / 60
33.5 / 85
24 / 61
41.3 / 105
(lb / kg)
3

2
the washer, turn on all hot water faucets and let
the water flow from each for several minutes. This will release any accumulated Hydrogen.
5

AND REDUCE WRINKLES.
CAUTION: TO RE DUC E TH E RI SK OF
ELECT RIC SH OCK, DO NOT REM OVE
COVER (OR BACK). NO USER SERVICEABLE
PARTS INSIDE. REFER SERVICING TO
QUALIFIED SERVICE PROFESSIONALS.
6

7

Disposing of the packing
The shipping package has protected your
new appliance on its way to your home.
All packaging materials are non-polluting and
recyclable. Please dispose of packing material
according to local environmental regulations.
Handling
Please handle the machine carefully and use
appropriate means while lifting and moving the
machine so that it does not get damaged. Do not
drag the machine on your floor. Do not hold on
to protruding parts when lifting.
Keep children away from the shipping carton
and packing components. Danger of suffocation
from plastic foil and folding cartons.
Disposing of your old appliance
Old Appliances are not worthless trash! Valuable
raw material can be recycled from old appliances.
To prevent children from locking themselves in the
appliances, remove the door. Please dispose of
your old appliance according to local environmental
regulations.
Factory - supplied equipment
Inside the drum there is a packet of accessory
parts supplied with your appliance. Check that
all the accessory parts supplied for your model
are there. If any parts are missing contact
customer service.
Any residual moisture inside the drum is due to
the final testing which every appliance
undergoes before leaving the factory.
Appliance stability is very important otherwise
washing machine could “wander” during the
spin cycles.
Do not install the appliance outdoor
or in an area exposed to freezing condition.
frozen hoses can tear / burst.
The installation area must be solid and even.
Soft floor surfaces such as carpets or surfaces
with foam backing are not suitable.
Removing the shipping rods
If the appliance is located in a room which
will be exposed to temperatures below freezing
point, or if it is located in a cabin that is being
shutdown for the winter, any residual water
in the pump or water inlet hoses must be drained.
The shipping rods must be removed before
using the appliance for the first time and must
be retained for any future transport.
(e.g when moving)
Installation area
8

9

10

11
white

12
Minimum clearances to combustible surfaces: 2" (5 cm) clearance both sides and 3" (7.5 cm) rear.
The Super Washer may be installed in a built-in, recessed area, closet or alcove.
The installation spacing is in inches and is the minimum acceptable.
Other installations must use the minimum dimensions indicated.
Minimum clearance between dryer cabinet and adjacent walls are: 2" either side and 3" front and rear.
Minimum vertical space from floor to overhead cabinets, etc. is 52" (132 cm).
Closet door must be louvered or otherwise ventilated and must contain a minimum of 60 sq. in. of open
area equally distributed. If this closet contains both washer and a dryer, doors must contain a minimum
120 sq. in. of open area equally distributed.
No other fuel-burning appliance shall be installed in the same closet with dryer.
Additional clearances for wall, door and floor molding may be required.
NOTE: If a door is installed that potentially encloses the unit while running, the door must allow for a
minimum of 20 sq. in. of air free movement. There must also be a 1" additional space in front of the
unit to the closed door and 1" from the back of the unit to the wall. Additional spacing should be
considered for easy installation, servicing and compliance with all applicable local, state and federal
codes.

13

For small items such as socks, children’s garments and small towels please use
a Washing Net Bag.
Make sure
Note : concentrated fabric softener must be diluted with a little water before
being poured into the dispenser
(This prevents the over flow siphon from getting blocked)
The blue cups are only for liquid detergent.
Please do not add powder in these cups.
Detergent for pre-wash and bleach
Fabric Softener
Detergent for main wash
Dispenser A
Dispenser B
Dispenser C
Pour 2 cups of RV type Antifreeze in soap dispenser.
on knob
Shut off water at both faucets and disconnect water inlet hoses from faucets and drain.
14
and bleach in
Fig. 12
:
:
:
Your washer is designed to use a high efficiency (HE) detergent, which
reduces or eliminates suds and results in more efficient washing.
in
Dispenser C (Fig.12).

15
Press this selection button to add once more rinse cycle to the selected wash program.
If you want to soak your clothes before the spin cycle, press this button to eliminate the
spin function. This will keep the clothes in the rinse water after the last rinse cycle is finished.
After the desired soak time, press this button again and the water will drain out and proceed
to the last spin cycle.
Press this button to turn on, or turn off the chime before you start the washing cycle.
Press this button to select one of the four memory settings. Then select the your favorite
wash cycles. Then press START/PAUSE button to run this program, and this program will
be memorized. If you want to run the memorized program later, press this button to select
desired program and then press START/PAUSE button.
Max Extract
Extra Rinse
No Spin
Color LED
Display
Delay Start
button
Chime button
Memory button
Program Dial
Start/Pause
button
Child Lock
Power
D temperature
select wash program.
wash cycle,

16
NORMAL
In a few minutes after the cycle ends, the door lock icon will change from locked to unlocked and then you
can open the door easily.

17

18
Your Washer has been designed to operate with easy maintenance.
Follow these simple maintenance procedures to obtain optimum performance:
1. Ensure that your machine was installed according to the correct installation procedures detailed in this Manual.
2. Do not use solvents either to clean the machine or to wash clothes.
3. Keep the inside of the detergent dispenser clean.

19

20
and approx 6 pints

21

22
23
prevent over - sudsing.
3 feet (100 cm)
24
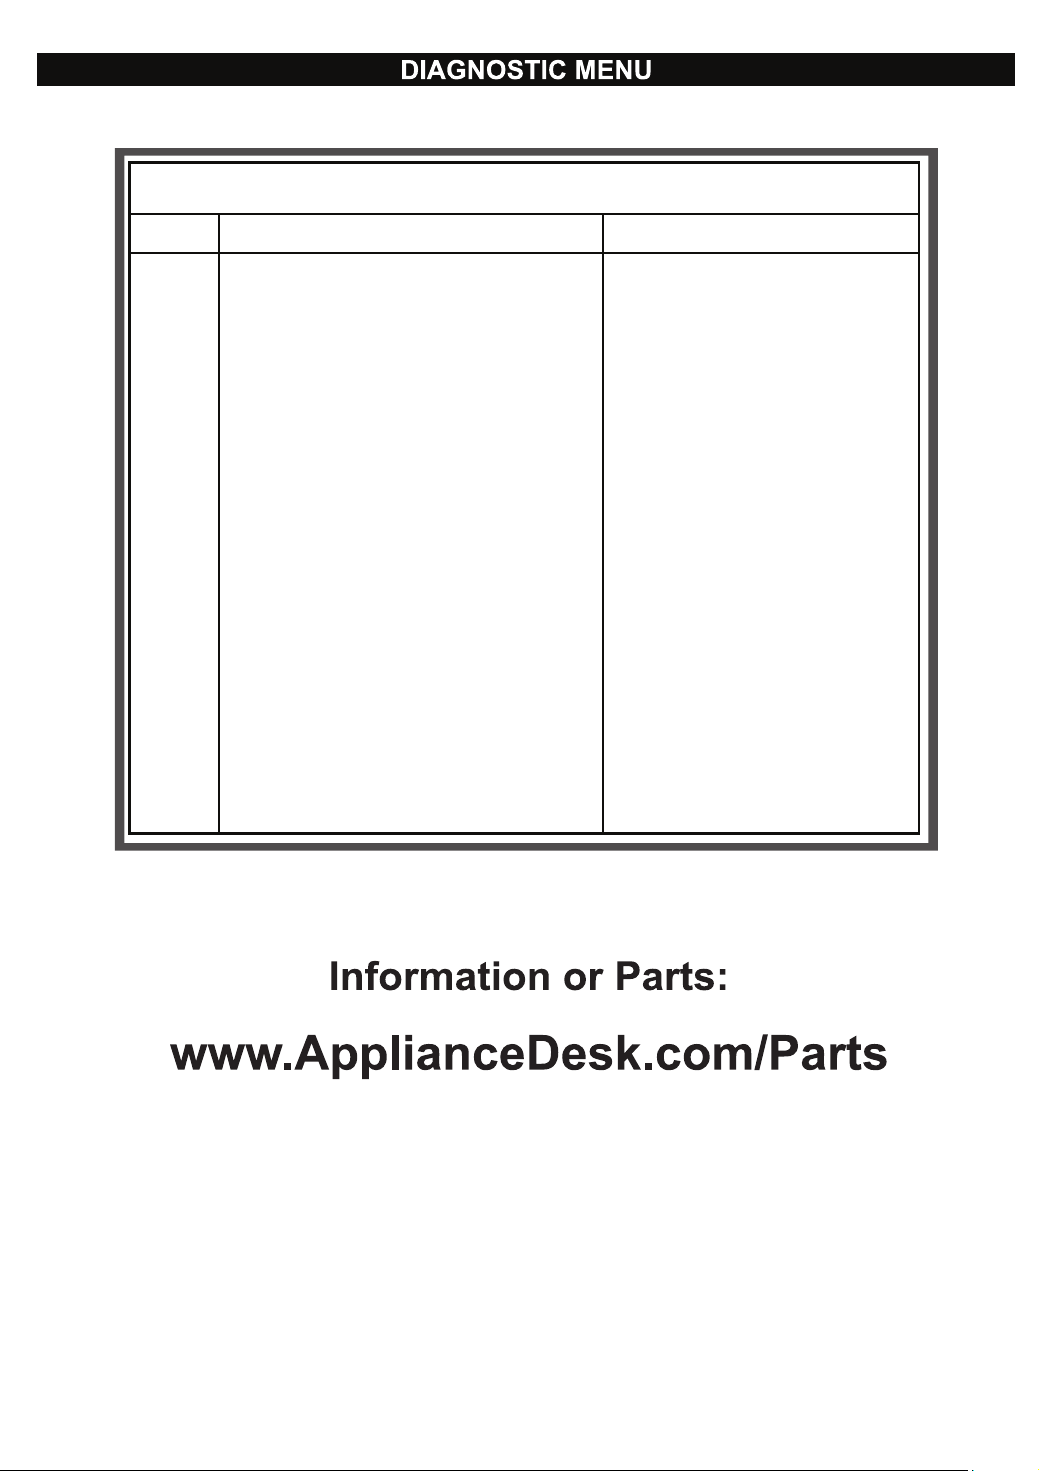
Door close
Drain
Water inlet
Water overfill
Motor
Washing heater failure
Water level failure
Communication between
display & electronic module
Door Switch
Drain Pump
Inlet Valves
Pressure Switch
Motor +Electronic
Module
Washing heater
Water level sensor
Communication
Cable
E1
E2
E3
E4
E5
E7
E10
E16
Code Description Component
DIAGNOSTIC MENU

Read the instructions carefully and keep for future reference
OWNER’S MANUAL
Compact Short Dryer

Consolidated Brands undertakes to the consumer-owner to repair
or, at our option, to replace any part of this product which proves
to be defective in workmanship or material under normal personal,
family or household use, in USA and Canada, for a period of one
year from the date of original purchase. During this period, we will
provide all labor and parts necessary to correct such defect, free
of charge, if the appliance has been assembled and operated in
accordance with the written instructions with the appliance.
In no event shall Consolidated Brands be liable for incidental
or consequential damages or for damages resulting from
external causes such as abuse, misuse, incorrect voltage or
acts of God. This warranty does not cover service calls which
do not involve defective workmanship or materials covered
by this warranty. Accordingly, diagnosis and repair costs for
a service call which does not involve defective workmanship
or materials will be the responsibility of the consumer-owner.
Warranty
Exclusions
Specifically, the following work is not covered under warranty
and does not constitute warranty work:
Most work is covered. The defining factor is, has the machine
malfunctioned (Consolidated Brand is responsible) or has the
customer omitted or done something to cause the appliance to
malfunction (customer is responsible). Some States do not
allow the exclusion or limitation of incidental or consequential
damages, so the above limitation or exclusion may not apply
to you.
Installation - e.g. incorrect attachment to rack or wall
Maintenance - e.g. failure to clean lint filters
Mishandling - e.g. breakage of door handle

You can register your Warranty by any of the following methods:
1. Mail in the Warranty Registration Card
2. Register online at www.ApplianceDesk.com
3. Scan the QR Code
Appliance Desk
Phone/Text: 1-800-776-3538
Email: [email protected]
Web: www.ApplianceDesk.com
Business hours: 9:00 am to 5:00 pm weekdays
For Customer Service:
This warranty is given by:
Consolidated Brands
10216 Georgibelle Drive, Suite 900D
Houston, Texas 77043-5249
Since it is a responsibility of the consumer-owner to establish
the warranty period by verifying the original purchase date,
Consolidated Brand recommends that a receipt, delivery slip or
some other appropriate payment record be kept for that purpose.
This warranty gives you specific legal rights, and you may also
have other rights which vary from State to State.
WARRANTY SERVICE
GENERAL

1

2

28.5 inches
27.5 inches
27.5 inches
The Dryer may be installed in a built-in, recessed area, closet or alcove.
The installation spacing is in inches and is the minimum acceptable.
Other installation must use the minimum dimension indicated.
Minimum clearance between dryer cabinet and adjacent walls are: 2" either side and 3" front
and rear.
Minimum vertical space from floor to overhead cabinets, etc. is 52" (132 cm).
Closet door must be louvered or otherwise ventilated and must contain a minimum of 60 sq.in.
of open area equally distributed. If closet contains both a washer and a dryer, doors must contain
a minimum of 120 sq.in. of open area equally distributed.
No other fuel-burning appliance shall be installed in the same closet with the dryer.
Additional clearances for wall, door and floor moulding may be required.
Additional space is needed when an external exhaust elbow is used.
NOTE: If a door is installed that potentially encloses the unit while running, the door must allow for
a minimum of 20 square inches of free air movement. There must also be a 1" additional space in
front of the unit to the closed door and 1" from back of the unit to the wall. Additional spacing should
be considered for easy installation, servicing and compliance with all applicable local, state, and
federal codes.
3

6 in (15 cm)
2 in (50 mm)
6 inches (15 cm)
22 in (563mm)
22 in
(563 mm)
(570 mm)
wood plank
wood plank
22.8 in
6 in (15 cm)
1 x 3 in
wood plank
Determine and mark the dryer position on the wall.
This dryer is not suitable to be directly placed on top
of a washing machine.
( )
( )
22 in
(563 mm)
22.4 in
(580 mm)
wood plank
4

(8 ft).
4 in (102 mm)
wood plank,
wood plank (not included)
5

6

7

Time Display - Shows Program times and time remaining (minutes)
Light Bar - Shows colors for different programs
Step 2 - Program Button
This button is used to select a drying program. When you press the Program button, it first
shows red on the light bar. Each time you press it, will show a different color for each of the
4 different programs.
inactive
drying program.
This button is used to set the drying time. With each press of the button, the time increases in
20-minute increments, up to 200 minutes. To change the time once the drying program is running,
press the Start/Pause button, make the time change, and then press Start/Pause again to restart.
Step 3 - Time Button
Step 4 - Start/Pause
this button to pause. Select the desired program and then press this
button again to restart.
Each of the drying programs is described below:
a) Red: The dry cycle runs at high heat and the default time is 150 minutes. The time can be
changed by pressing the Time button. This program is best for drying a heavy load.
b) Light Blue: The dry cycle runs at high heat and the default time is 200 minutes. This
program works with a sensor and will adjust the time automatically and will stop when the
clothes are dry. The time cannot be changed in this program.
c) Dark Blue: The dry cycle runs at no heat, just air and the default time is 30 minutes. The
time can be changed by pressing the Time button. This program is best for delicates or if
you just want to refresh clothes.
d) Green: The dry cycle runs at half heat and the default time is 90 minutes. The time can be
changed by pressing the Time button. This program is best for drying a light to normal load
and if you want clothes to be damp dry for ironing or for hanging up to dry.
Red Time Dry: High Heat 150
Light Blue Sensor Dry: High Heat 200
Dark Blue Sensor Dry: Air + High Heat ECO
Green Time Dry: Half Heat 90
Color Program Display
8
Step 1 - Power Button

9

10

11

Use High Heat program and
increase dry time
12