

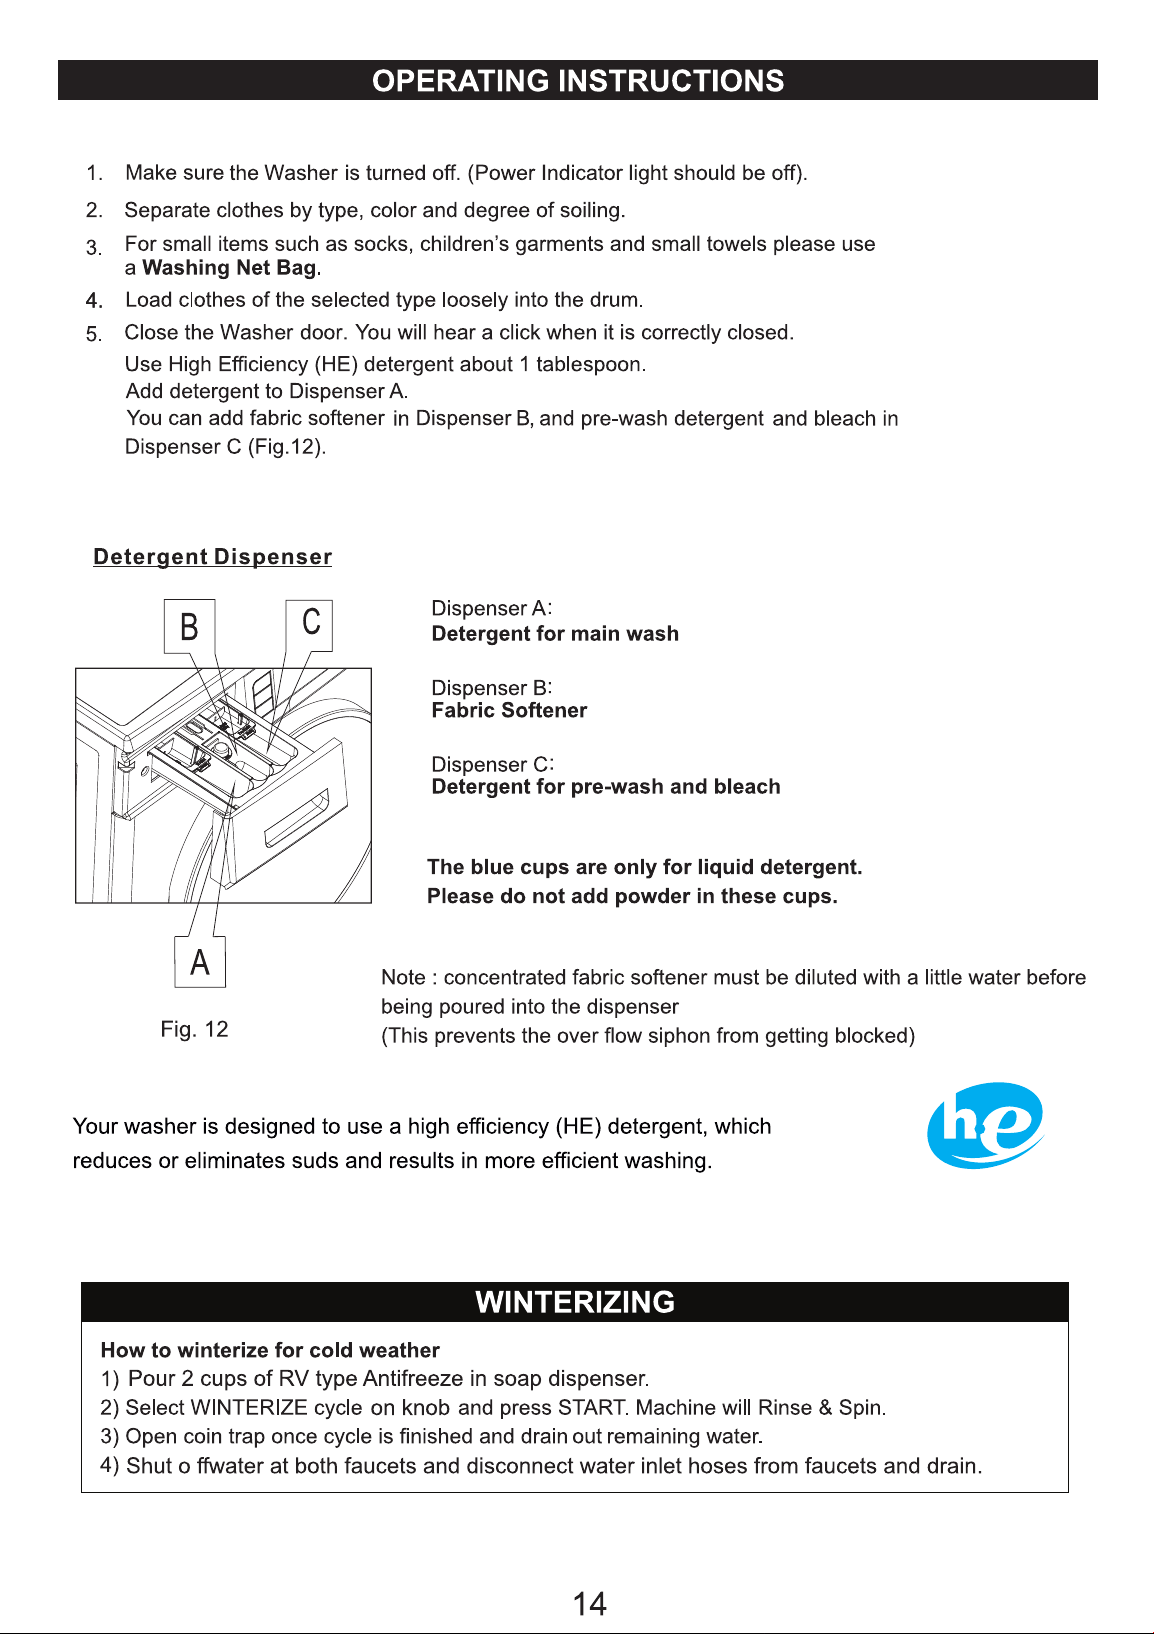

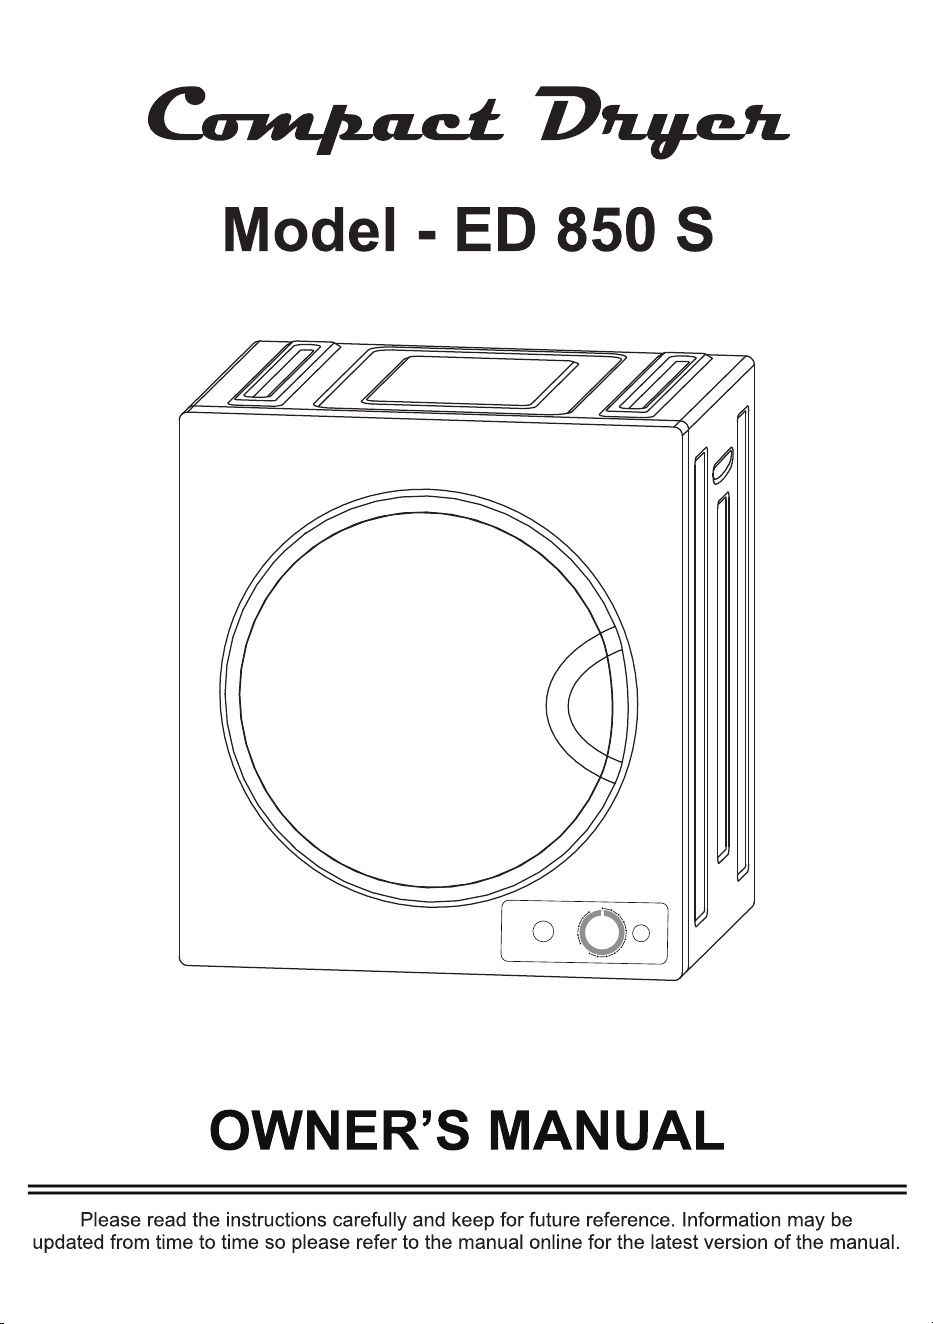

Congratulations on your new Compact Dryer!
Here are some of the best reasons for buying your Dryer:
Easy to use
Variable heat levels
Wall mount option
Built-In installation
Options for Sensor and Time Dry programs
In addition to its contemporary design, this is a highly sophisticated engineered
product that will give you many years of satisfaction.
Safety
Use the appliance indoors. It is not intended to be used outdoors.
Ensure that open flame sources, such as candles are not placed on top
of the dryer.
Do not place items in the dryer that are soiled with flammable liquids, oils
and other chemicals. These items should be washed thoroughly before
placing them in the dryer.
Ensure fabric softeners or products to eliminate static are not used inside
the dryer, unless recommended by manufacturers of these products.
Do not dry items containing rubber, plastic or similar materials.
Ensure the dryer and electrical cord are not placed near heat sources,
such as radiators, heaters, air ducts or in direct sunlight.
Ensure vents and ventilation openings are not blocked.
Ensure the power cord is not bent or twisted, and not exposed in an area
where is could be a tripping hazard.
Do not use the dryer if the cord is damaged.
To disconnect the dryer, press the power button to turn it off, then grasp
the plug of the power cored firmly and pull straight out of the outlet.
Do not open the dryer and reach into the drum while it is rotating.
Ensure the dryer is not overloaded.
Do not tamper with controls.
Perform regular maintenance and cleaning of lint filter after each use.
Ensure periodic cleaning of exhaust duct is done by a qualified technician.
Check that foreign objects are not in the drum.
This appliance is not intended for use by persons, including children, with
reduced physical, sensory or mental capabilities, or lack of experience and
knowledge, unless they have been given supervision or instruction
concerning use of the appliance by a person responsible for their safety.
Safe Disposal
Before discarding the dryer, please remove the door to prevent
child entrapment.
In order to reduce the risk of fire, electric shock, and/or injury, please follow
safety precautions. Read all instructions carefully and save for
future reference.
Do not allow children or pets to play on or in the appliance. Close supervision
is needed when the appliance is used near children and pets.
Placement
Do not place or store the dryer where it will be exposed to the weather.
Place the dryer in dry ventilated area, away from heat and direct sunlight.
Place the dryer on a flat, smooth surface. Do not place on carpet or
uneven surfaces.
Ensure there is adequate ventilation around the dryer, leaving at least
4 inches (10 cm) space between the dryer and the adjacent walls.
Keep the exhaust vent opening and surrounding areas free of obstructions
and build-up of lint and debris.
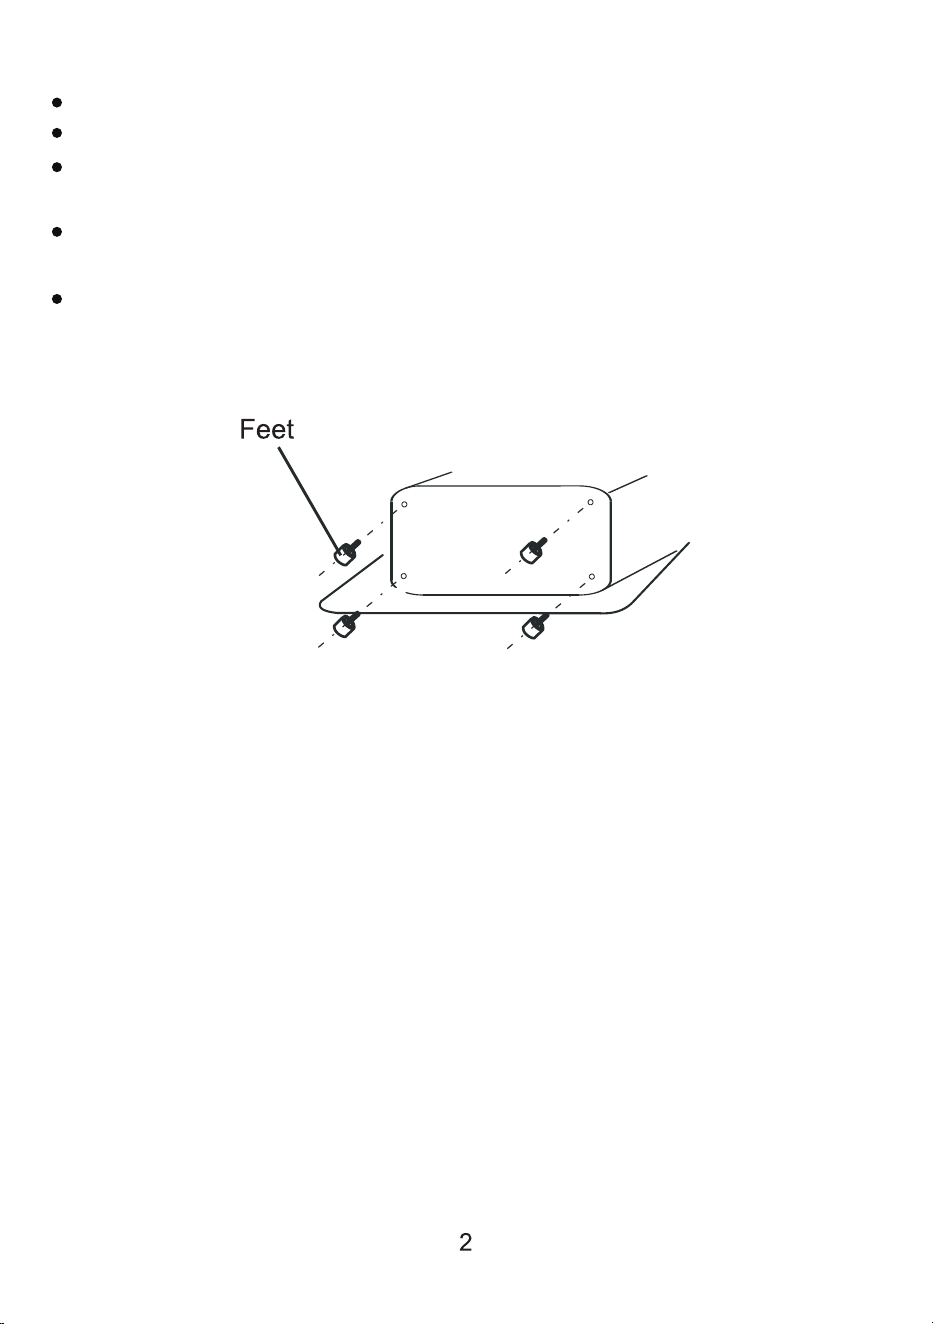
The dryer comes with feet that need to be attached to ensure stability.
If the dryer is rack mounted, a secure bracket is required to ensure stability
and prevent vibration. At least 2 inches (5 cm) between the dryer and walls
is required. (The bracket is not included).

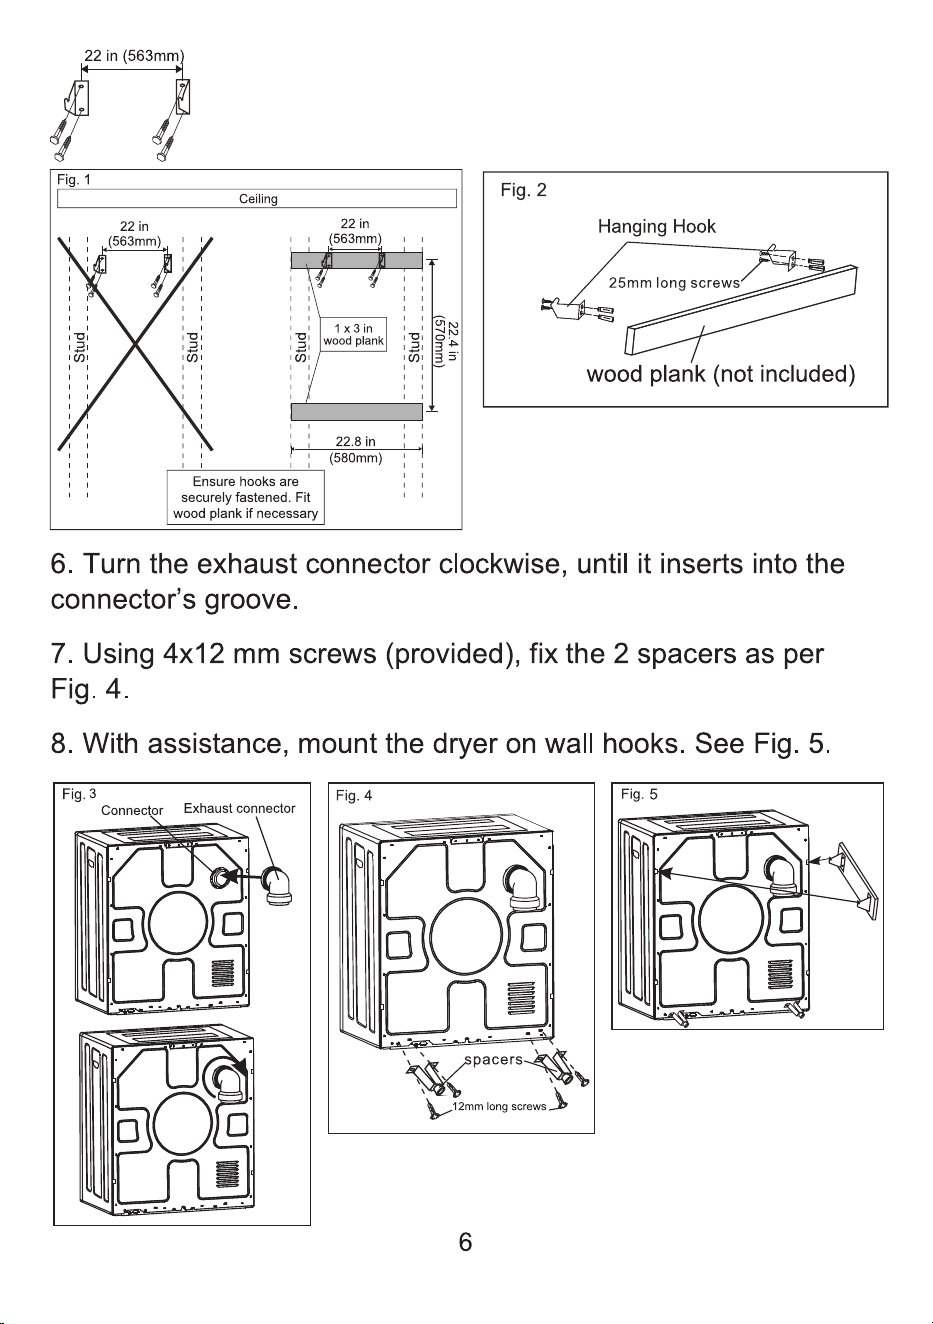
Installation
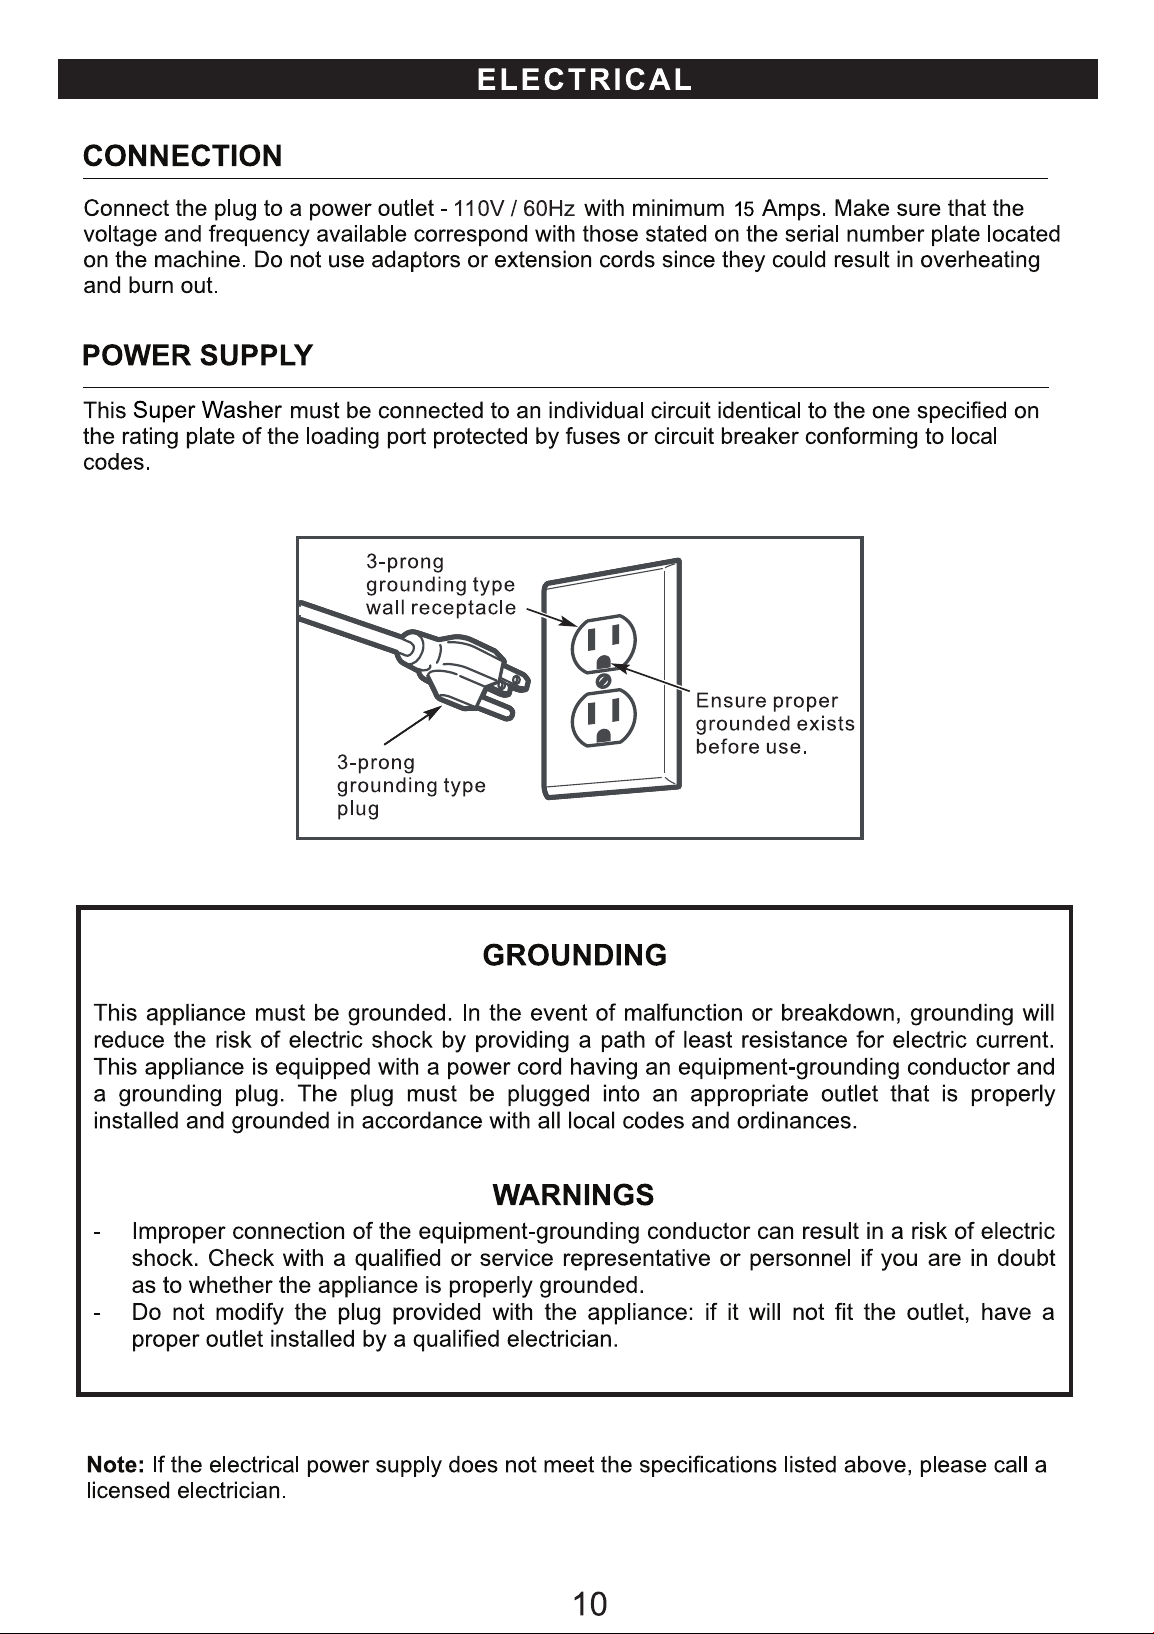
The dryer must be properly grounded. Do not modify the plug.
Do not install the dryer in a tight-fitting cabinet. Ensure there is adequate
ventilation space all around the dryer (please see detailed
installation instructions).
Do not use flexible plastic venting materials which may collapse. Use only
vent hoses that are approved by the manufacturer.
In Canada and the United States, only those foil-type flexible ducts, if
any, specifically identified for use with the appliance by the manufacturer
shall be used and that comply with the outline for the Clothes Dryer
Transition Duct, subject to 2158A, shall be used.
In Canada, the exhaust duct shall be 4” (10.2 cm) in diameter.
In the United States, the exhaust duct shall be 4” (10 cm) in diameter.
The total length of flexible metal duct shall not exceed 8 feet (2.4 m).
The duct shall not be assembled with screws or other fastening means
that extend into the duct and catch lint.
The appliance shall no be exhausted into a chimney, wall, ceiling, attic,
crawl space, or a concealed space of a building.
The dryer must be installed and serviced by a qualified technician.
Install the dryer according to manufacturer's instructions and local codes.

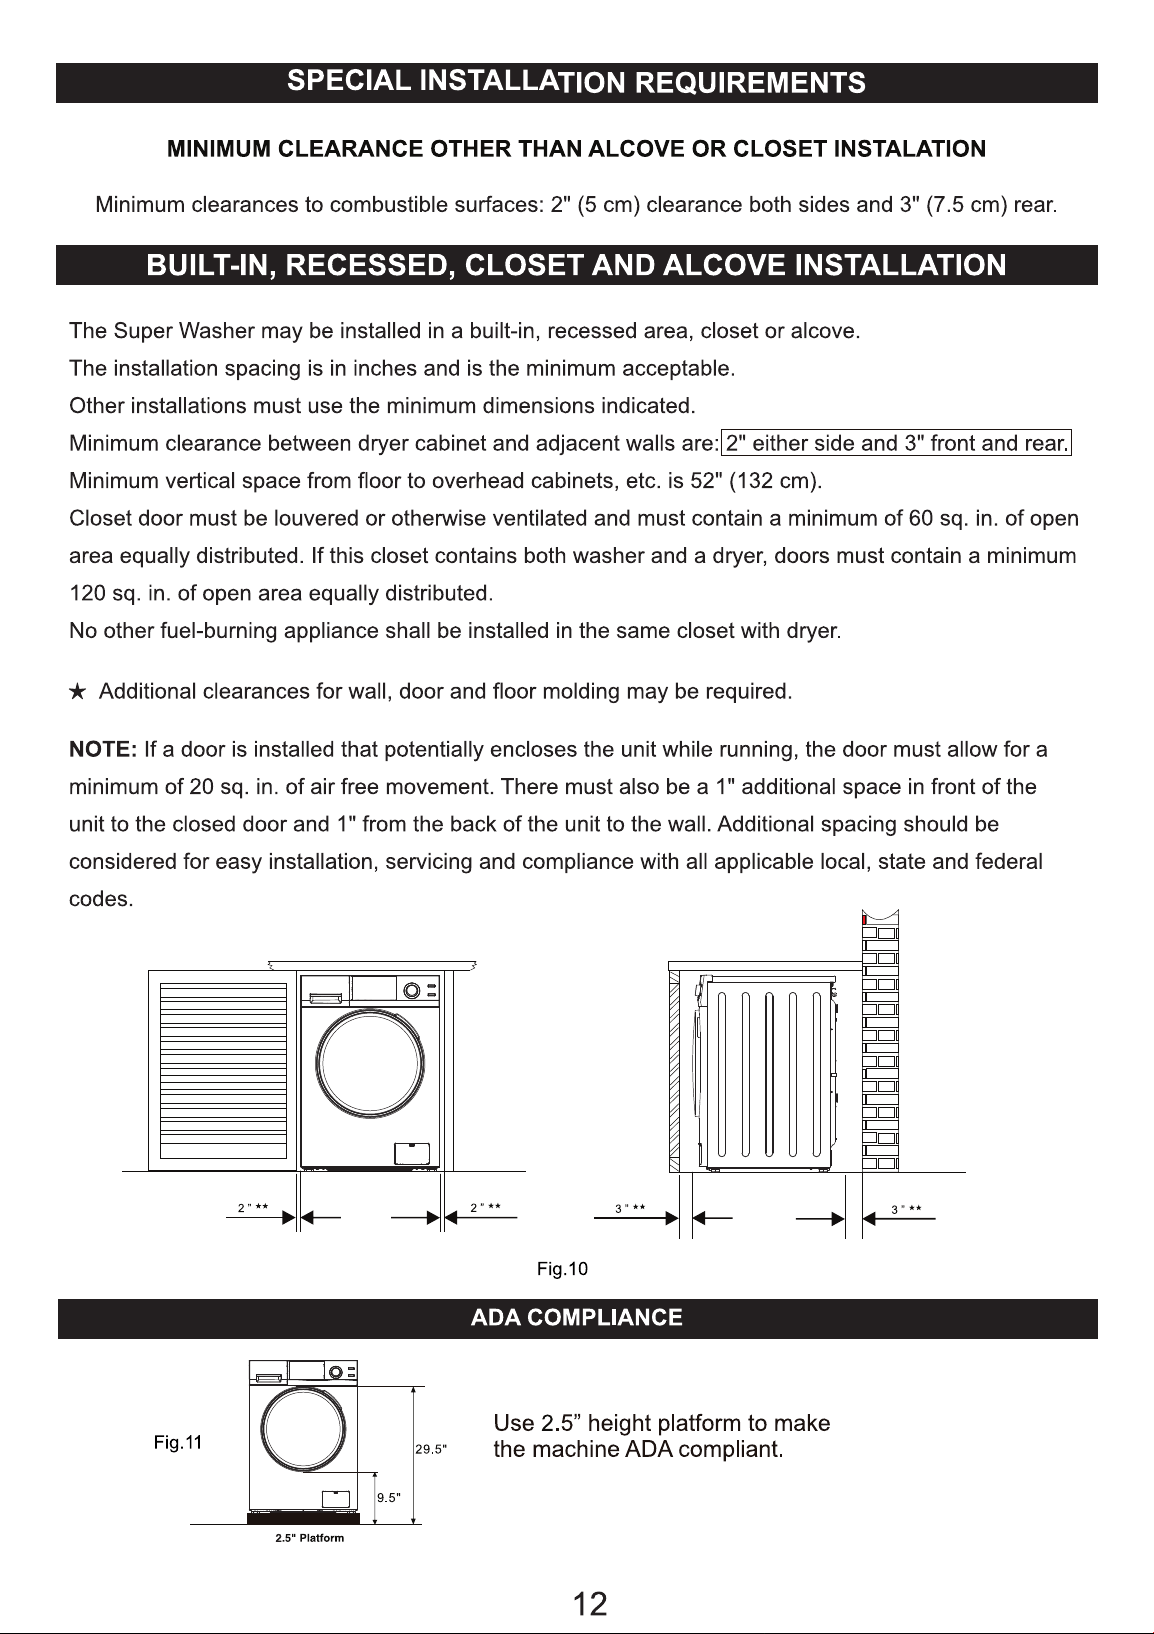
Built-In, Recessed, Closet and Alcove Installation
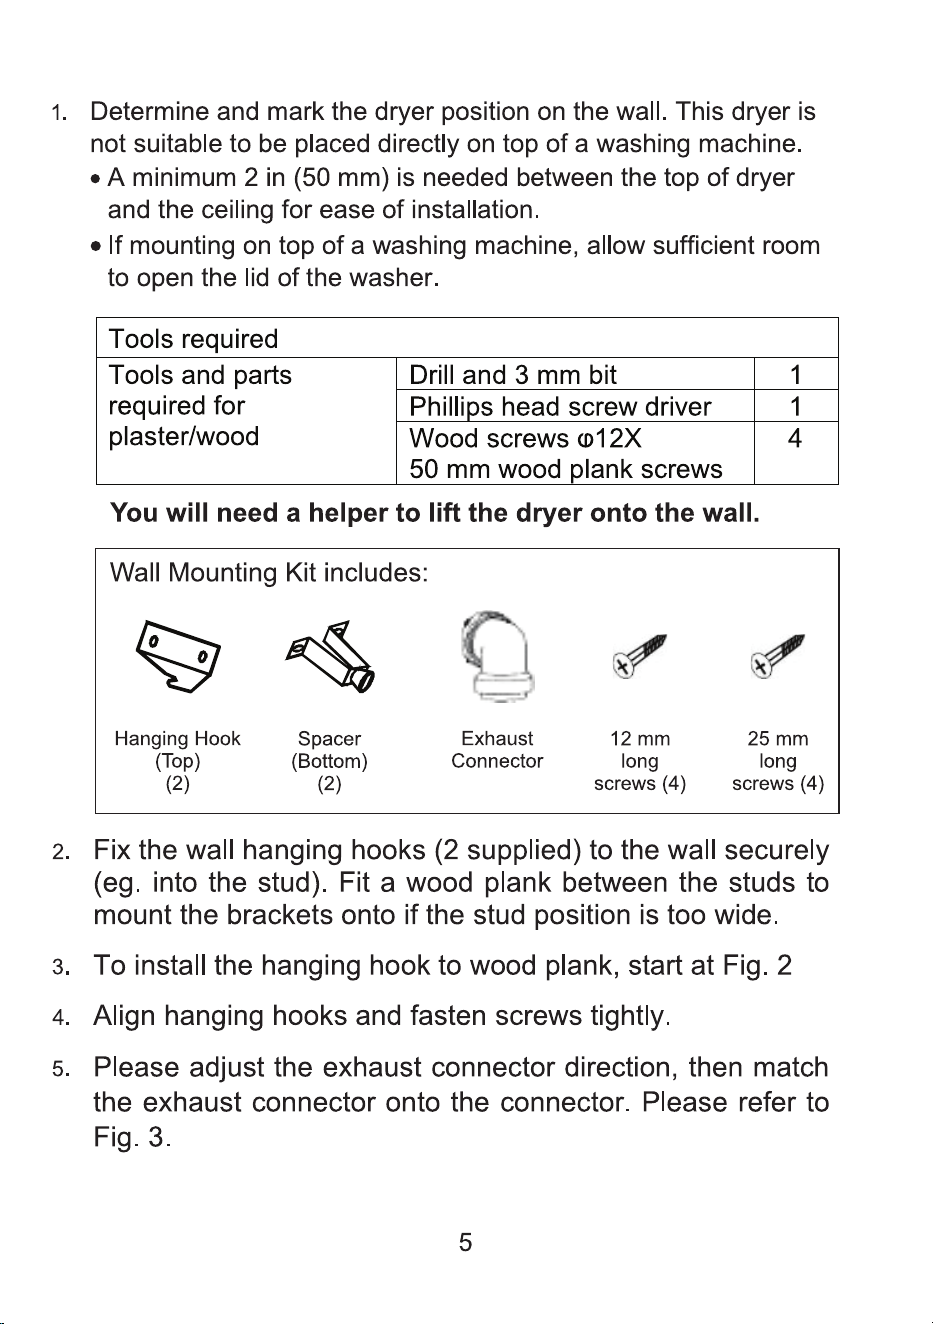
Wall Mounting Instructions
Add bullets: Wall mount option, Built-In installation, Easy to use. Some bullets will need to be removed.

Dry Function button
Mode button
Time Knob
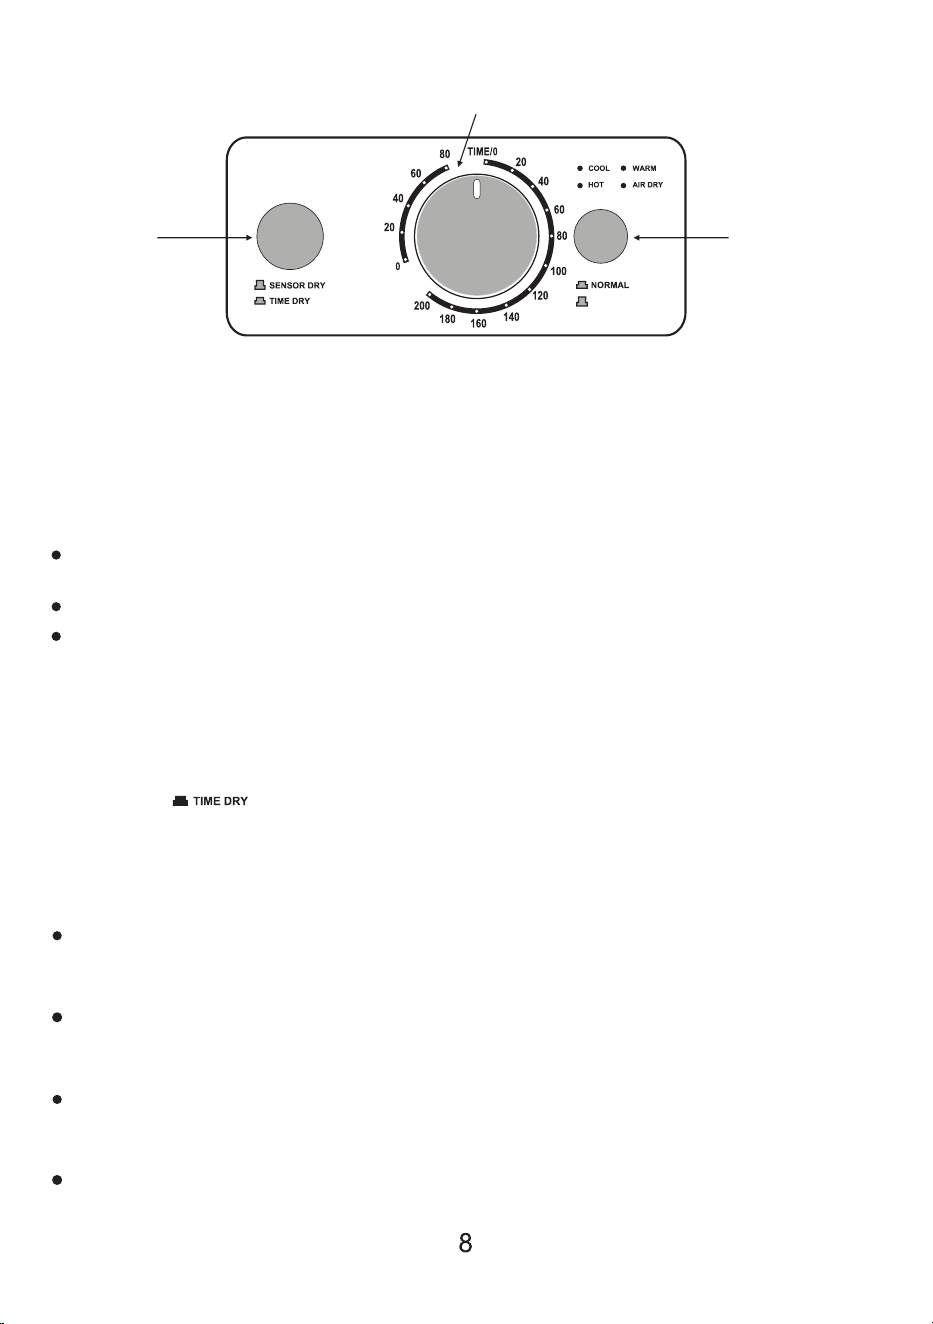
Control Panel
The Control Panel has a Dry Function button on the left, a Mode button
on the right and a Time Knob in the middle. The Dryer can be operated in
NORMAL Mode or SLEEP Mode.
Normal Mode
The Normal mode operates in conjunction with the dry functions.
Select Sensor Dry or Time Dry. For Sensor Dry leave the Dry Function
button out. For Time Dry press the Dry Function button in.
Press the Mode button to select NORMAL mode.
Turn the Time Knob to select the number of minutes to dry. The off
position is 0. The dryer will start when the Time Knob is turned to the
desired dry cycle.
Control Panel Functions
SLEEP
Dry Functions
Time Dry
The Time Dry function operates when the Dry Function button is pressed
down. Turn the Time Knob clockwise to the desired time setting.
Preset levels of heat correspond to the following time ranges:
Red zone – Hot air blows from 200 to 120 minutes. Use for large or
heavy loads.
Orange zone - Warm air blows from 120 to 20 minutes. Use for
normal loads.
Blue zone - Cool air blows from 20 to 0 minutes. Use for delicate loads
or to refresh.
Green zone - Air blows from 80 to 0 minutes. Use for delicate loads
or to refresh.
Dry Function
button
Mode button
Time Knob
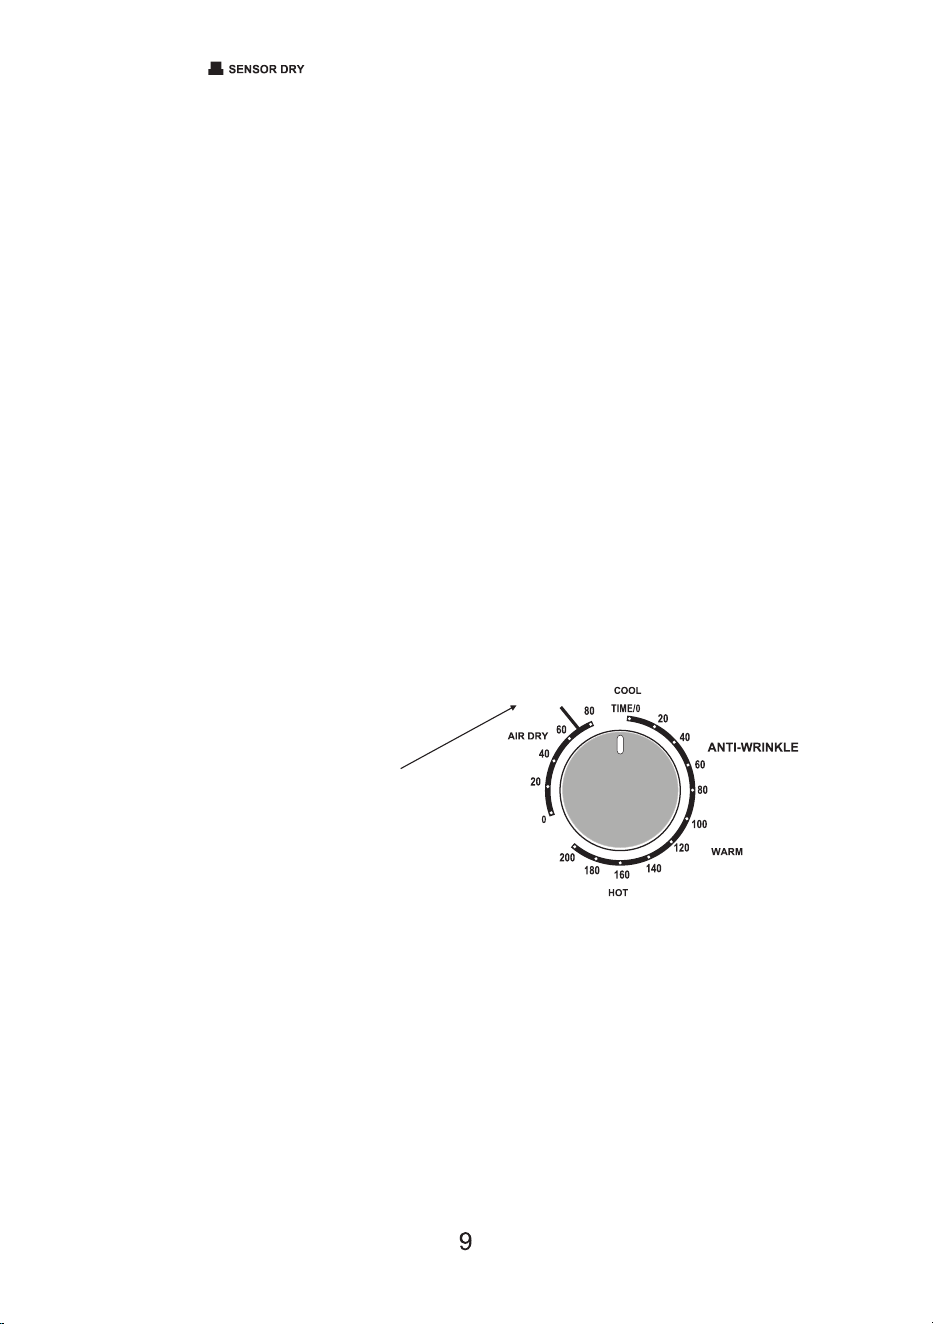
Sensor Dry
The Sensor Dry function operates when the Dry Function button is up
(not pressed down). Turn the Time Knob clockwise to 200. When the time
reaches the 120-minute mark, the moisture and humidity levels are
measured by the sensor and the drying time is automatically adjusted to
stop hot air blowing once the clothes are dry. During the remaining time
in the cycle, cool air blows until the cycle ends at 0.
Before using the Dryer, please check the inside of the drum to ensure
that children or pets have not climbed into the appliance.
Please turn Time Knob clockwise to SLEEP setting.
SLEEP
Sleep Mode
When the SLEEP mode is selected, the dryer automatically operates
for a duration of 270 minutes (4 and a half hours). Cool air will blow into the
drum for the first 150 minutes (2 and a half hours). Then hot air will blow for
the next 120 minutes (2 hours). Once you load your clothes into the drum
and close the door, turn the Time Knob as shown in the diagram – on the
left upper side of the Time Knob, between 60 and 80. The dryer will start.
Anti-Wrinkle
To refresh the load, turn the Time Knob between 40 - 60 minutes.
Warm air will blow into the drum and refresh the clothes and thereby
prevent wrinkles.
Maintenance
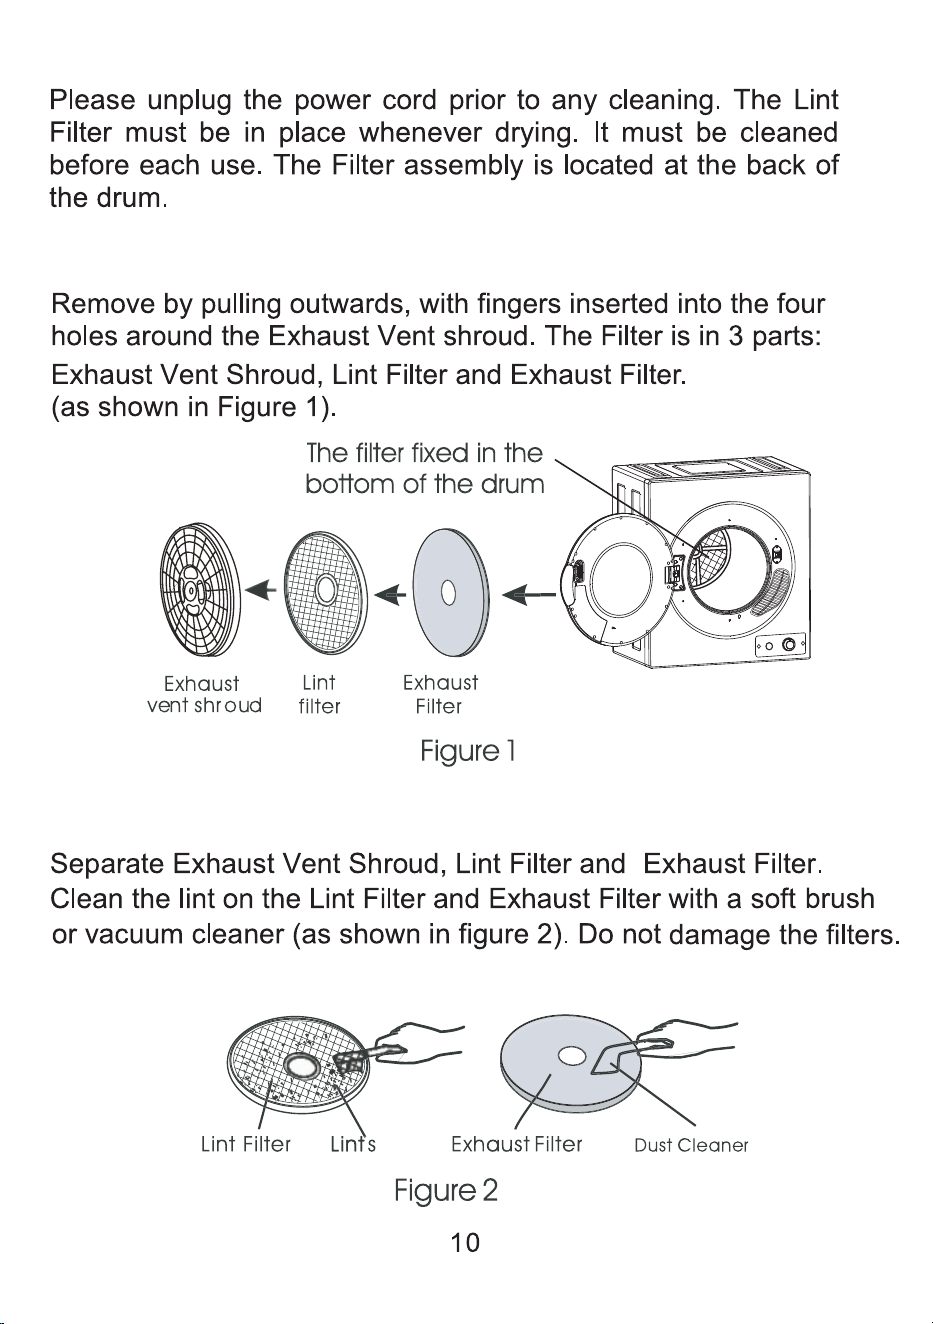
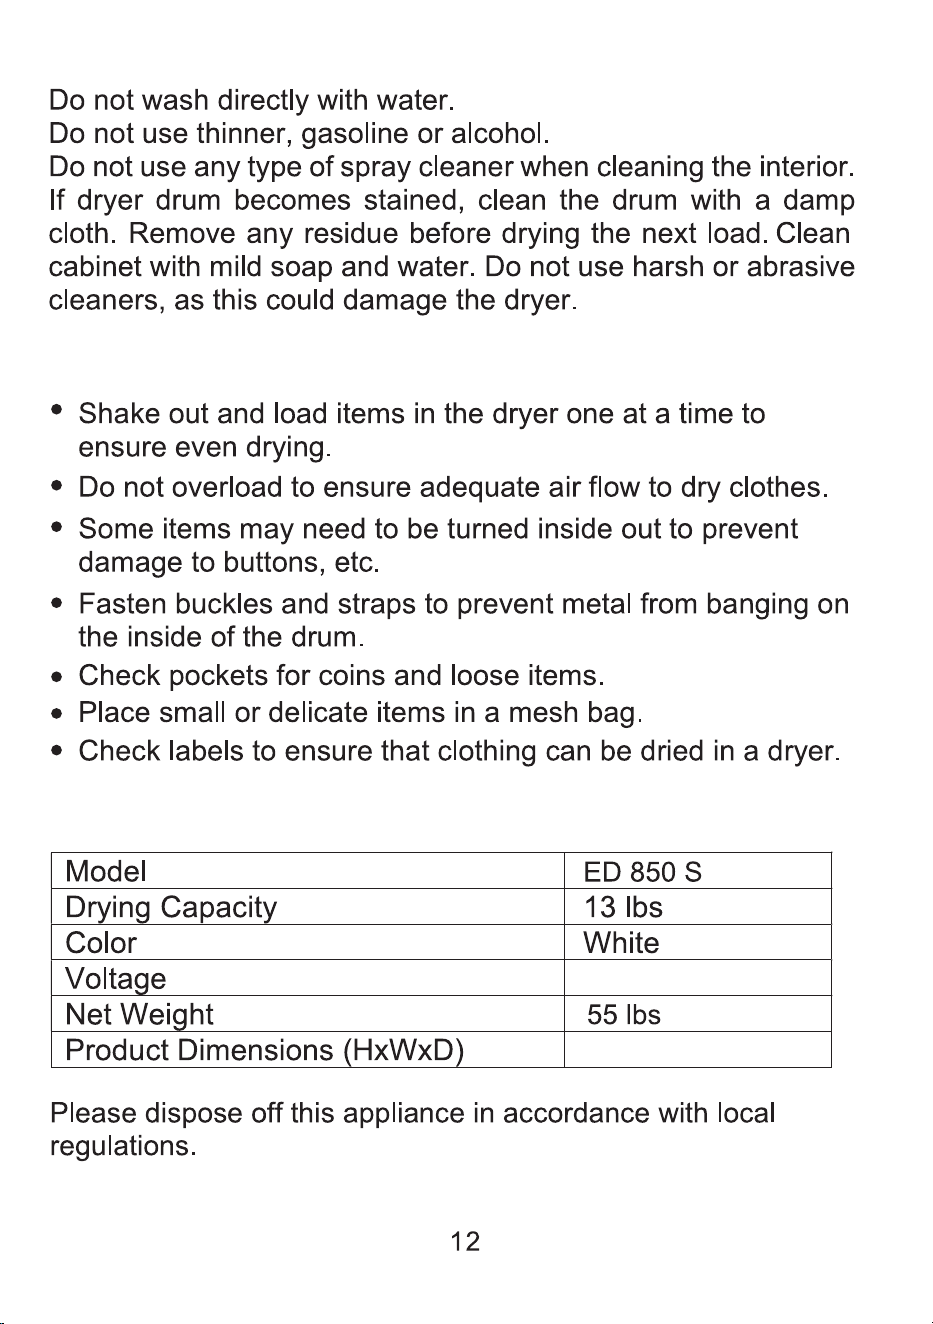
1. Removing the Filters
2. Cleaning the Filters

3. Re-installing the Filters
Cleaning the Air Intake Filter
Cleaning
Drying Tips
Technical Specifications
120V - 60Hz
27.5 x 23.6 x 21.5
inch
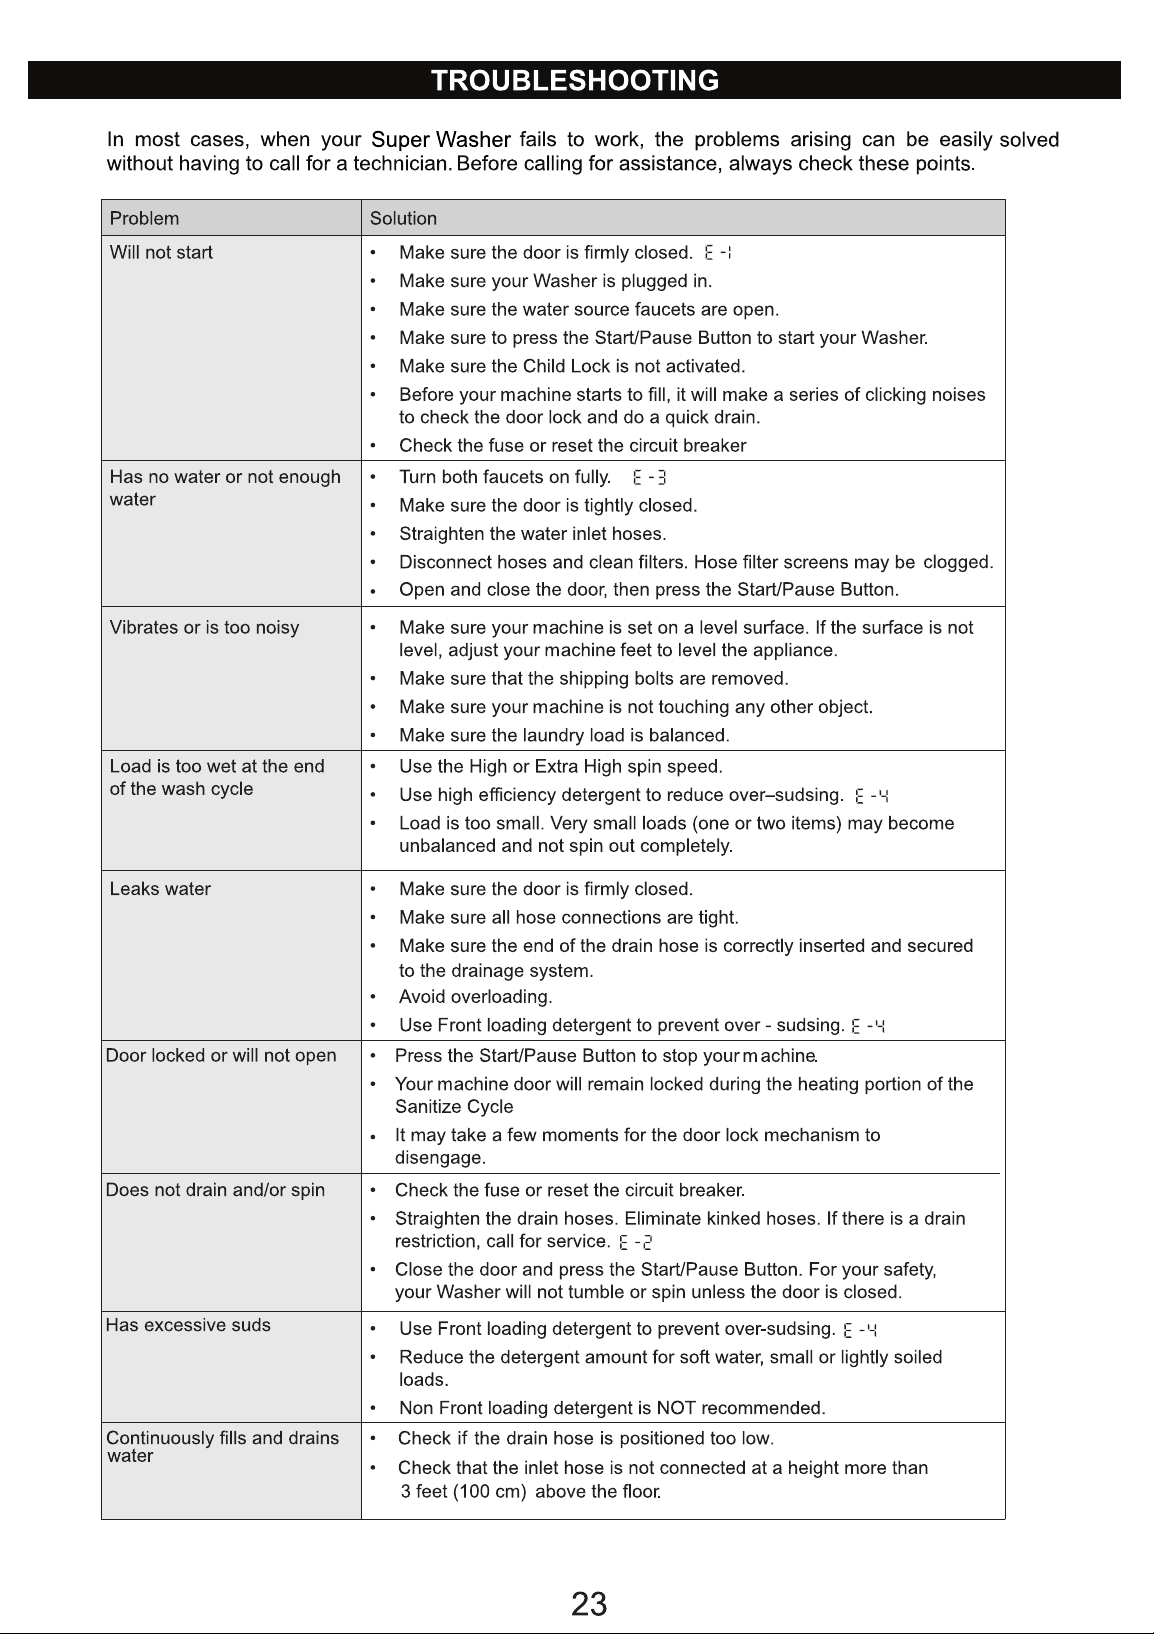
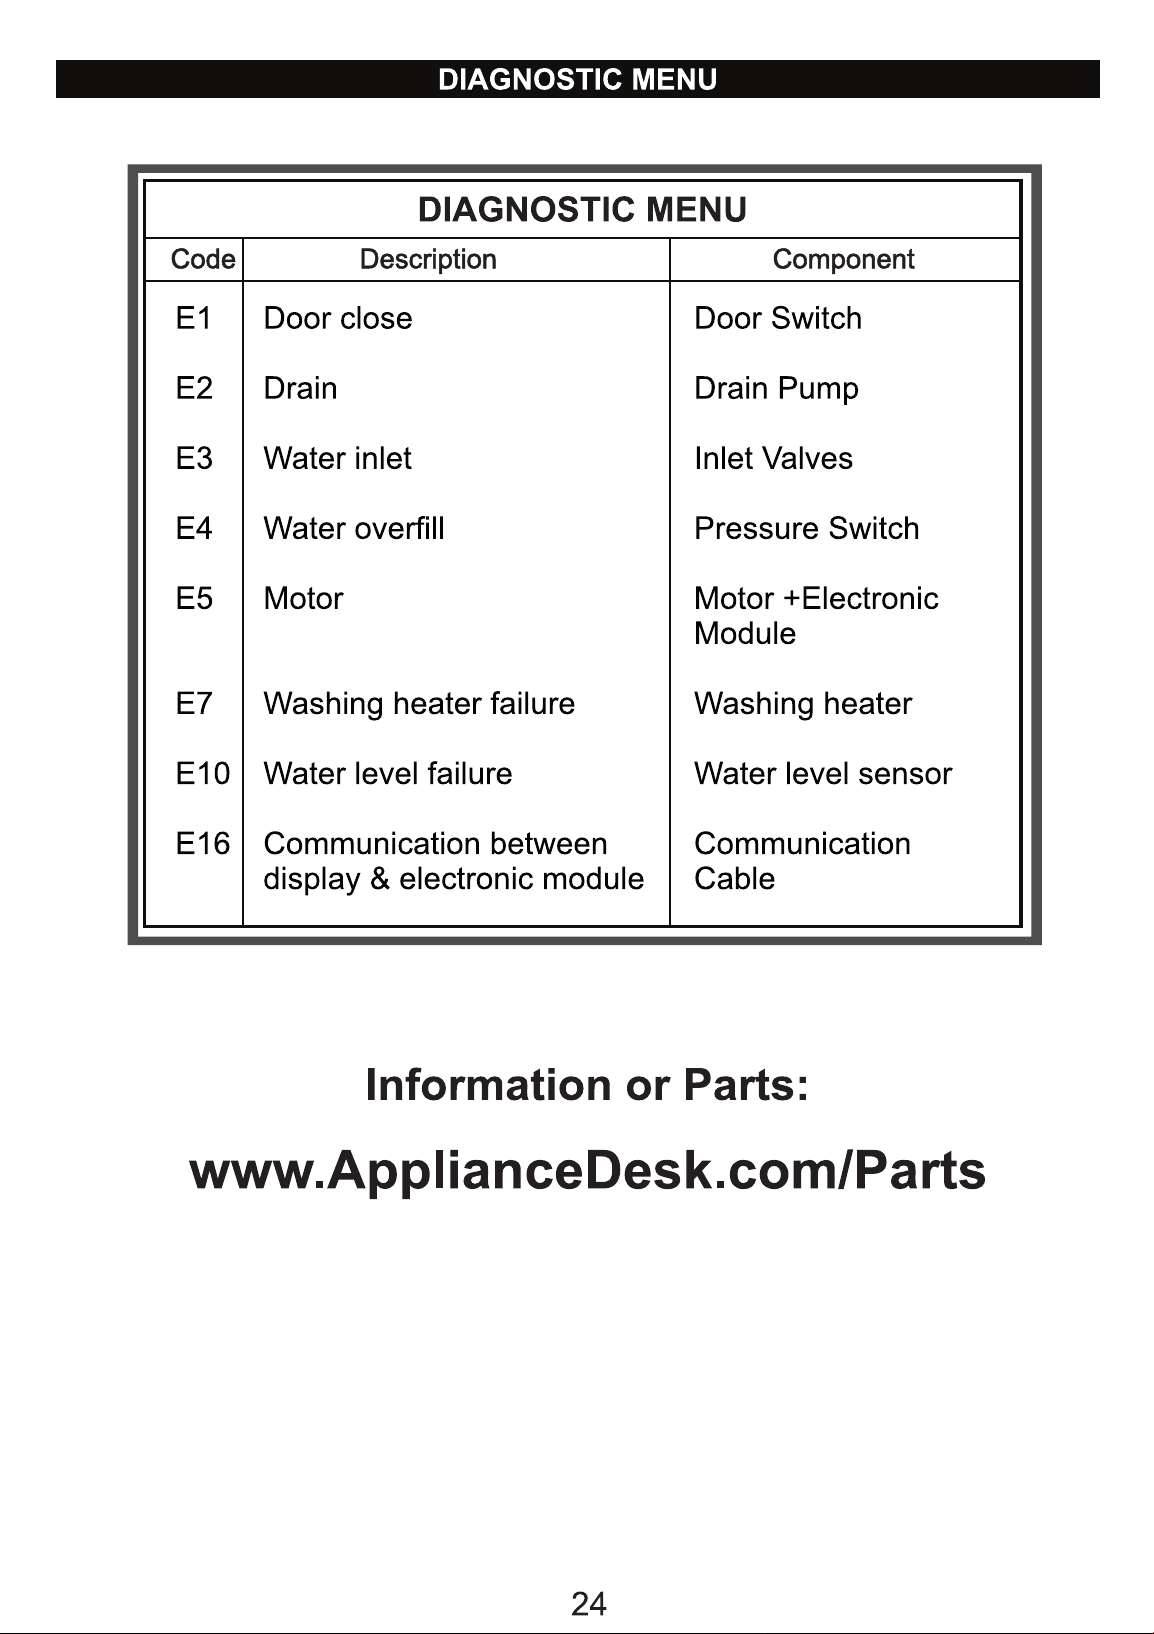
In most cases, when your Dryer fails to work, the problems arising can be
easily solved without having to call for a technician. Before calling for
assistance, always check these points.