Loading ...
Loading ...
Loading ...
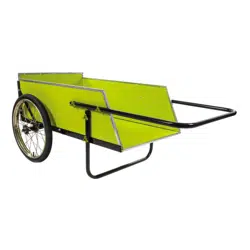
Assembly
Your garden + utility cart requires assembly. Account for all
parts and hardware before beginning assembly. If any parts
are missing or damaged, or if you have any questions or need
additional instructions, Please call the Snow Joe
®
+ Sun Joe
®
customer service center at 1-866-SNOWJOE
(1-866-766-9563).
NOTE: When assembling your cart, place the heads of all
screws to the inside and hex nuts with at washers to the
outside.
NOTE: The wheels may be sent in an under-inated condition.
Use a standard bicycle pump to inate as needed.
Tools needed:
• Wrench (included)
• Screwdriver (not included)
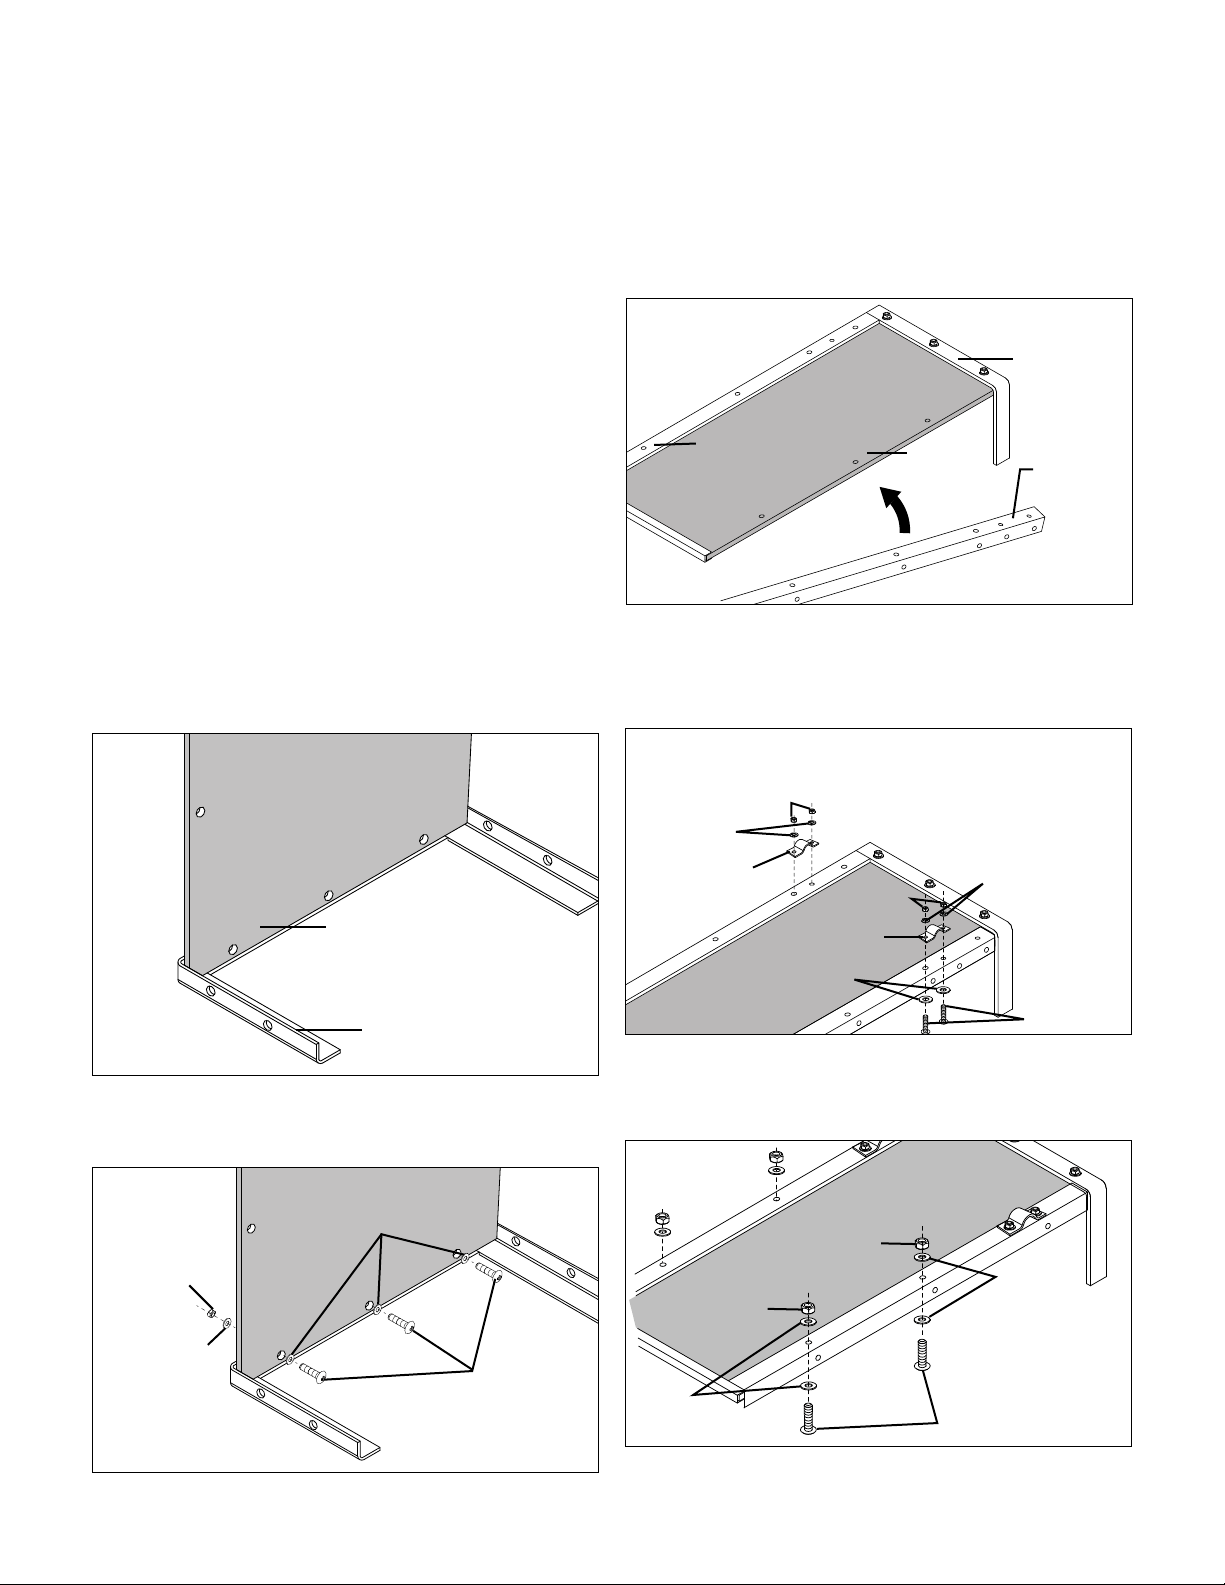
1. Lay the front angle clamp down (at) on oor and stand
the bottom panel on the front angle clamp. Align the three
holes in the bottom panel with the three holes in the front
angle clamp (Fig. 1).
2. Push three M6 x 25 screws through the bottom panel
and the front angle clamp. Secure the screws with
#2 at washers and hex nuts, and tighten (Fig. 2).
3. Turn the front angle clamp and bottom panel upside
down, and lay the side angle clamps on the bottom panel
(Fig. 3).
4. Secure the axle clamps to the side angle clamps and the
bottom panel by using four M6 x 30 screws, lock washers,
#2 at washers and hex nuts. Do not tighten until the axle
is fully assembled (Fig. 4).
5. Secure the side angle clamps and bottom panel together
with four M6 x 25 screws, eight #2 at washers, and four
hex nuts. Tighten the four nuts (Fig. 5).
Fig. 1
Bottom panel
Front angle clamp
Fig. 2
M6 x 25
screws
Flat washer #2
Flat washer #2
Hex nut
Fig. 3
Side angle
clamp
Front angle
clamp
Side angle
clamp
Bottom
panel
Fig. 4
Axle clamp
Lock
washers
Hex nuts
Axle clamp
Lock
washers
Hex nuts
M6 x 30
screws
Flat washer #2
Fig. 5
M6 x 25
screws
Flat
washer #2
Hex nut
Hex nut
Flat
washer #2
4
Loading ...
Loading ...
Loading ...