Loading ...
Loading ...
Loading ...
14
Cut the overlay panel to the dimensions shown below in
Figure 18. On the top drawer only, drill the 2 counter-bored
holes which are clearance for screw heads on the face of
the top drawer and the lock hole at the bottom of the top
drawer only.
This is also a convenient time to locate and drill the holes
for your handle. Most often the handle is to match that of
the surrounding cabinetry. If your handle attaches from the
back-side of the custom panel, locate the mounting holes
while the panel is attached to the drawer and cabinet. After
the panel is removed from the drawer, drill the mounting
holes from the front, to the recommended diameter of the
handle manufacturer. Counter bore the back-side of the
panel so the screw heads do not interfere with the surface
of the drawer.
Step 2: Size the Overlay Panel
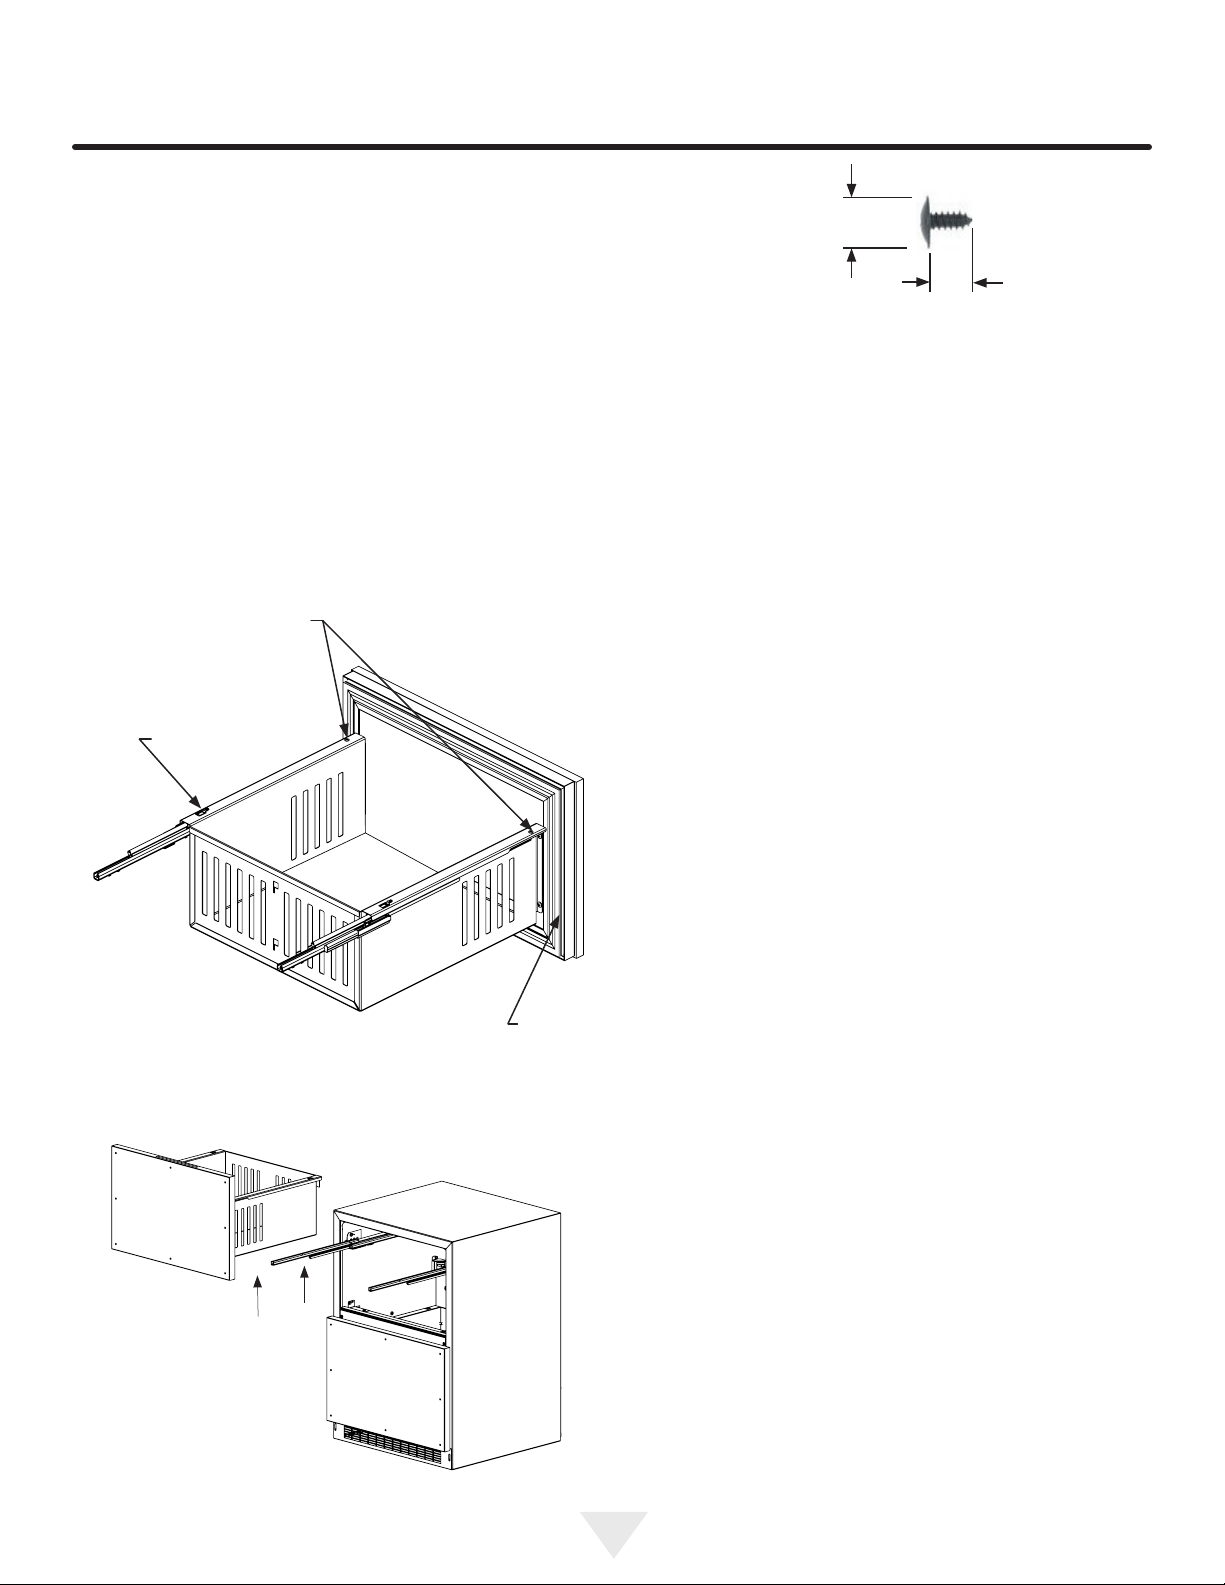
Figure 17
.35/.31
(9 mm/7.5 mm)
.50
(12.5)
Figure 15
Remove screws
Clips
Gasket
Figure 16
Step 1: Remove Drawers from unit.
1. Begin by pulling out the top drawer. (See Figure 14).
Remove screws securing drawer to slides (See Figure
15). Pull drawer forward, lift up and out to clear clips in
rear of drawer. Move drawer forward about 1" (2.5 cm)
and set down on slides. At the right rear corner of the
drawer disconnect the display wire harness (See Figure
14a). Remove the drawer from the unit by lifting up off
of the slides. Repeat for bottom drawer but disregard
the harness instructions as there is no wiring to the bot-
tom drawer.
2. Remove the drawer divider from the drawer and
remove the gasket from the drawer front. (See Figure
15). Do this by pulling the gasket out of the channel
that holds it to the drawer front. This will expose the
clearance holes for mounting the overlay panel. (See
Figure 19).
OVERLAY DRAWER PANEL INSTALLATION
Loading ...
Loading ...
Loading ...