Loading ...
Loading ...
Loading ...
9
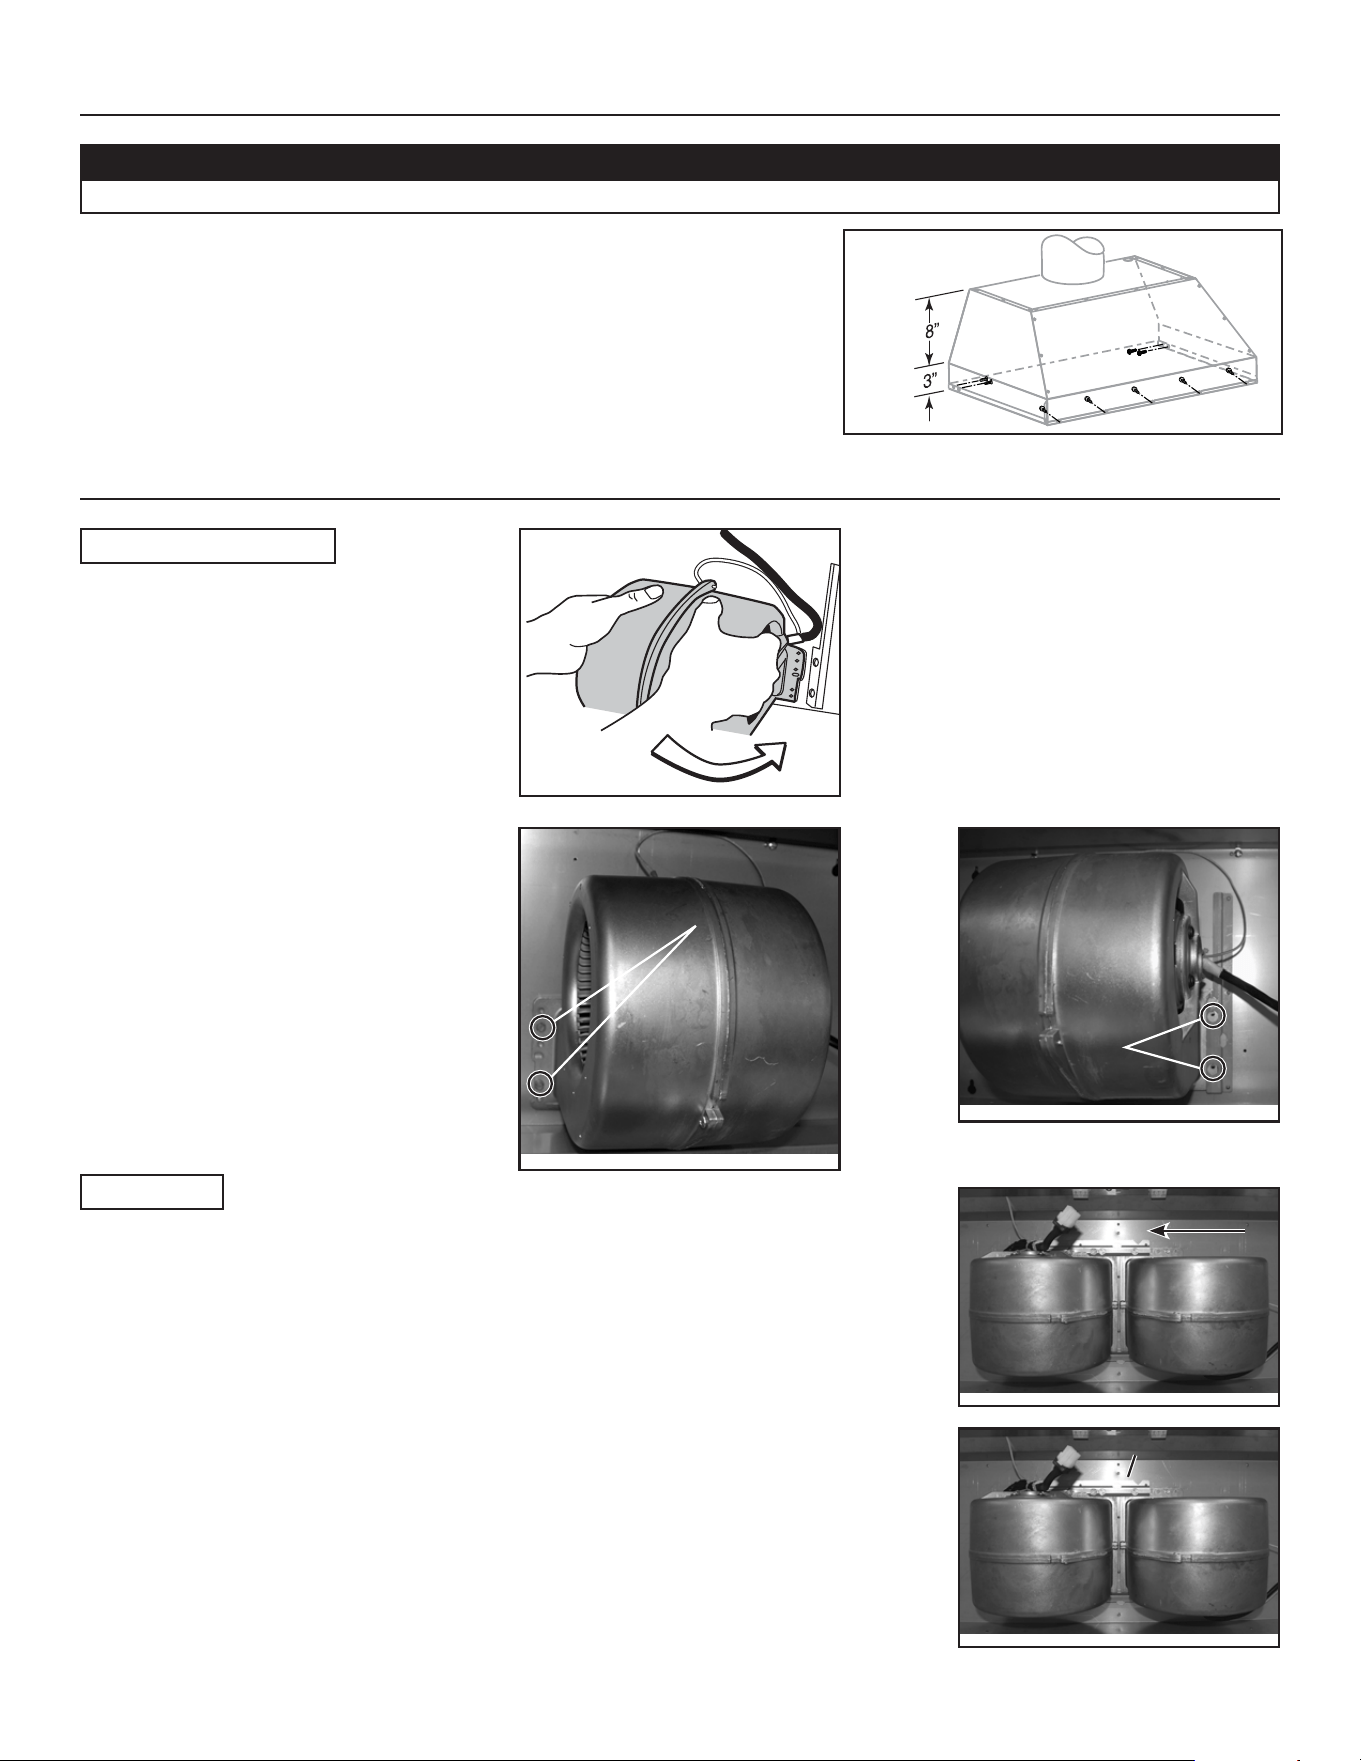
13. INSTALL POWER PACK
CAUTION
Take care not to kink ducting when installing the power pack.
Using provided no. 8 x 1/2” chrome plated screws, install the power pack inside the
custom hood. Start with 2 screws on front corners, then use 4 screws for sides and
use the remaining ones to finalize securing the front power pack. (See figure at right
for mounting screw specific locations.)
Make sure the adapter/damper (or the adapter) enters the ducting. When there is
access to the top of the power pack, seal connections with metal foil duct tape.
14. REINSTALL BLOWER(S)
HH0102A
CP34 AND CP35 MODELS
HD0293
Slide the blower to engage its flange in the
retaining bracket.
HD0269
LEFT SIDE MOUNTING
SCREW LOCATIONS
Using a 5/16” socket, secure the blower to the
inner top of the power pack with all blower
mounting screws (previously removed in step 12).
HD0282
RIGHT SIDE
MOUNTING SCREW
LOCATION
For each blower, slide it to engage its flanges in both retaining brackets.
NOTE: Both blowers are identical and can be mounted on either side of the power pack.
CP37 MODEL
For each blower, using a 5/16” socket, secure the blower to the inner top of the power pack through
the front and rear brackets with all blower mounting screws (previously removed in step 12).
BLOWERS FRONT BRACKET
BLOWERS REAR BRACKET
HD0297
HD0298
Loading ...
Loading ...
Loading ...