Loading ...
Loading ...
Loading ...
7
10. INSTALL ADAPTER AND DAMPER (CP37 MODEL ONLY)
Using 2 no. 8 x 3/8” screws from parts bag, assemble the adapter on the top of the power pack.
Seal all joints with metal foil duct tape to eliminate air leaks.
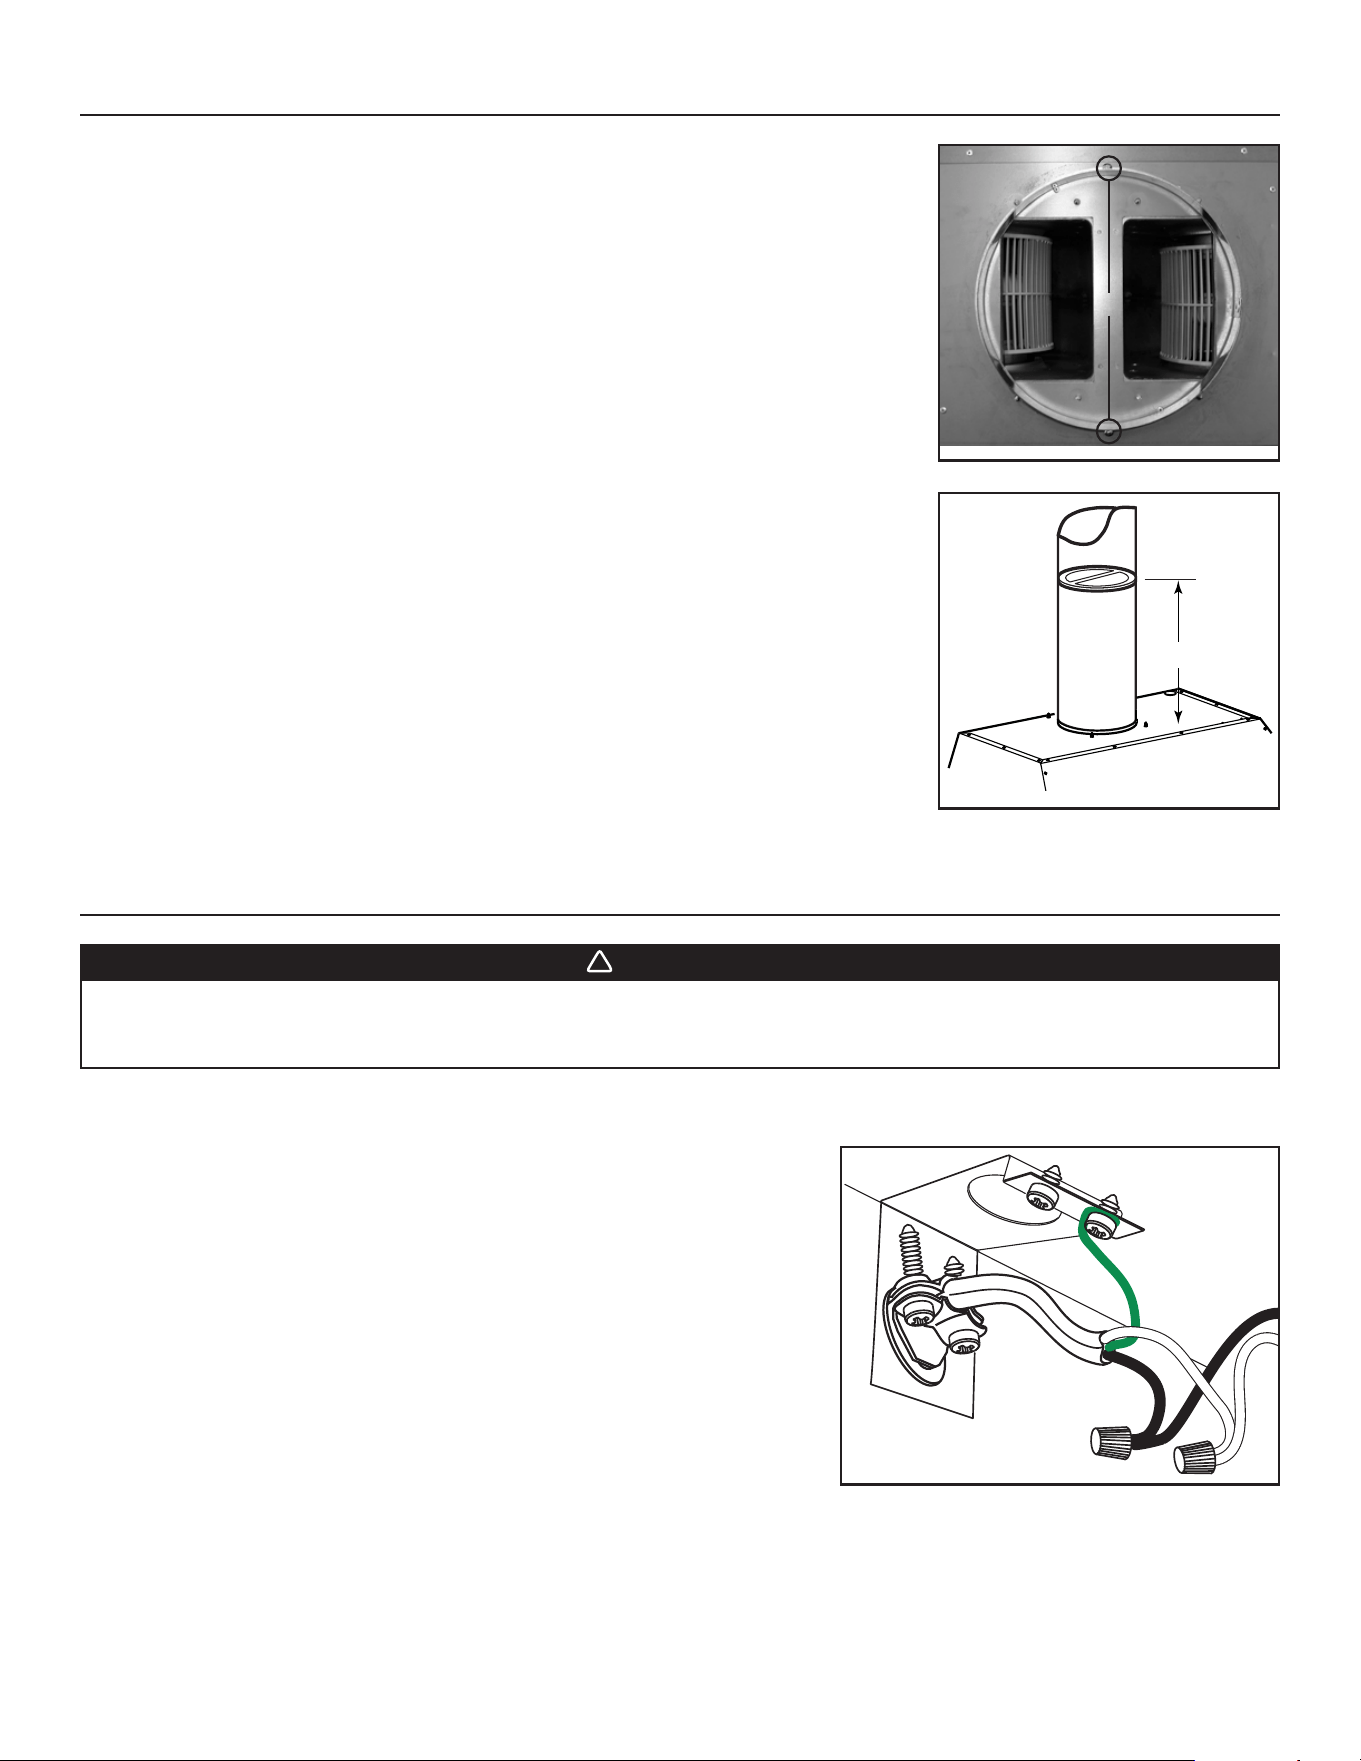
Install 10” damper inside the VERTICAL ductwork that will be attached to power pack. Do not
install in a horizontal ductwork or it will not open and close properly. Remove shipping tape if
present. To optimize airflow and quiet sound, position the damper at least 17” above the top of the
CP37 power pack; or as far as the duct run will allow (see figure at right). Secure the damper to
the duct with 3 no. 8 sheet metal screws (not provided). Ensure damper opens and closes freely.
Seal all joints with metal foil duct tape to eliminate air leaks.
17” min.
HJ0017A
11. CONNECT WIRING
Position the power pack below the installed custom hood. Insert the house wiring cable through the wire clamp previously installed in step 8.
Tighten the wire clamp to secure the cable.
HJ0026
MOUNTING SCREW LOCATIONS
WARNING
!
Risk of electric shock. Electrical wiring must be done by qualified personnel in accordance with all applicable
codes and standards. Before connecting wires, switch power off at service panel and lock service disconnecting
means to prevent power from being switched on accidentally.
Using the provided wire connectors, connect power pack wires to power cable into
wiring box.
Connect wires as follow: BLACK to BLACK, WHITE to WHITE and GREEN or bare
wire under ground screw. DO NOT FORGET TO CONNECT THE GROUND. Reinstall
wiring cover.
HE0059
Loading ...
Loading ...
Loading ...