Loading ...
Loading ...
Loading ...
14 15
ninjakitchen.co.uk
ninjakitchen.co.uk
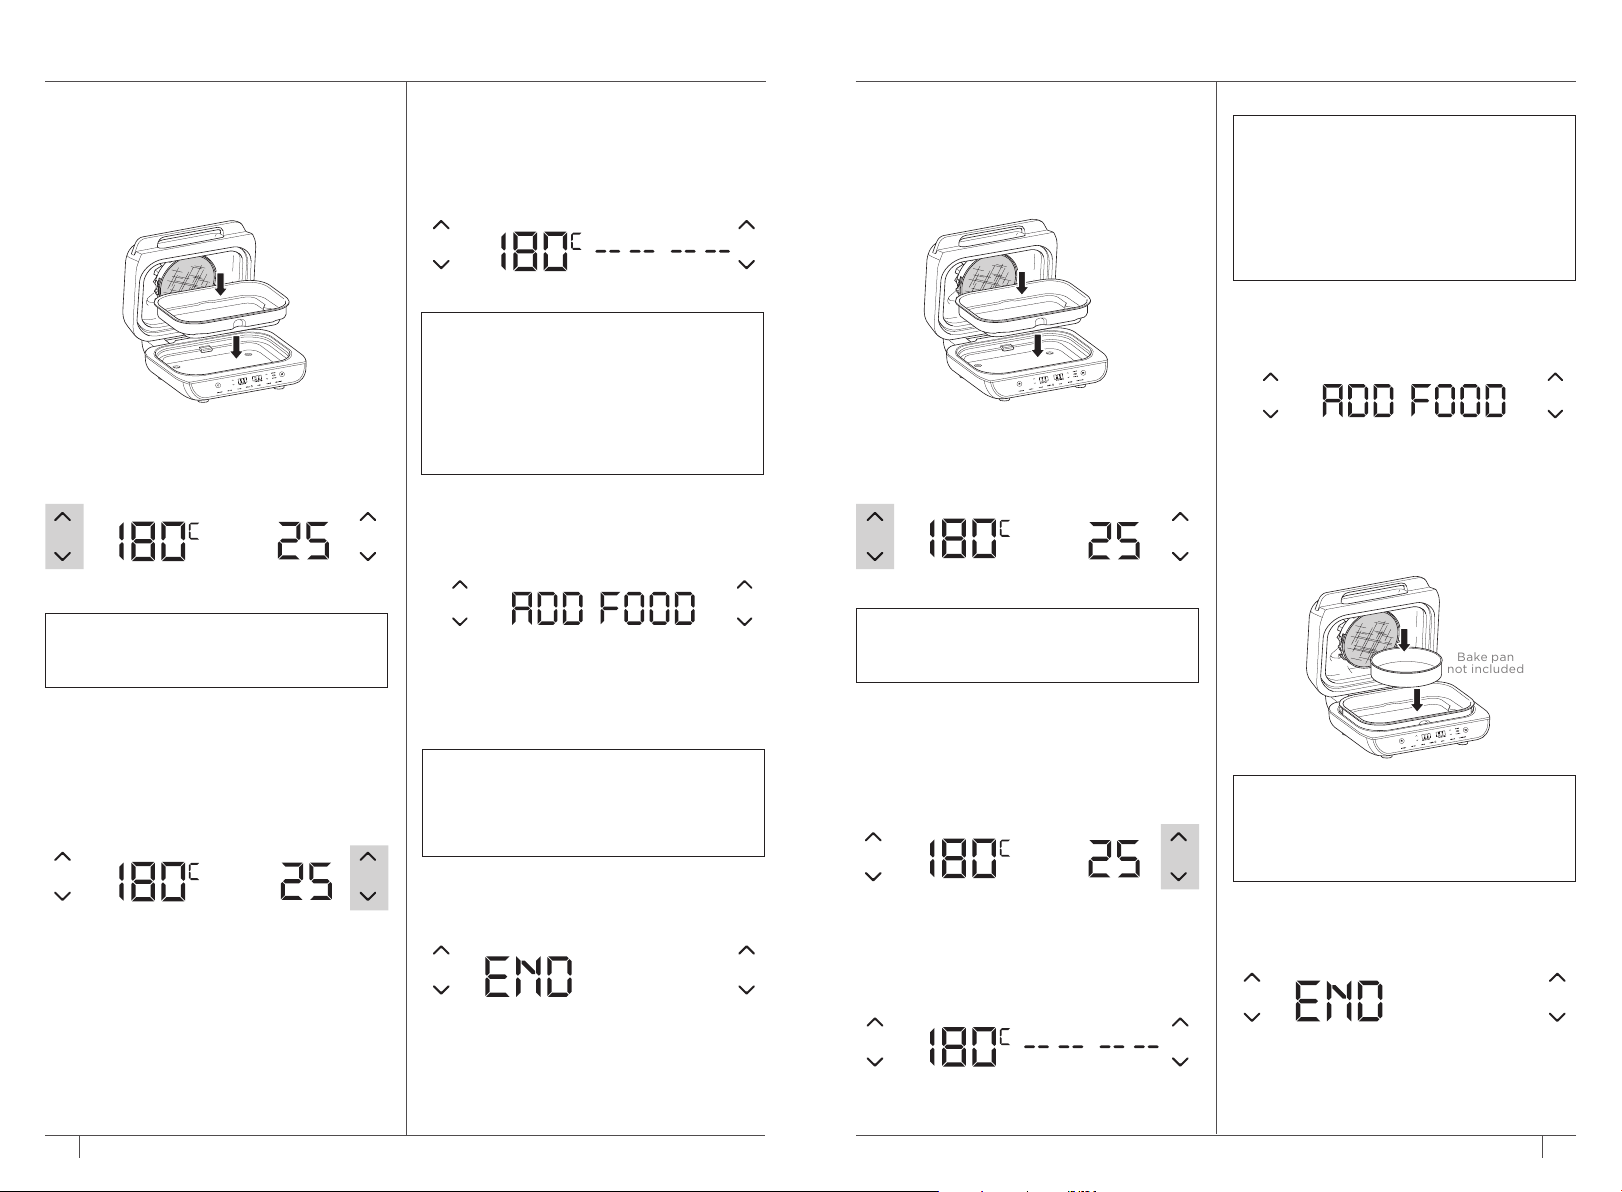
USING YOUR GRILL – CONT.
5 When preheating is complete, the unit
will beep and “ADD FOOD” will appear
on the display.
6 Open the lid and add ingredients to the
pot or set the bake pan directly in the
pot, and close the lid to start cooking.
Once the lid is closed, cooking will
begin and the timer will start counting
down.
7 When cook time is complete, the unit will
beep and END will appear on the display.
Bake
1 Place cooking pot in the unit with the
indent on the pot aligned with the bump
on the main unit. Ensure the splatter
guard is in place, then close the lid.
2 Press the BAKE button. The default
temperature setting will display. Use the
set of arrows to the left of the display to
adjust the temperature.
3 Use the set of arrows to the right of the
display to adjust the cook time, in 1-minute
increments, up to 1 hour and in 5-minutes
increments from 1 to 2 hours, or, if using
the probe, refer to the instructions on
pages 9–11.
4 Press START/STOP to begin preheating.
PRE will illuminate on the right side of the
display and the progress bar will begin
illuminating. It will take approximately 3
minutes for the unit to preheat.
NOTE: While preheating is strongly
recommended for best results, you can
skip it by pressing the PREHEAT button.
“ADD FOOD” will appear on the display.
Open the lid and place ingredients in the
crisper basket. Once the lid is closed,
cooking will begin and the timer will start
counting down.
NOTE: Convert traditional oven recipes by
reducing the temperature by 10°C. Check
food frequently to avoid overcooking.
NOTE: If you would like to use the probe
to just check your food’s internal outcome,
press MANUAL for 2 seconds and the
food’s internal temperature will appear on
the screen for 5 seconds.
Roast
1 Place cooking pot in the unit with the
indent on the pot aligned with the bump
on the main unit. Ensure the splatter
guard is in place, then close the lid.
2 Press the ROAST button. The default
temperature setting will display. Use the
set of arrows to the left of the display to
adjust the temperature.
3 Use the set of arrows to the right of
the display to adjust the cook time, in
1-minute increments up to 1 hour and
5-minute increments from 1 to 4 hours, or,
if using the probe, refer to the instructions
on pages 9–11.
4 Press START/STOP to begin preheating.
PRE will illuminate on the right side of the
display and the progress bar will begin
illuminating. It will take approximately 3
minutes for the unit to preheat.
5 When preheating is complete, the unit
will beep and “ADD FOOD” will appear
on the display.
6 Open the lid and place ingredients in
the pot. Once the lid is closed, cooking
will begin and the timer will start
counting down.
7 When cook time is complete, the unit will
beep and END will appear on the display.
NOTE: While preheating is strongly
recommended for best results, you can
skip it by pressing the PREHEAT button.
“ADD FOOD” will appear on the display.
Open the lid and place ingredients in
the cooking pot. Once the lid is closed,
cooking will begin and the timer will
start counting down.
NOTE: Convert traditional oven recipes by
reducing the temperature by 10°C. Check
food frequently to avoid overcooking.
NOTE: If you would like to use the probe
to check your food’s internal temperature,
press MANUAL for 2 seconds and the
food’s internal temperature will appear on
the screen for 5 seconds.
Bake pan
not included
Loading ...
Loading ...
Loading ...