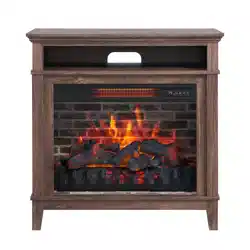
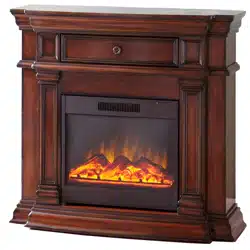
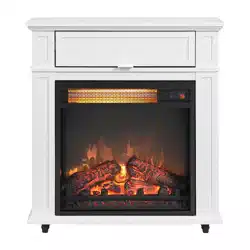
USER MANUAL ELECTRIC FIREPLACE MEDIA MANTEL
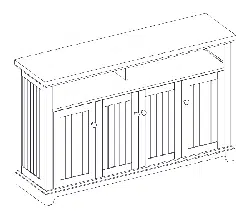
PACKAGE CONTENTS


HARDWARE CONTENTS (NOT SHOWN ACTUAL SIZE)


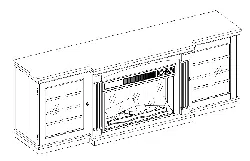
ASSEMBLY INSTRUCTIONS
1. Insert four wooden dowels (BB) into the holes on the back of the left front panel (F) and right front panel (G). Attach the left wall (D) to the left front panel (F), secure with screwing two short screws (AA) by Phillips screwdriver.

Repeat for the right wall (E).

2. Screw four connecting rods (CC) into the designated plastic bushings on the top of the base (K).


3. Insert four wooden dowels (BB) into the holes on the top of the base (K). Place assembly from Step 1 onto base (K), secure with screwing four locknuts (DD) by Phillips screwdriver.


4. From behind the assembly, attach the fireplace glass front (I), lowering it into the front groove on base (K). Secure the Glass by turning the pre-assembled plastic knobs.

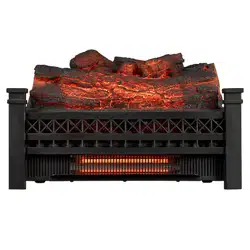
5. Place the fireplace grate (M) by matching the bottom pins into the holes on the base (K), secure with screwing two screws (EE) by Phillips screwdriver.


6. Remove the film from the adhesive on the top of the fireplace grate (M) and place the fire log (L) on the center of the fireplace grate (M).

7. Insert the fireplace brick wall (J) into the grooves along the walls (D,E) and base (K).

8. Insert two wooden dowels (BB) into the top outer holes on both left wall (D), left front panel (F), right front panel (G) and right wall (E). Attach center shelf (C), secure with screwing four long screws (FF) by Phillips screwdriver.


9. Lift up the fireplace brick wall (J), slot the USB cable from the behind through the cable hole on the fireplace brick wall (J). Attach the USB cable from the heater into the USB port behind the fireplace grate (M).

10. Secure the fireplace brick wall (J) to the product using the panel mounting hardware (HH), screwing four screws by Phillips screwdriver (As shown in diagram 10)


11. Screw four connecting rods (CC) into the designated plastic bushings on the top of the center shelf (C).


12. Insert three wooden dowels (BB) into holes on left side of center shelf (C). Attach corner panel (B), secure with screwing two locknuts (DD) by Phillips screwdriver.

Repeat for remaining corner panel (B)

13. Insert the center back panel (H) into the grooves on corner panels (B) and center shelf (C).

14. Screw four connecting rods (CC) into the designated plastic bushings on the back of the top (A).


15. Insert six wooden dowels (BB) into the top outer holes on both corner panels (B). Attach top (A), secure with screwing four locknuts (DD) by Phillips screwdriver.

Assembly is now complete. With the help of another person, move the assembly to the final desired location. Once in final position you may plug the heater into the power outlet.

OPERATING INSTRUCTIONS

Controls and Display
The control panel will display the heater setting when the unit power is turned ON. Whichever control icon you press will display the current setting of the corresponding function. Press the control icon again to adjust the setting. Following adjustment of any setting(s), the unit will resume to display the heater setting after 5 seconds.
 Power Function
- When the unit is plugged-in but not in use, F or C will illuminate to indicate that it is in stand-by mode.
- Press the POWER ICON to turn the main power to the unit ON or OFF.
- When the unit is powered ON, the control panel will display the heater setting to indicate the unit has power.
- Functions stored in memory will resume at the last setting.
- When the unit is powered OFF, the fan will continue to blow for a 40 second cool-down cycle prior to shutting down (a countdown will be displayed).
 Flame Brightness Function
- Press the FLAME BRIGHTNESS ICON to display the current flame brightness setting.
- Press the FLAME BRIGHTNESS ICON again to scroll down through the flame brightness settings: 5, 4, 3, 2, 1, OF (OFF).
 Flame Speed Function
- Press the FLAME SPEED ICON to display the current flame speed setting.
- Press the FLAME SPEED ICON again to scroll down through the flame speed settings: 5, 4, 3, 2, 1.
 Heater Function
- Press the HEATER ICON to display the current heater setting.
- Press the HEATER ICON again to scroll down through the heater settings. Note: Long-hold the icon to quickly scroll through settings.
- Set the heater to “HI” (High) to have the heater run continually.
- Set the heater to “OF” (OFF) to use the flame functions without heat.
- This heater has a thermostat sensor to control the ambient temperature in the surrounding area of the fireplace. The heater will cycle ON and OFF to maintain the selected temperature. The thermostat setting range is 90ºF (43°C) to 65°F (18°C). Note: This may not exactly match the room thermostat reading as their sensors are located in different areas.
- Hold down the FLAME SPEED ICON for 10 seconds to toggle between Fahrenheit and Celsius. “F” or “C” will be displayed on the control panel (°F/°C can only be toggled from the control panel and will not work if using the remote control).
- See HEATER OVERRIDE section to disengage the heater.
 Sleep Timer Function (Remote Control Only)
- The Sleep TIMER function will set a countdown to shut down the unit’s main power.
- Press the TIMER ICON to display the current Sleep Timer setting.
- Press the TIMER ICON again to scroll through the timer settings, which are: 30 (minutes), 1H, 2H, 3H, 4H, 5H, 6H, 7H, 8H, 9H, OF (OFF).
- When the timer reaches zero, it will turn OFF the main power and will maintain all the settings in memory.
HEATER OVERRIDE
The power to the heater can be disengaged to prevent the heater from being accidentally or unintentionally powered on. This feature is primarily added to help prevent children from powering on the heater when it is not desired.
Note: The heater override can only be set from the control panel and will not work if using the remote control.
- First turn the main power OFF. Press the POWER ICON; as the heater setting display is flashing, press the POWER ICON again and long-hold 20 seconds. The E3 symbol will display to indicate that the heater is now disengaged.
- Note: The Flame and Timer functions will operate normally. Only the heater is disengaged.
- Repeat the same process to re-engage the heater function. The E3 symbol will change back to display the heater setting when the heater is re-engaged.
MEMORY FUNCTION
- This unit has a memory function that allows you to turn off the MAIN POWER and retains all the other function settings (excluding the SLEEP TIMER function).
CARE AND MAINTENANCE
- Make sure the unit is turned OFF, unplugged and the heating elements of heater are cool whenever you are cleaning the heater or fireplace.
- Clean the metal trim using a water-dampened soft, clean cloth. DO NOT use brass polish or household cleaners as these products will damage the metal trim.
- The motors used on the fan and the flame generator assembly are pre-lubricated for extended bearing life and require no further lubrication. However, periodic cleaning/vacuuming of the fan/heater and air intake/ output vents are recommended.
- When the heater is not in use, the power cord should be stored properly to avoid contact with hot or sharp objects.
- Any other servicing should be performed by an authorized service representative.
- Tips for using touch-up pen (GG): For scratches, stroke in direction of scratch. For worn areas, stroke in the direction of wood grain. Rub excess colorant promptly with a soft cloth.
- The furnishing has no user serviceable parts.
Replacing the Remote-Control Battery
When the remote control (N) stops operating or its range seems reduced, it is time to replace the battery. Note: The battery should be removed if the product is to be left unused for a long time.

- The battery compartment is located on the back end of the remote control (N).
- Press the small tab inward as you slide the battery door open and remove the old battery.
- Insert a new CR2025 lithium battery (not included), checking that the + and - sides of the battery match the inside of the battery compartment.
- Re-insert the battery door
Note: Harmful if swallowed.
Disposal of Used Battery
A battery may contain hazardous substances that could be endangering the environment and human health.
- This symbol marked on the battery and/or packaging indicates that used battery shall not be treated as municipal waste. Instead it shall be left at the appropriate collection point for recycling.
- By ensuring the used battery is disposed of correctly, you will help prevent potential negative consequences for the environment and human health. The recycling of materials will help to conserve natural resources.
- Do not dispose of battery in fire. Battery may explode or leak.
For more information about collection and recycling of used battery, please contact your local municipality, your waste disposal service or the point-of-sale where you purchased this battery

TROUBLESHOOTING
| PROBLEM |
POSSIBLE CAUSE |
CORRECTIVE ACTION |
| Error E1 displayed on control panel. |
The overheat sensor has been engaged. |
Unplug unit, wait 15-20 minutes, then the sensor will reset itself. Plug the unit back in and turn on the heater. If the problem persists, call customer service.
Note: The other functions will work normally excluding the heater.
|
| Error E2 displayed on control panel. |
The thermostat sensor is broken or not working correctly. |
Unplug unit, wait 15-20 minutes, then the sensor will reset itself. Plug the unit back in and turn on the heater. If the problem persists, call customer service.
Note: The other functions will work normally excluding the heater.
|
| Error E3 displayed on control panel. |
Heater override function is engaged. |
See Heater Override Section for more details. |
| No power. |
The unit does not have power. |
Check that the power cord is securely plugged into a standard 120V outlet. Then check to make sure the unit is powered on. |
| No flame effect but the unit is powered on. |
The flame effect is powered off. |
Push the flame brightness button until desired level is achieved. |
| USB cable |
Connect the USB cable into the USB port behind the Fireplace Grate |
| Heater and blower do not power on but rest of functions are working. |
Heater setting. |
Set the heater to "HI" (High) to have the heater run continually. |
| Power cord gets warm to the touch. |
Normal operation. |
This is normal for a heater appliance as it requires more current to operate. Check the connections of the appliance cord and the outlet. Make sure the plug fits tightly into the outlet. During use, check the plug and outlet frequently to determine if it is HOT; if so, discontinue use of the appliance and consult with a qualified technician to check or change the overheating outlet(s). |
| Remote control does not work. |
Weak or failing batte |
Replace with 1 CR-2025 battery (See page 16 for more information). |
| Remote control signal is weak and only work sometimes. |
Pressing the buttons too quickly. |
Press the buttons slowly and steadily to ensure the transmitter recognizes the request. |
| Using the remote control too far away or at an off angle. |
Move closer to the insert; the remote control will only work within a distance of 20 feet and 45 degrees to either side from the front of the fireplace insert. |
| Fan motor continues to blow after the unit is powered off. |
Normal operation. |
This is a standard feature; the blower runs for an additional time to cool off the heater tubes |
REPLACEMENT PARTS LIST
For replacement parts, call our customer service department at 877-888-8225, 8 a.m. - 8 p.m., EST, Monday - Sunday. You could also contact us at [email protected] or visit www.lowespartsplus.com.