Loading ...
Loading ...
Loading ...
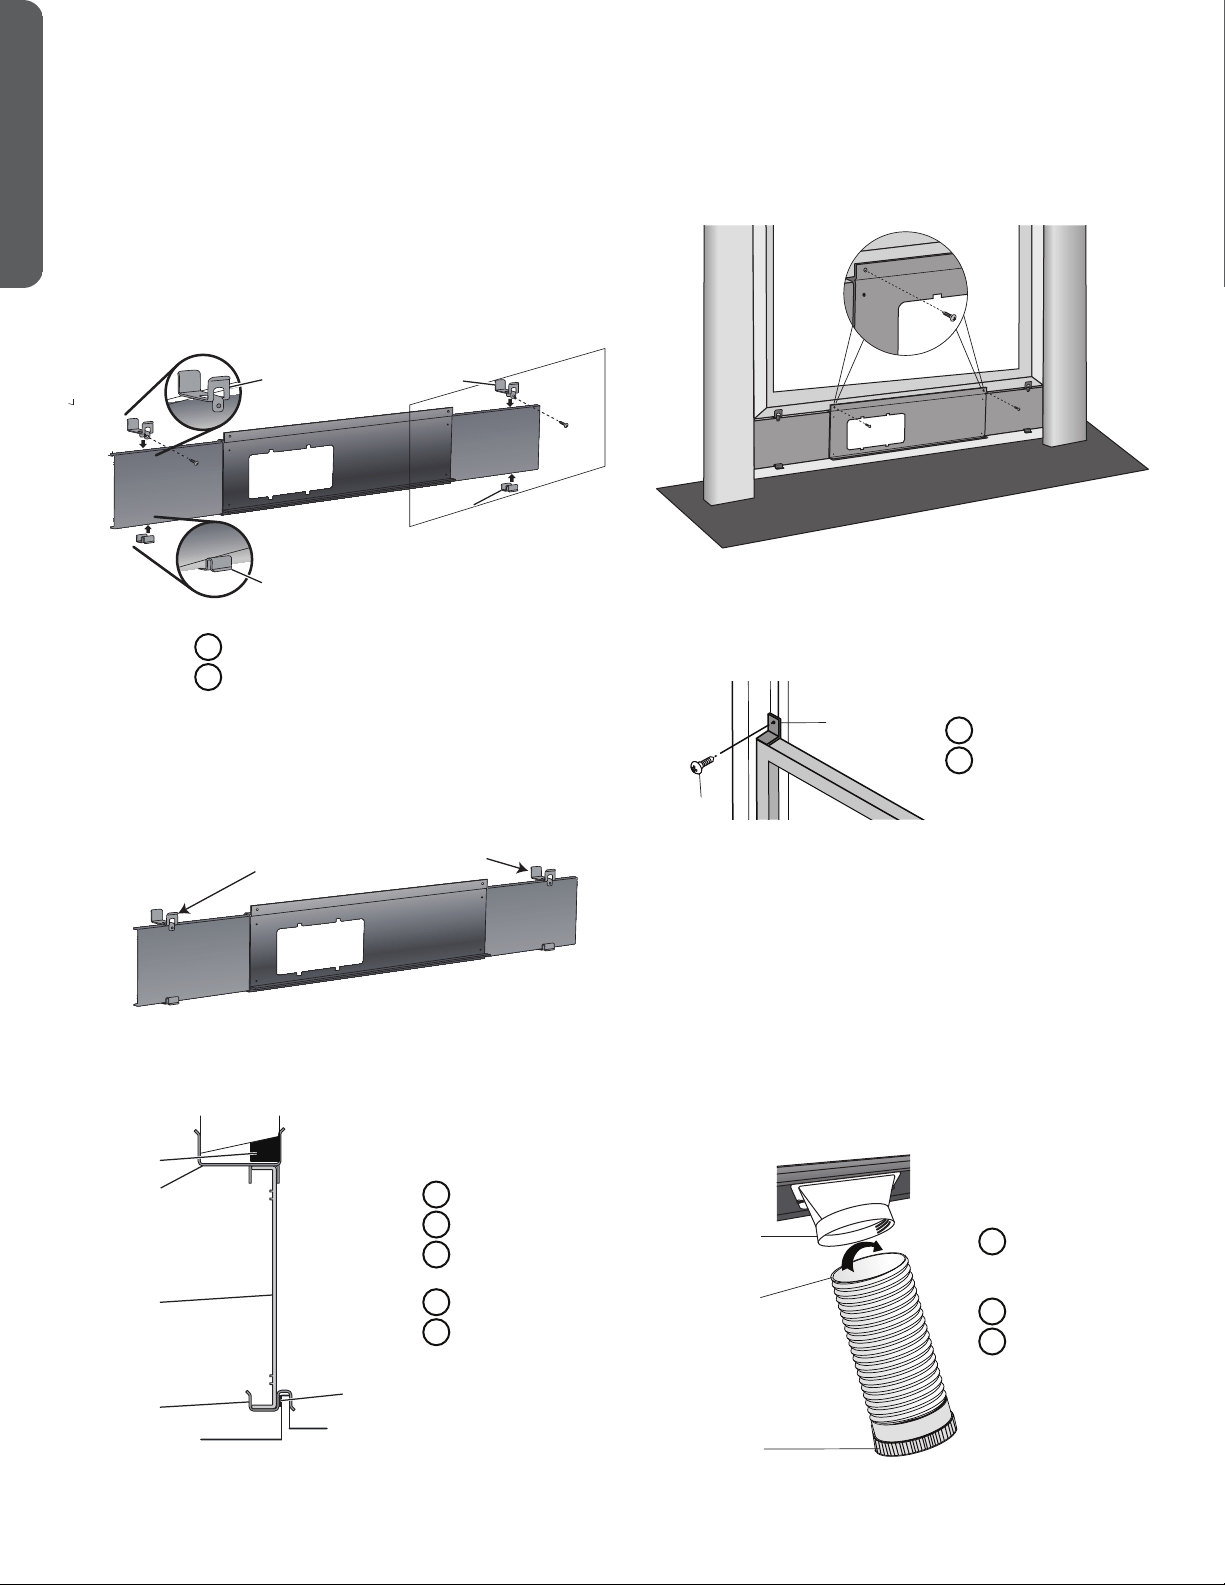
A A Exhaust Nozzle (1 or
B
C
2 depending on
model)
B Hose (open end)
C Hose (connector
end)
NOTE: Do not attach additional hoses to extend the
ïèñê÷ëÝëìöúòøïççèæõèäöèæòòïìñêèĦæìèñæüäñçðäü
damage the air conditioner.
2. Using a counterclockwise motion, attach the open end
of the exhaust hose to the exhaust nozzle.
STEP 4 - ATTACH EXHAUST HOSE
TO THE EXHAUST NOZZLE
1. Grasp both ends of the exhaust hose and gently pull to
expand the hose.
B
A
4. For vinyl windows only.
Skip to step 6 for wood windows.
Place the two top window brackets and two bottom
window brackets where they will best support the
extension panels.
Before Assembly
USE ONLY FOR VINYL
A Top Window Brackets
B Bottom Window Brackets
After Assembly
5. Apply the top foam strip (provided) across the top of the
window panel assembly, and then apply the bottom foam
strip (provided) across the bottom front edge of the window
panel assembly, as shown.
A Top Foam Strip
B Top Bracket
C Extension Panel
D Bottom Bracket
E Bottom Foam Strip
6. Place the window panel assembly in the window, and using
the screws provided, fasten the assembly to the window
sill and window frame.
7. Using one pointed screw, install the Security bracket to the
window.
NOTE: The security bracket prevents the window
from being opened from the outside.
A Security Bracket
B Pointed Screw (1)
A
B
A
B
Attach with pointed screws (2)
A
B
C
D
E
TYPCIAL VINYL WINDOW INSTALLATION
ENGLISH
6
Loading ...
Loading ...
Loading ...