Loading ...
Loading ...
Loading ...
7
6
SECTION 1 Set-Up & First Brew
Setting up Your Brewer
1. Unwrap cord and plug the brewer into
a grounded outlet. Remove all pieces of
packing tape and clear plastic sticker
from LCD Control Center.
2. Place a large mug (10 oz. minimum) on the
Drip Tray Plate.
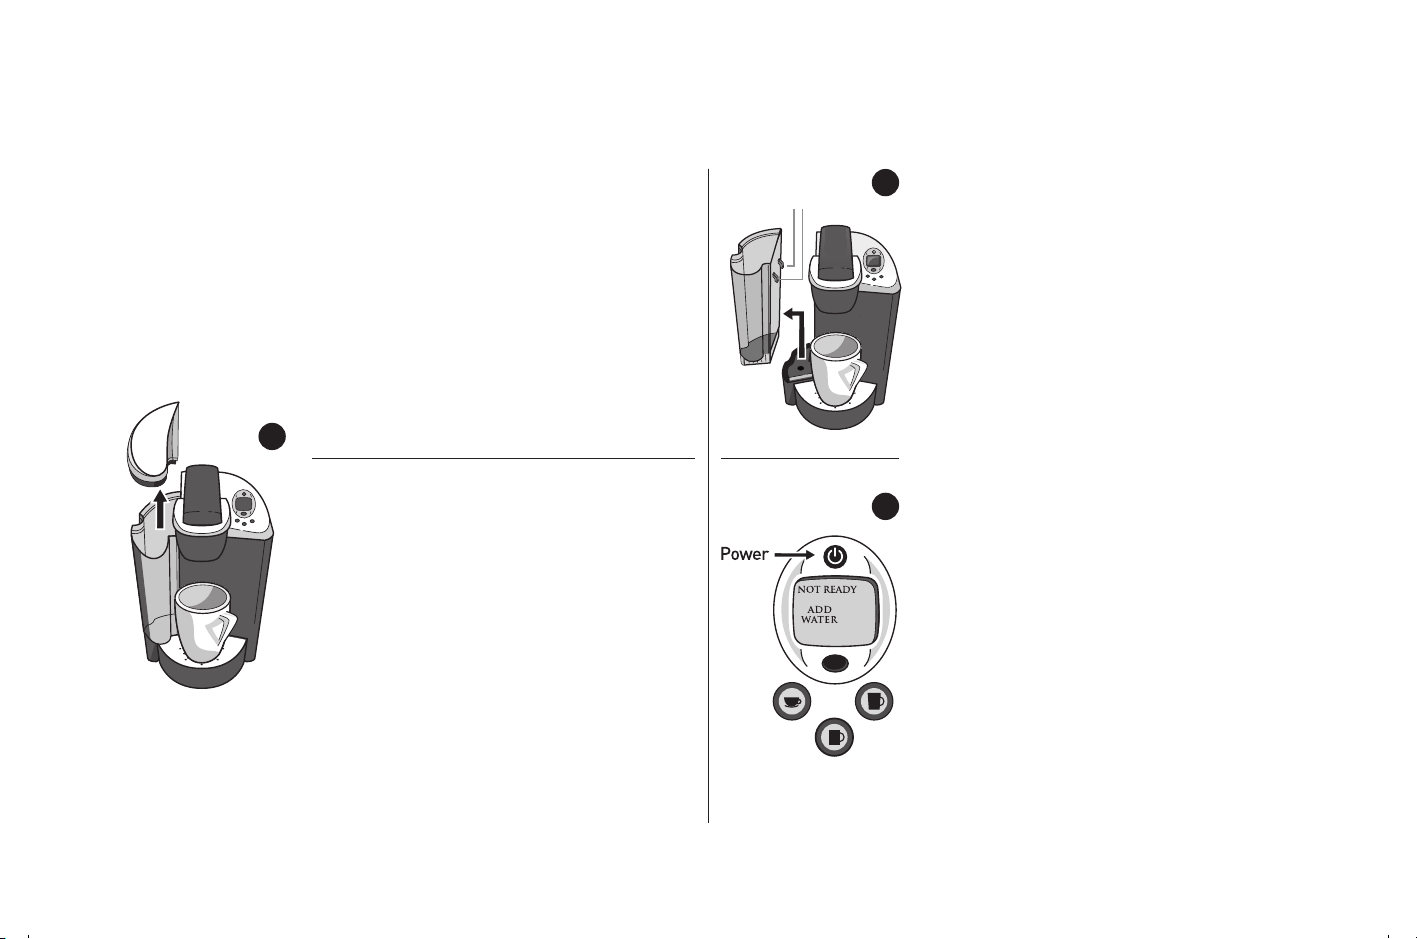
3. Remove the Water Reservoir from brewer
by first removing Lid from Reservoir (fig. 1),
then lifting Reservoir straight up and away
from brewer (may be tight), (fig. 2). Rinse
with fresh water.
IMPorTanT: You cannot use your Keurig
®
brewer until
it has been set-up for its first use as set forth below.
noTe: If brewer has been exposed to temperatures
below freezing, allow brewer at least two hours to
reach room temperature before brewing. A frozen
or extremely cold brewer will not operate.
4. Fill Water Reservoir with bottled or filtered
water so that the water is to and not beyond
the MAX FILL line.
5. Place Water Reservoir base into the left side
of the brewer and be sure the Water Reservoir
Lock Tabs engage with the brewer (fig.2).
Replace Lid on Water Reservoir.
6. Press the Power Button found directly
above the LCD Control Center (fig. 3).
7. The LCD Control Center will illuminate and
indicate “NOT READY.” NOTE: A K-Cup
®
pack
should not be used for this sequence
.
NOTE: If the Water Reservoir is empty or
not in place on the brewer, the LCD Control
Center will also indicate “ADD WATER.” None
of the buttons will be activated until water
is added to the Water Reservoir and Water
Reservoir is in place.
fig.
2
fig.
3
fig.
1
Lock Tabs
dtp1005-001900 ctp09
P6 201309003 KER755_K60-65.pdf 1C( K) ZB2319 2013.09.06
Loading ...
Loading ...
Loading ...