Loading ...
Loading ...
Loading ...
14
Cleaning + Maintenance
mWARNING! To avoid accidents, always remove the
battery and disconnect the charger from the power supply.
Never immerse the unit in any liquid for cleaning.
The paint sprayer can only be operated normally if it's
cleaned and preserved after each use. When cleaning, use
the appropriate cleaning solution (warm, soapy water for latex
materials; mineral spirits for oil-based materials). If ammable
solvents need to be used, always use such kind of solvents in
a well-ventilated area free of ammable vapors.
mWARNING! NEVER use any solvent that have a
ashpoint lower than 73.5ºF (23ºC).
Clean the Paint Container
1. Stop the sprayer and remove the battery. Press the On/O
switch so that the material inside the spray gun assembly
ows back into the container.
2. Unscrew the container. Discard any unused paint or stain
to its original container.
NOTE: Do not return any paint to the original container if
it has been thinned. Discard appropriately according to
regulations or save in a separate container.
3. Pour a small amount of the appropriate cleaning solution
into the container. Clean the container and properly
dispose of the cleaning solution. Rell the container with
new cleaning solution.
4. Reattached the container on the sprayer. Insert the battery
and spray the solution through the gun in a safe area.
Rell and repeat spray process, until the solvent being
sprayed is clean and clear.
5. Stop the sprayer and remove the battery. Press the On/O
switch so that the material inside the spray gun assembly
ows back into the container.
Clean the Housing and the Parts
1. Remove the paint container and pour out any remaining
solvents.
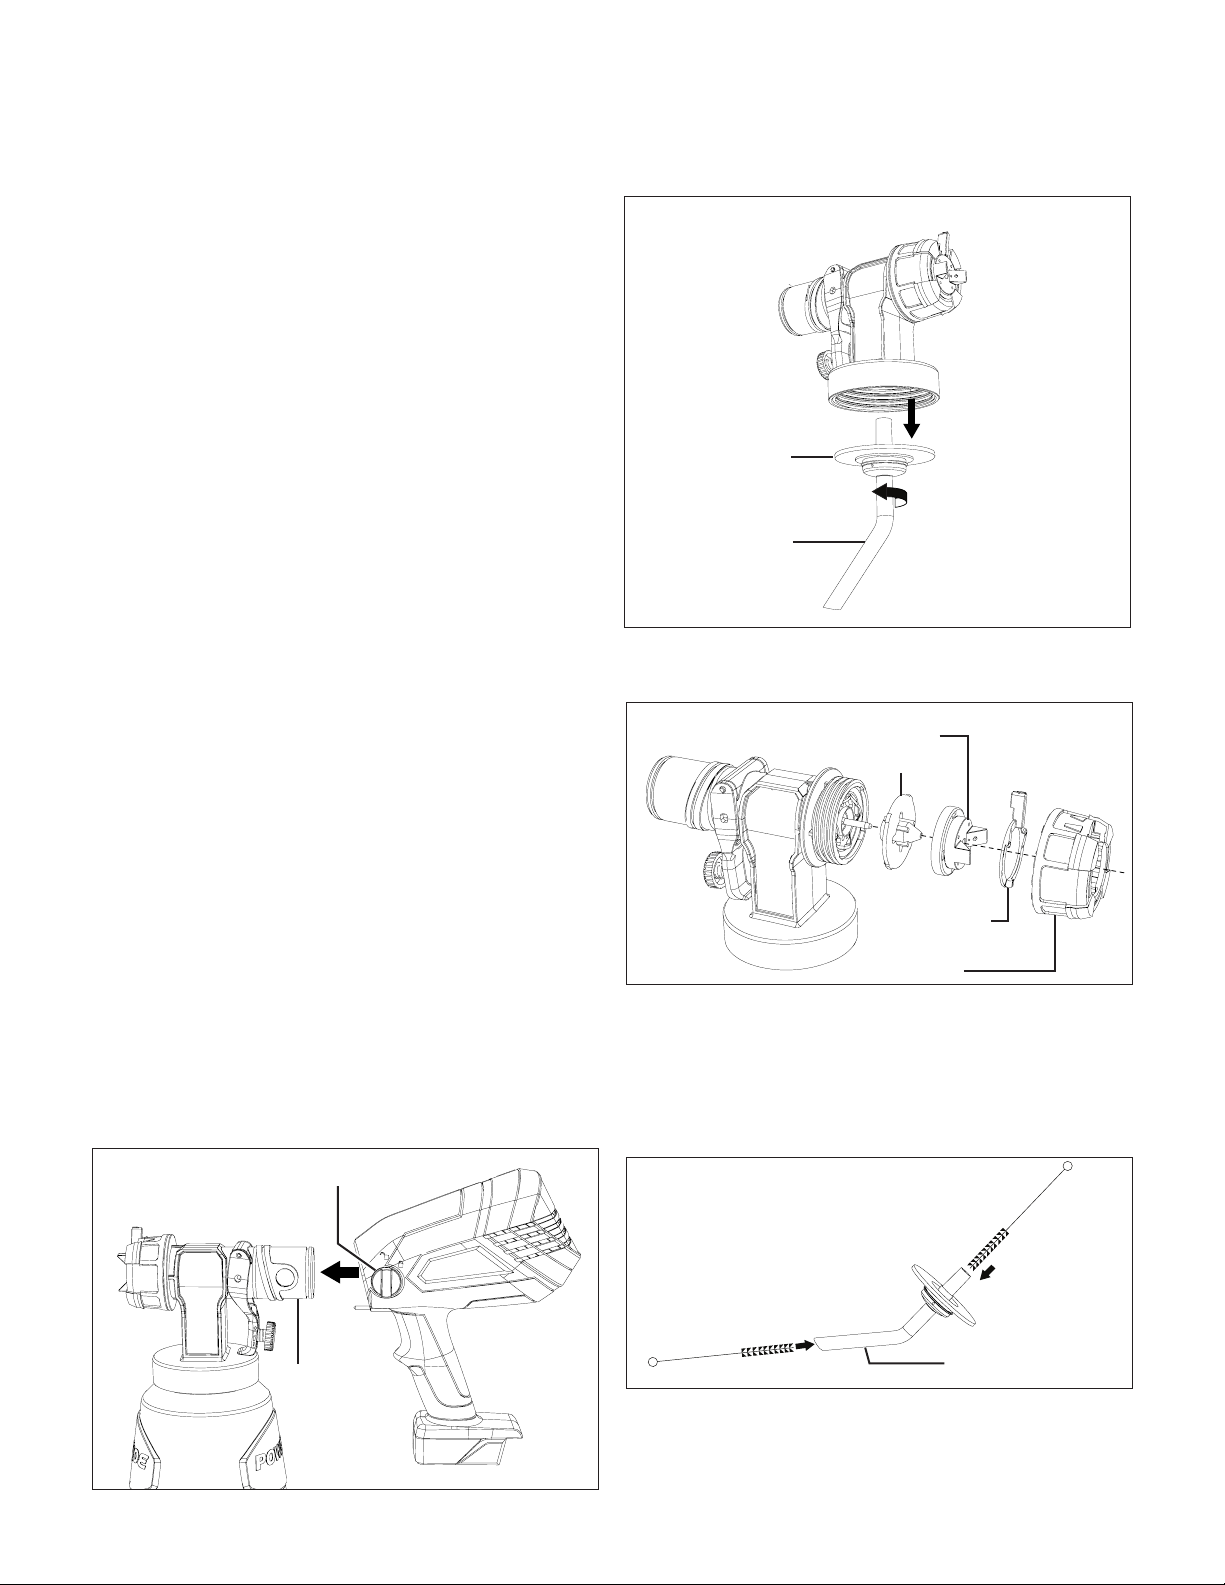
2. Turn the quick release knob to the unlock position and pull
out the spray gun assembly (Fig. 23).
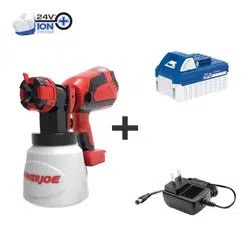
3. Turn the suction tube clockwise and pull out to remove the
seal and the suction tube (Fig. 24).
4. Unscrew the tip collar, remove the spray width control
lever + ring, air cap and the nozzle tip (Fig. 25).
5. Dip a clean cloth in water or proper solvent, and clean all
the disassembled parts, the gun assembly, and the motor
housing.
6. Double check the suction tube. If it's blocked, use the
supplied cleaning brush to clean through the inlet and the
outlet (Fig. 26).
7. If needed, use the needle clean out tool to clean the
nozzle tip (Fig. 27).
Fig. 23
Quick release knob
Spray gun
assembly
Fig. 24
Suction tube
Seal
Fig. 25
Tip collar
Spray width
control lever
+ ring
Air cap
Nozzle tip
Fig. 26
Suction tube
Loading ...
Loading ...
Loading ...