Loading ...
Loading ...
Loading ...
12
mWARNING! Switch o the unit and remove the battery
before adjusting the spray pattern. NEVER point the spray gun
at any part of the body.
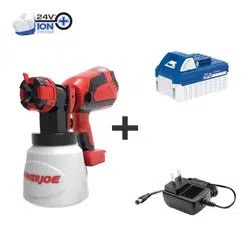
Adjusting the Spray Width
The sprayer width can be adjusted by the spray width control
lever. Turn the lever counterclockwise for a narrow spray,
clockwise for a wider spray (Fig. 16).
mWARNING! Switch o the unit and remove the battery
before adjusting the spray width. NEVER point the spray gun at
any part of the body.
Adjusting the Spray Amount
The ow control knob regulates the amount of liquid that can
be sprayed. Turning the knob clockwise increases the ow of
liquid; turning the knob counterclockwise decreases the ow of
the liquid (Fig. 17).
NOTE: Always test the spray on scrap cardboard and
similar material rst. Begin with largest ow setting. If less
ow is desired, adjust the ow control knob slowly until the
appropriate ow amount is achieved.
Basic Spray Process
mWARNING! DO NOT insert the battery until all settings
are done and you are ready to use the paint sprayer. Do not
squeeze the On/O switch until you are ready to spray.
mWARNING! Always do a test spray on scrap
material before a new project, after changing material
and spray settings.
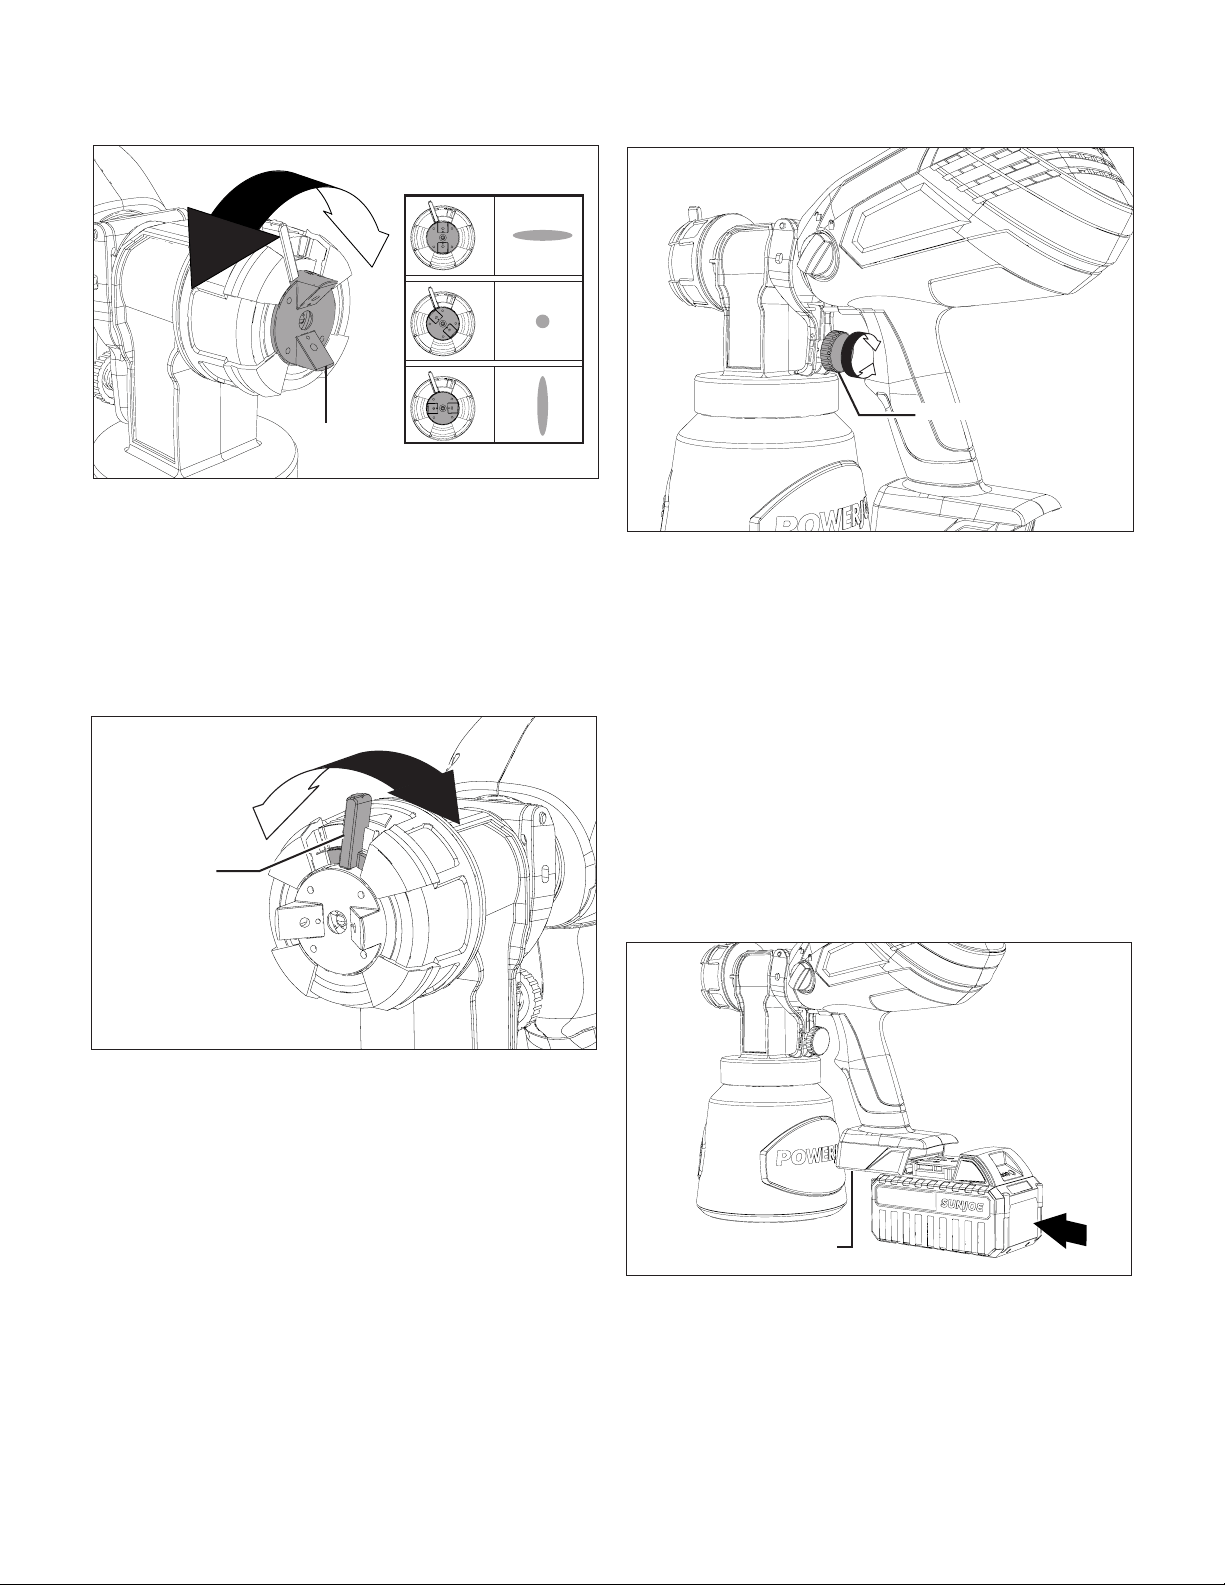
1. Insert the battery into the battery compartment on the
back of the machine, until it clicks into position (Fig. 18).
2. Position the paint sprayer perpendicular to the spray
surface, keep the distance between the sprayer and
the surface between 2 inch (5 cm) and 12 inch (30 cm),
depending on the spray pattern and size desired.
Fig. 15
Air cap
Fig. 16
Spray width
control
lever
Fig. 17
Flow control knob
Fig. 18
Battery compartment
Loading ...
Loading ...
Loading ...