Loading ...
Loading ...
Loading ...
16
STEP BY STEP INSTRUCTIONS
INSTALLING YOUR DRYER
We recommend that your new dryer be installed by a qualied appliance technician.
If you feel that you have the skills to install the dryer, please read the installation
instructions thoroughly before installing.
CAUTION: If, after completing these steps, you are unsure that the dryer is properly
installed, contact a qualied appliance technician.
STEP 1 - UNPACK THE DRYER
1. Remove all packing materials. This includes the foam base and all adhesive tape
holding the dryer accessories inside and outside.
2. Inspect and remove any remains of packing, tape or printed materials before
using the dryer.
WARNING
To avoid danger of suffocation, keep plastic bag and other packing
material away from babies and children. Do not use this bag in cribs,
carriages and playpens. The plastic bag could block nose and mouth
and prevent breathing. This bag is not a toy.
STEP 2 - ATTACH A POWER CORD TO THE DRYER
(ELECTRIC DRYER - U.S. ONLY)
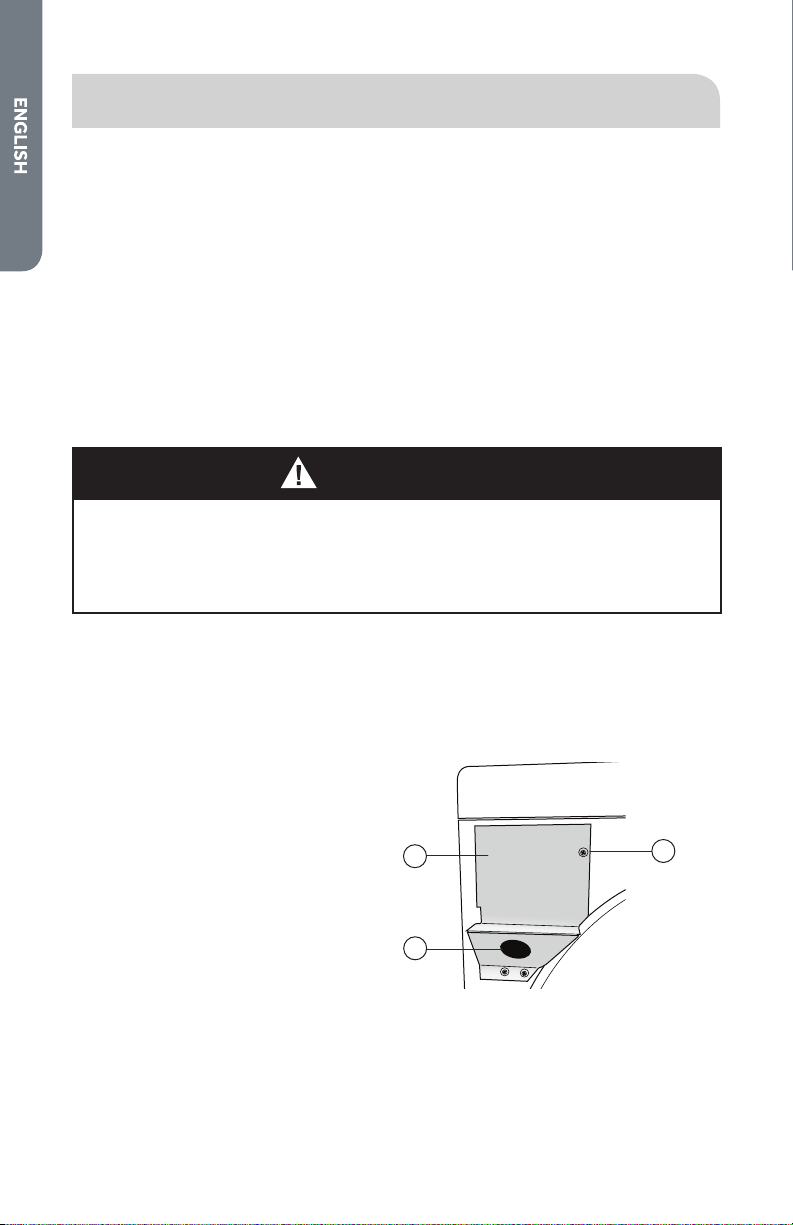
1. Remove the screw securing the terminal block access cover, located on the back
of the dryer’s upper corner.
a Terminal Block Access Cover
b Hole in Strain Relief Mounting
Bracket
c Access Cover Screw
A
B
C
2. Insert a UL listed strain relief into the mounting bracket hole. Position the strain
relief so that one tab is pointing up and one tab is pointing down. Tighten the
strain relief screws just enough to hold the two halves together.
Loading ...
Loading ...
Loading ...