Loading ...
Loading ...
Loading ...

6
Quick Start
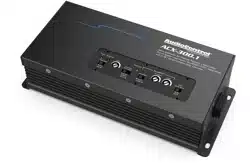
Here are a few general steps to get your ACX-300.1 amplier up and
running:
1. Undo the +12V and Ground connections to the battery before
making any connections to the amplier.
2. Pick a mounting location that will provide access to the controls
and connections, provide plenty of good ventilation, and also
protect the amplier from heat, moisture, and dirt.
3. The ACX-300.1 amplier needs to be securely mounted using the
four mounting holes located in each corner.
4. Before drilling any holes, take every precaution to prevent
any damage to fuel lines, power and other electrical wiring,
hydraulic brake lines, and other systems, that might compromise
vehicle safety.
5. When making connections, designate red RCA plugs as right,
and designate white, black, or gray plugs as left. This is a good
idea for consistency.
6. Use quality interconnect cables.
7. Connect the +12V input wire on the included wiring harness
assembly to the +12V terminal of the vehicle battery, using the
appropriate gauge wire
8. Connect the Ground wire of the included wiring harness assem-
bly to a ground source such as the negative battery terminal,
vehicle chassis, or other ground source, using the same wire
gauge as the +12V power wire.
9. Connect the remote power wire of the unit to the remote turn-
on switch of your source unit. Alternatively, you can skip this
connection and use the GTO™ Signal Sensing.
10. Connect your audio inputs to the unit – either speaker-level or
line-level RCA… not both.
11. Connect your loudspeakers (minimum impedance of 2 Ohms).
12. When all connections are made, reconnect the vehicle battery.
13. Adjust your gain setting to maximize your signal level.
14. Set the ACX-300.1 crossover to the frequency recommended by
the loudspeaker manufacturer.
15. Enjoy the ride!
Loading ...
Loading ...
Loading ...