
Loading ...
Loading ...
3
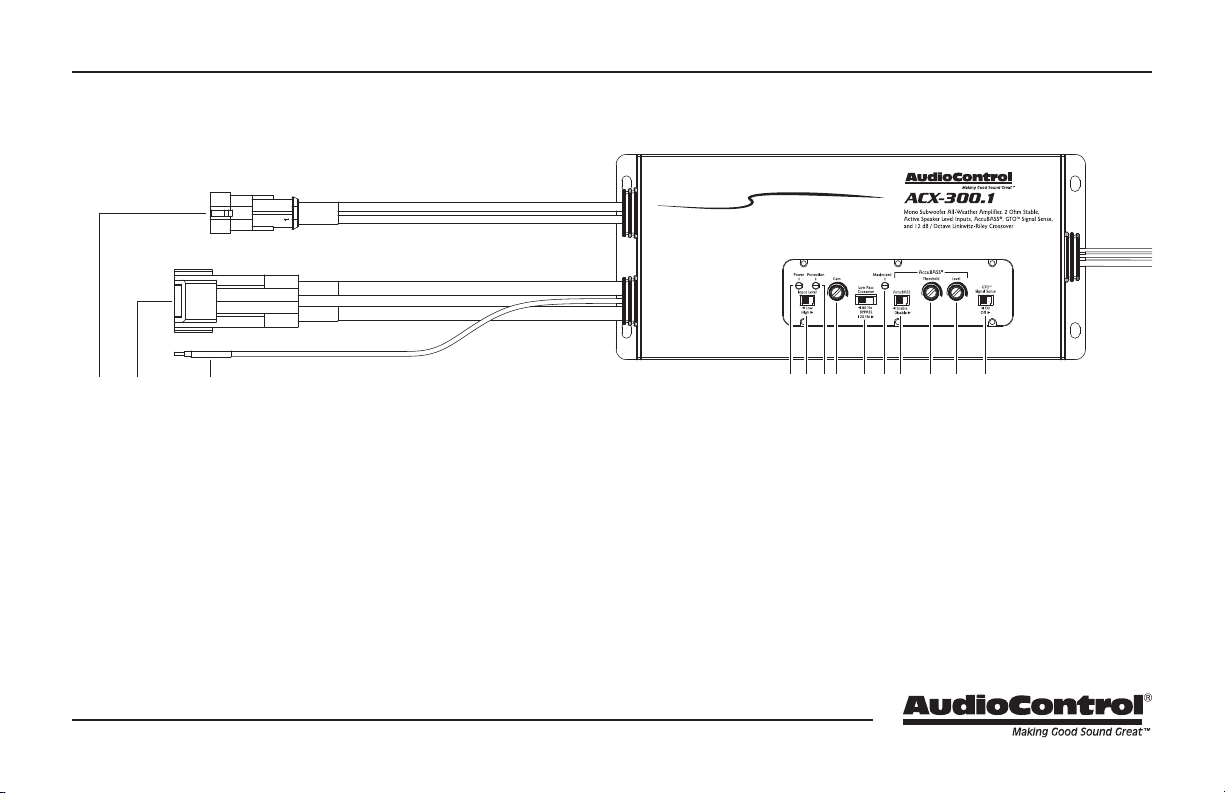
1. Speaker Output – Connect these wires to your subwoofer using
the included water resistant harness. Speaker wire may then be
crimped or soldered onto the bare leads. Use a decent sized wire
gauge as this baby is powerful!
2. Power Input Terminal +12V & Ground – Connect these wires
to the +12V and Negative binding posts of the vehicle battery
via one of two included harness options. You may use either the
included water resistant harness, or the included harness kit to
terminate your own custom-length water-resistant harness. Use
quality insulated wiring of the recommended wire gauge, such as
wire gauge 8 or thicker.
3. Remote Power Input Wire – This wire connects to the 12V remote
trigger output of some head units and controls the on/o state of
the amplier. Alternatively, you can use the GTO™ feature of the
amplier so it will turn on when an speaker level signal is detected
at the RCA inputs.
4. Power LED - When the unit has been powered on, the LED will
glow warmly red
5. Input Level - Use this switch to specify which type of signal input
voltage type you are using - high is speaker level & low is RCA line
level.
Connection Features
R
E
M
O
T
E
REM
GND
+12V
OUTPUT
INPUT 1
INPUT 2
1 2 3 4 5 6 7 8 9 10 11 12 13
Loading ...
Loading ...
Loading ...